This is quite an exciting exercise that evolves around, drawing, illustration and collage, and creating a narrative as a result. It joins all the experiences and skills that I’ve been developing through the coursework, including previous units, where we learnt about the juxtaposition and skill of collaging. I should create an initial drawing of a dog or cat, and incorporate it into the collage for its further exploration. I think this exercise aims to teach us how to create continuousity from the transformation of the initial image.
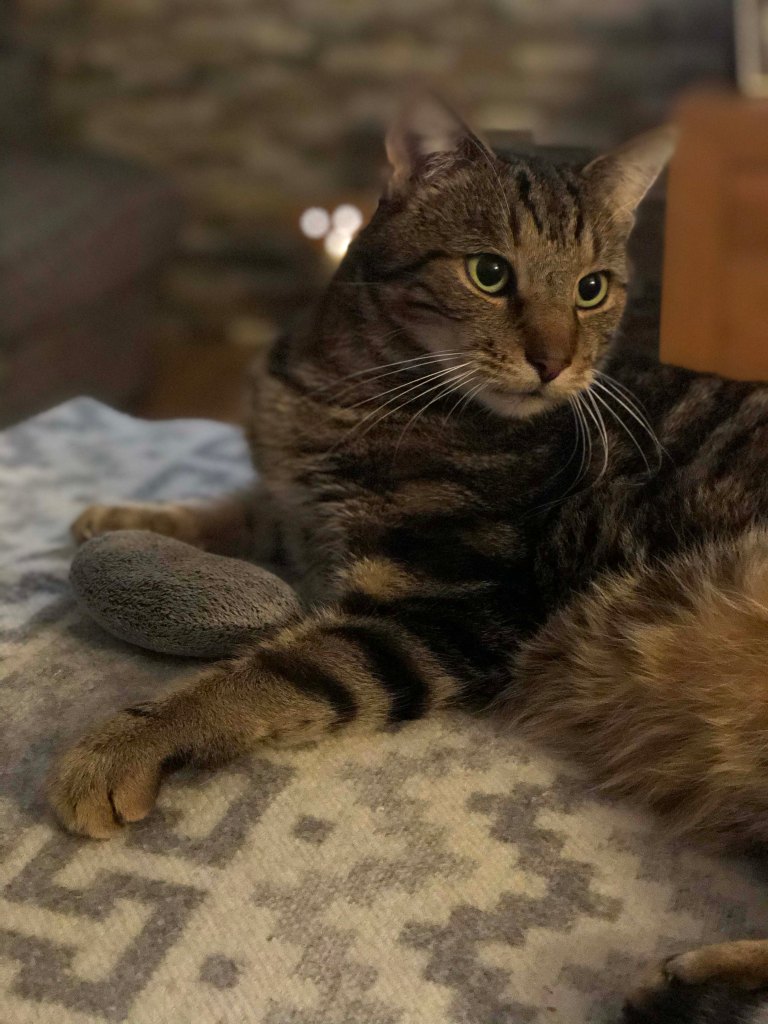
I have some pets at my parent’s house: two dogs, Jack Russel and a mini Yorkie, and we have a cat in my house, a tabby cat Howard. Thinking in advance, I started picking up some characteristics of our animals, and how their features can potentially evolve into the narrative. I assume it is all about imagination, and the creative process will lead me to some exciting outcomes.
I had some photographs of our cat Howard, I decided to go with the drawing of the cat by the way, because their personality is quite versatile, they can be shy, cheaky, confident and timid, all in one pet.
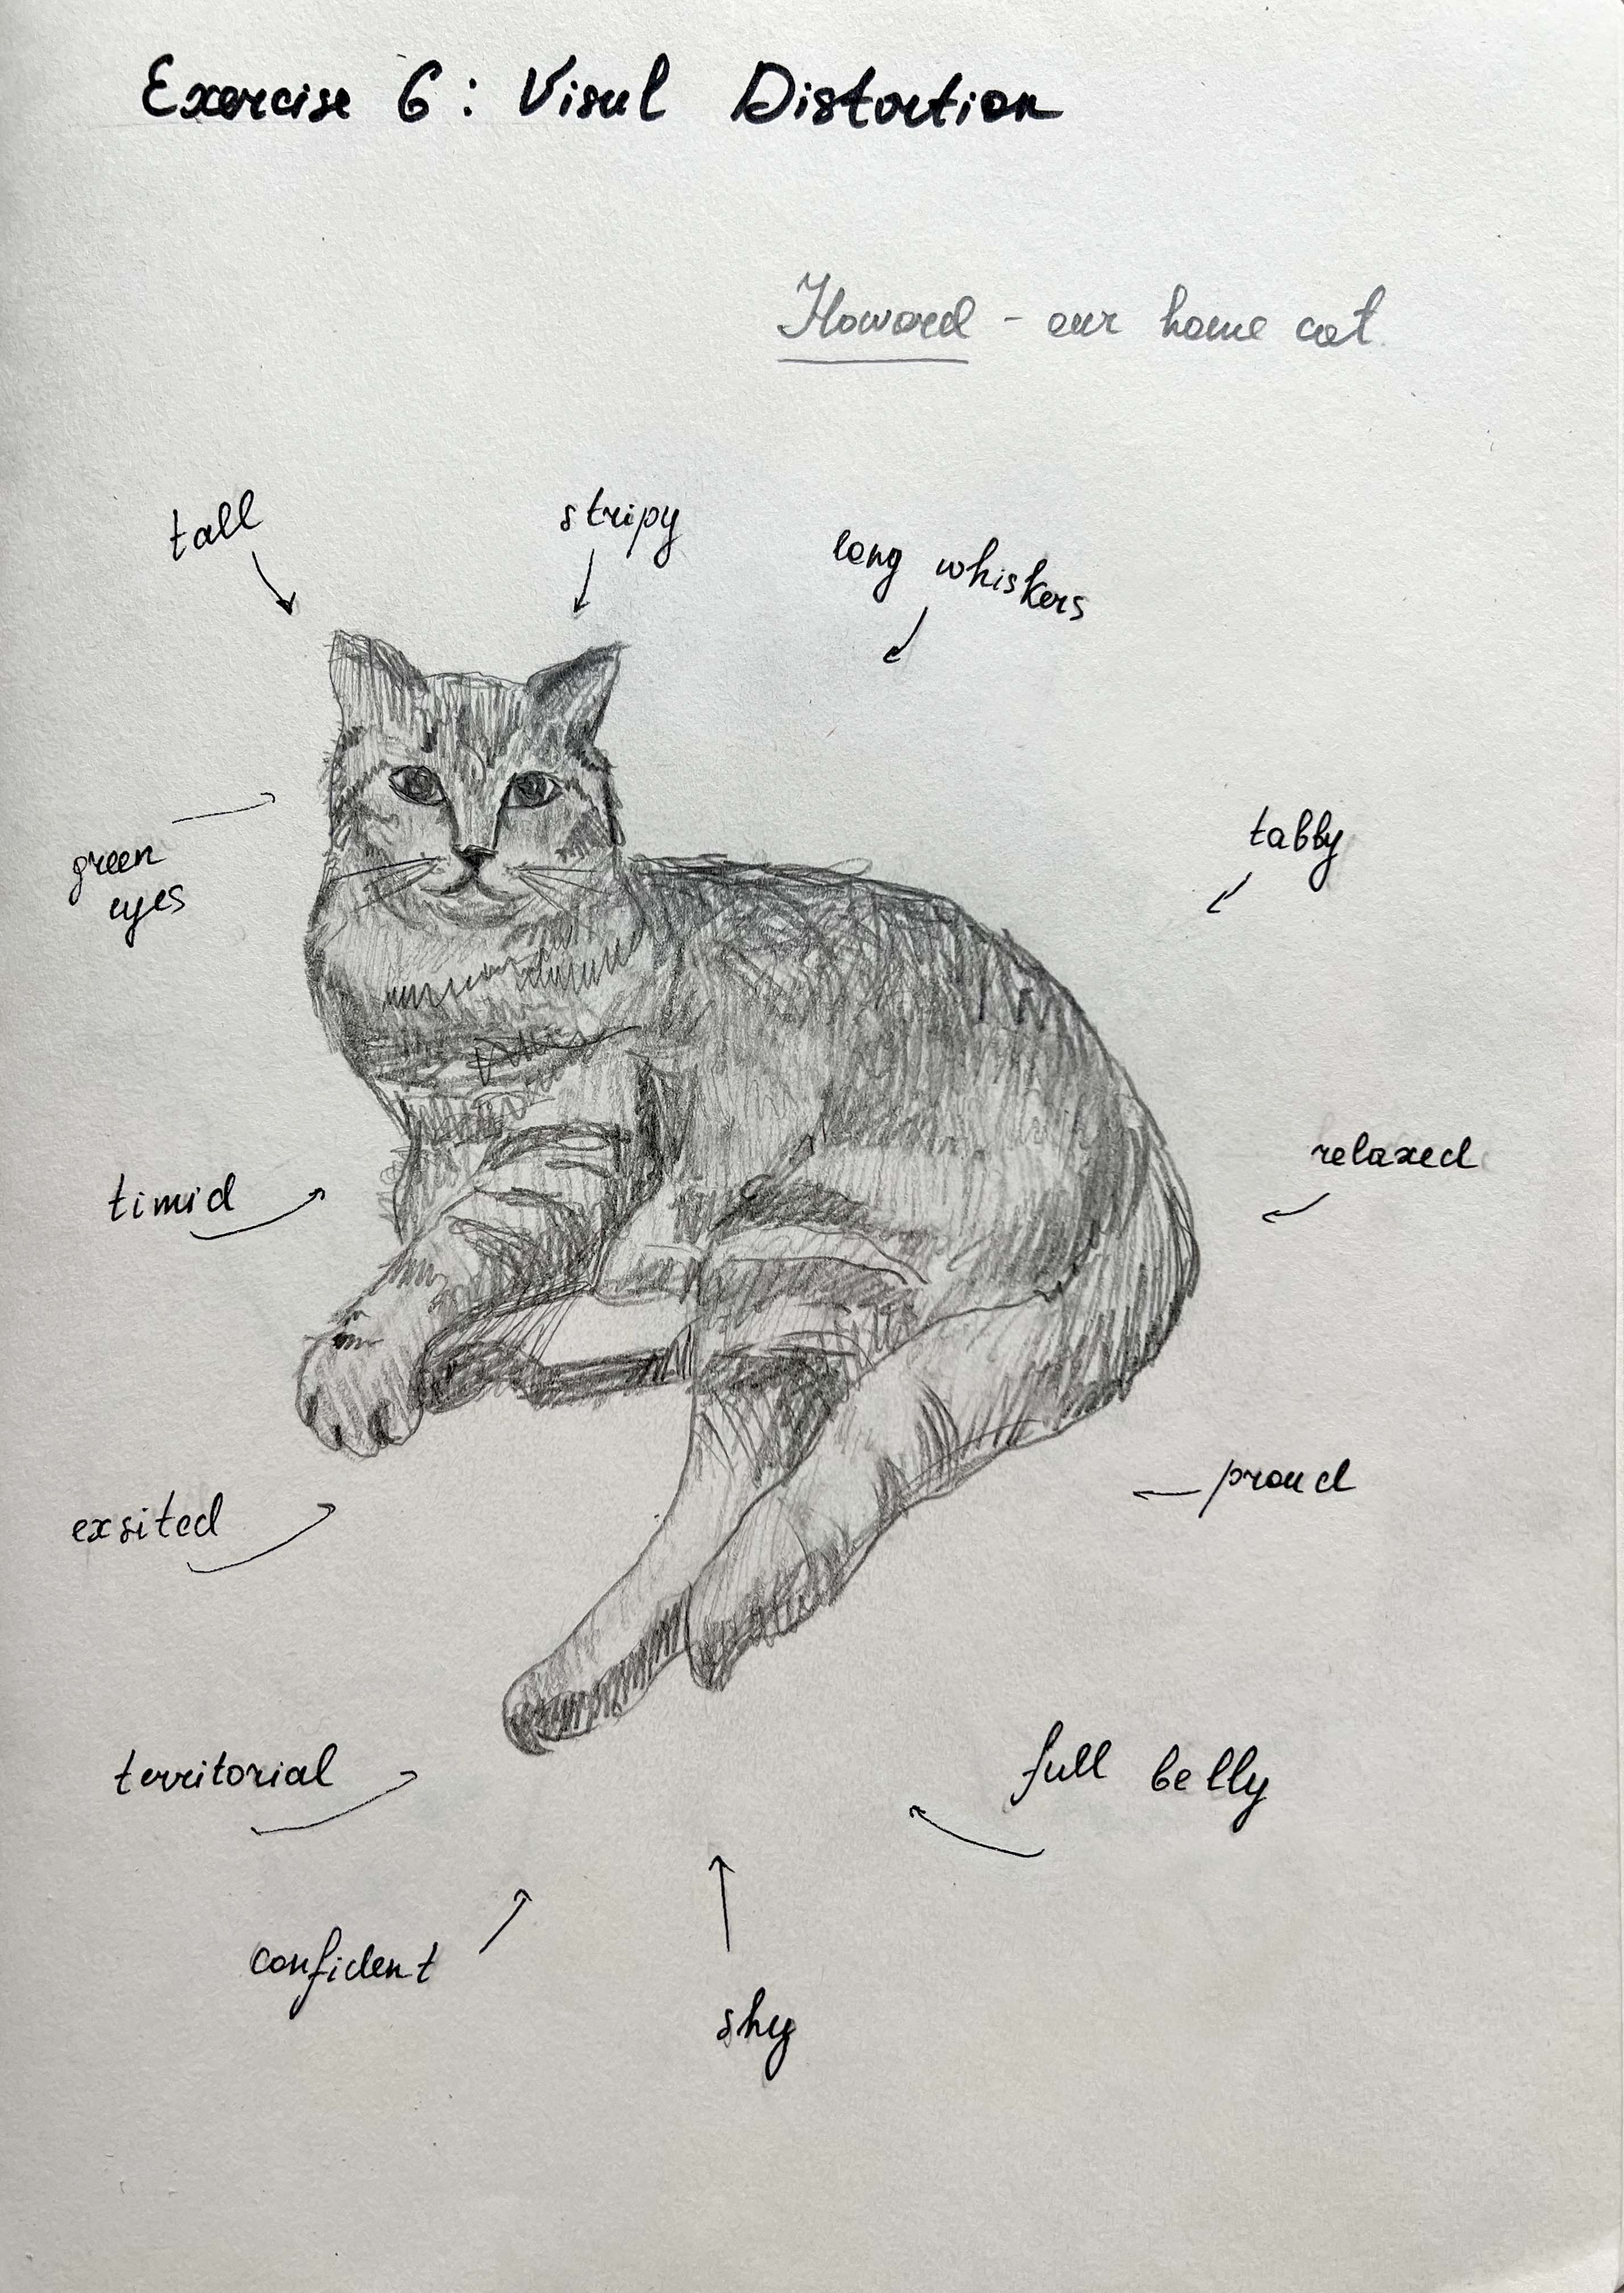
I did a mind map with a sketch of Howard and describing his charachteristic, the way he looks and his personality.
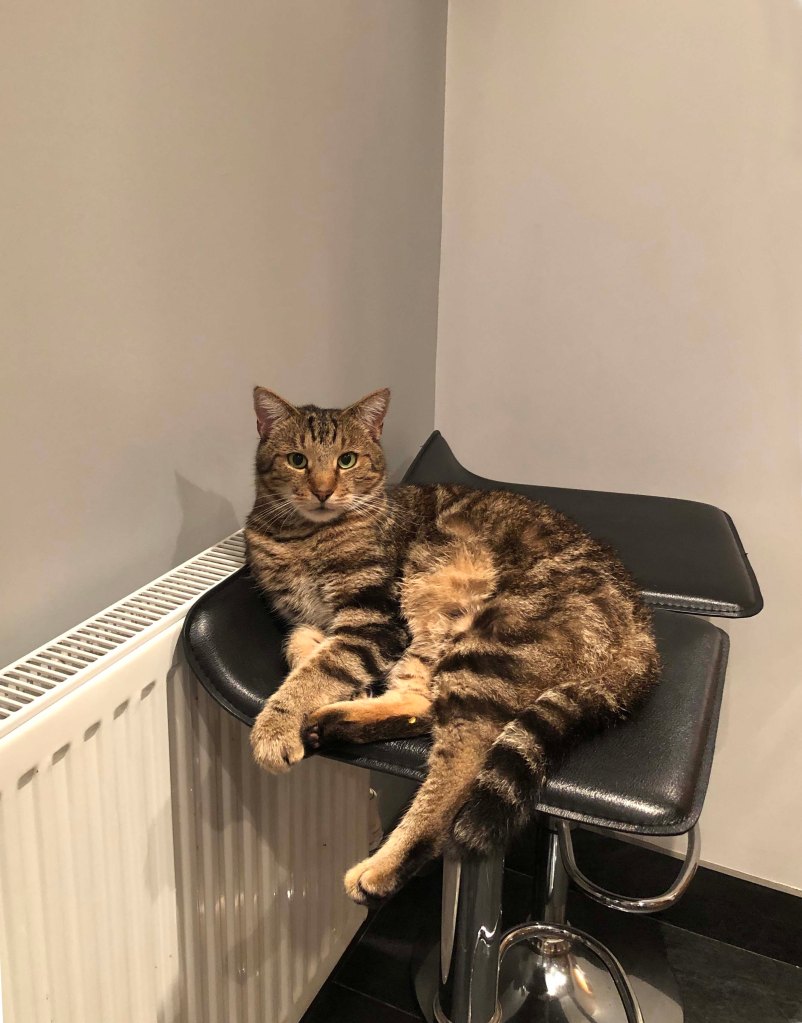
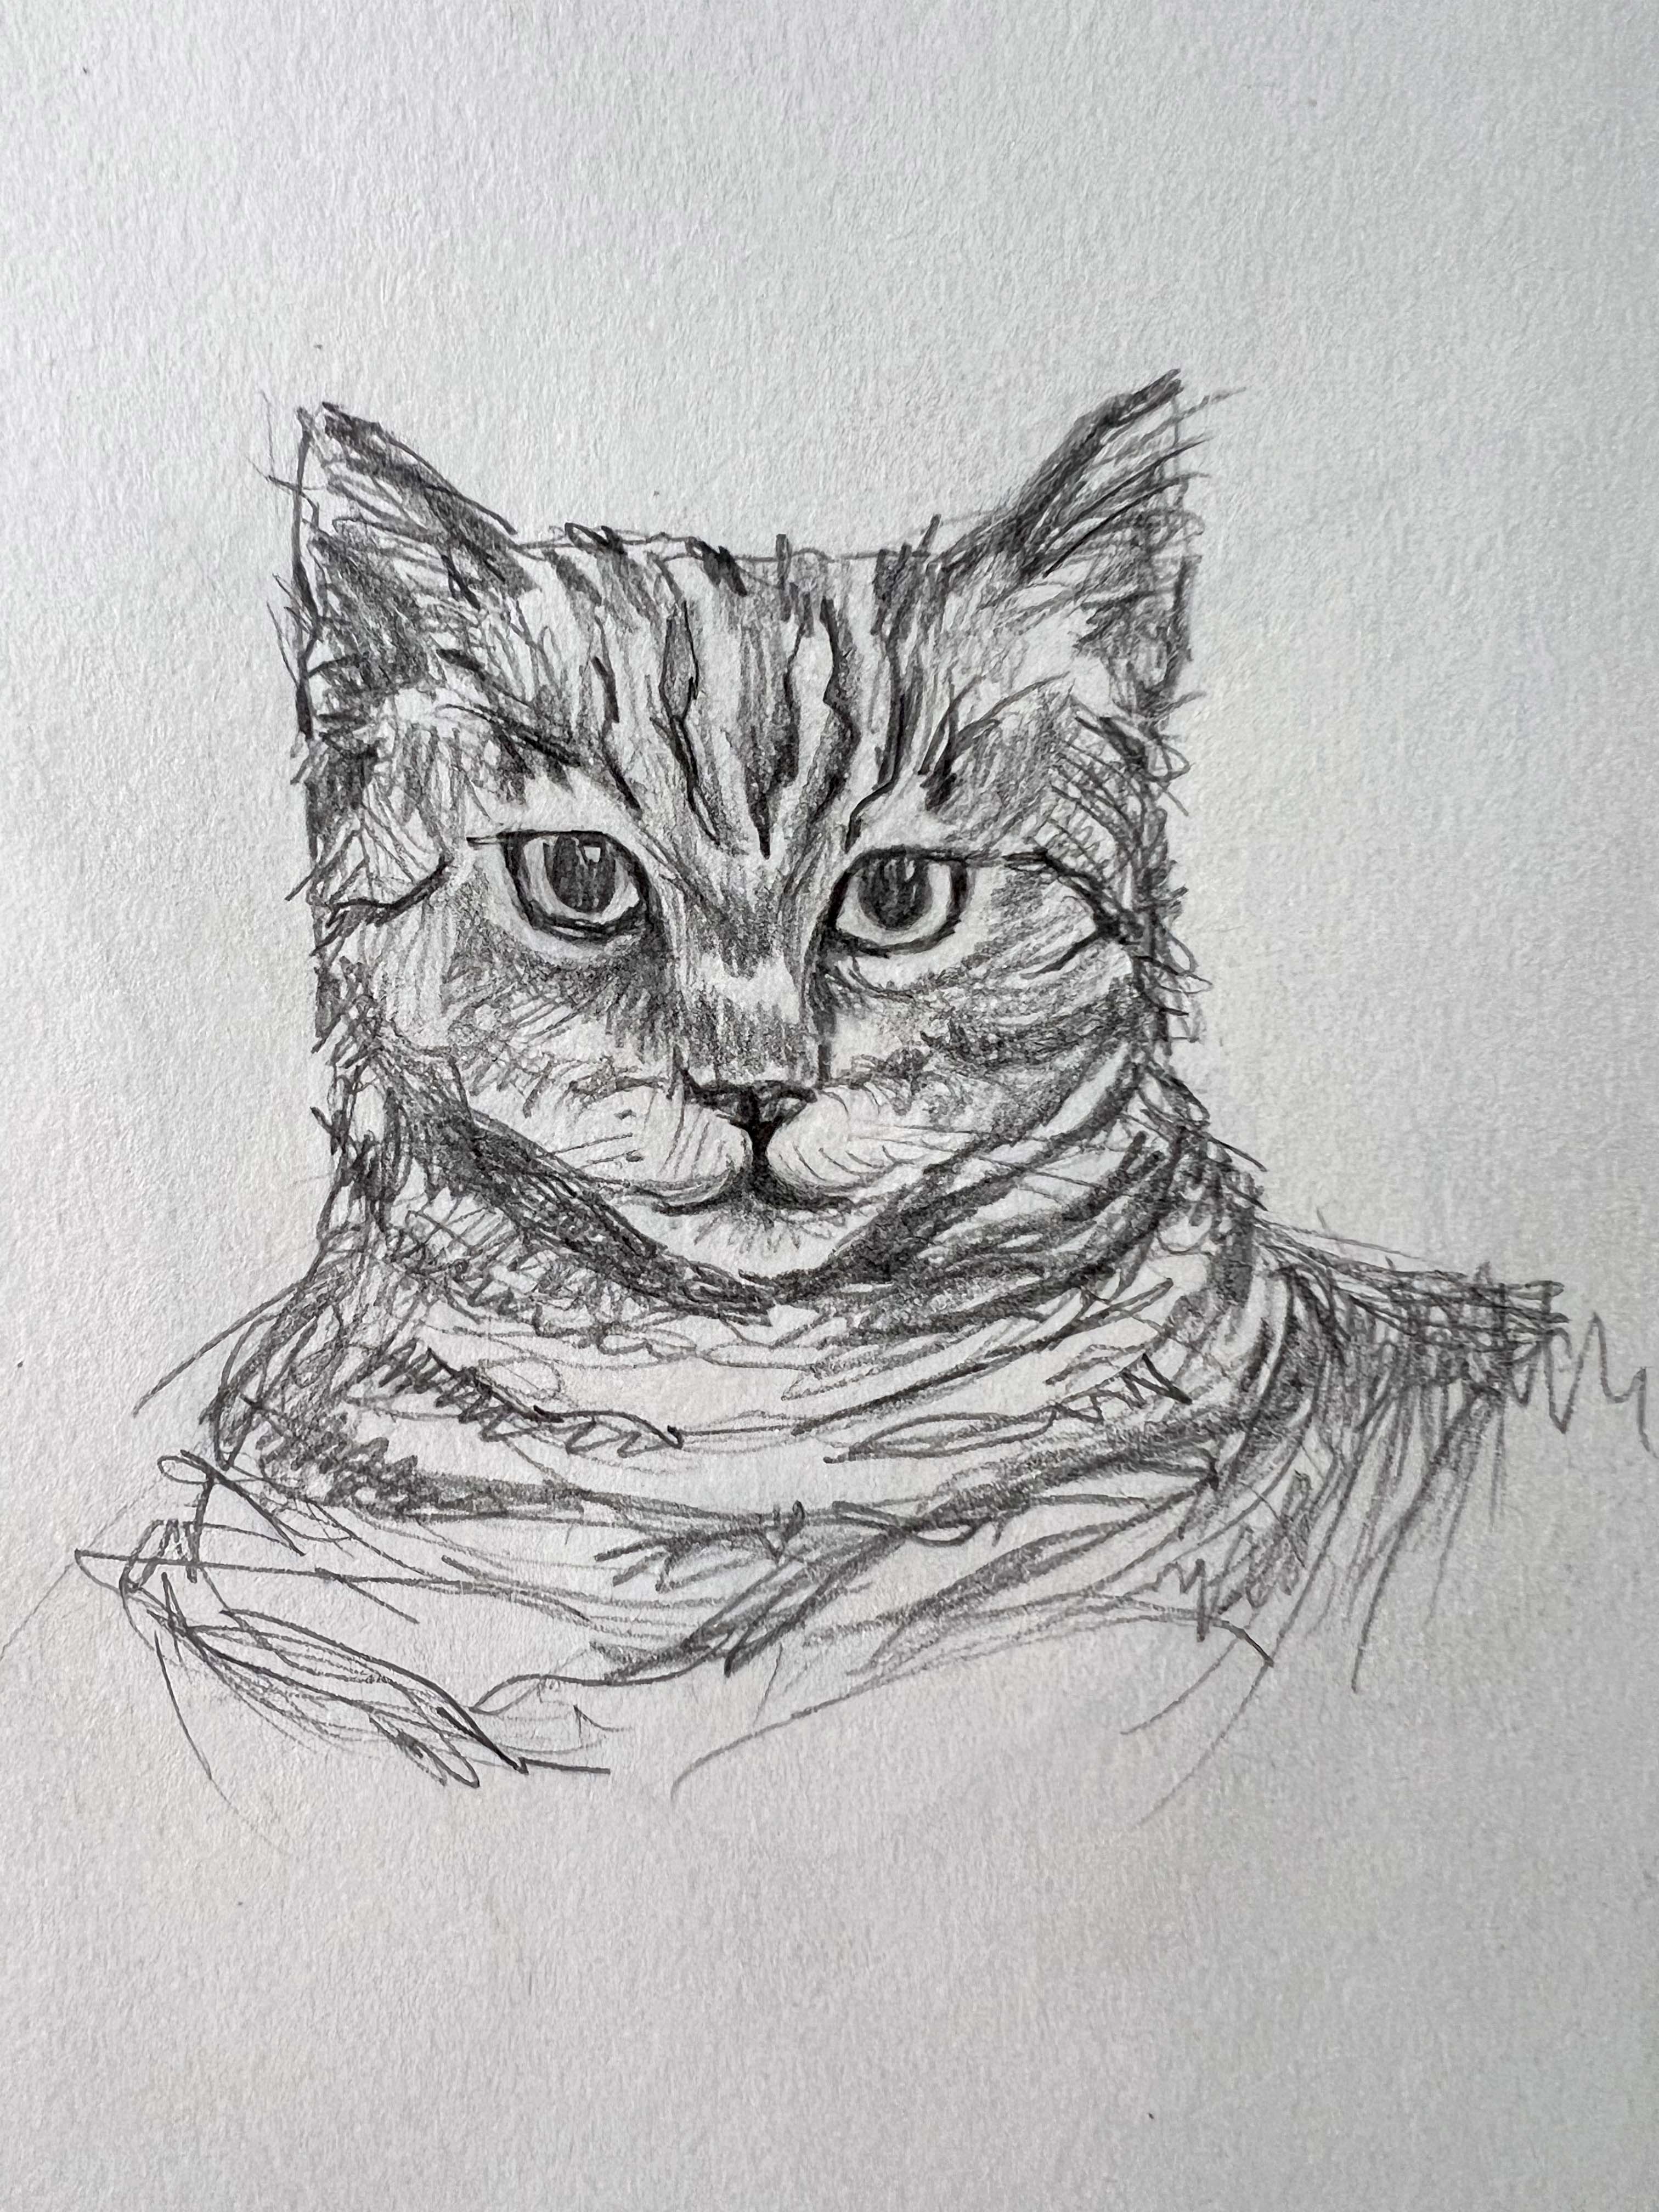
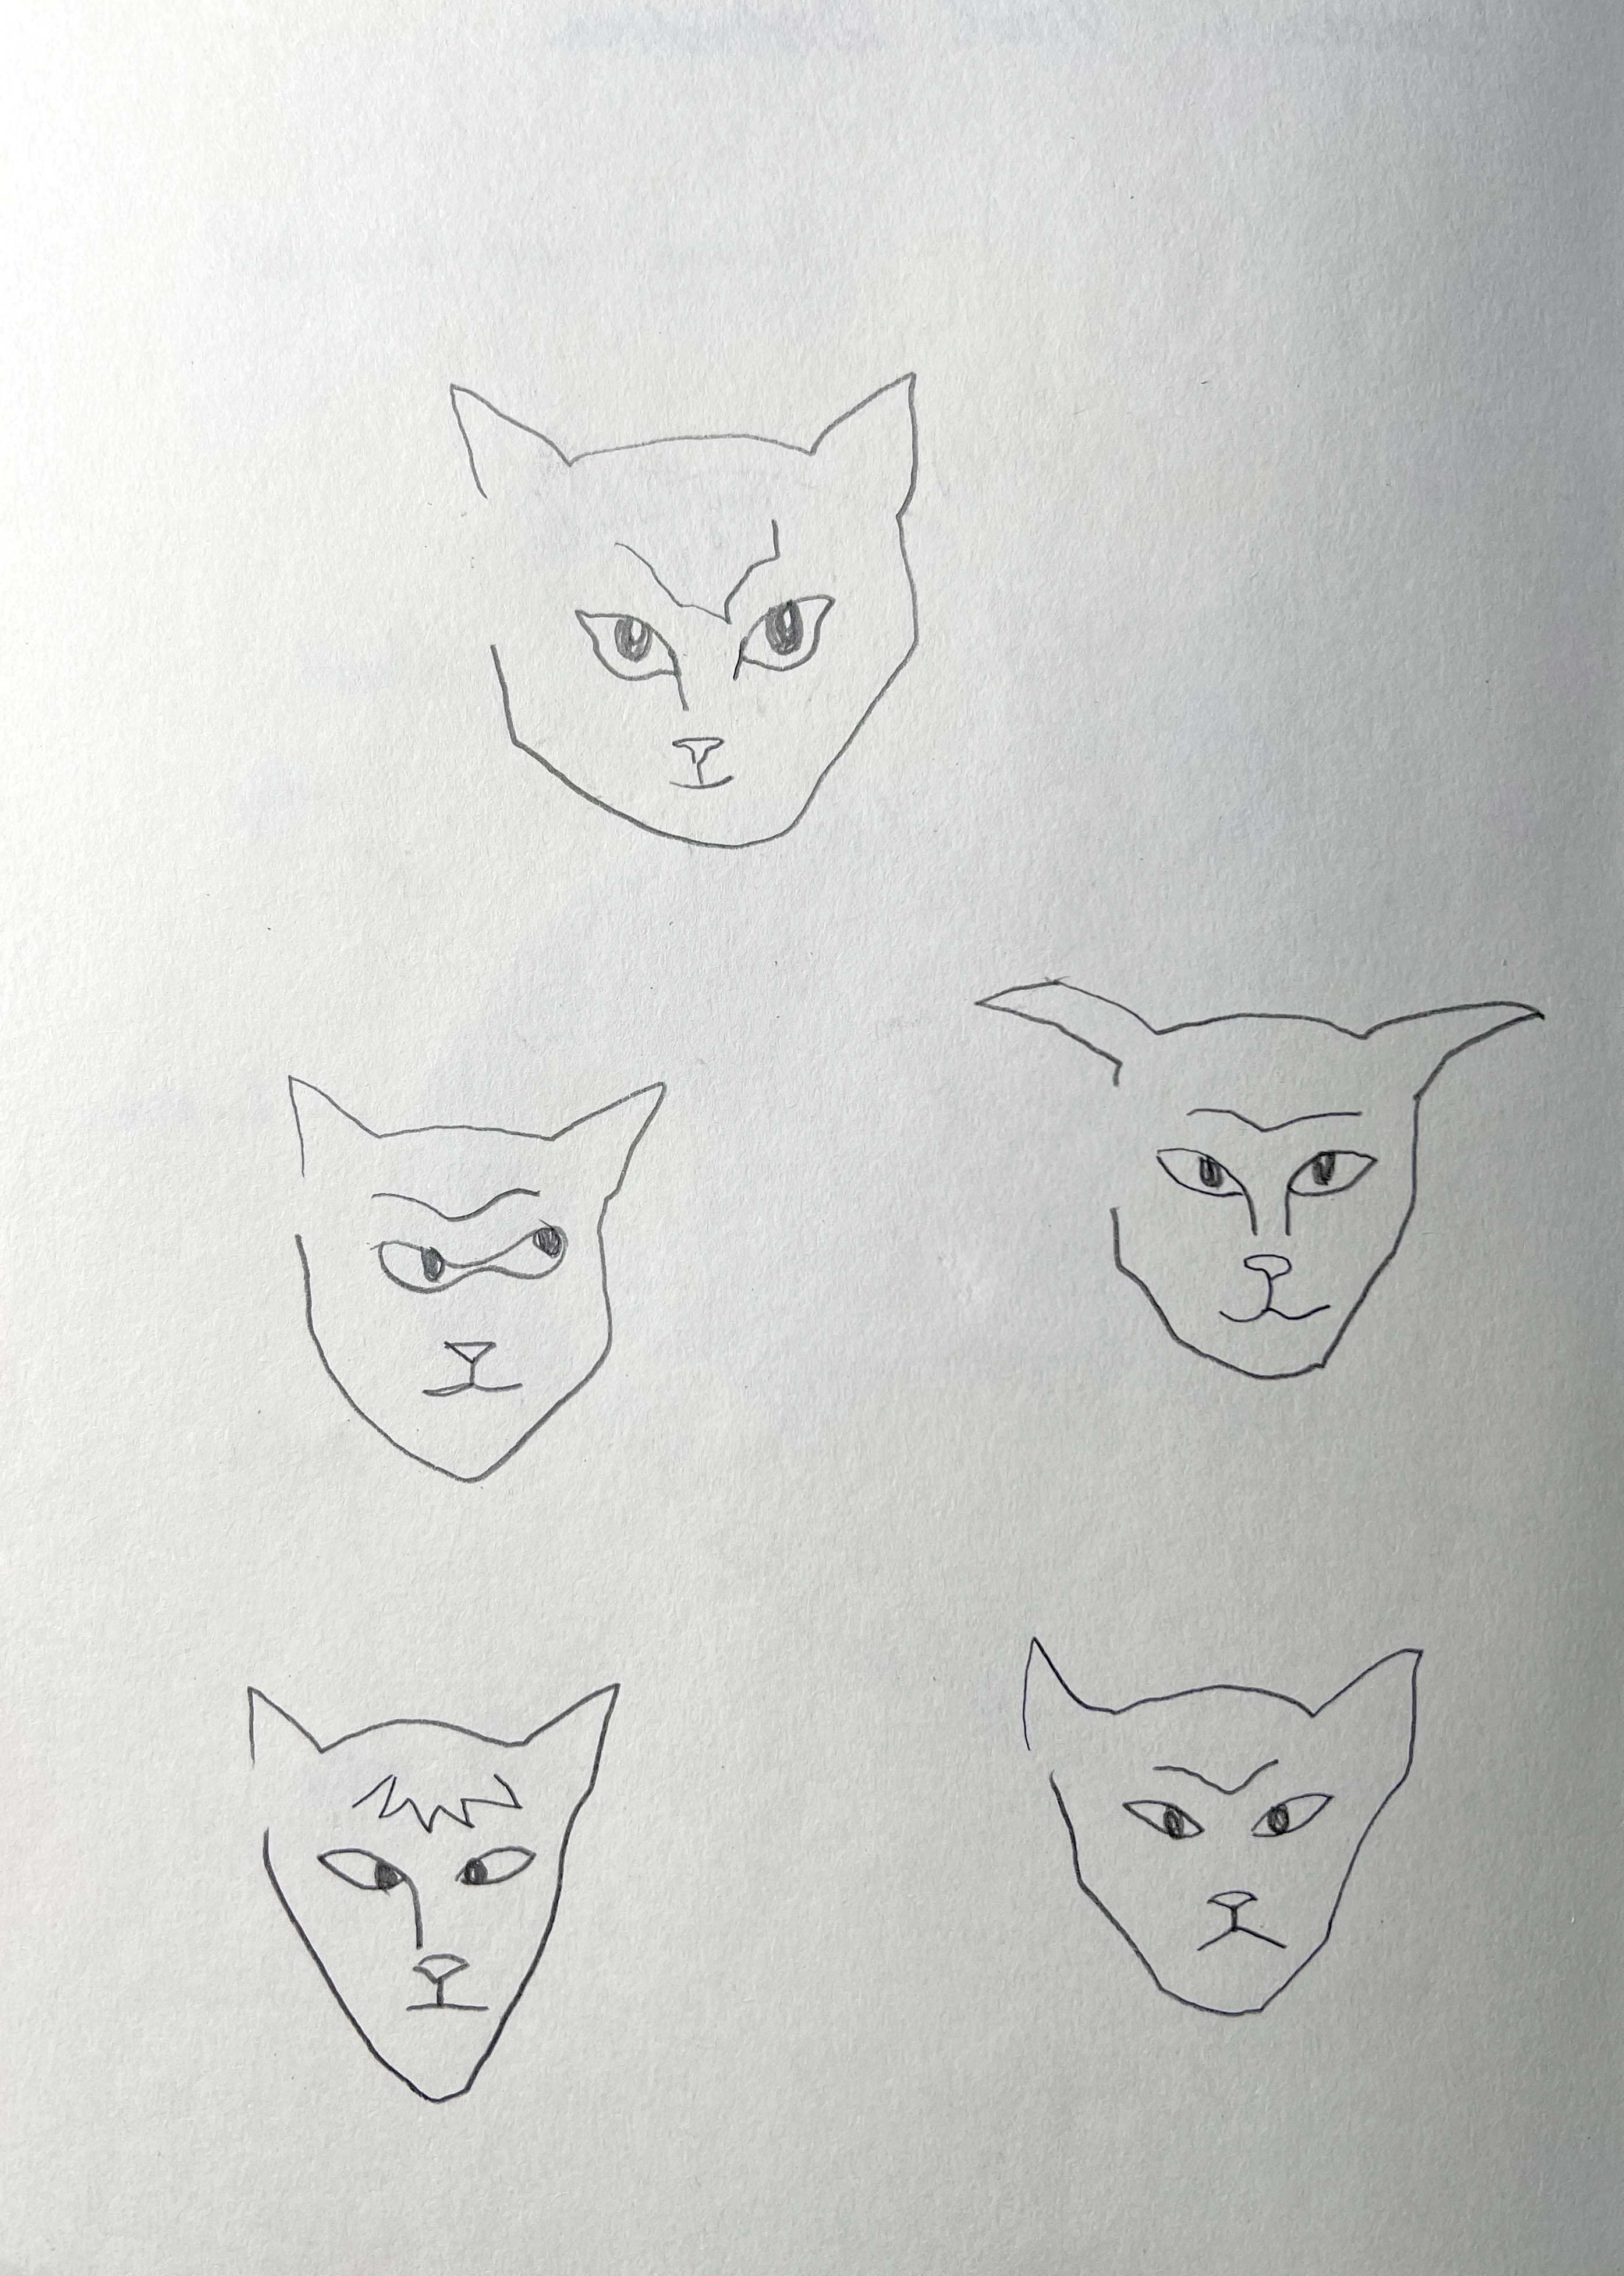
I made a sketch of Howard from the picture where he sat on a kitchen chair. He looks there relaxed and confident, but still keeps his cuteness. I used only a portrait of him, rather than depicting the whole body.
After I did a line drawing of the sketch, using only five lines. That’s basically his personality how I see this cat when he is in a funny, or playful mood. Also, he has slightly buzzed eyes, so I used the opportunity to draw them too. I had a little laugh by doing these drawings, as they sum up this cat very well.
As this exercise evolves around the mastering of collaging and juxtaposition, I went for some inspiration from my books for collages I have from the first unit for core concepts. This is the area that I particularly enjoyed. The beauty is that you can create the narrative by doing the collage from the flow. From my observation, the narrative of a collage can change dramatically because of the materials and colours that are being used. The purpose of distortion is to create the feeling of the design during the creative process. I loved that kind of experiment, but the tricky part of it is that it can catch the designer with some unusual outcomes, as it is difficult to plan in advance.
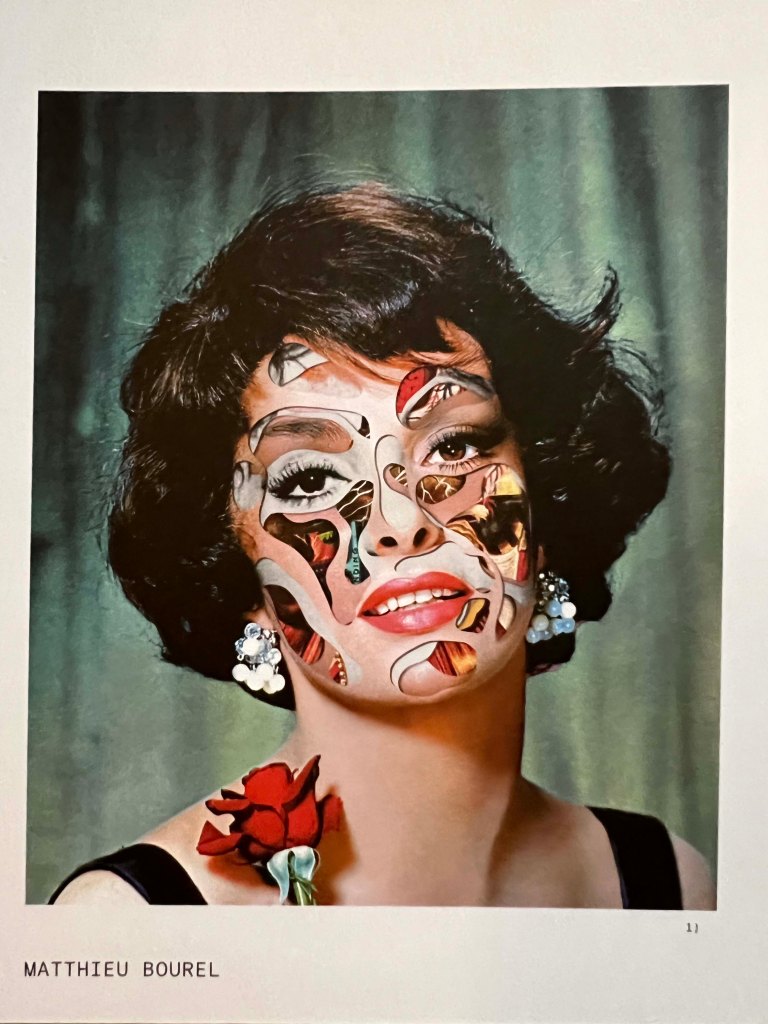
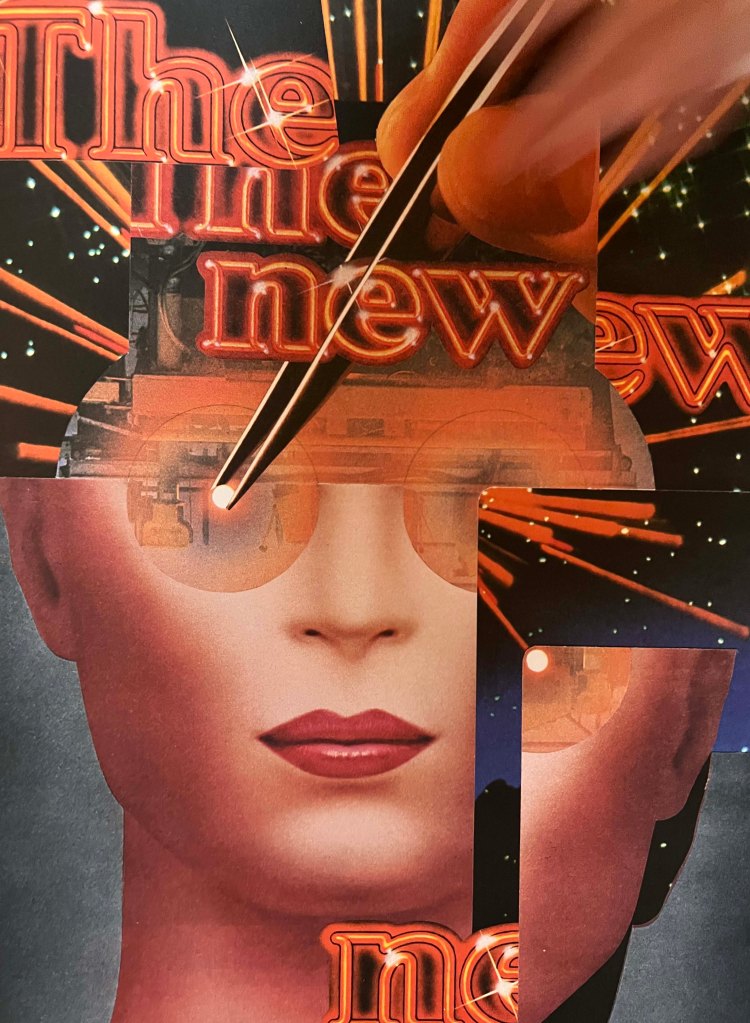
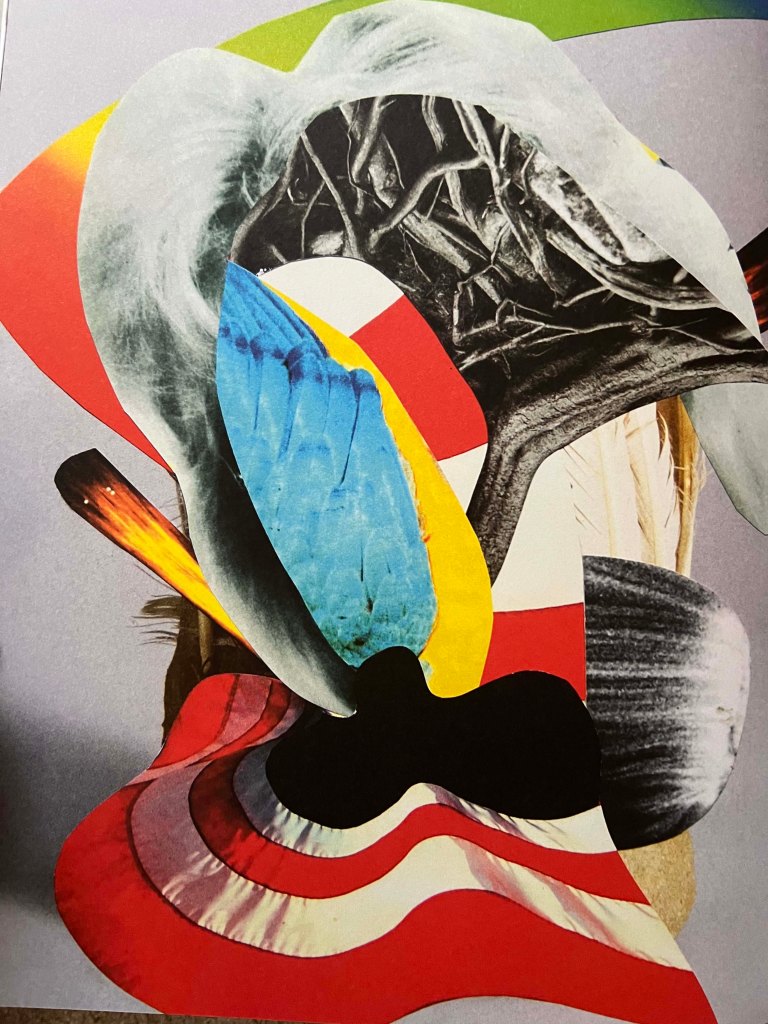
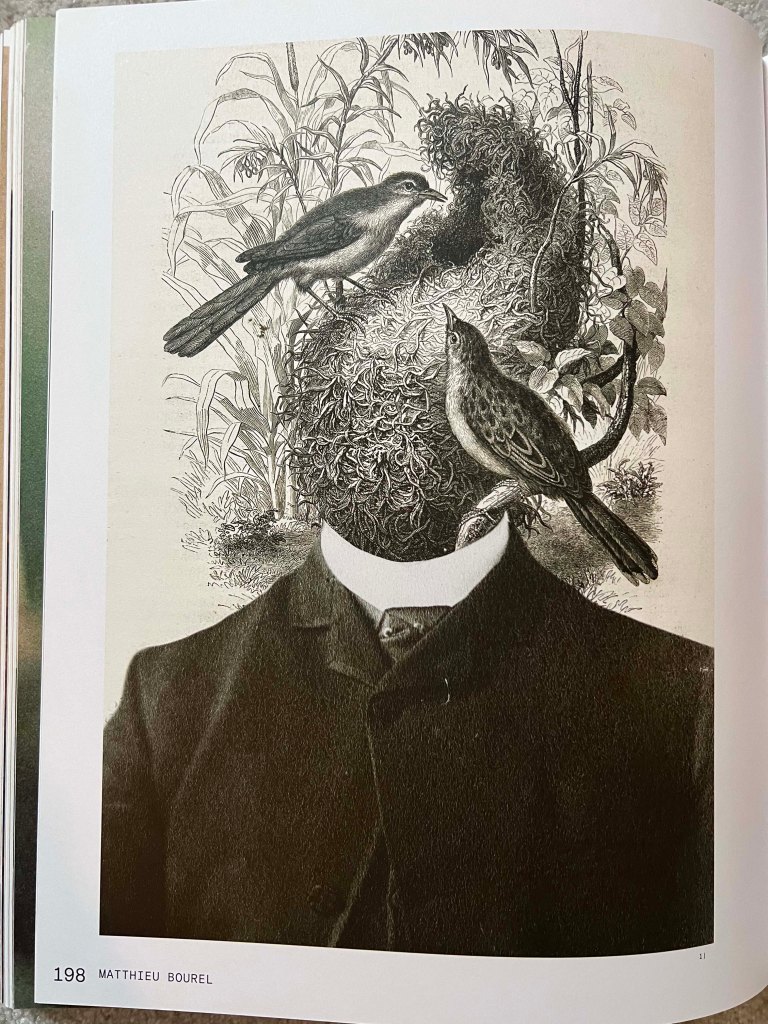
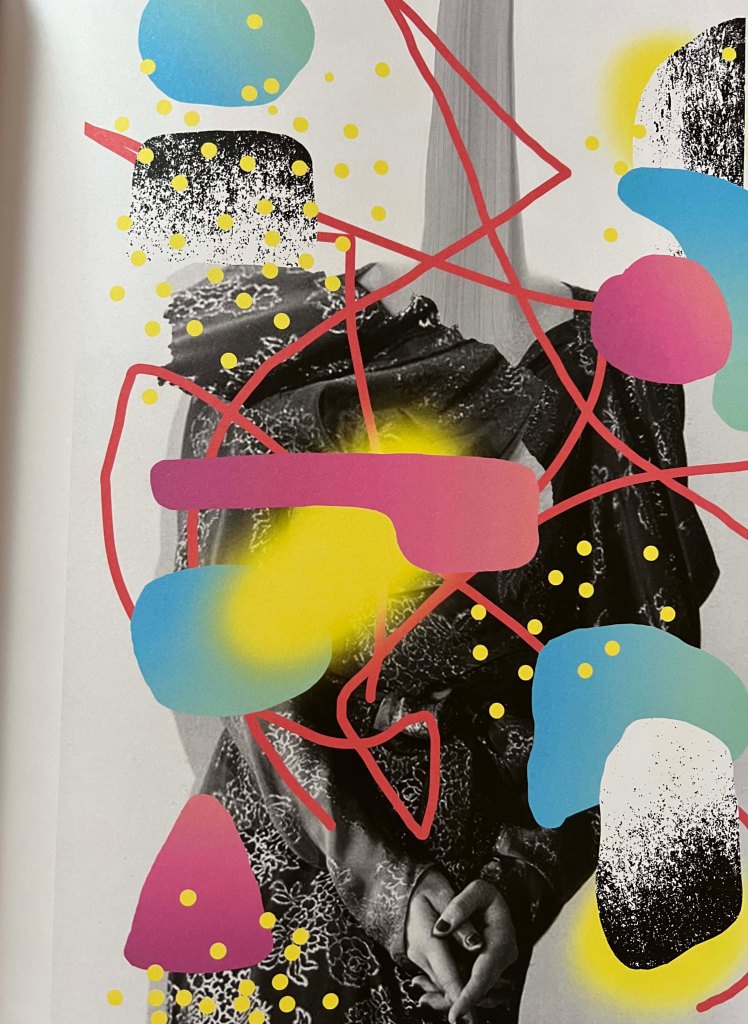
Bellow I saved some designs from the book The Age of Collage Vol. 2. By bringing together disparate images and objects, collage transcends boundaries between artistic disciplines. Traditional analogue technology has its roots in surrealism and Dadaism. Collage like any other type of art doesn’t have limits and in some cases boundaries.
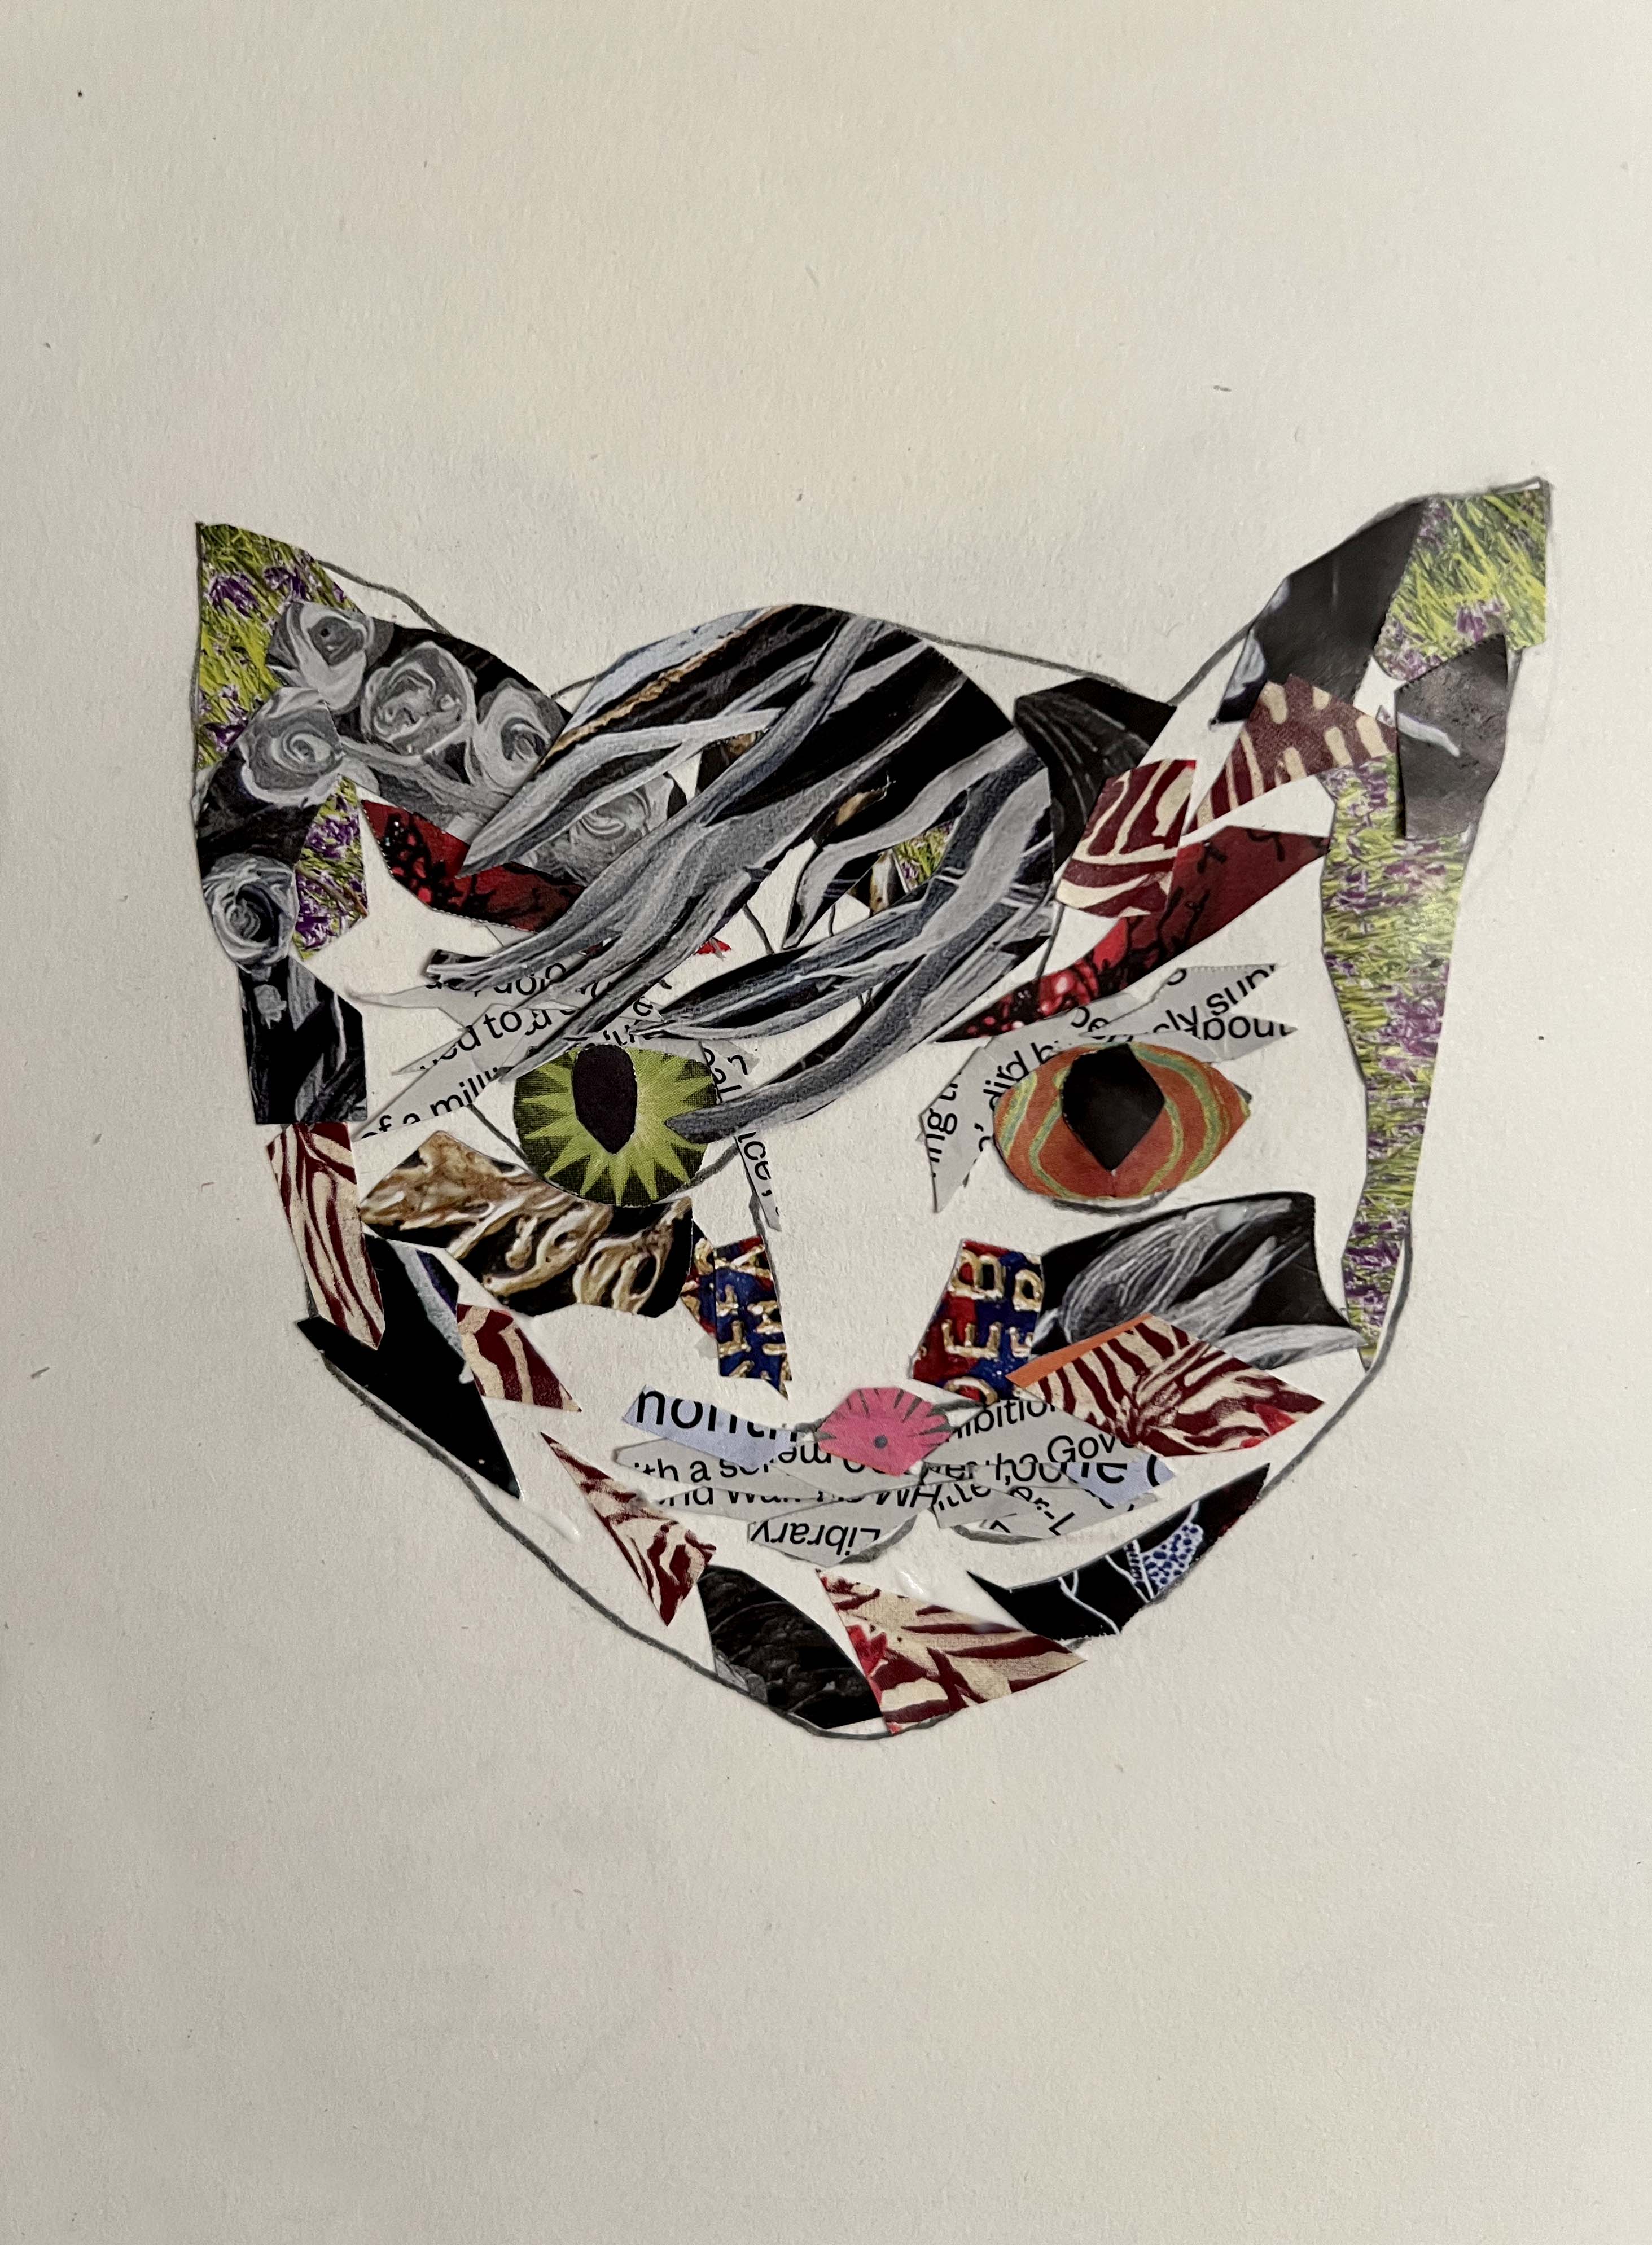
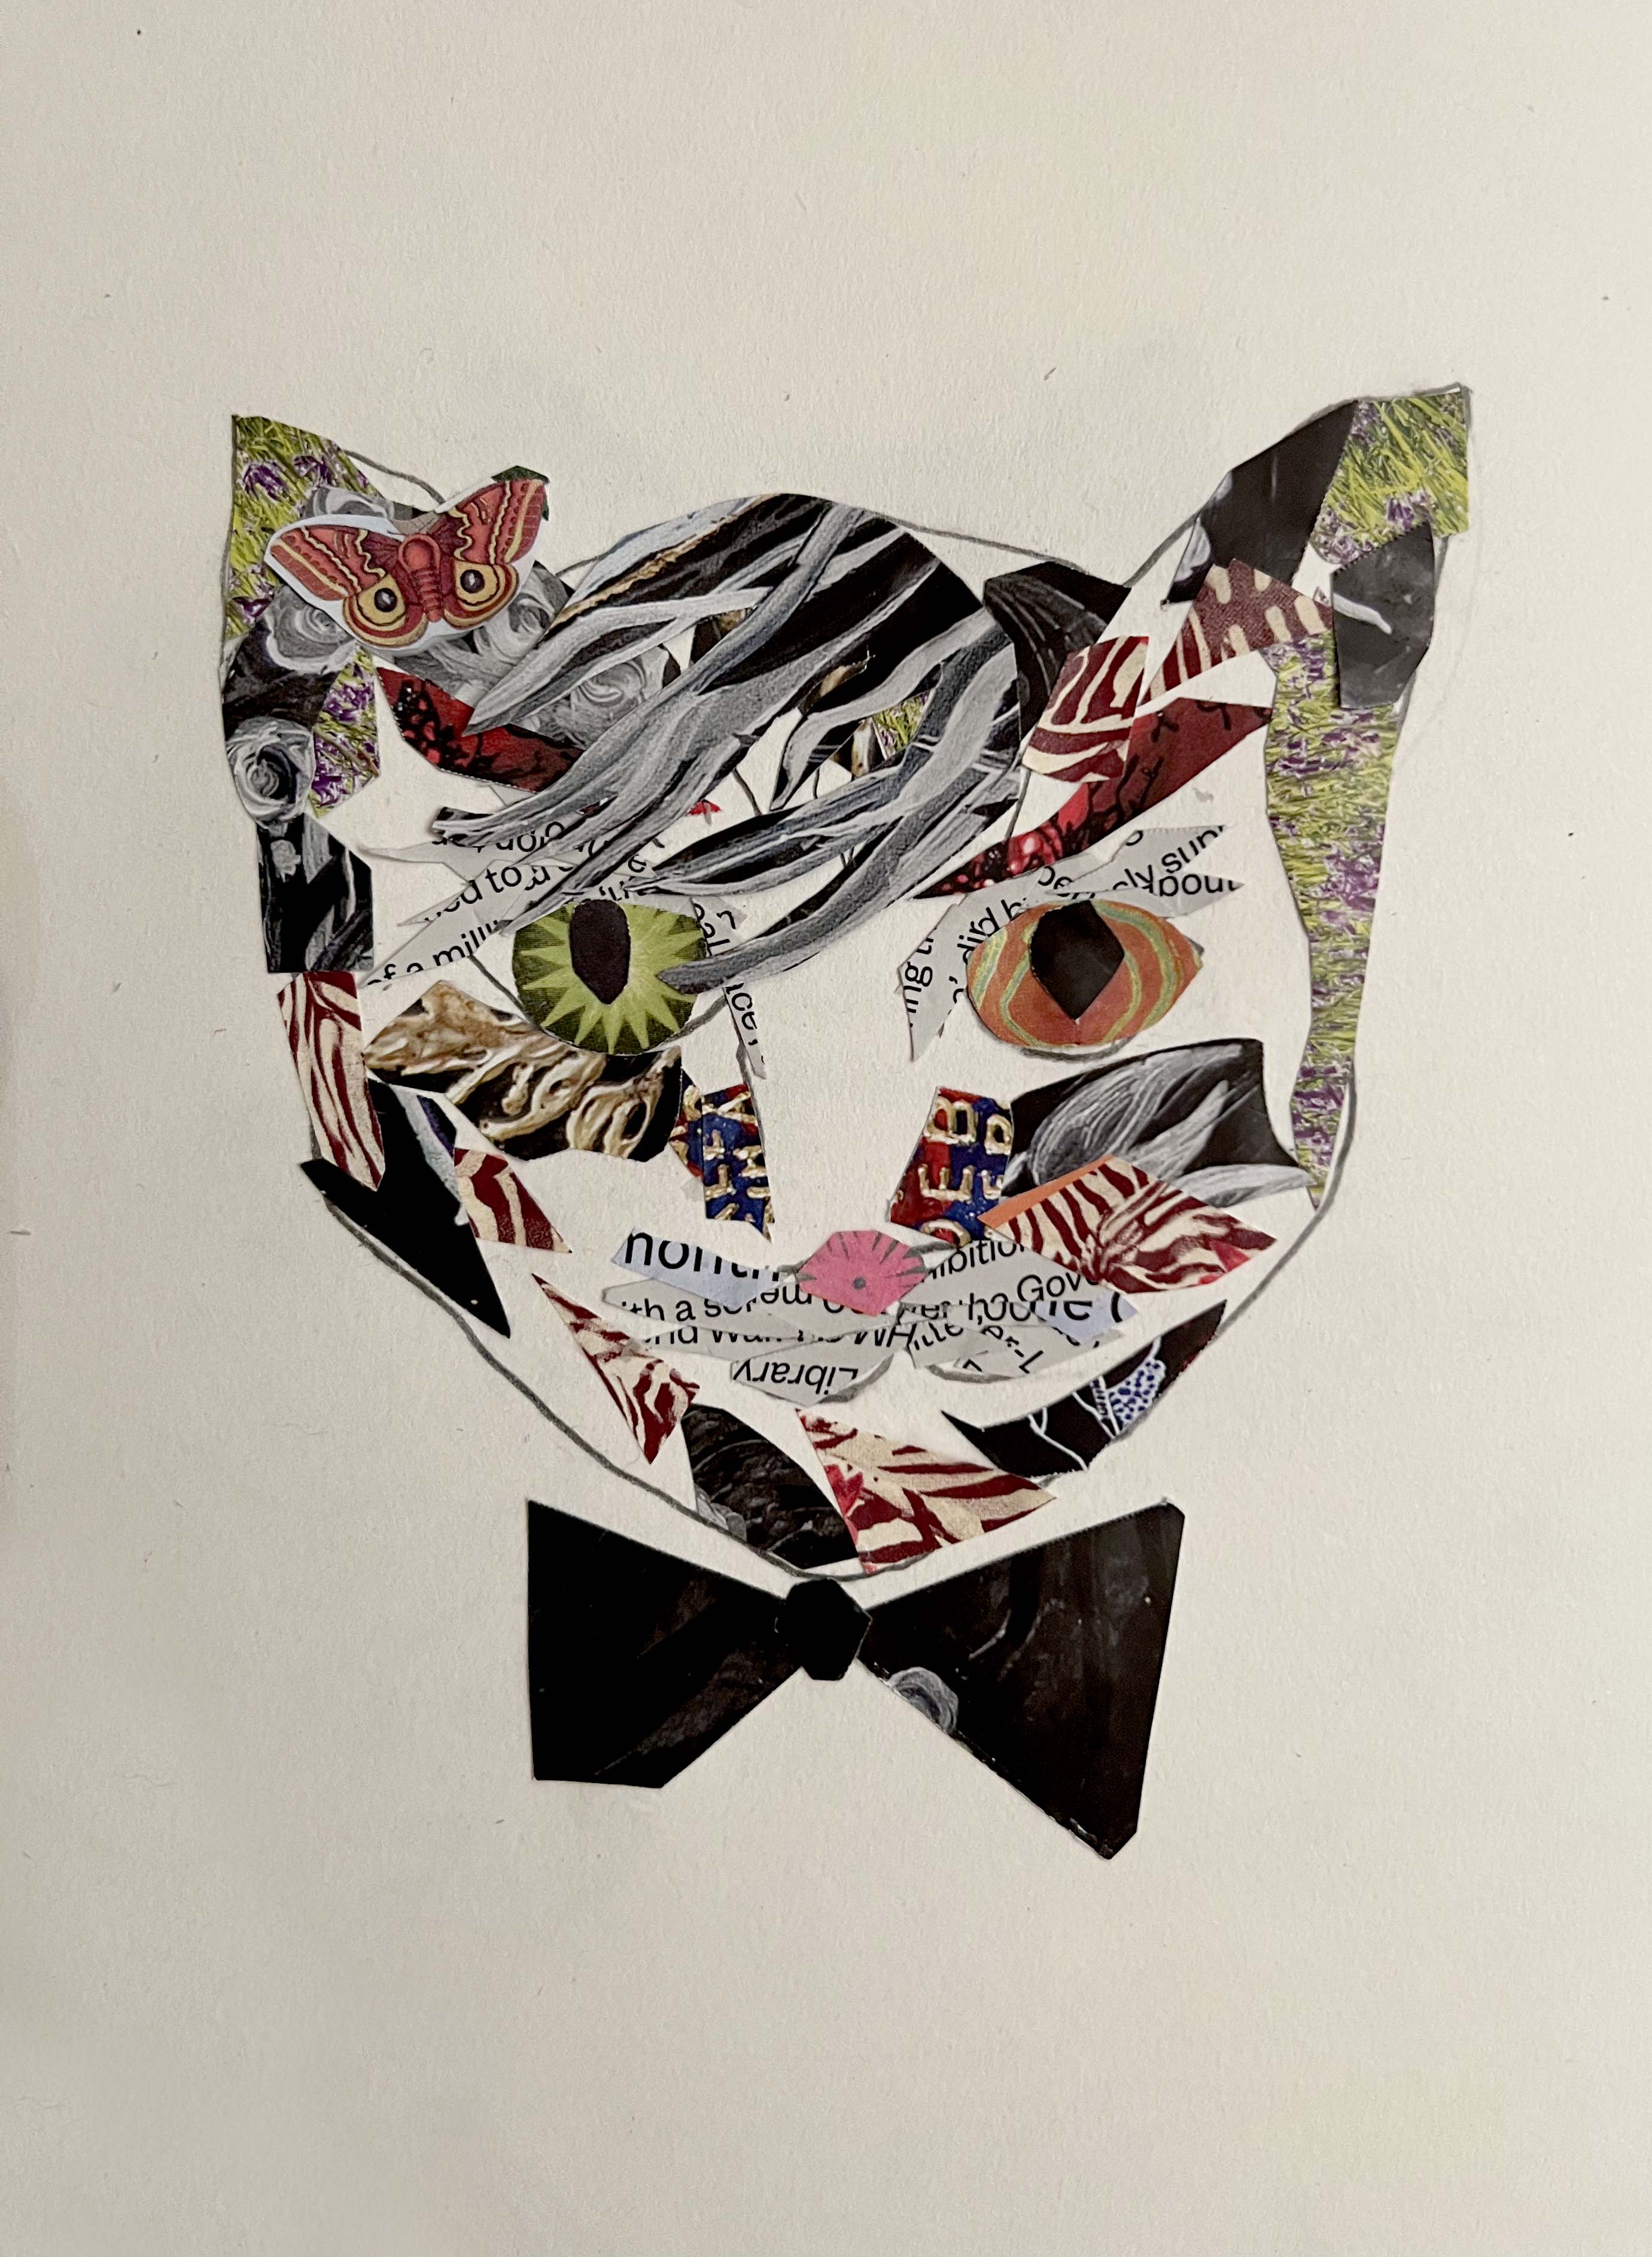
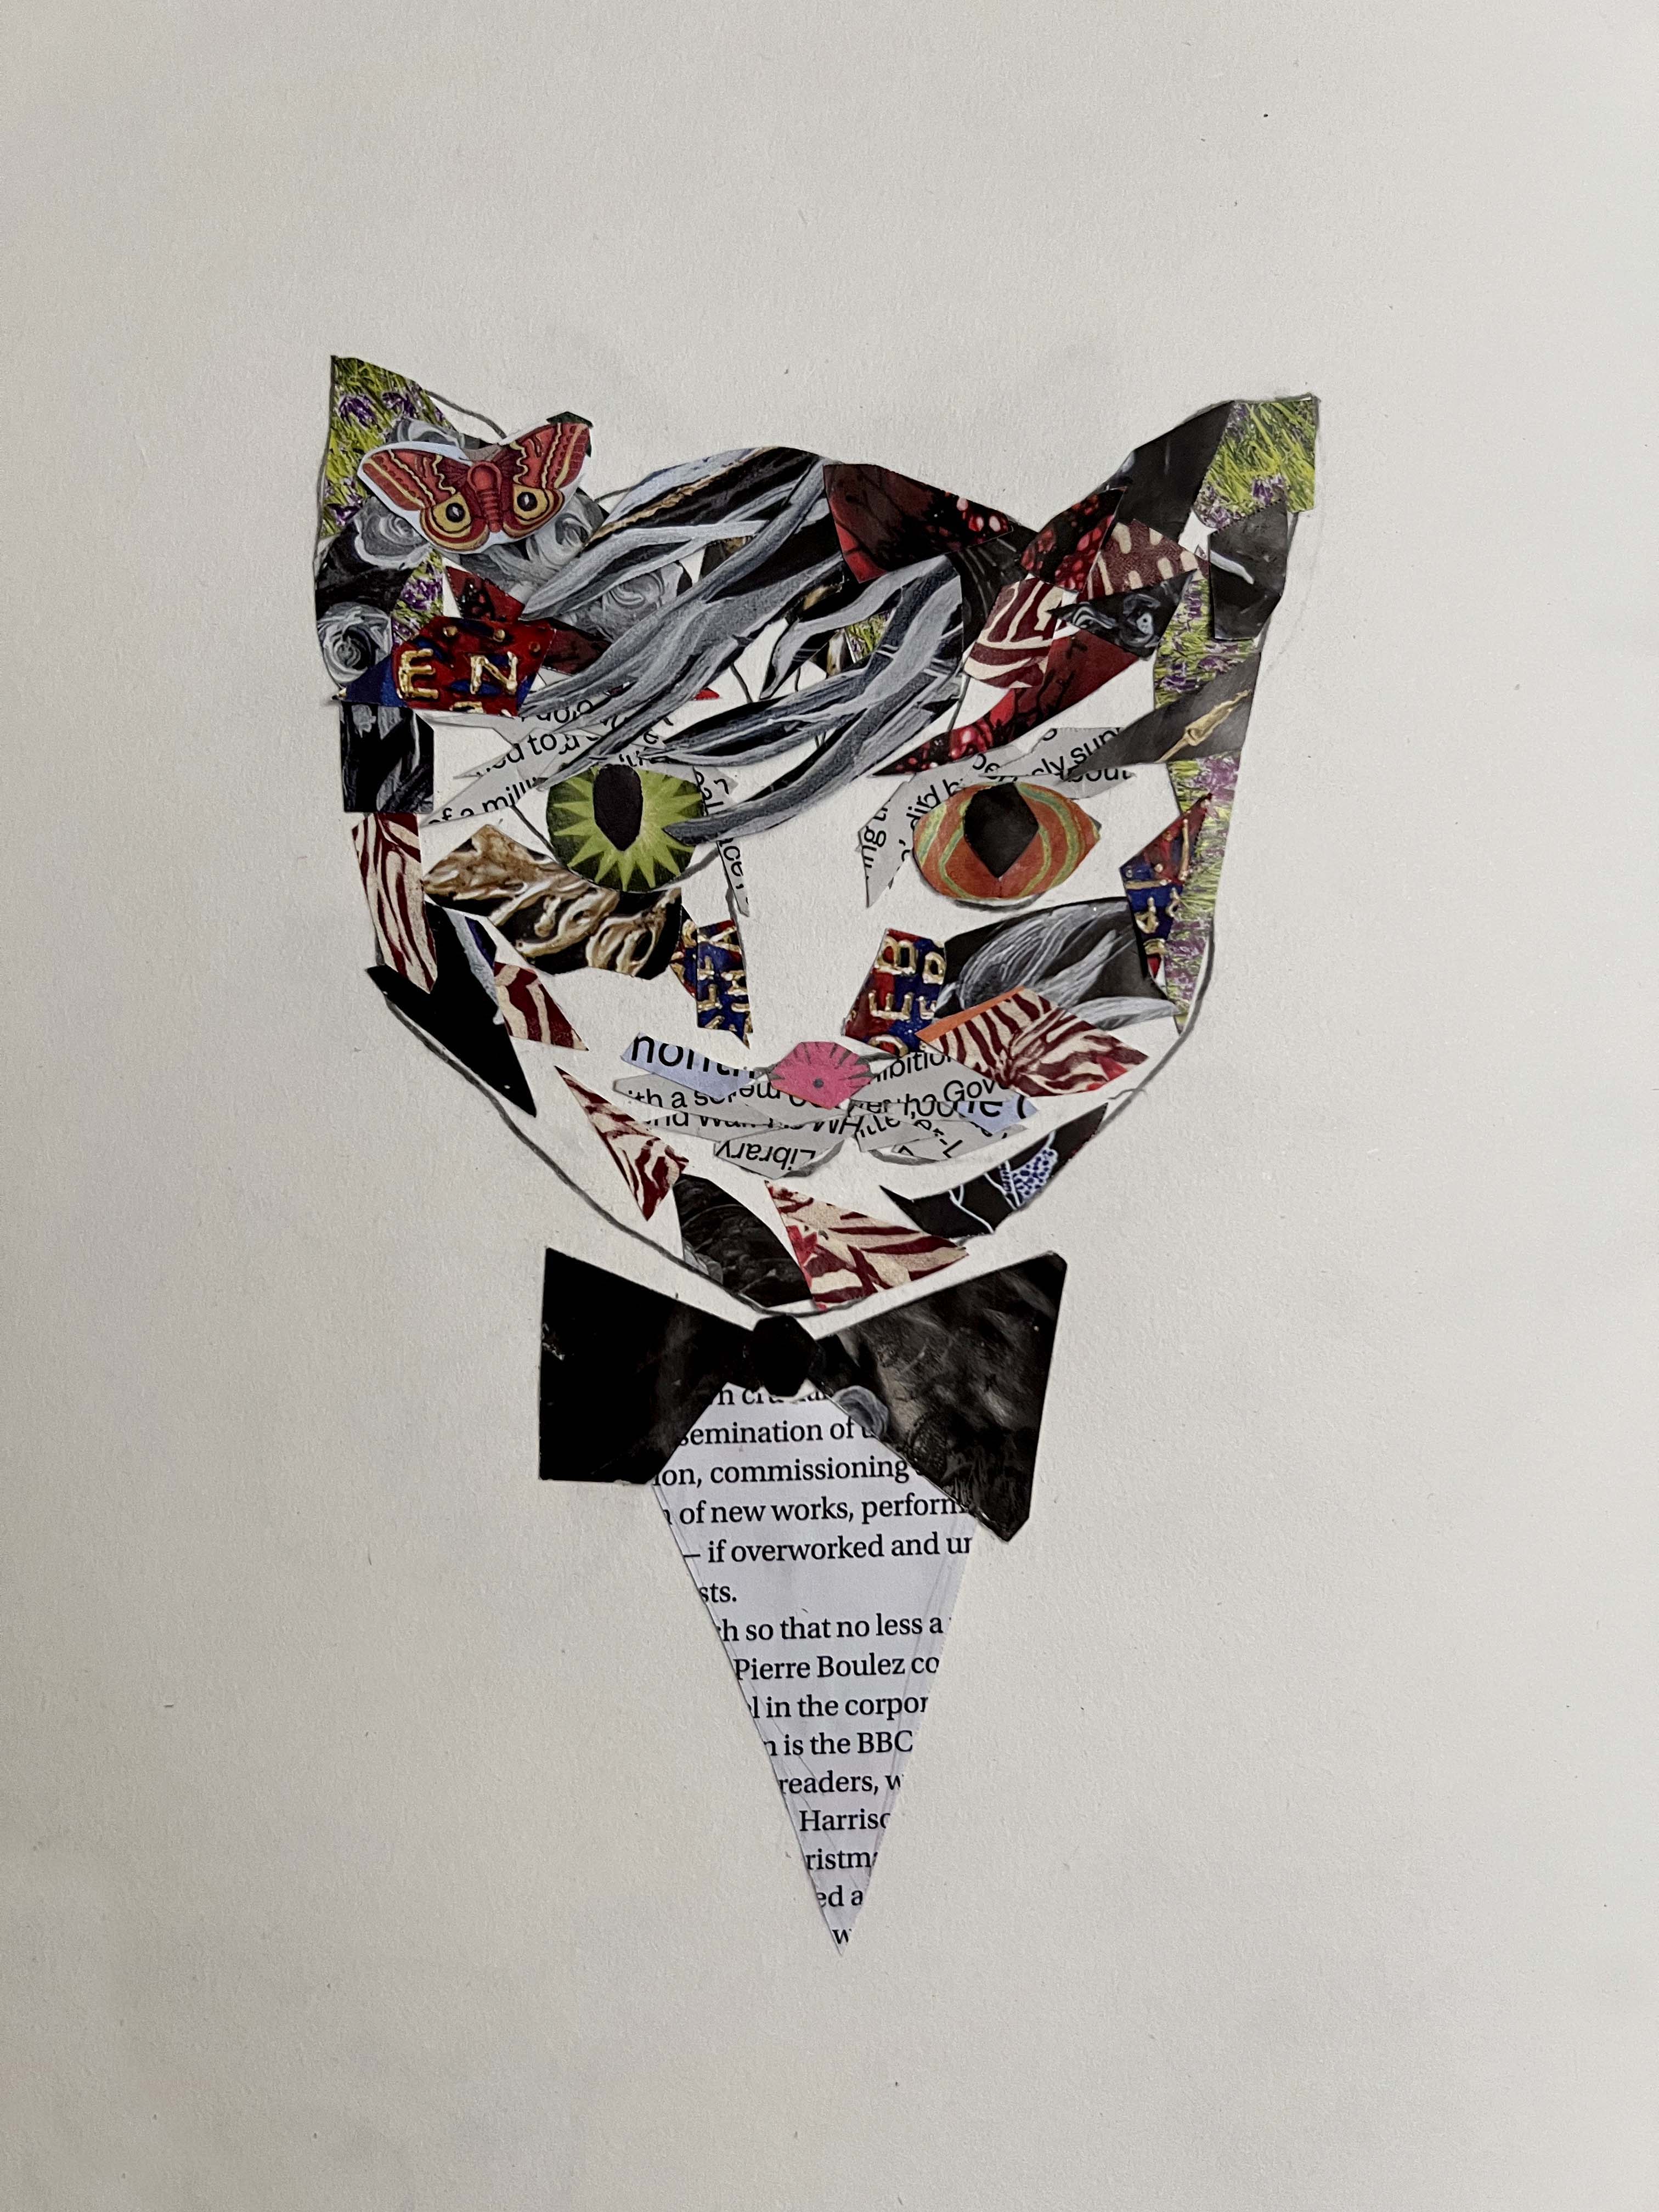
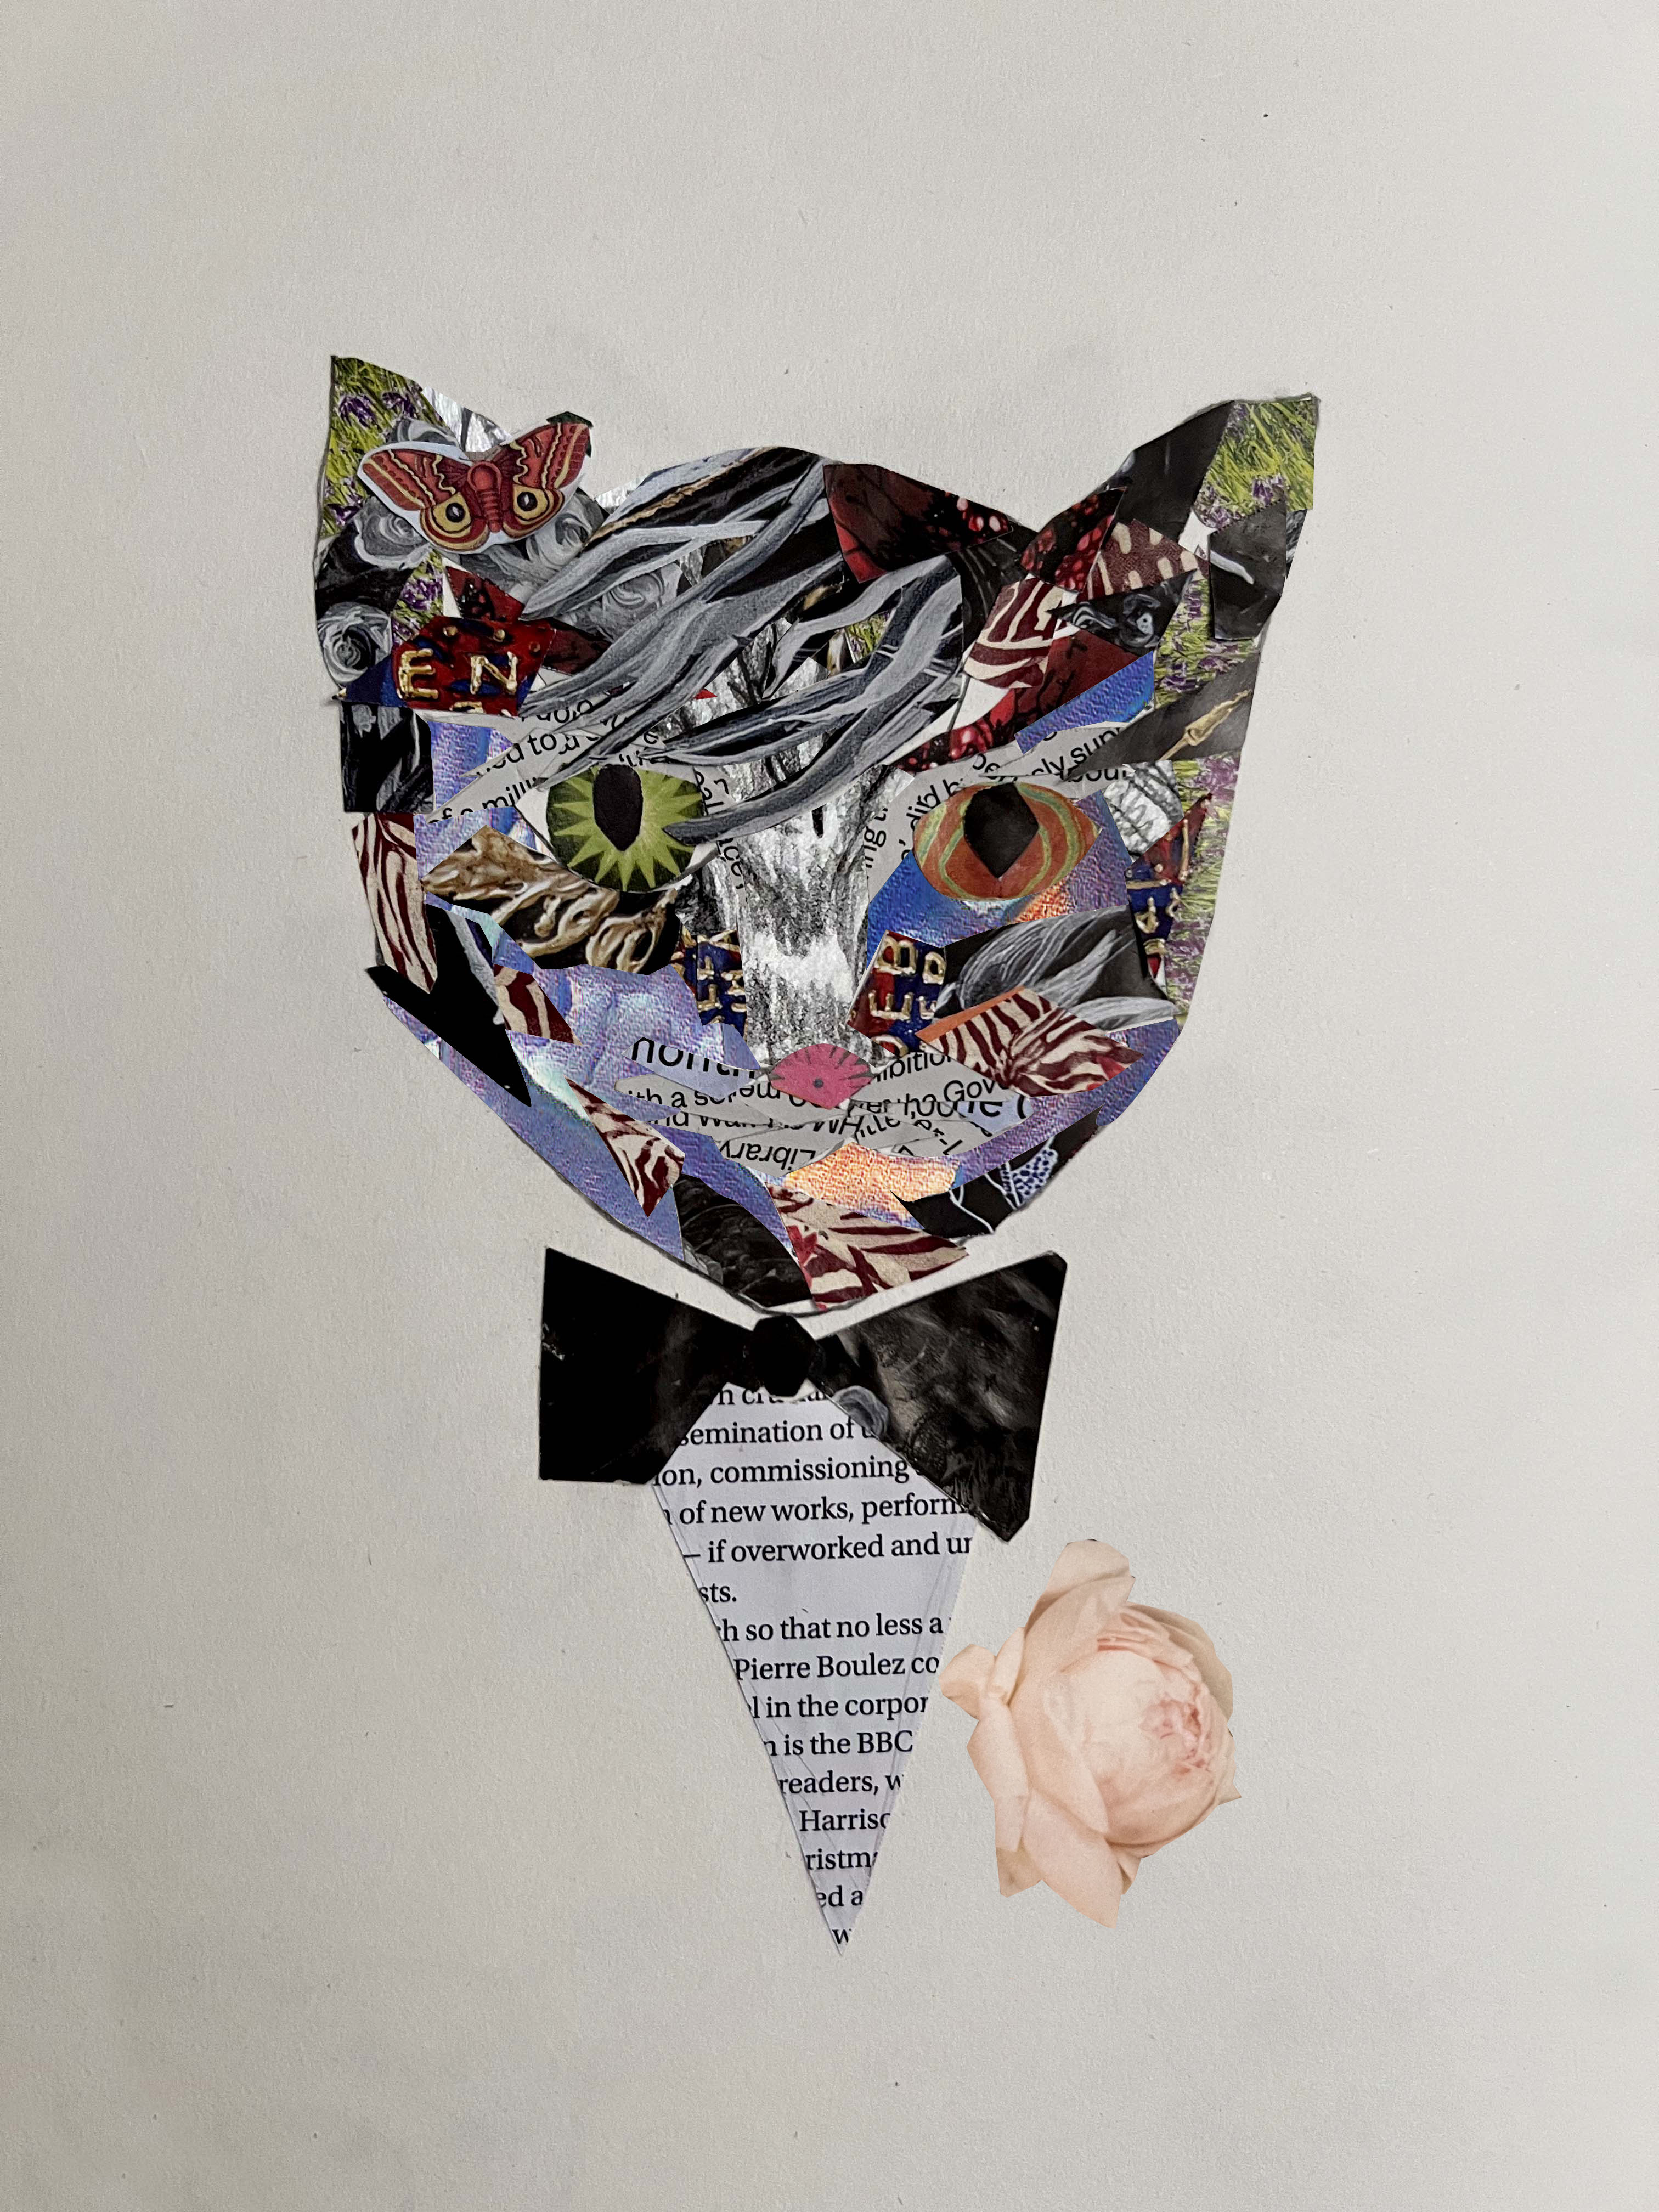
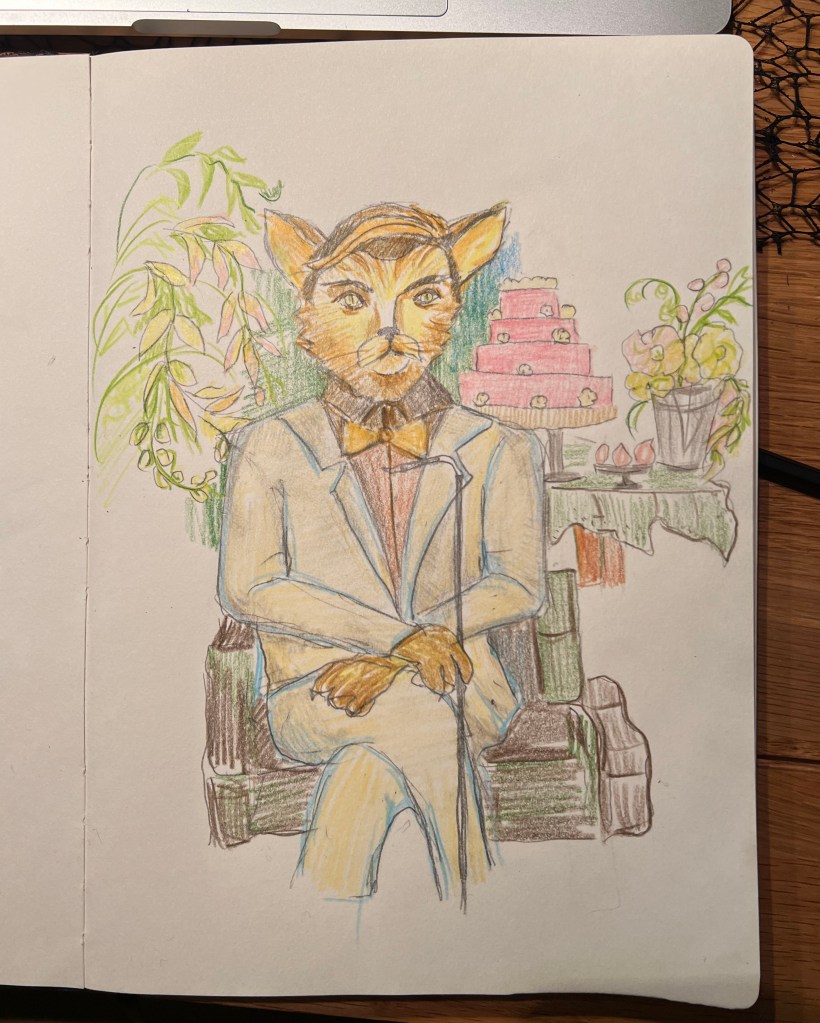
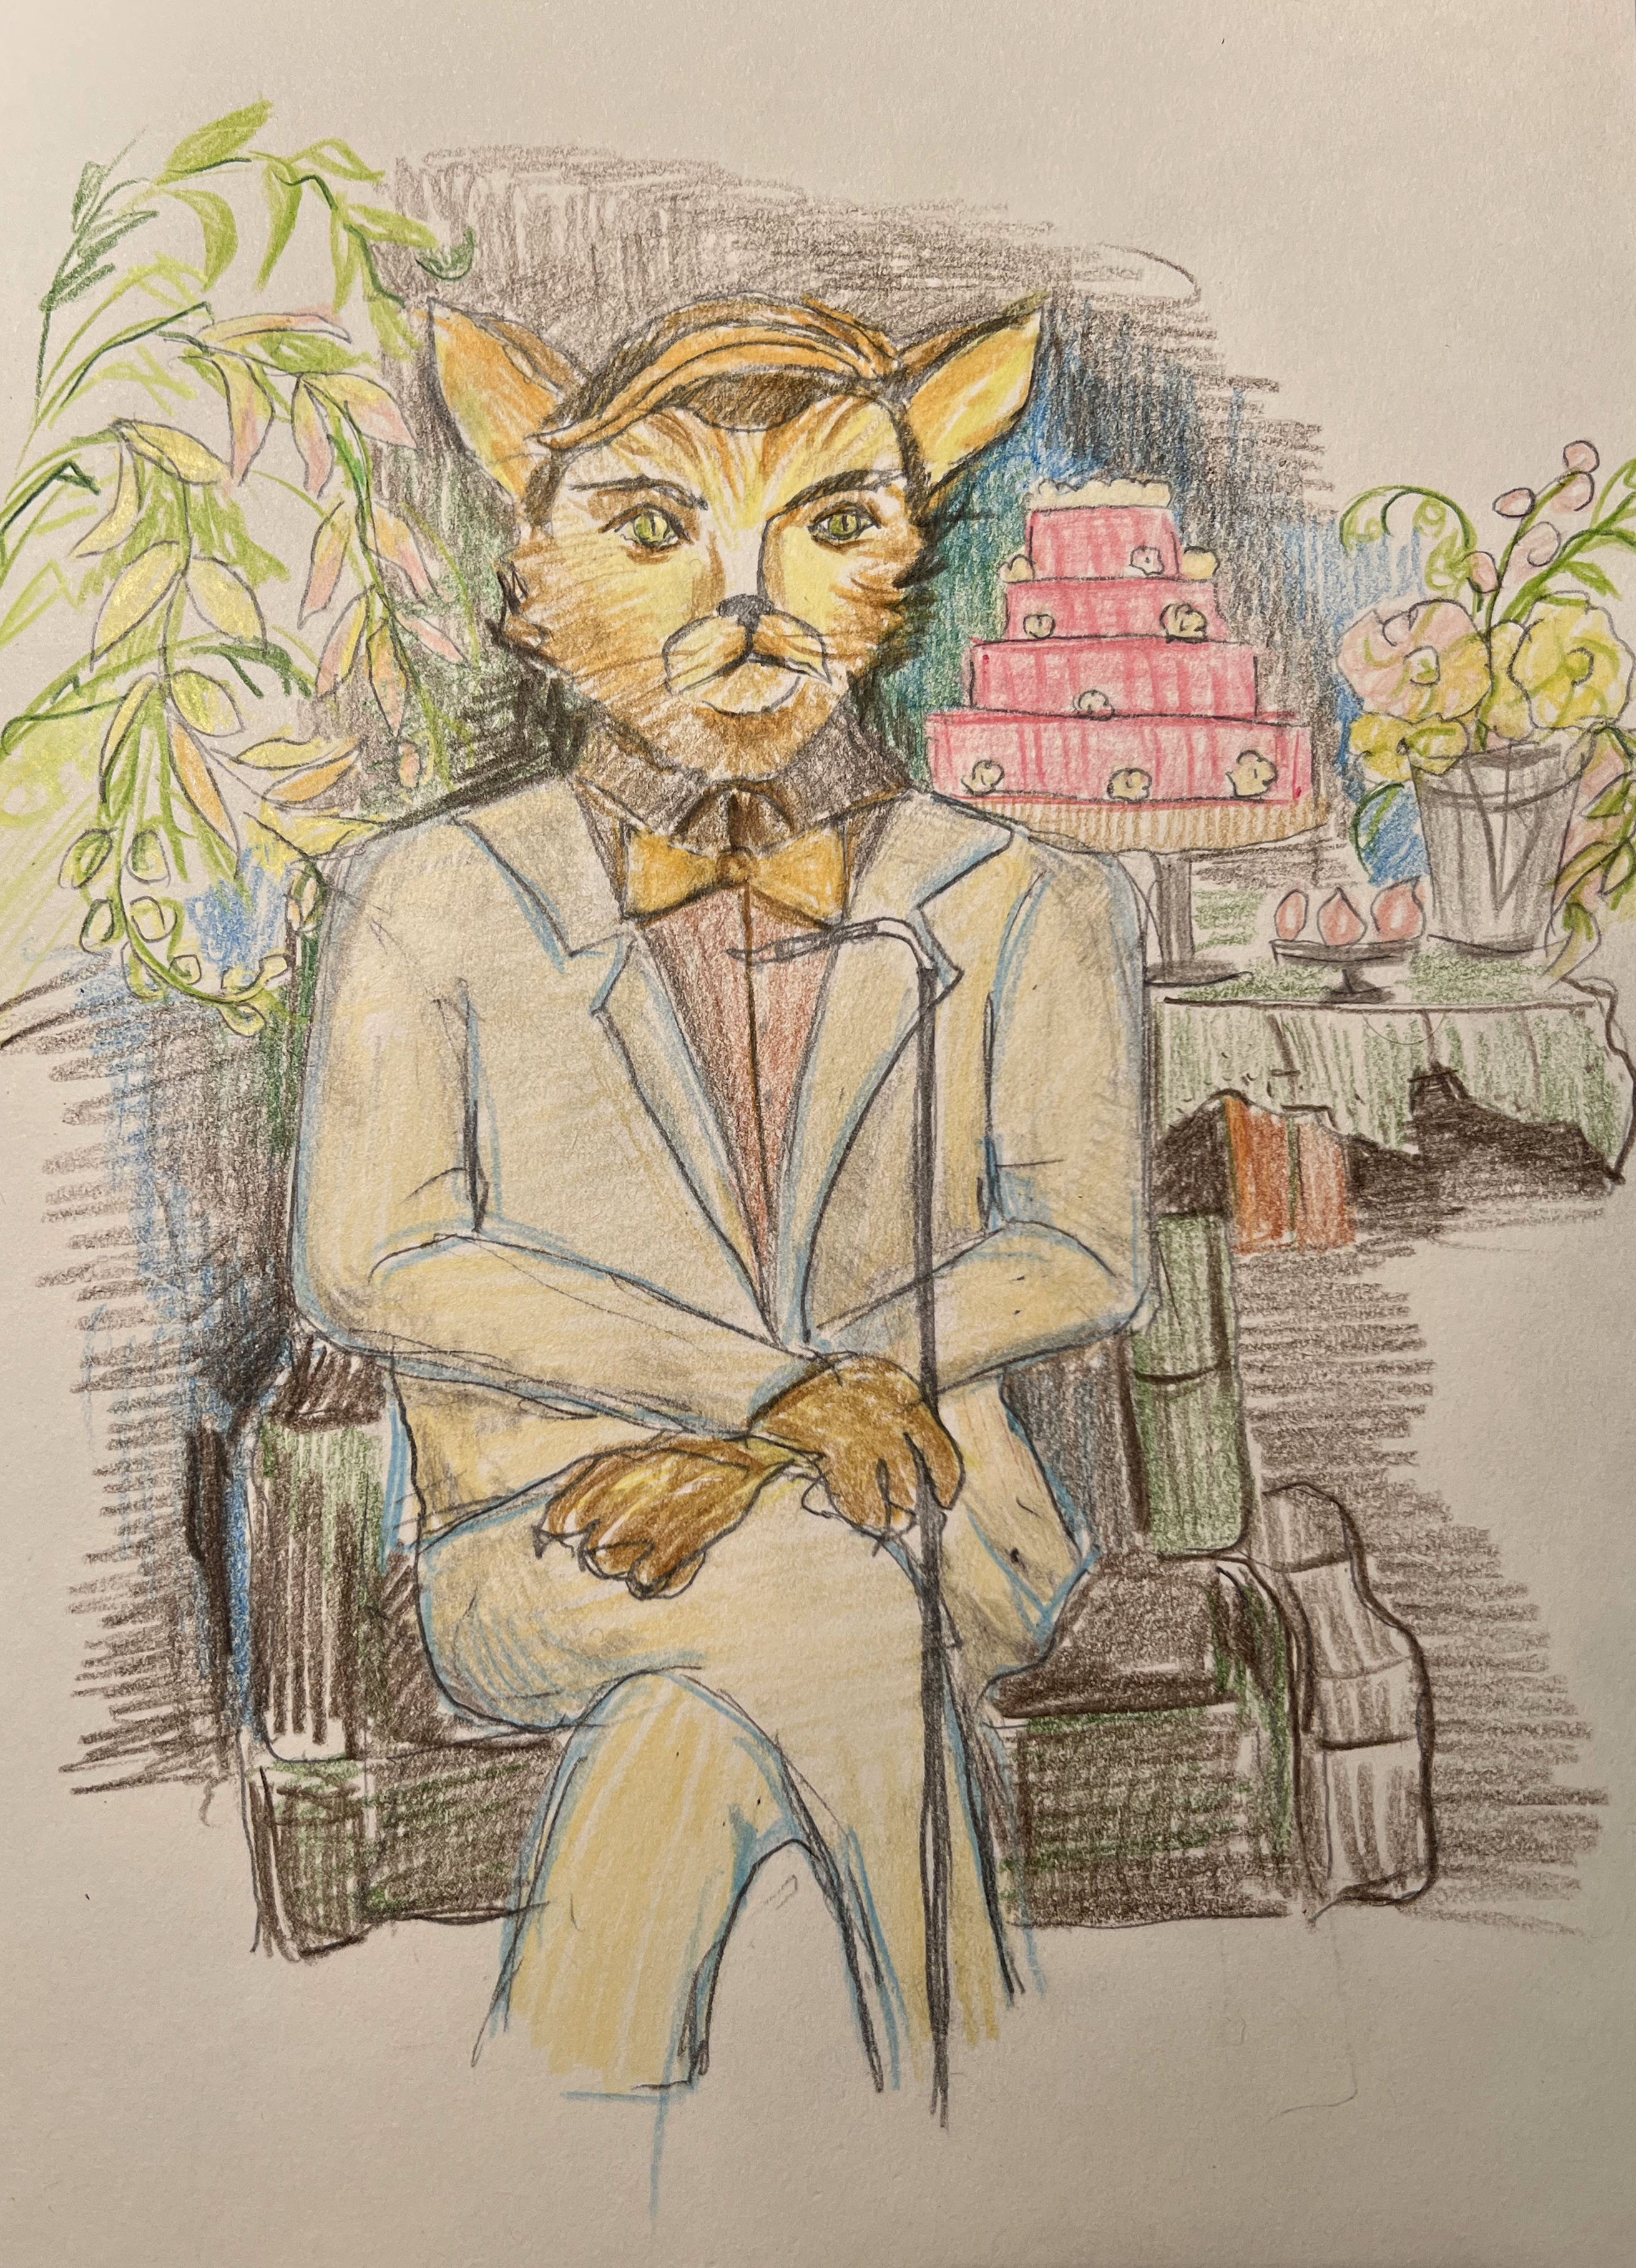
After some research, I proceeded to the collage version of the cat. I chose the simple drawing line I thought best represented the cat’s personality. I had some cuts from Economist magazines that my stepdad has a subscription to, also, I created lots of cuts from the photography magazines. In addition, I used some little parts from the brochure with text and some photos of nature, like flowers and grass. I cut different shapes cuts, depending on the area I was going to use on the cat’s face. I was going with a flow, and after filling most of the gaps the face started to re-appear in a new version. I looked at the collage and thought that this cat reminded me of a personality or character from the early 1920s, that this cat is slim, wearing a suit and a bow tie, has some manners, and also loves attention.
I was looking at this collage, and my husband asked me to describe what I saw, which helped me to visualise the idea I could evolve around that collage that I created. We came up with the idea that it could be the Great Gatsby cat, that’s iconic personality, that I could build a narrative around.
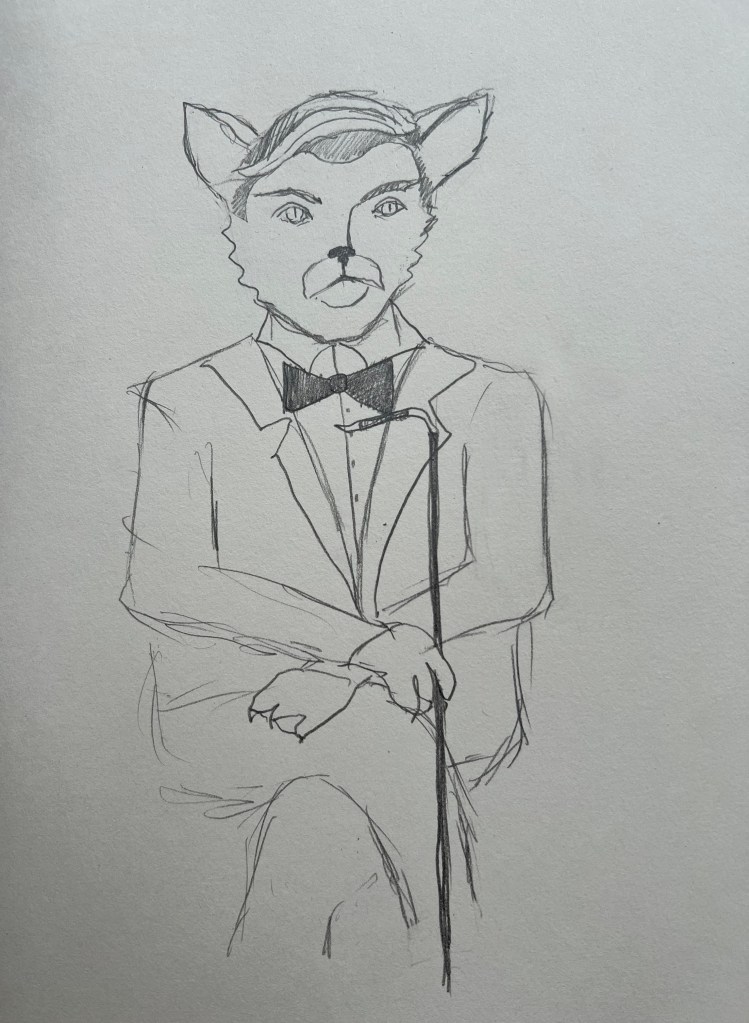
While looking through the cat collage, I began the next part of the design, creating the drawing. Following the general lines, I combined the personality of our cat Howard with Gatsby. What’s remarkable is that I created the cat’s bangs, which matched Jay Gatsby’s hairstyle, I think there was even a kind of mannerism that overlapped here as well.
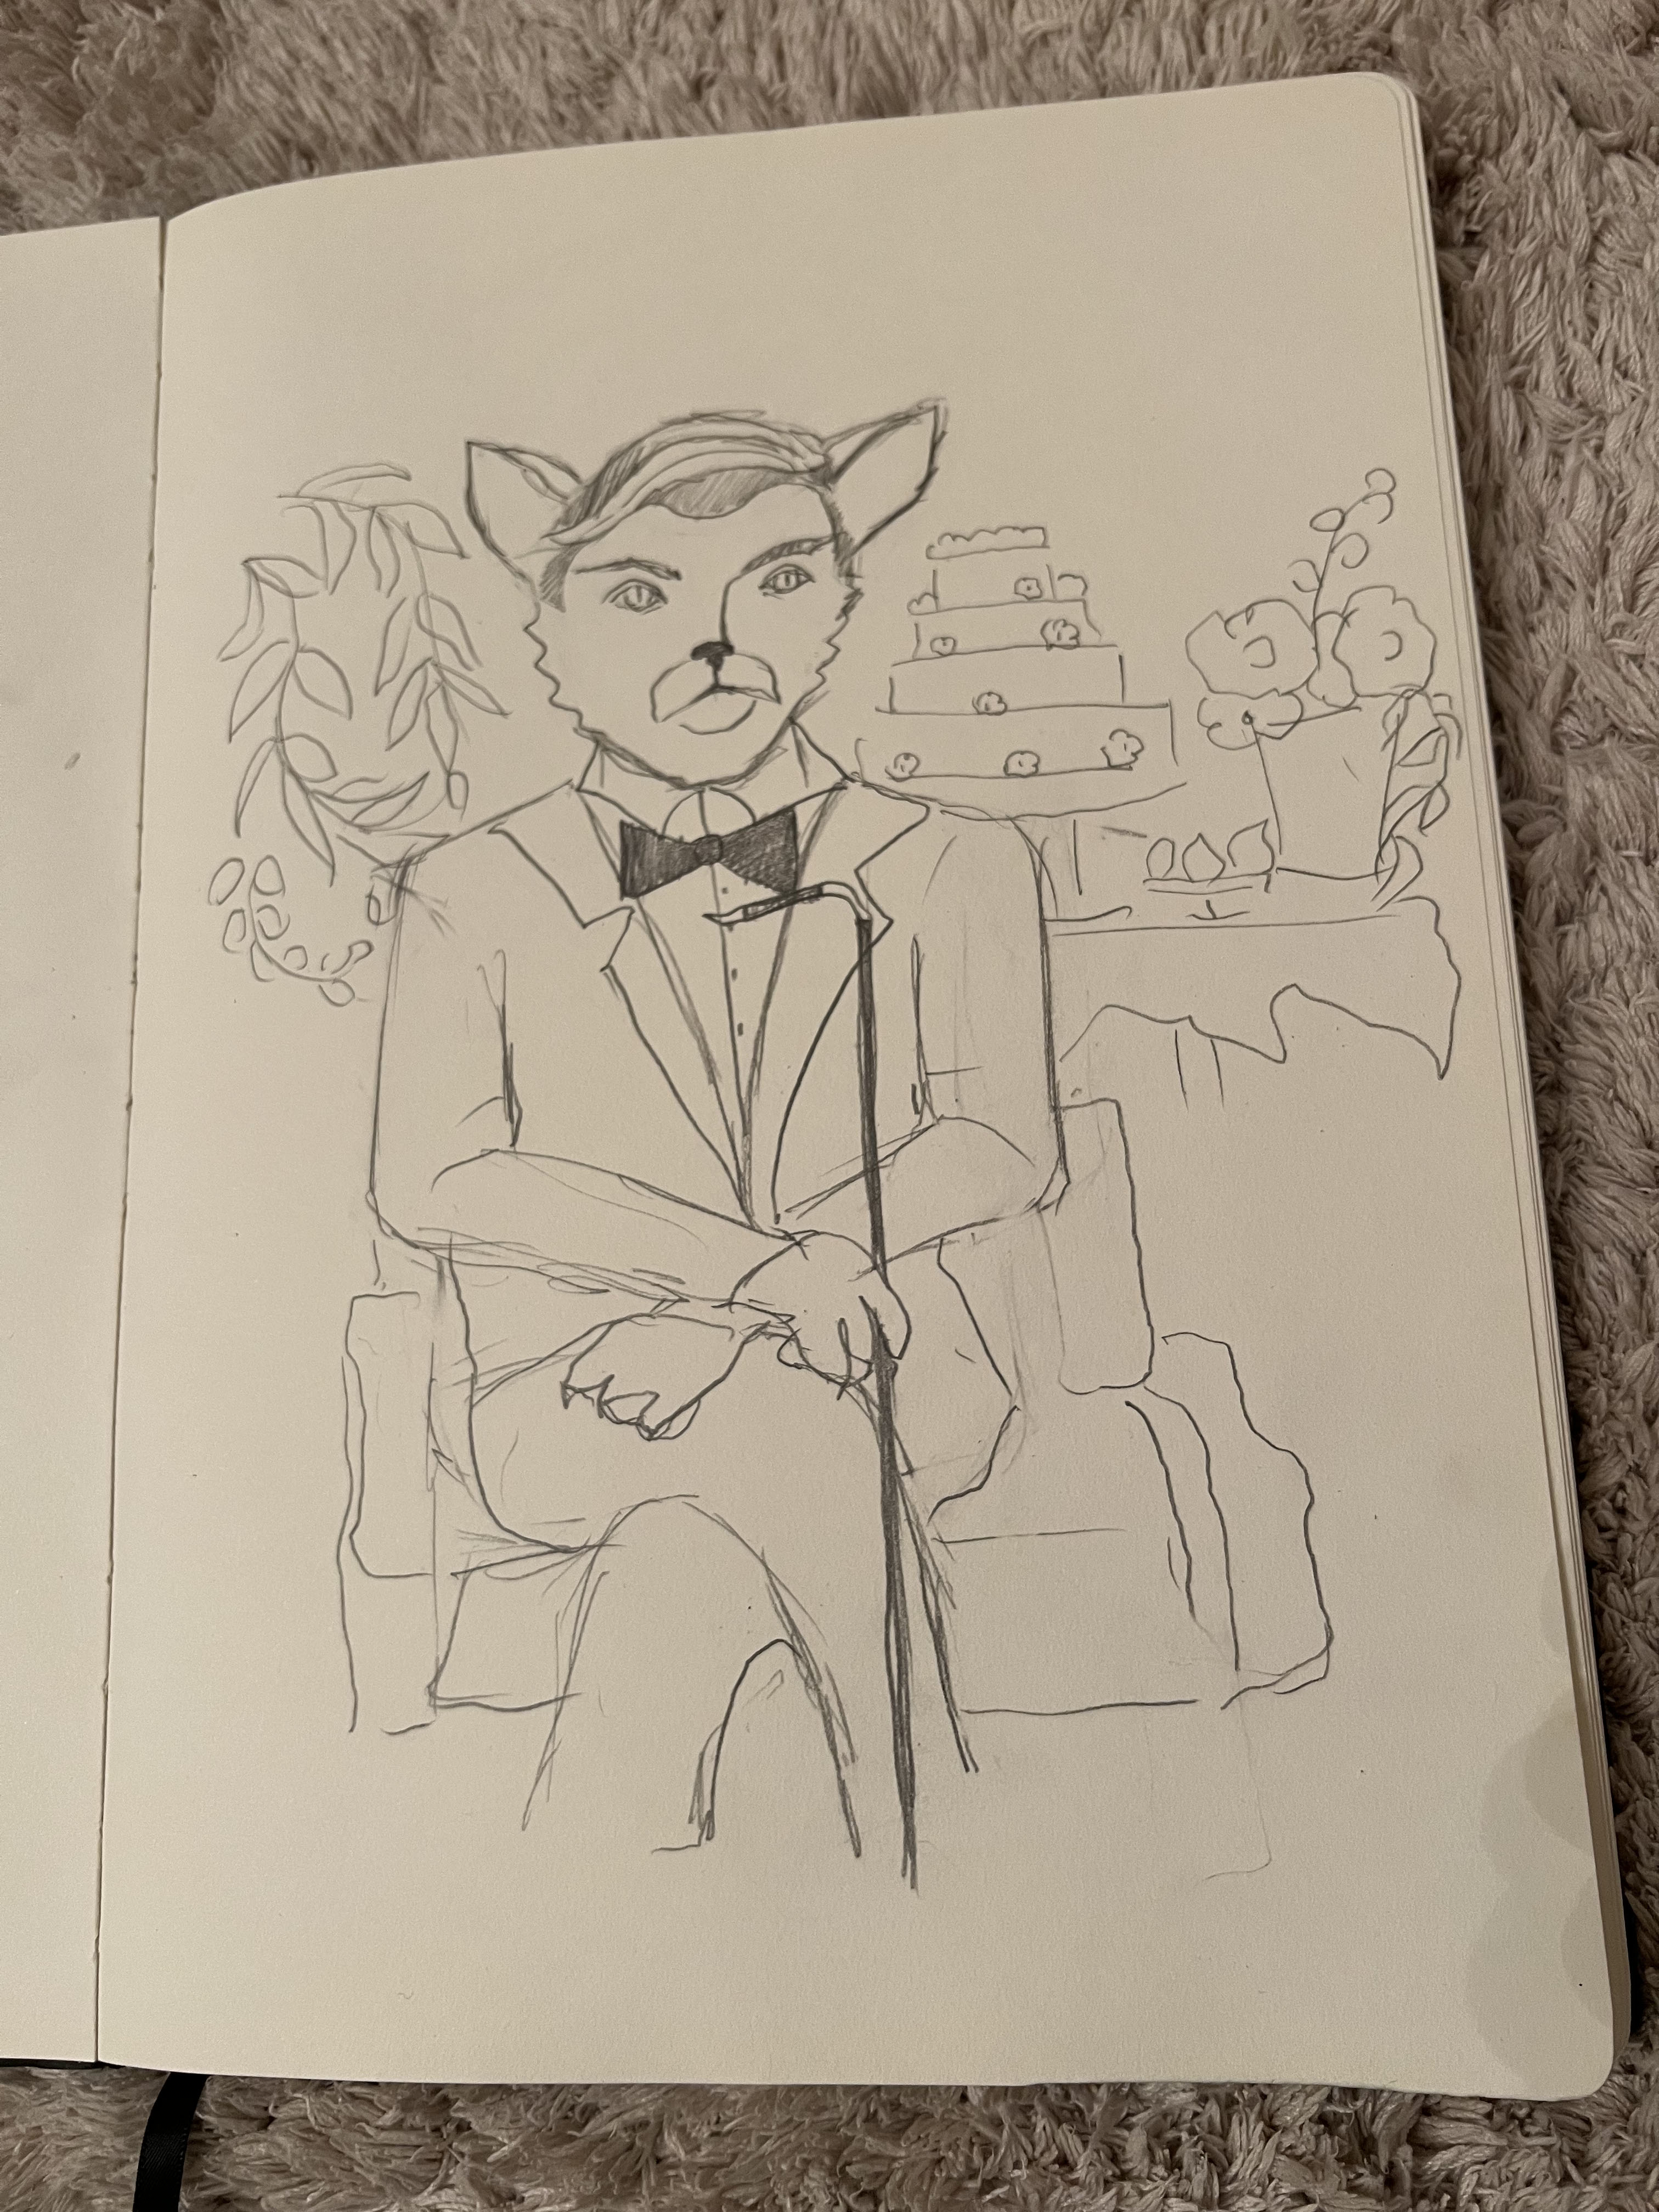
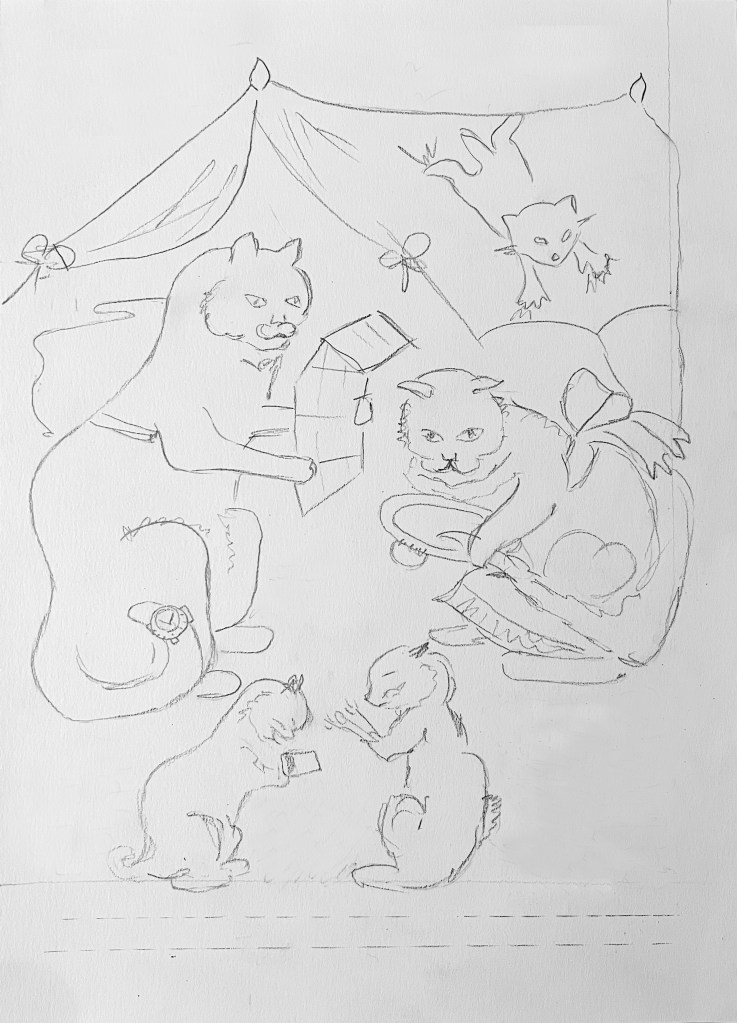
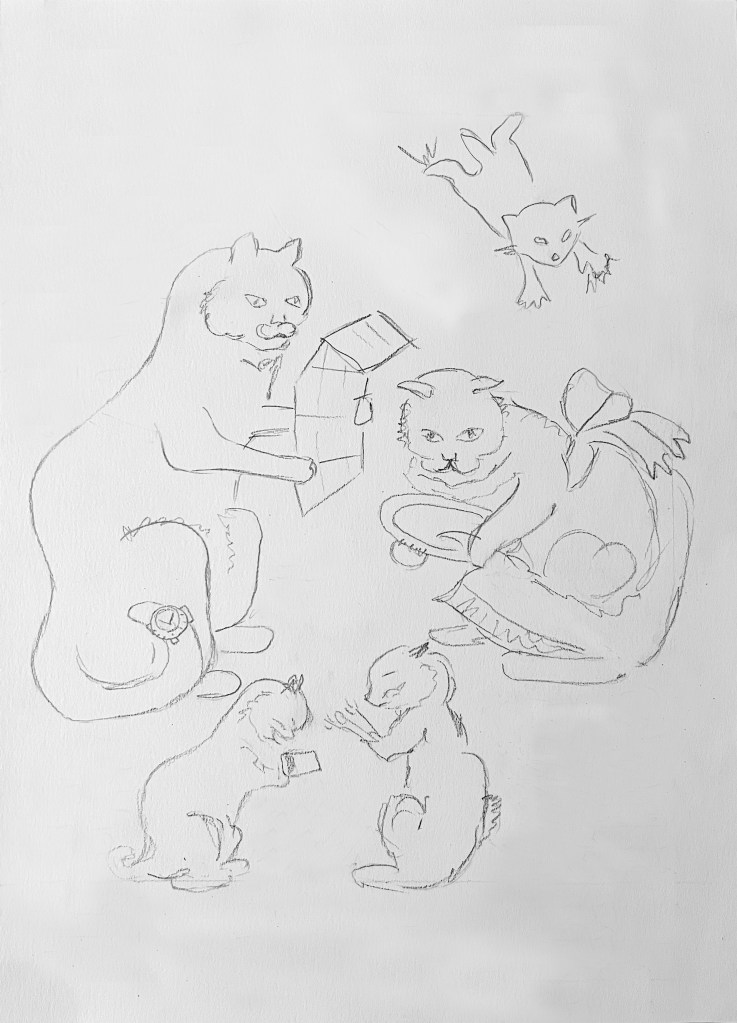
I thought about which part of the film I would like to display in this story. The film has so many ideas I could get inspiration from, especially the love story Jay Gatsby had with the love of his life Daisy. I was going to depict that, but then I thought his facial expression was too serious for the love affair around him. Therefore I decided to present Gatsby the cat, proudly sitting on a chair with his cane. There is a celebration going on around, a birthday cake and decorations, but the character is sitting all in his thoughts, being distant from everything that is happening.
TheGreat Catsby
That’s the name of the illustration I came up with in the result, The Great Catsby. As I was using watercoloured pencils. I brightened up the illustration in Photoshop, adding additional sketches and contrast. I definitely can say that was quite a fascinating transformation to witness, how the sketch of the animal, combined with juxtaposition and collage can lead to personality creation. I was surprised to see the outcome, and what imagination can bring if you just simply follow the creative process without planning much ahead. That’s useful knowledge, that I was personally happy to discover.
In this exercise, I was asked to design a tattoo for a friend based on the word Mum. In addition, I need to place a ready design on the greeting card to send to his mother (a personal touch of saying Happy Mother’s Day).
History of tattoos
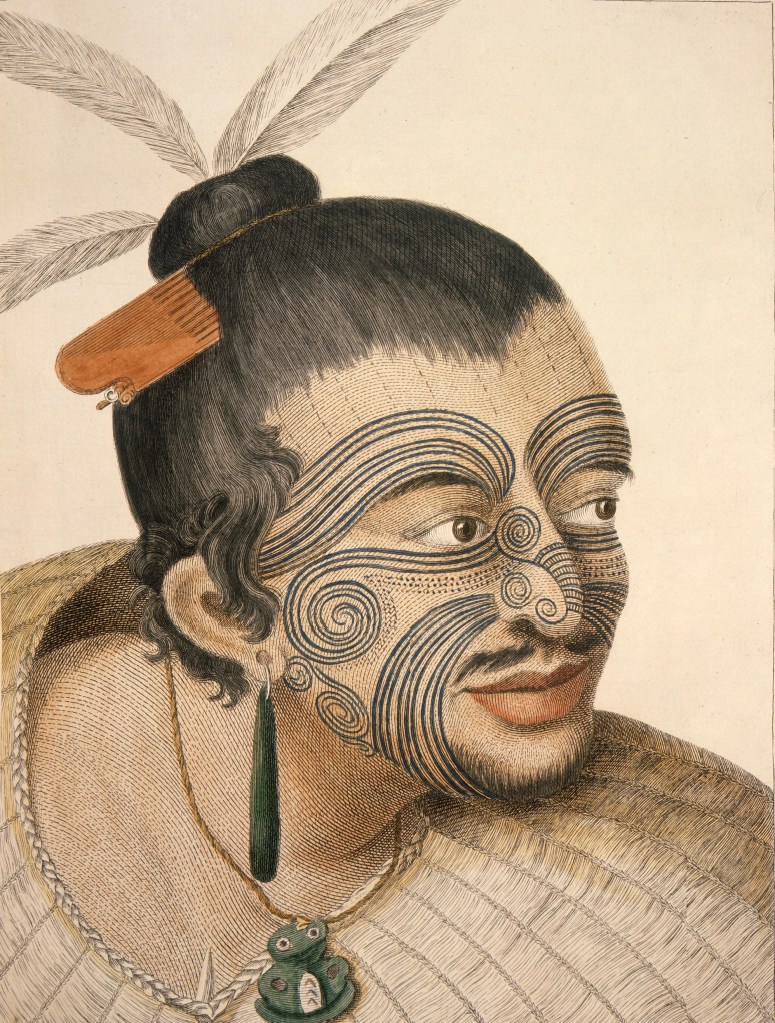
The art of tattooing has been practised by various cultures throughout history and holds great cultural significance. The earliest signs of tattoo art can be seen in ancient Japanese clay figurines, which were adorned with painted or engraved facial markings. These figurines, discovered in tombs dating back as far as 5000 BCE, showcase the early practice of tattooing in the region.
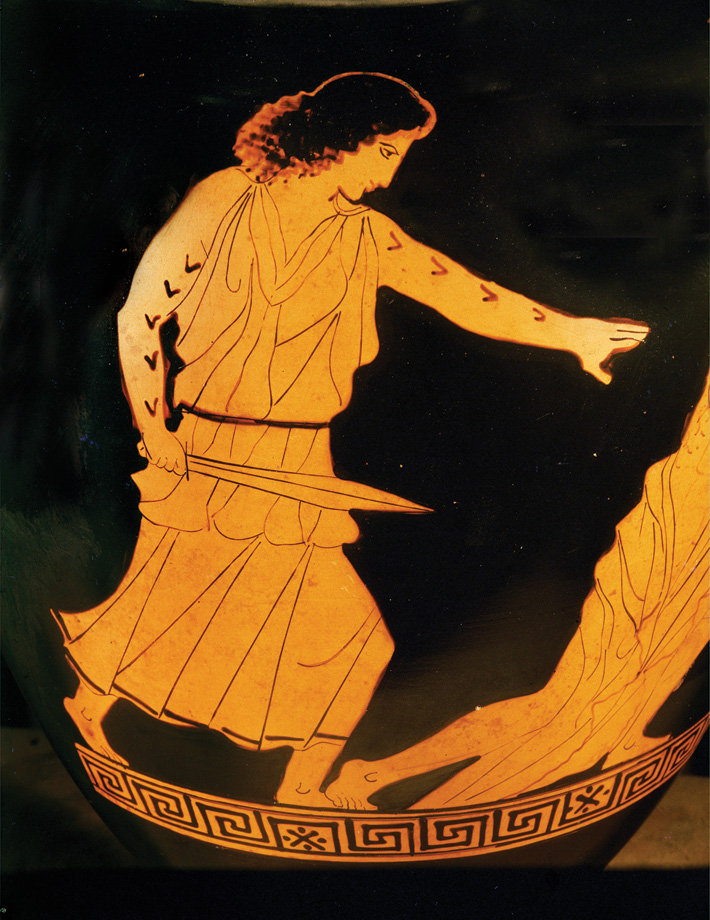
Tattoos were also prevalent in ancient Greece and Rome, often used to signify a person’s social status or as a form of punishment.
In Polynesia, tattooing played a significant role in the culture and traditions of various island communities. Polynesian tattoos, also known as tā moko or tatau, represented important events in a person’s life, their status within the community, and their connection to spiritual beliefs. The intricate designs and patterns of these tattoos were unique to each individual and held deep cultural meanings.
The oldest known tattoos on human skin belong to a man from the Bronze Age, estimated to be around 3300 BCE. Known as ‘Otzi the Iceman’, his mummified remains were discovered in the Alps, located on the border between Austria and Italy. Remarkably, Otzi had a total of 57 tattoos on his body, providing a fascinating glimpse into the ancient practice of tattooing.
Moving into the Middle Ages, tattoos started to become associated with criminality and were often used to brand individuals as outcasts. In Europe, sailors often adorned their bodies with tattoos as a form of identification or to symbolize their achievements and experiences during their extensive travels.
As we entered the 20th century, tattoos were still considered taboo in many parts of society, particularly in conservative circles. However, World War II played a significant role in changing popular attitudes towards tattoos. Soldiers returning from the war often had tattoos as reminders of their service, and this helped to normalise the practice.
Since then, tattoos have continued to evolve as an art form. Today, tattooing has become a mainstream form of self-expression and personal adornment, with people choosing tattoos to commemorate loved ones, express their identities, or simply appreciate the beauty of body art.
It’s important to note that the history of tattoos is vast and diverse, with various styles and cultural significance across different regions. The art of tattooing continues to evolve and thrive, allowing individuals to tell their unique stories through ink on their skin.
In Western culture, tattoos have evolved from being seen as a symbol of rebellion or counterculture to being widely embraced as a form of personal expression and art. In recent decades, tattoos have gained mainstream acceptance, and people from all walks of life now choose to adorn their bodies with meaningful and aesthetic designs. From small, discreet tattoos to full sleeves and body suits, Western culture has seen a surge in creativity and diverse styles, allowing individuals to showcase their unique identities, commemorate loved ones, or simply appreciate the beauty of tattoo art.
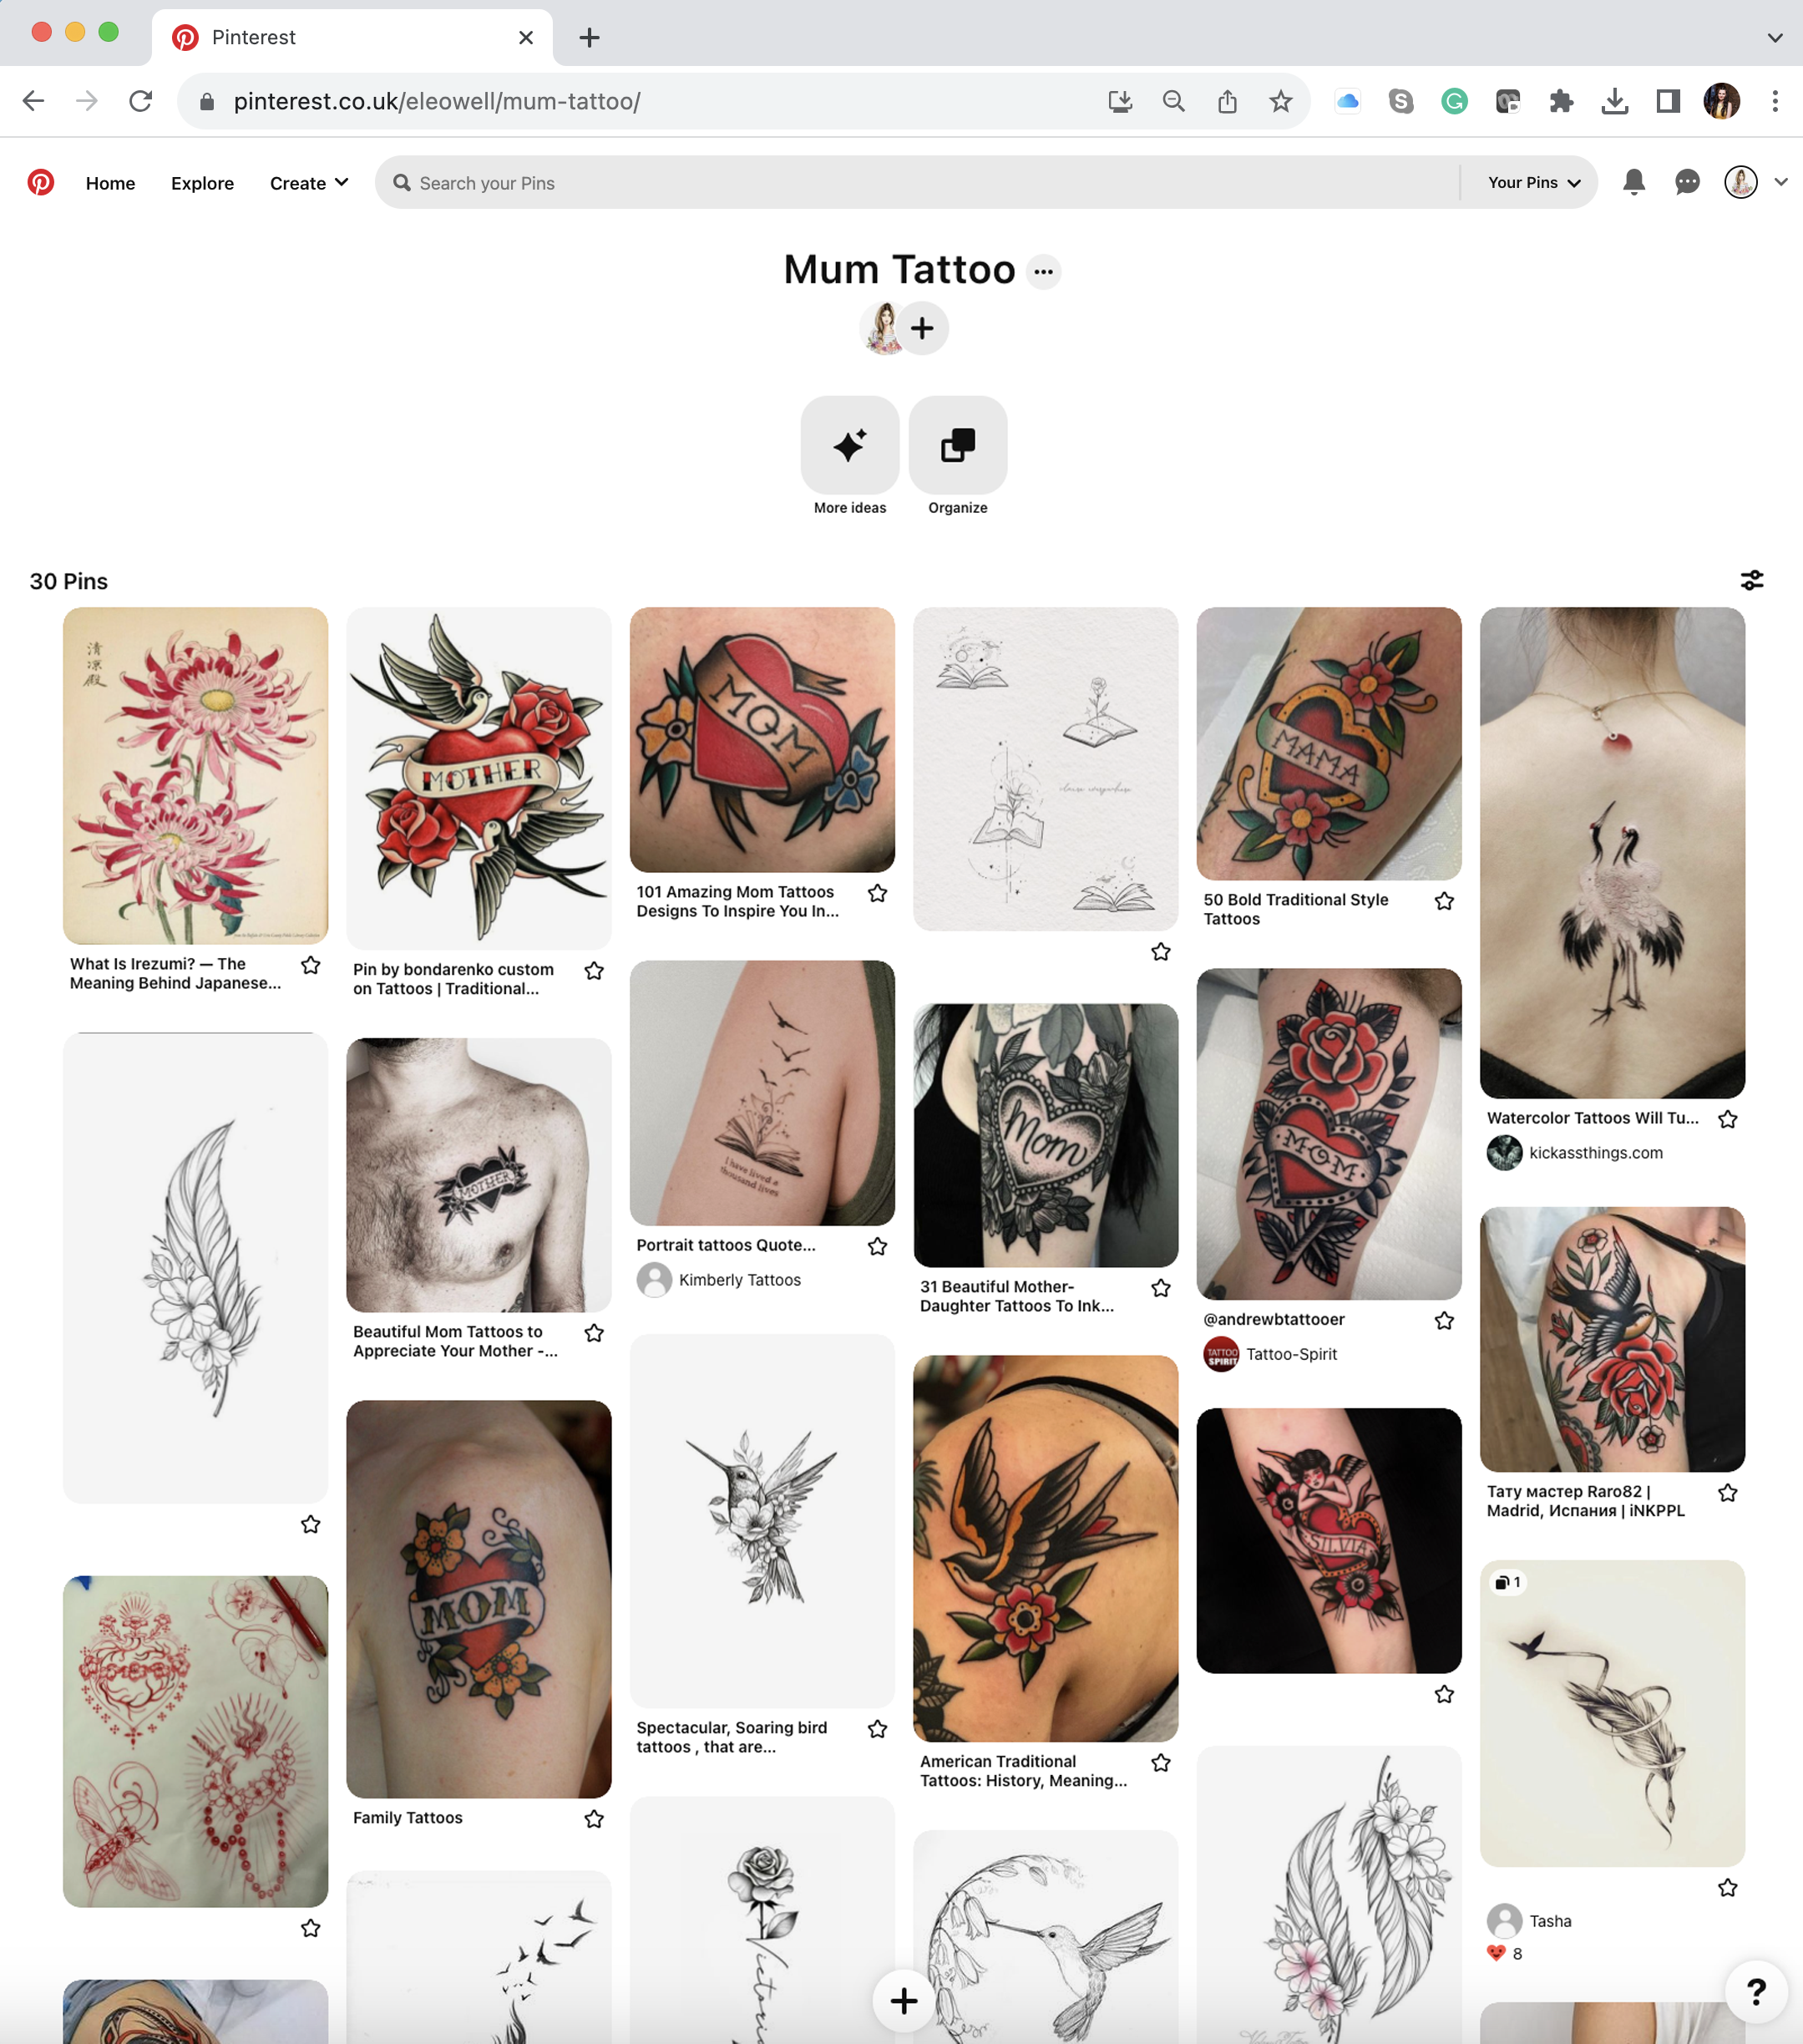
Since the task was to design a tattoo for a mother, I also looked for examples that matched this theme. I found the identities of various categories and types of tattoos. Several features consistently appeared in these designs, such as a love heart, the word mum written inside of it, and red and black colours. These tattoos are often done with elaborate designs, such as hearts, flowers, or banners, ranging from simple and minimalist to decorative and ornate. Today, ‘Mum’ tattoos continue to hold sentimental value and are popular choices for people wanting to honour their mothers or celebrate the concept of motherhood.
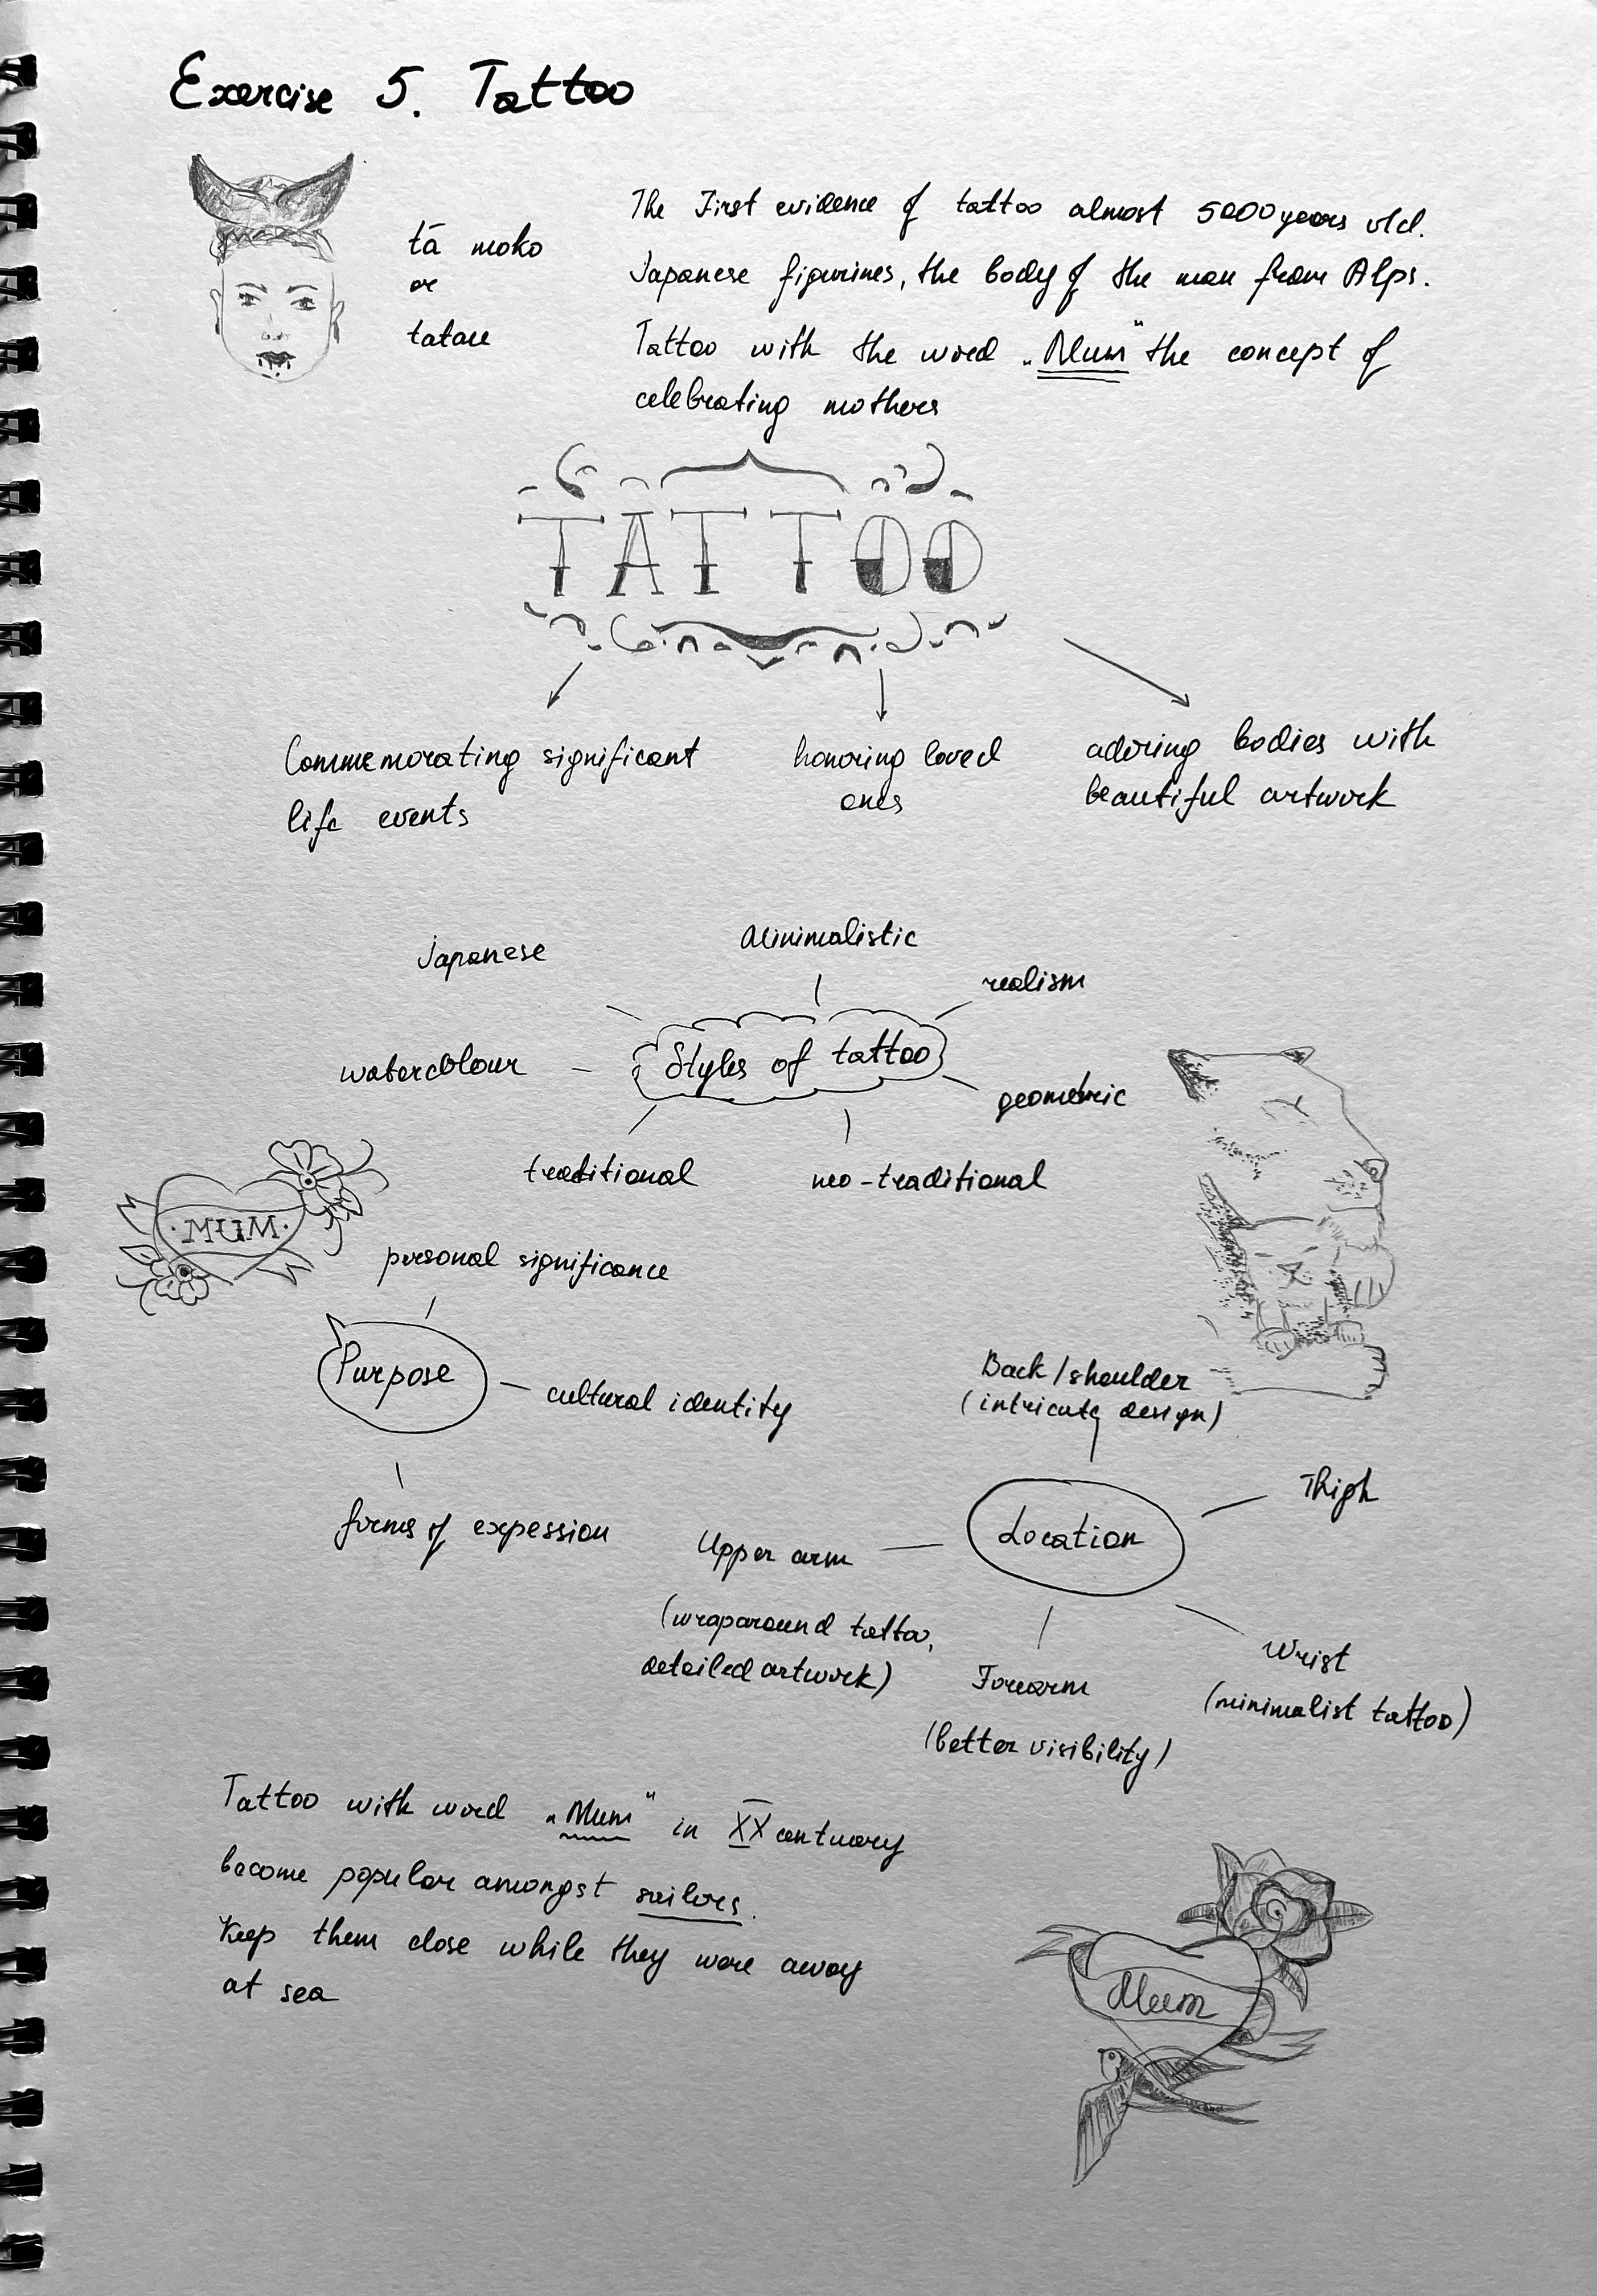
As part of my research, I also created a mind map that contains my thoughts on tattoos and the symbols associated with the word ‘Mum’. I spent a bit of type of going through keywords and style variations that I was going to produce. Also, I’ve discovered that each part of the body could represent a particular style and scale of the tattoo.
Tattoo styles refer to different artistic techniques and designs used in the creation of tattoos. There are numerous tattoo styles, with each style having its own unique characteristics and cultural influences. Here are a few popular tattoo styles:
Traditional
Realism
Neo-Traditional
Japanese
Blackwork
Watercolor
Minimalist.
Sketches
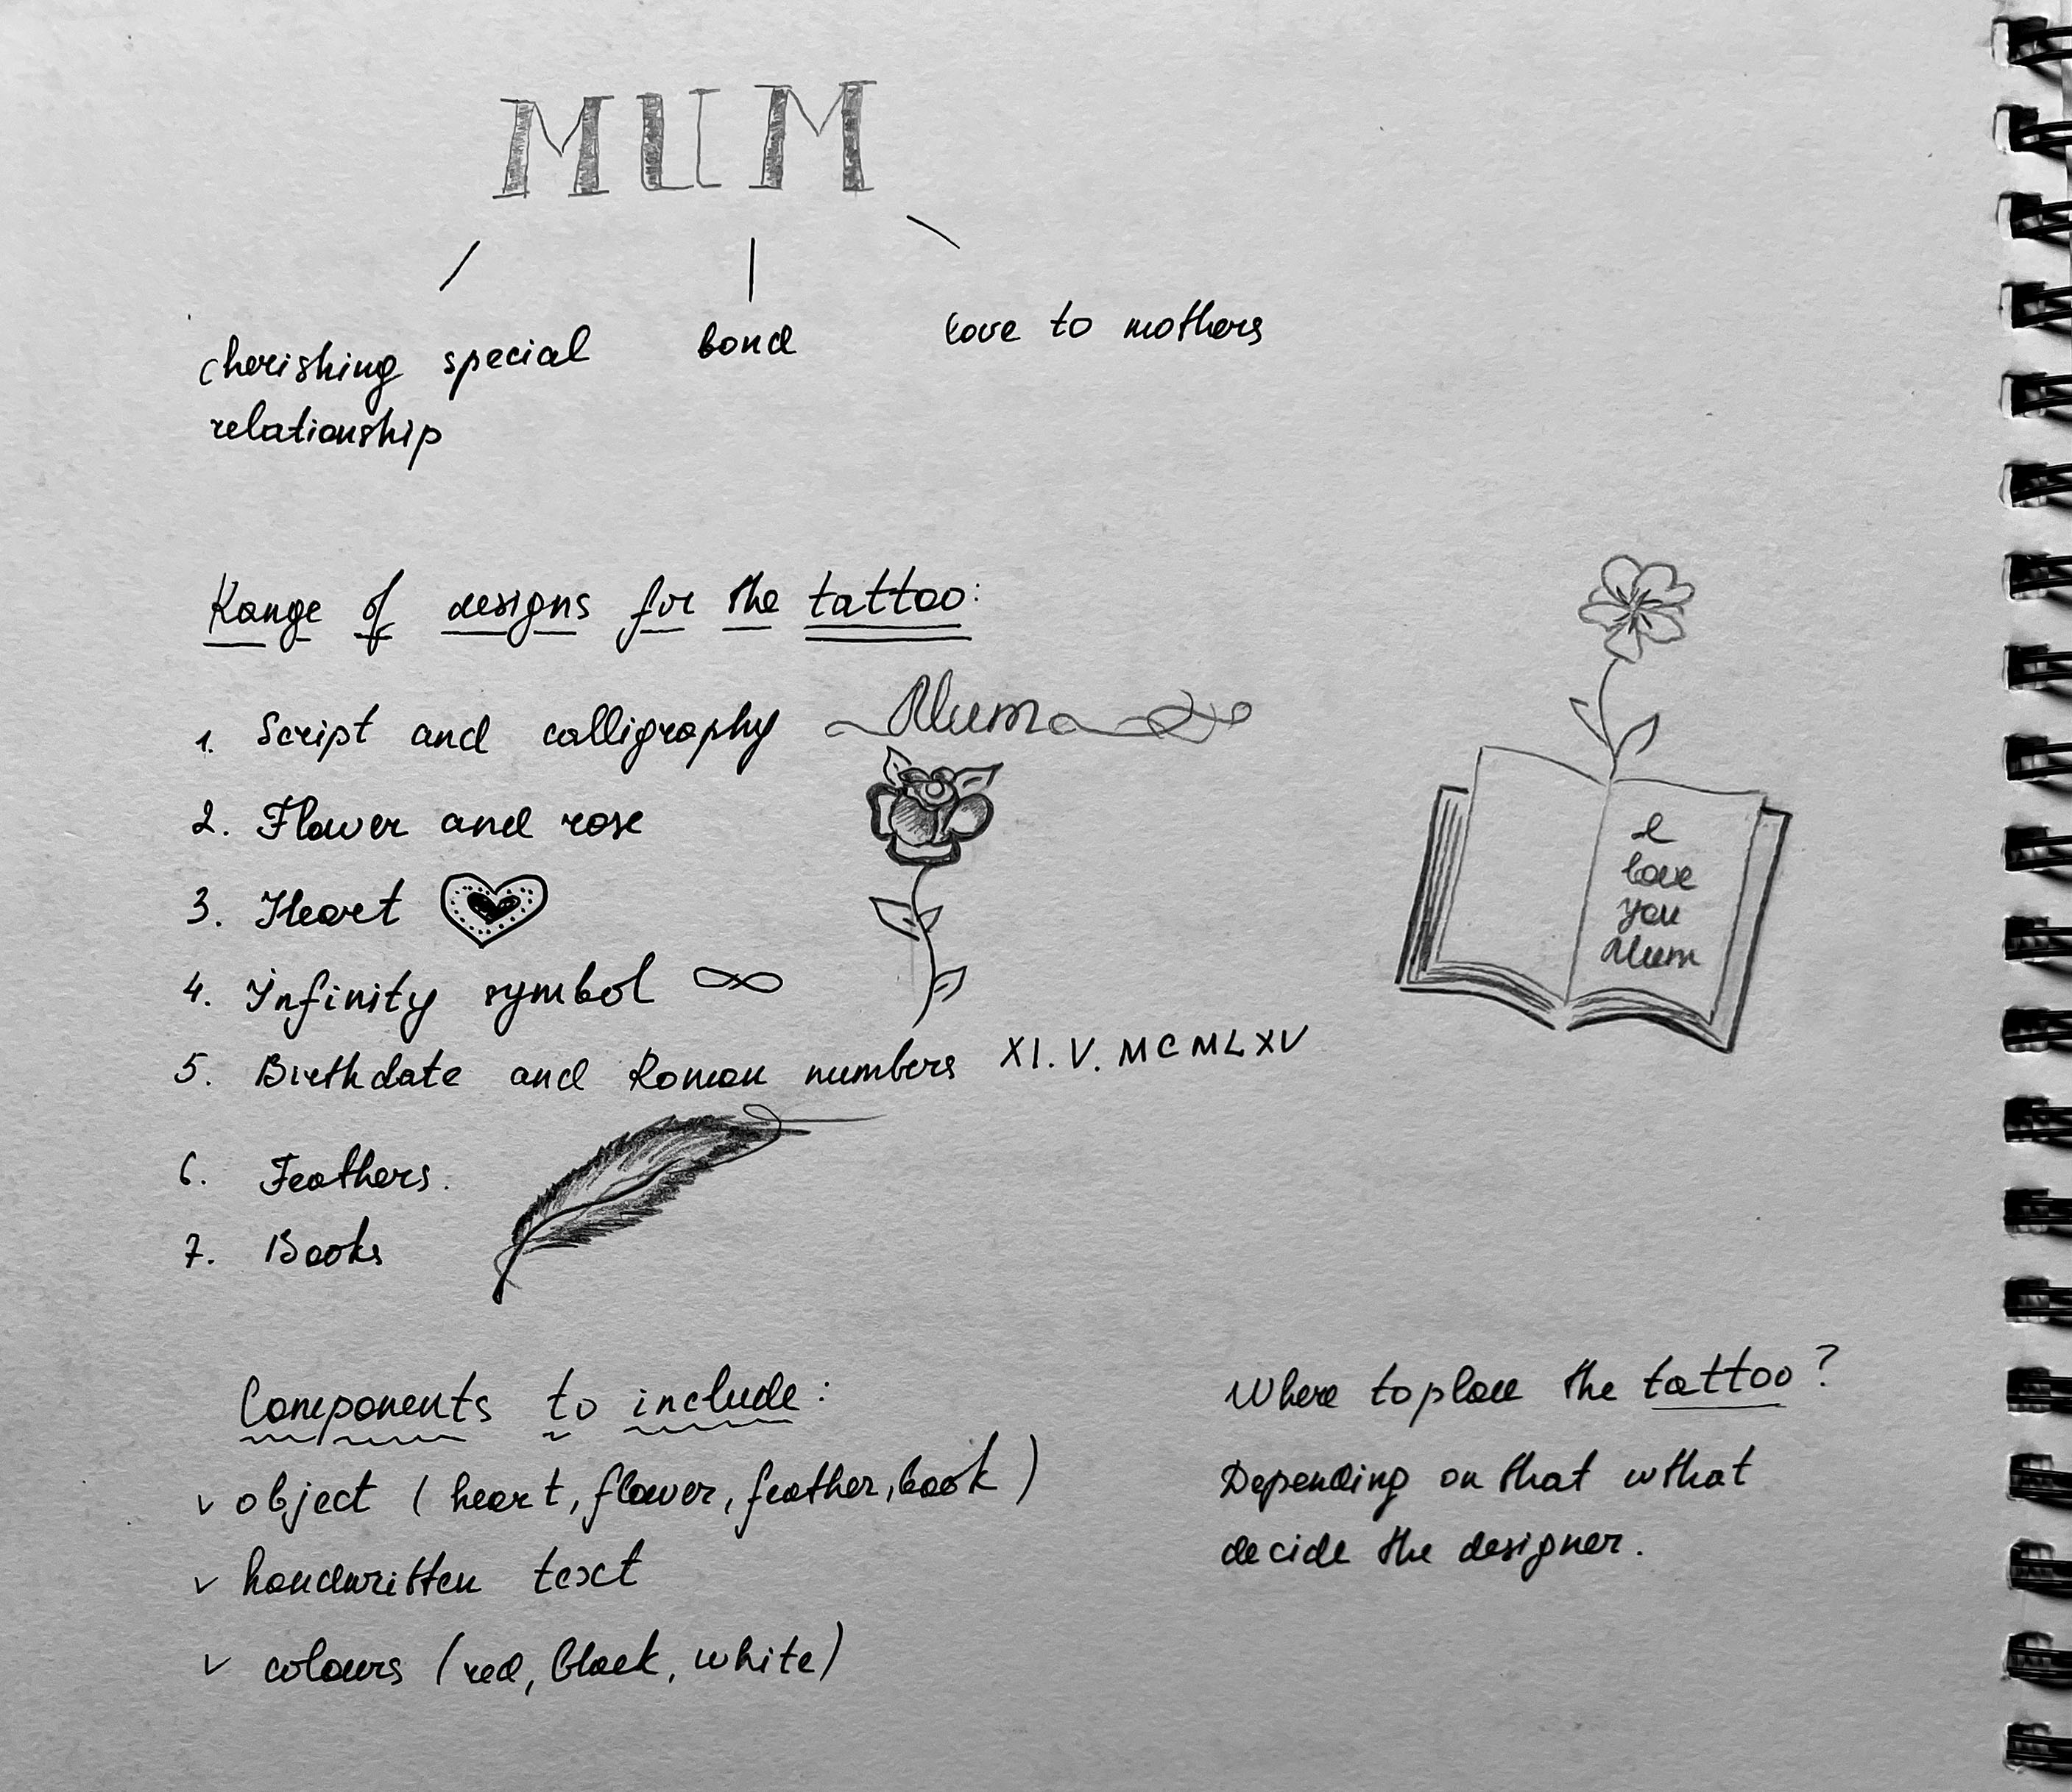
Here I experimented with some designs I was going to apply for the tattoo. I went through such elements as feather, rose, and flowery font. I felt like I was going a slightly safe route, that sketches variations looked quite ordinary and probably it was done many times before. I needed some unusual solution that would bring a special meaning to the tattoo design.
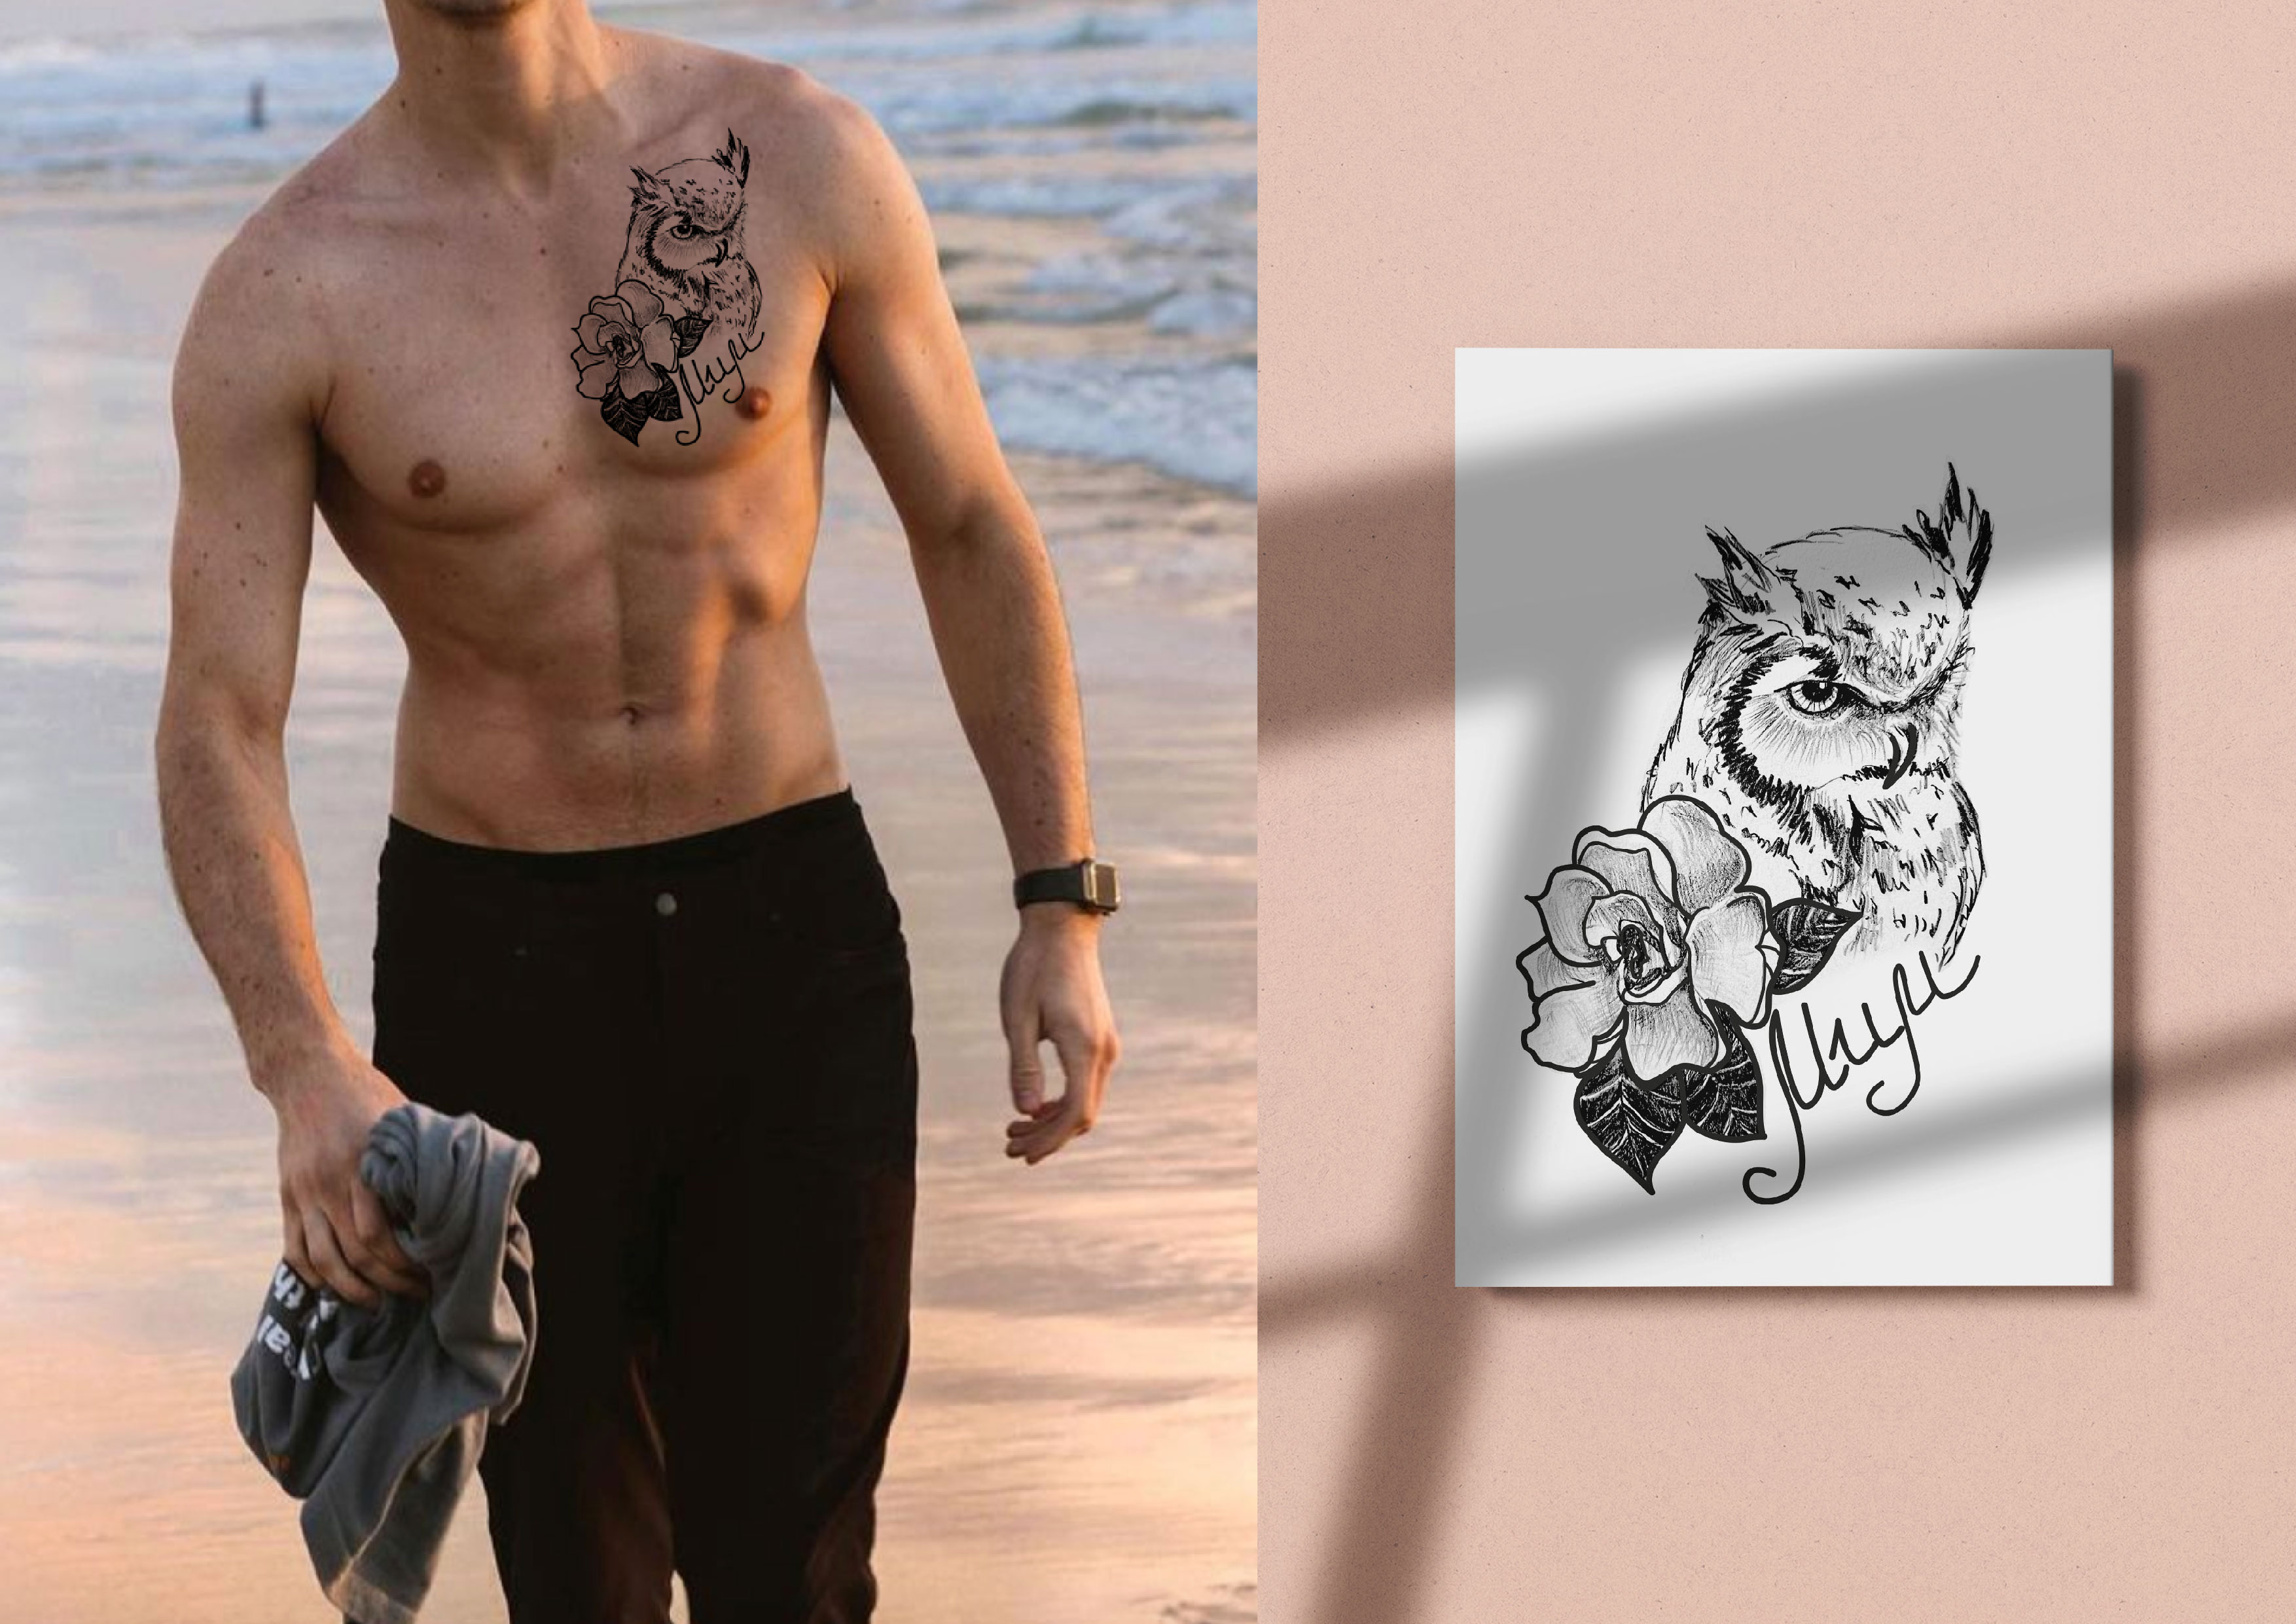
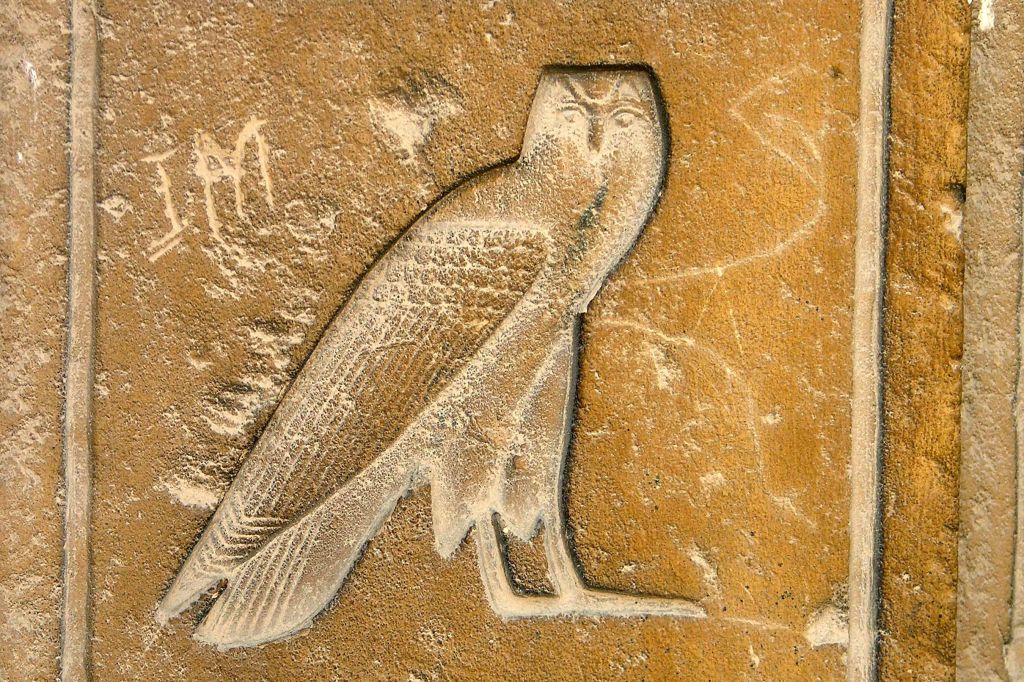
I thought if the purpose of the Mum tattoo is to honour and show love for one’s mother or family, it would be useful to look into design from the historical point of view and do research on the first Mum tattoos ever made. The earliest evidence of the word ‘Mum’ as a tattooable design can be traced back to ancient Egypt. In Egyptian hieroglyphics, the symbol of an owl, which represents the sound ‘mum’, was associated with the goddess Mut, the mother goddess and protector of royals. This symbol was often used as a protective charm, and tattoos bearing this symbol were believed to bring blessings and ward off evil. I had an idea to design a beautiful symbol of a bird for the tattoo, why not try on the owl symbol, which has deep historical meaning.
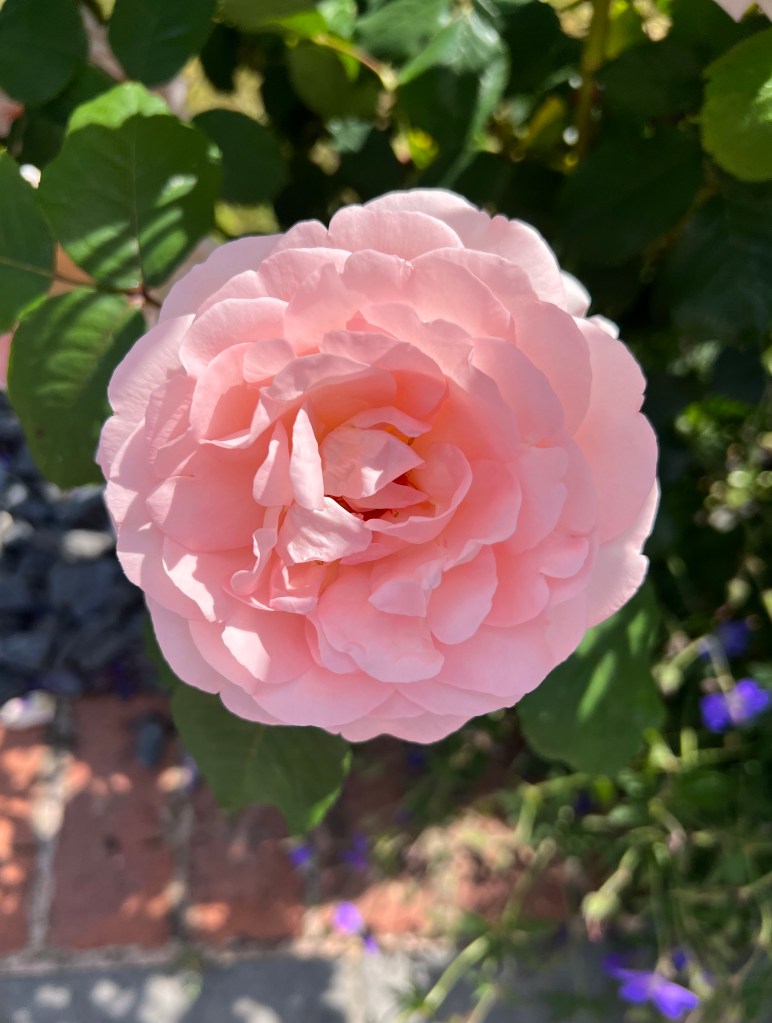
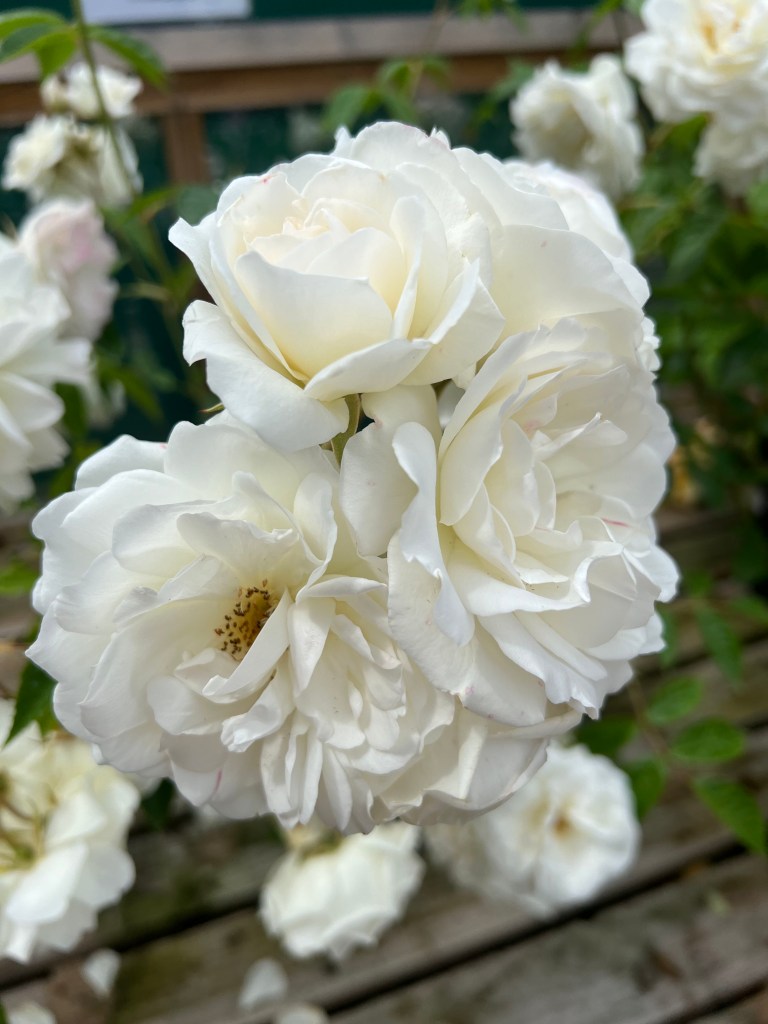
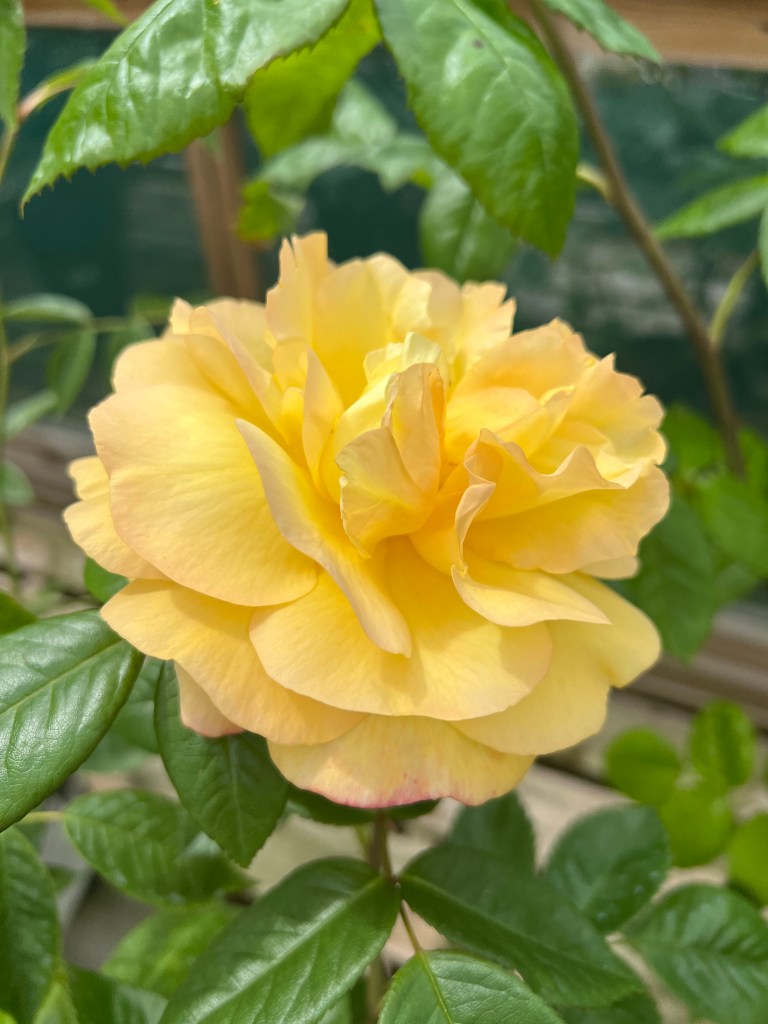
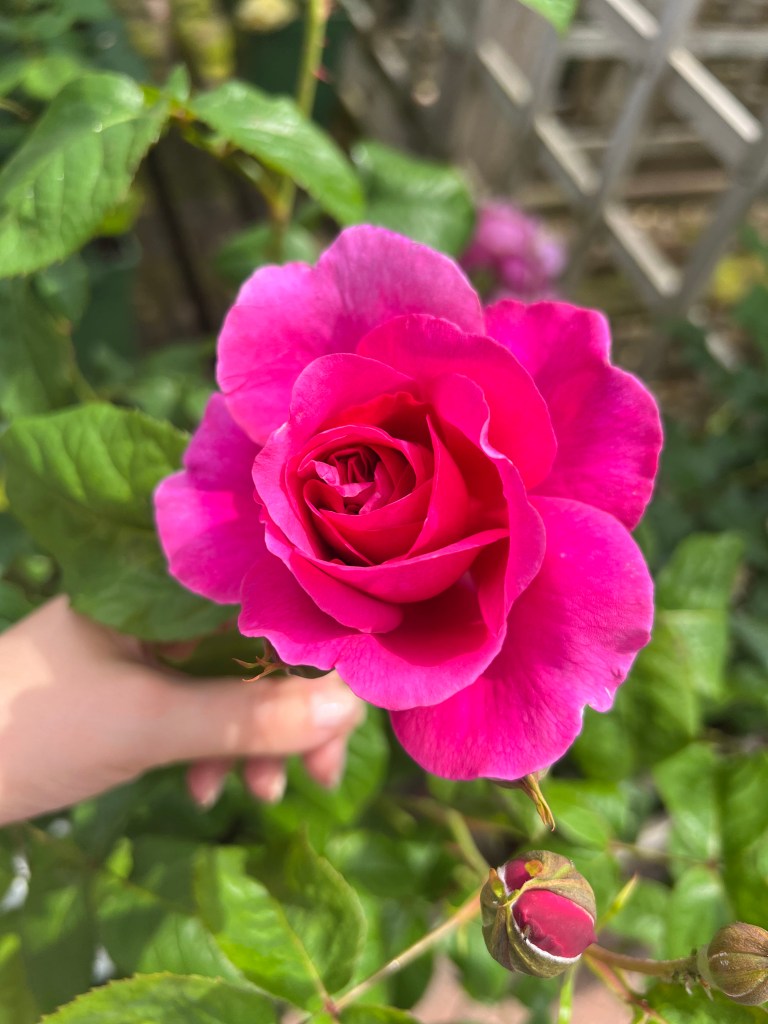
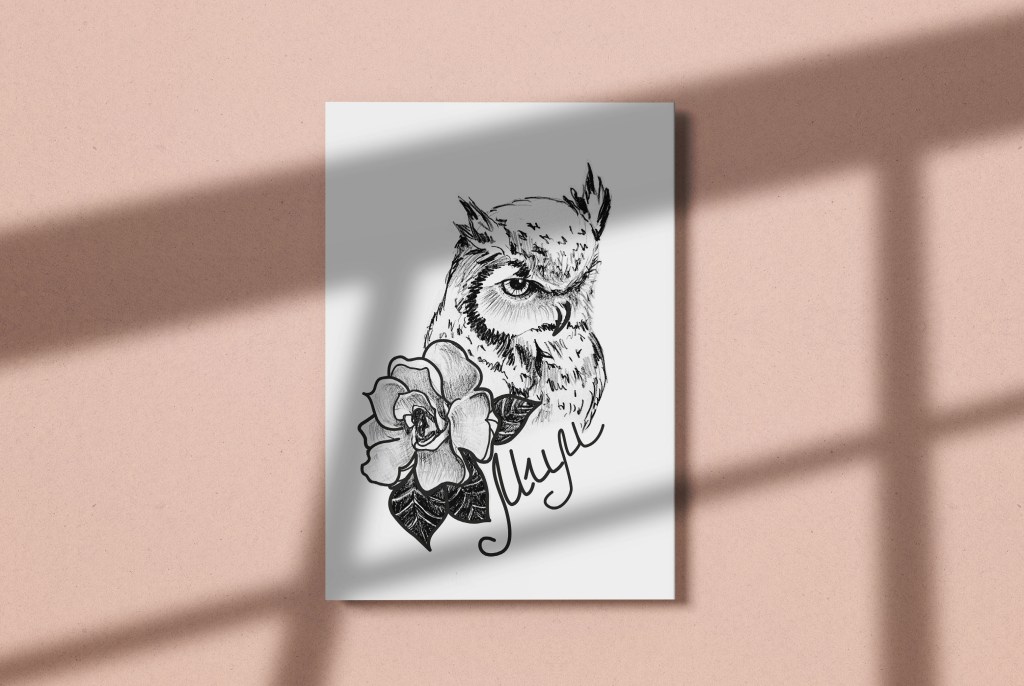
I was going to combine the image of the owl, which symbolises wisdom, and add beautiful roses. I was aware that the image of the owl bird could be quite specific and not everyone’s preference, I just really loved the historical meaning behind it, and I thought the design was worth trying. I had a collection of roses on my phone, and I thought they could be a good reference for my design as well.
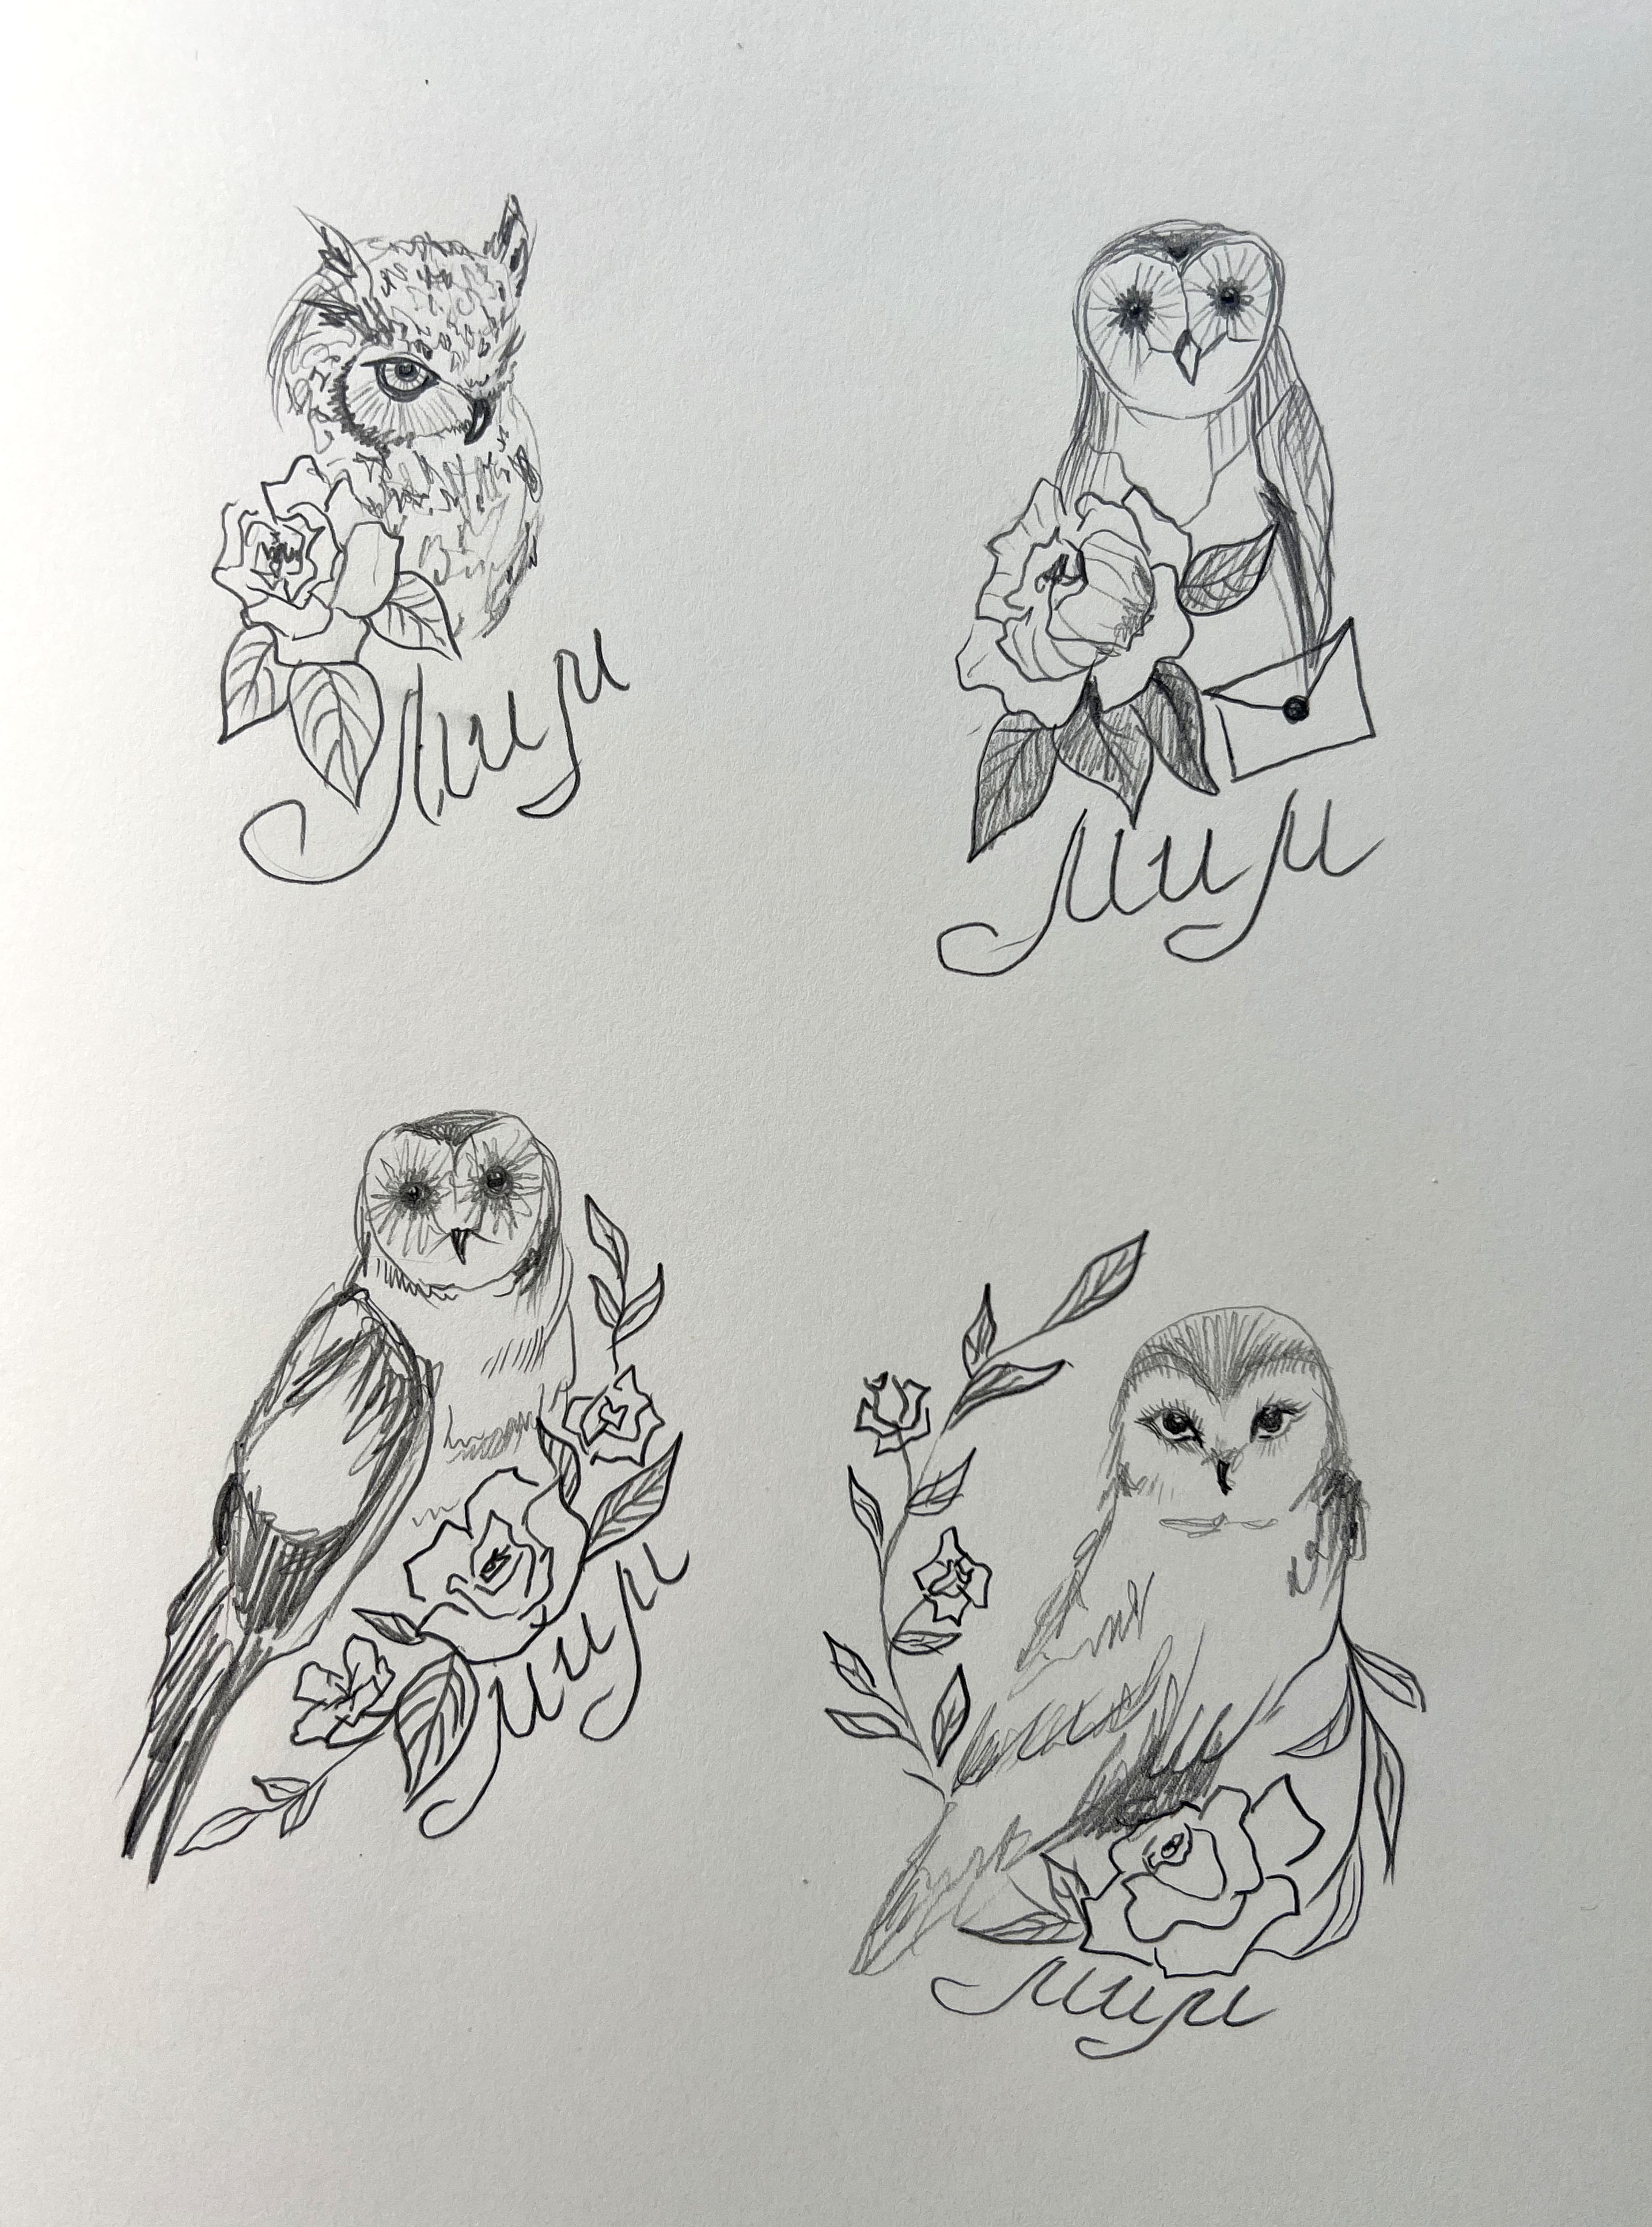
As I had this recent idea, I created some additional illustrations, trying to choose the shape of the owl I was going to use. I went for the more traditional way of owl-looking, which was not as geometric as Egyptian drawing. In the corner, I added a rose and written text with the word mum. I was going to use my own writing for the tattoo, rather than typography.
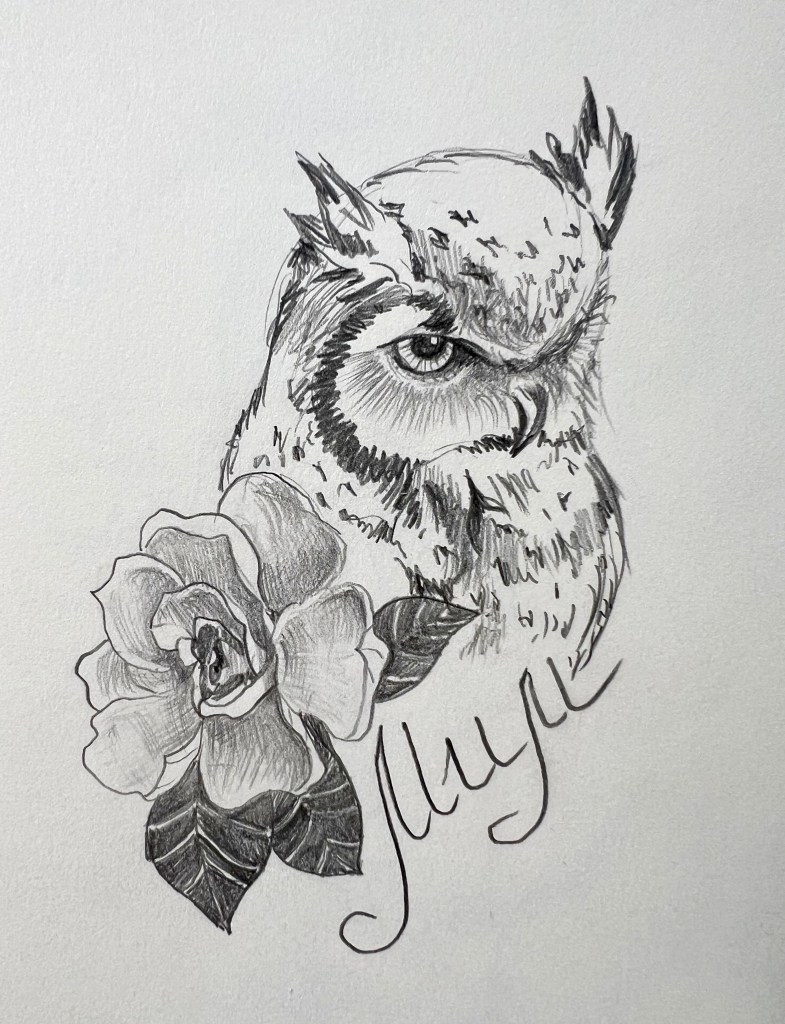
When I thought of the style of the tattoo, I could characterise it as traditional, also known as Old School. Traditional tattoos originated in the early 20th century and are characterised by bold, thick black outlines, a limited colour palette, and simple, iconic designs like anchors, roses, and swallows. In my case, it was going to be a rose and an owl.
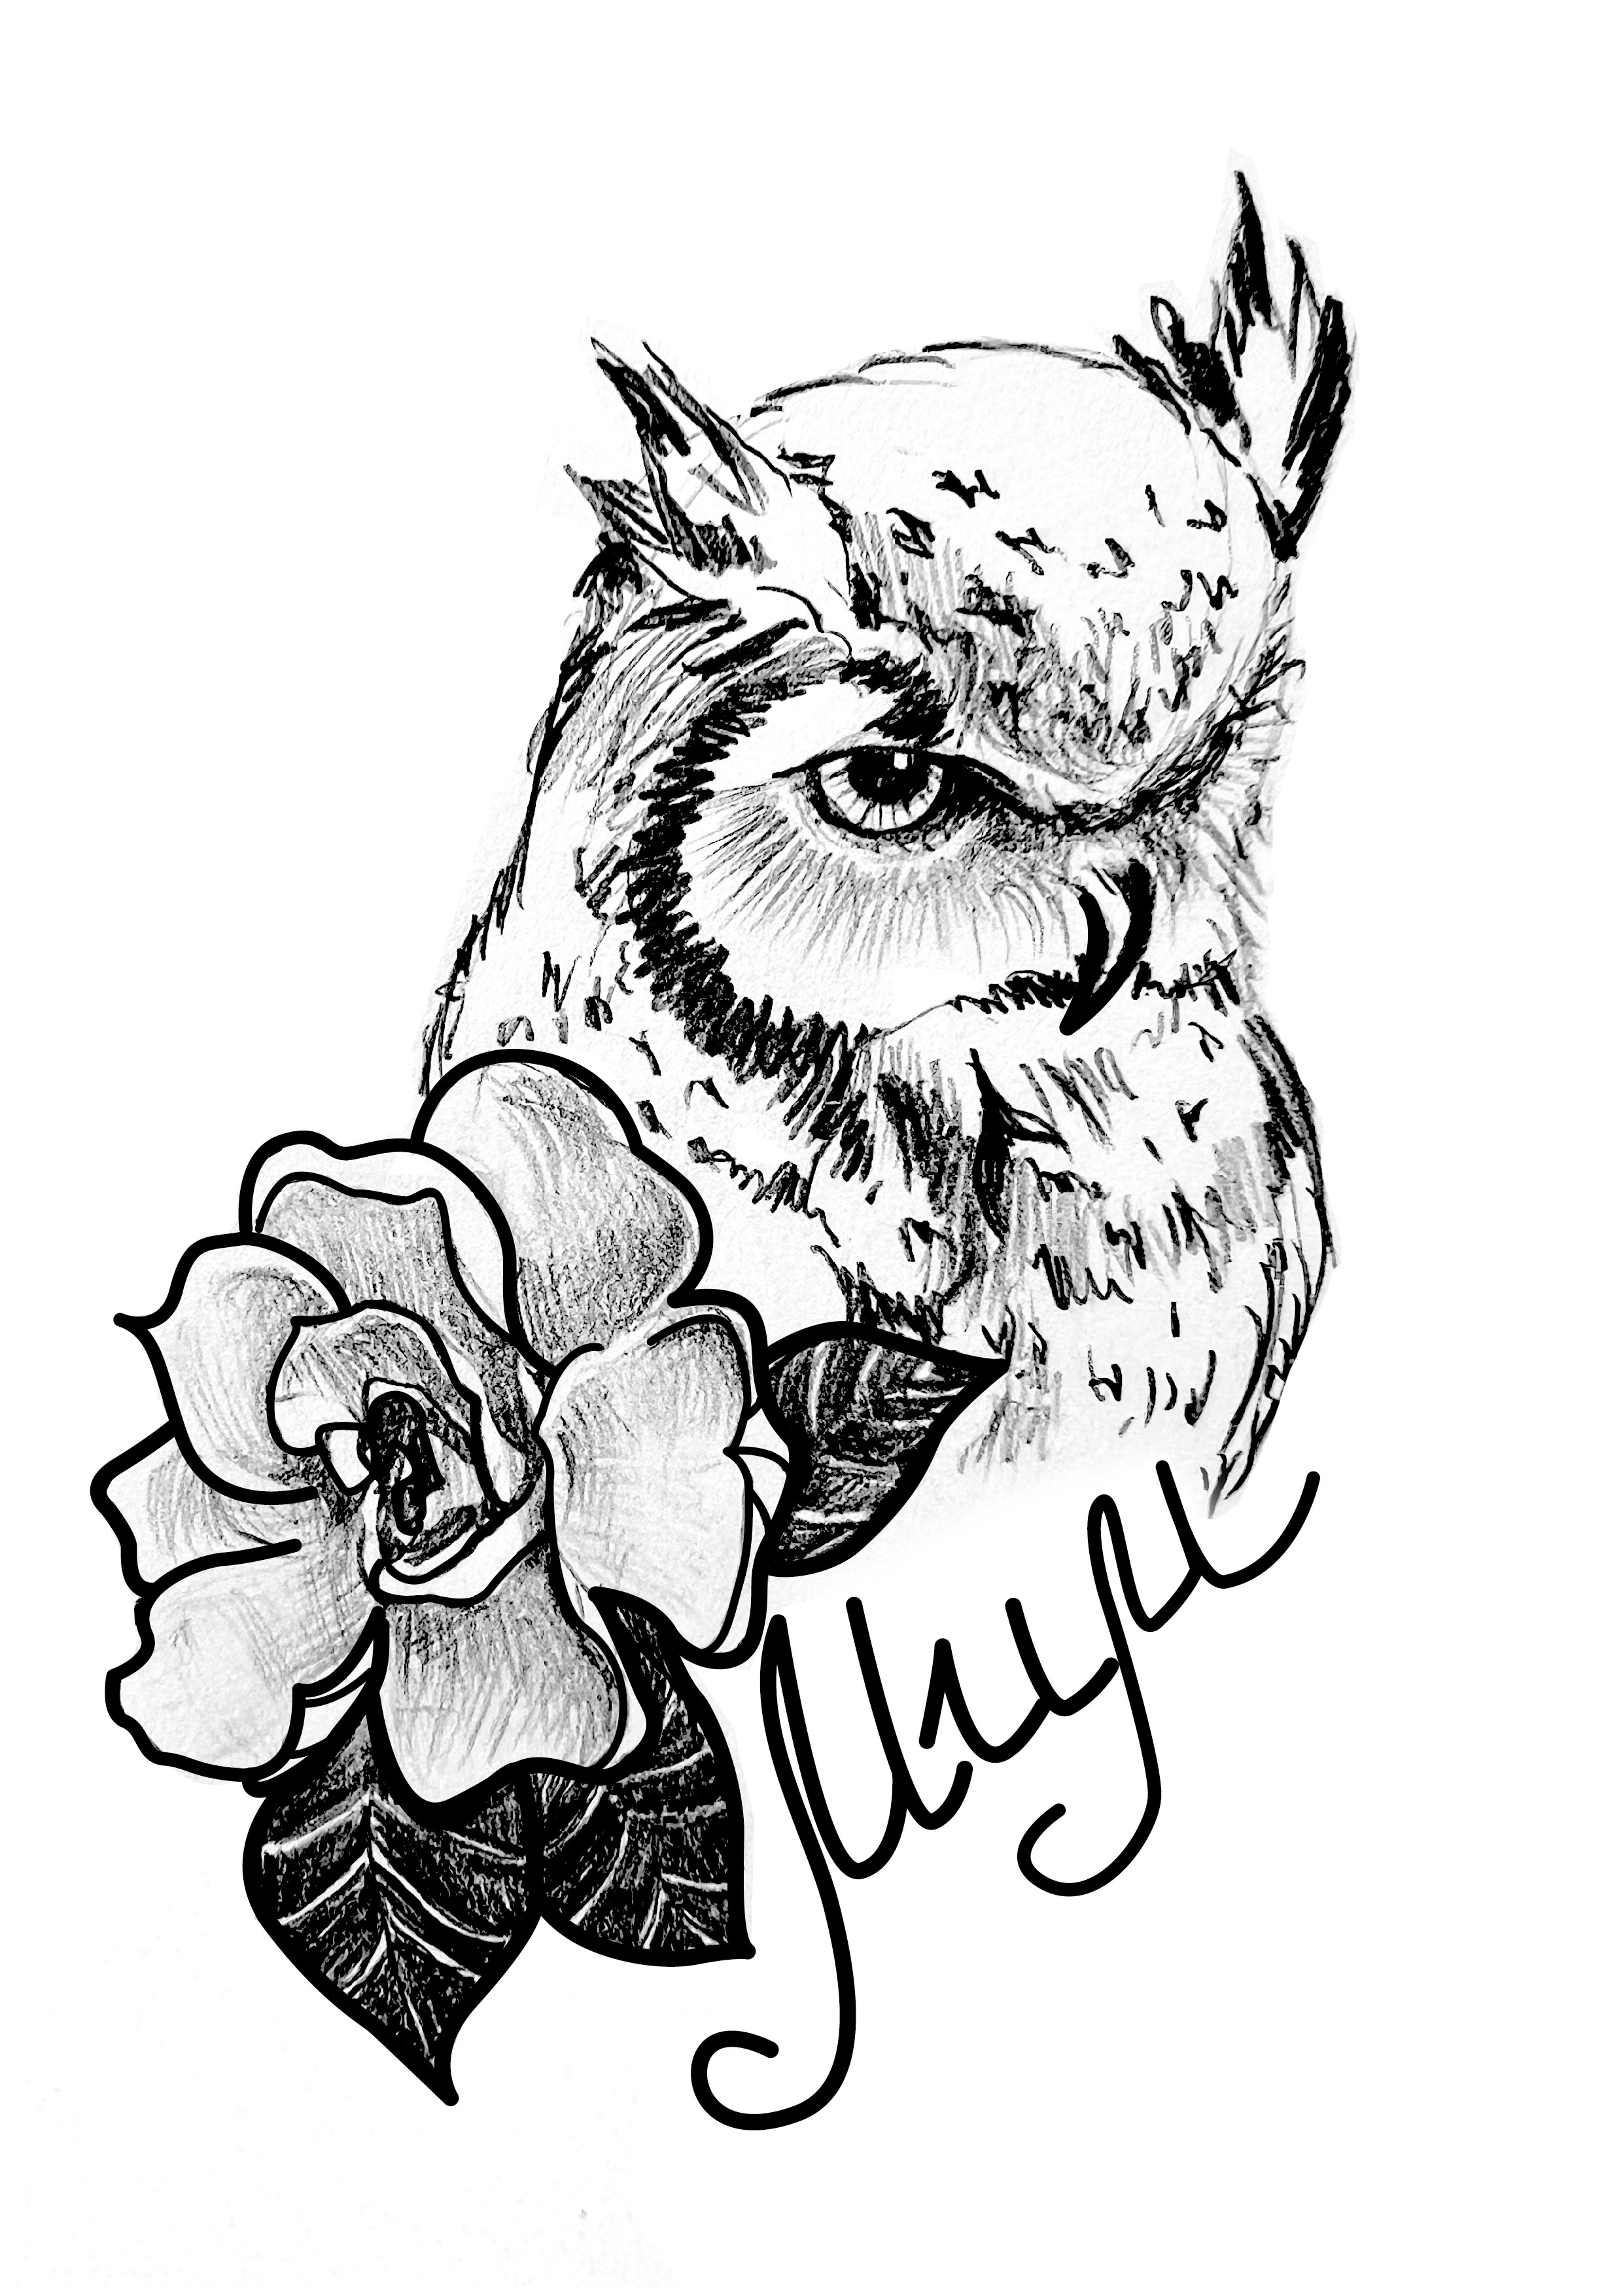
My choice of the image for the tattoo was that looked the most realistic. I was not sure whether the drawing of the owl ended up being too serious, I found the choice of the tattoo style quite a personal process, and it is always useful to work with a client, but here I made a choice on my own preference. After brief sketches, I created the detailed sketch, with some shadows, and fine details of the owl, planning later to edit it in Photoshop and Illustrator for the actual tattoo. I left the image being black and white, but in addition, I made some bold outlines around roses and birds, to highlight the borders around the image.
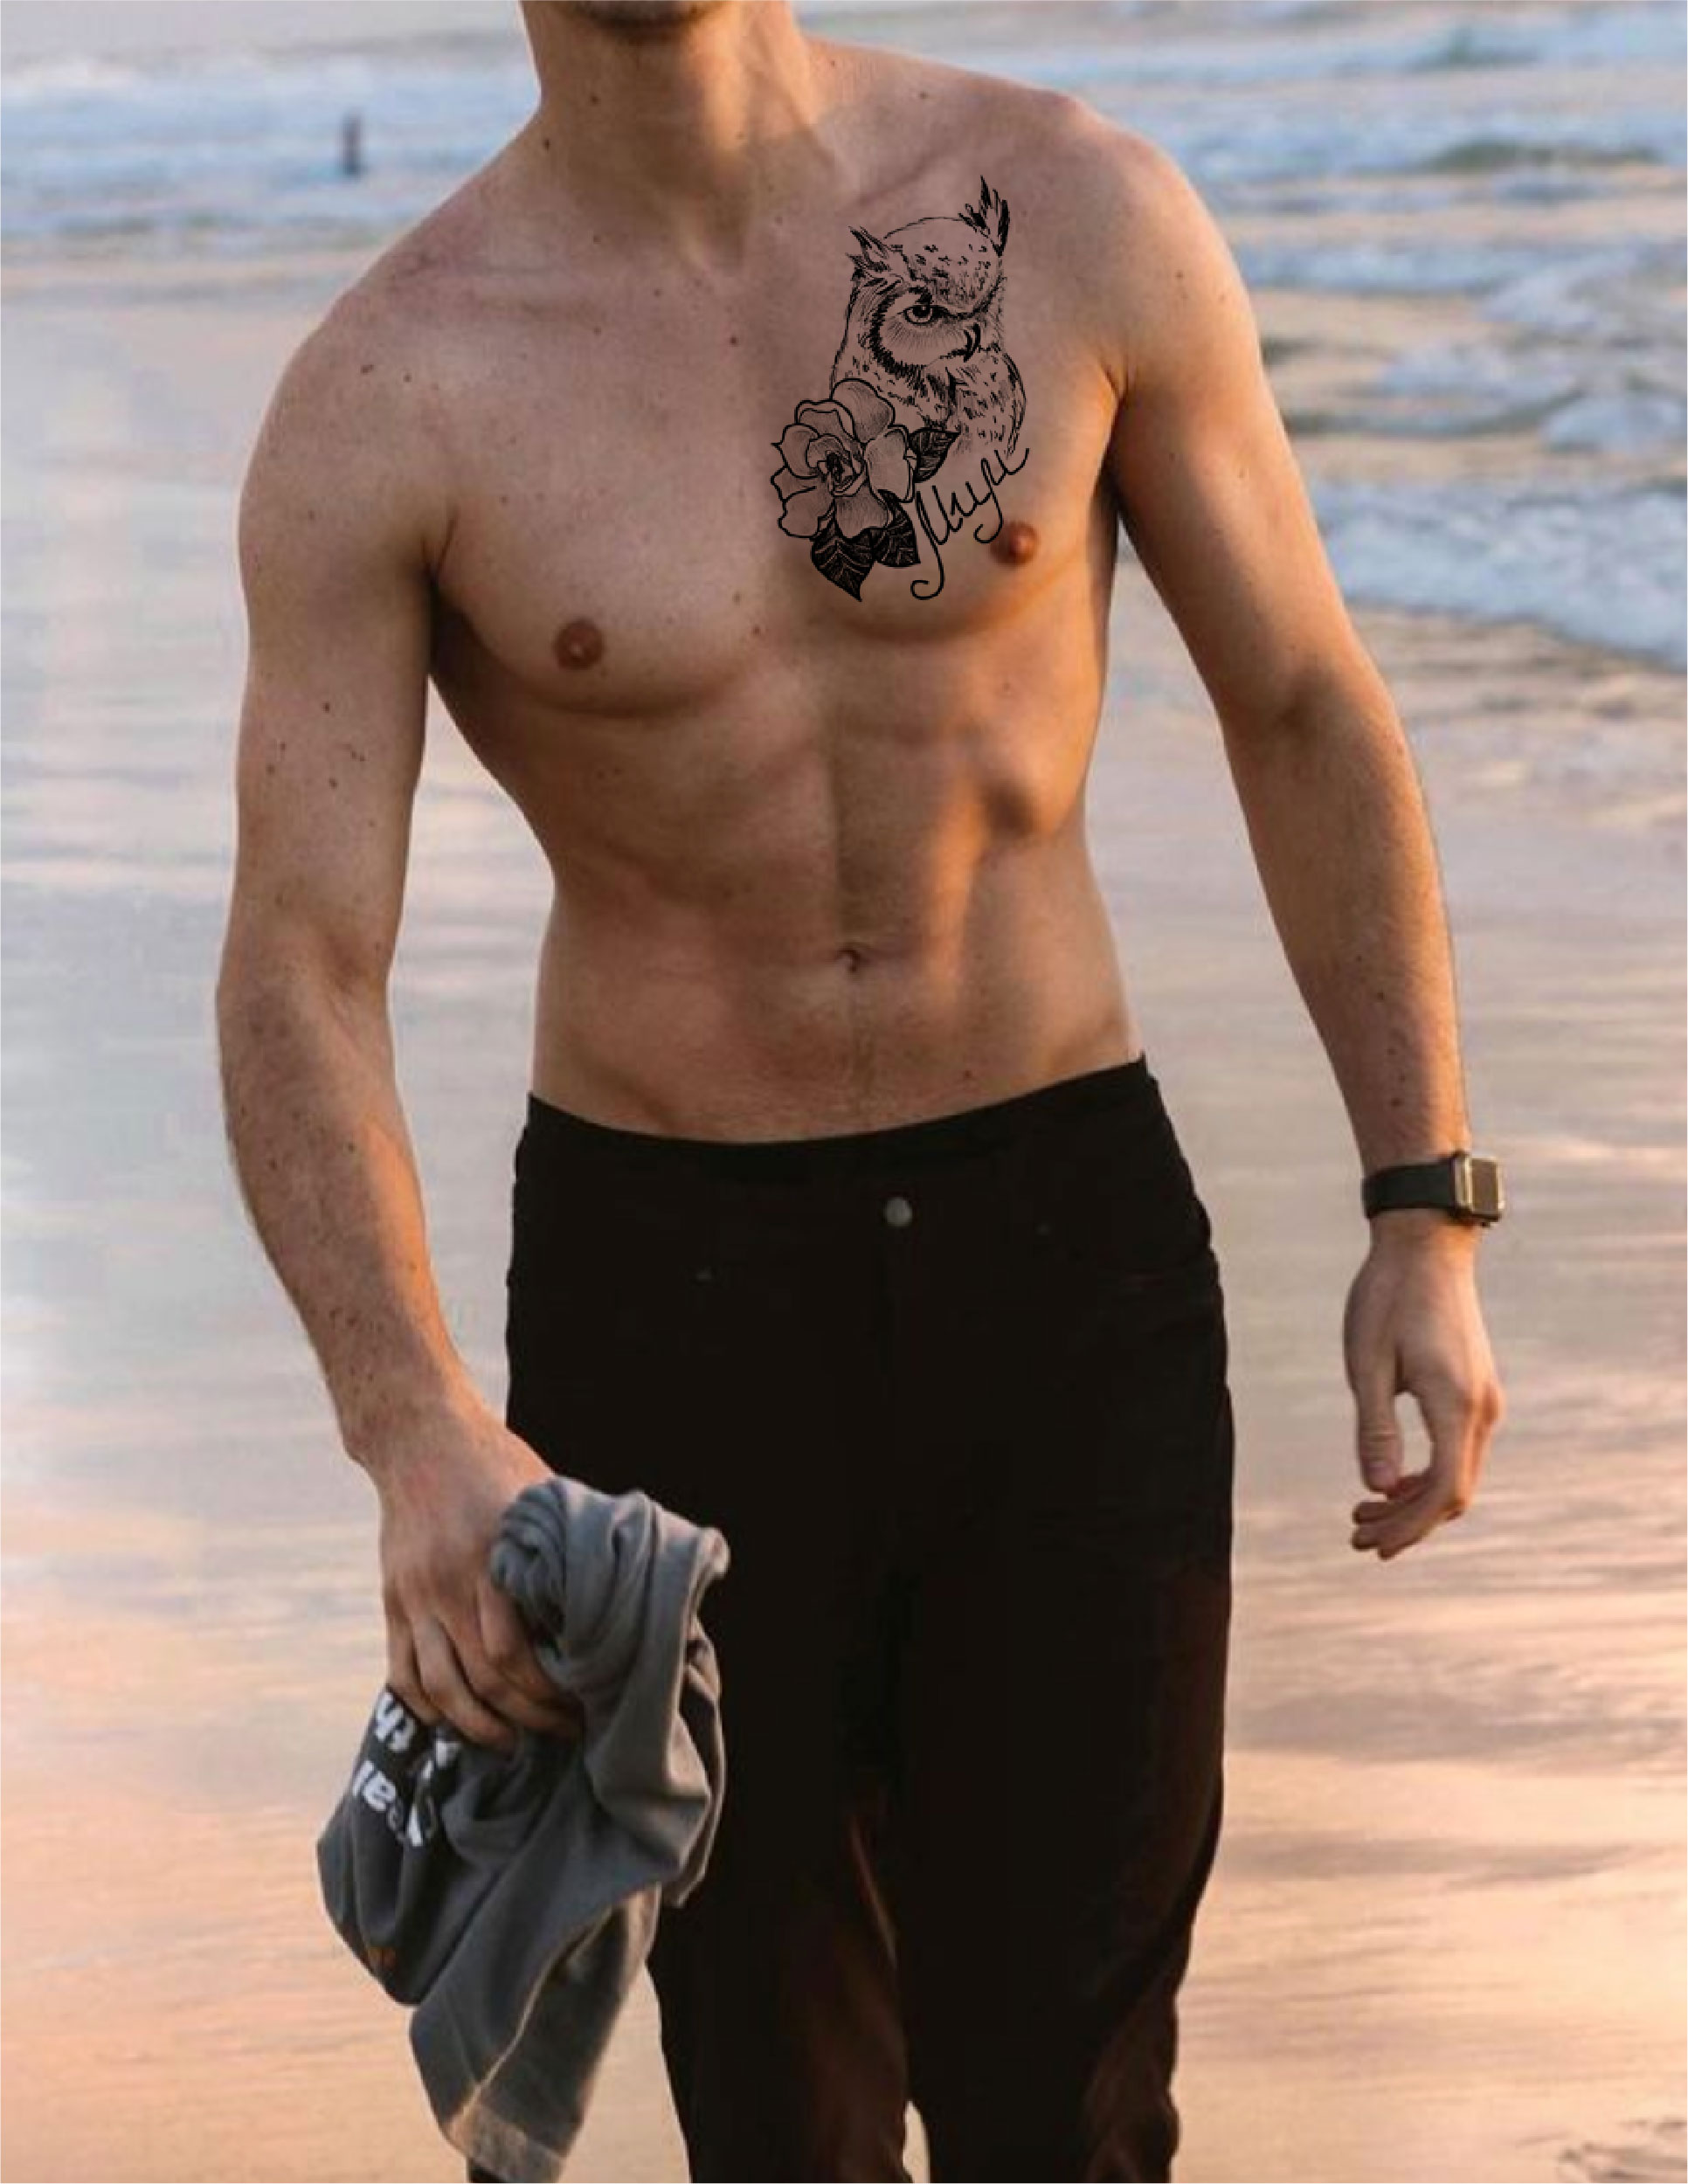
For the final touch, I created mockups of the tattoo on the actual man’s body, and on the greeting card. In the exercises, I felt quite like a beginner, as the world of tattoo masters is so advanced, and the precision of the lines and details is vital, as that is the type of art that people apply to their bodies for a lifetime. I think my tattoo conceptually has a great opportunity to be used. As I mentioned before, the tattoo choice is quite an intimate process, and there is always a significant part of working with a client in order to achieve the most successful result.
For this exercise, I was asked to design an illustration for use on the menu of a sophisticated, quality fish restaurant – one in a chain sited in major European cities. Also, one of the main requirements for any food depicted should be visually appetising.
The keywords for the exercises are:
modern
bright
contemporary
fresh
sophisticated
quality
seafood.
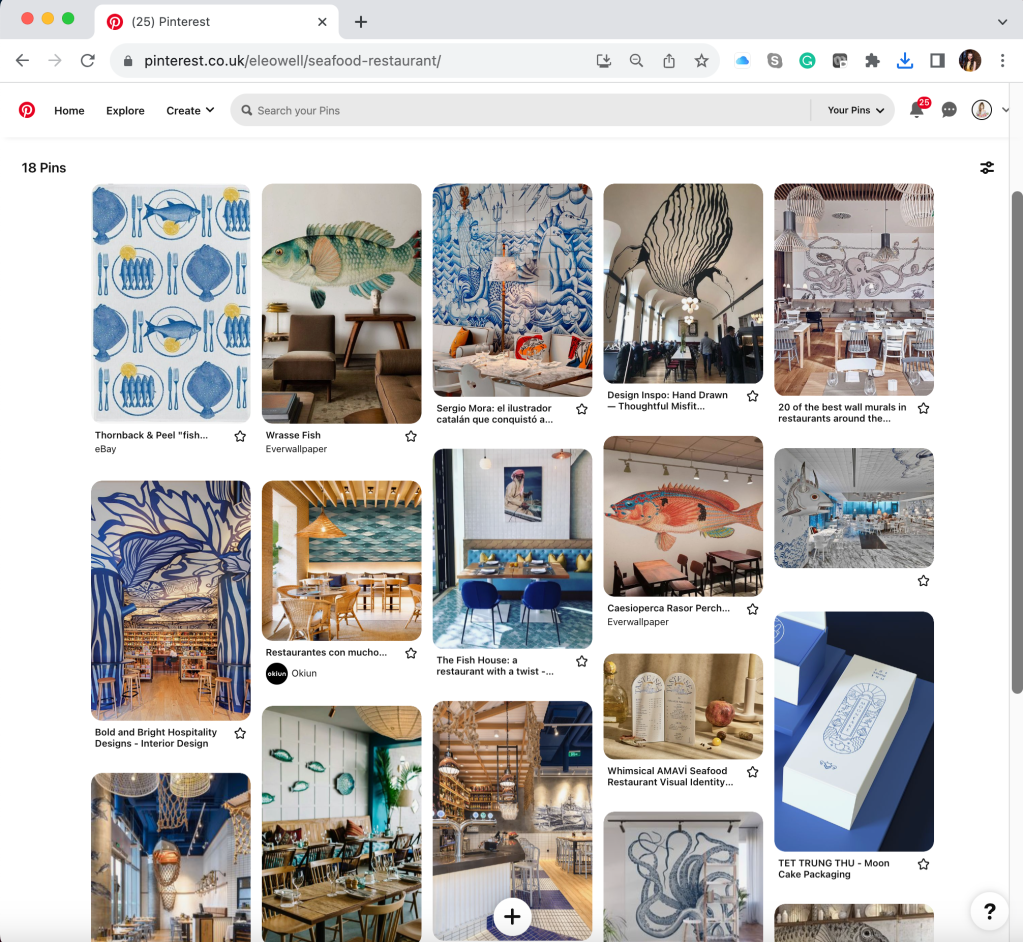
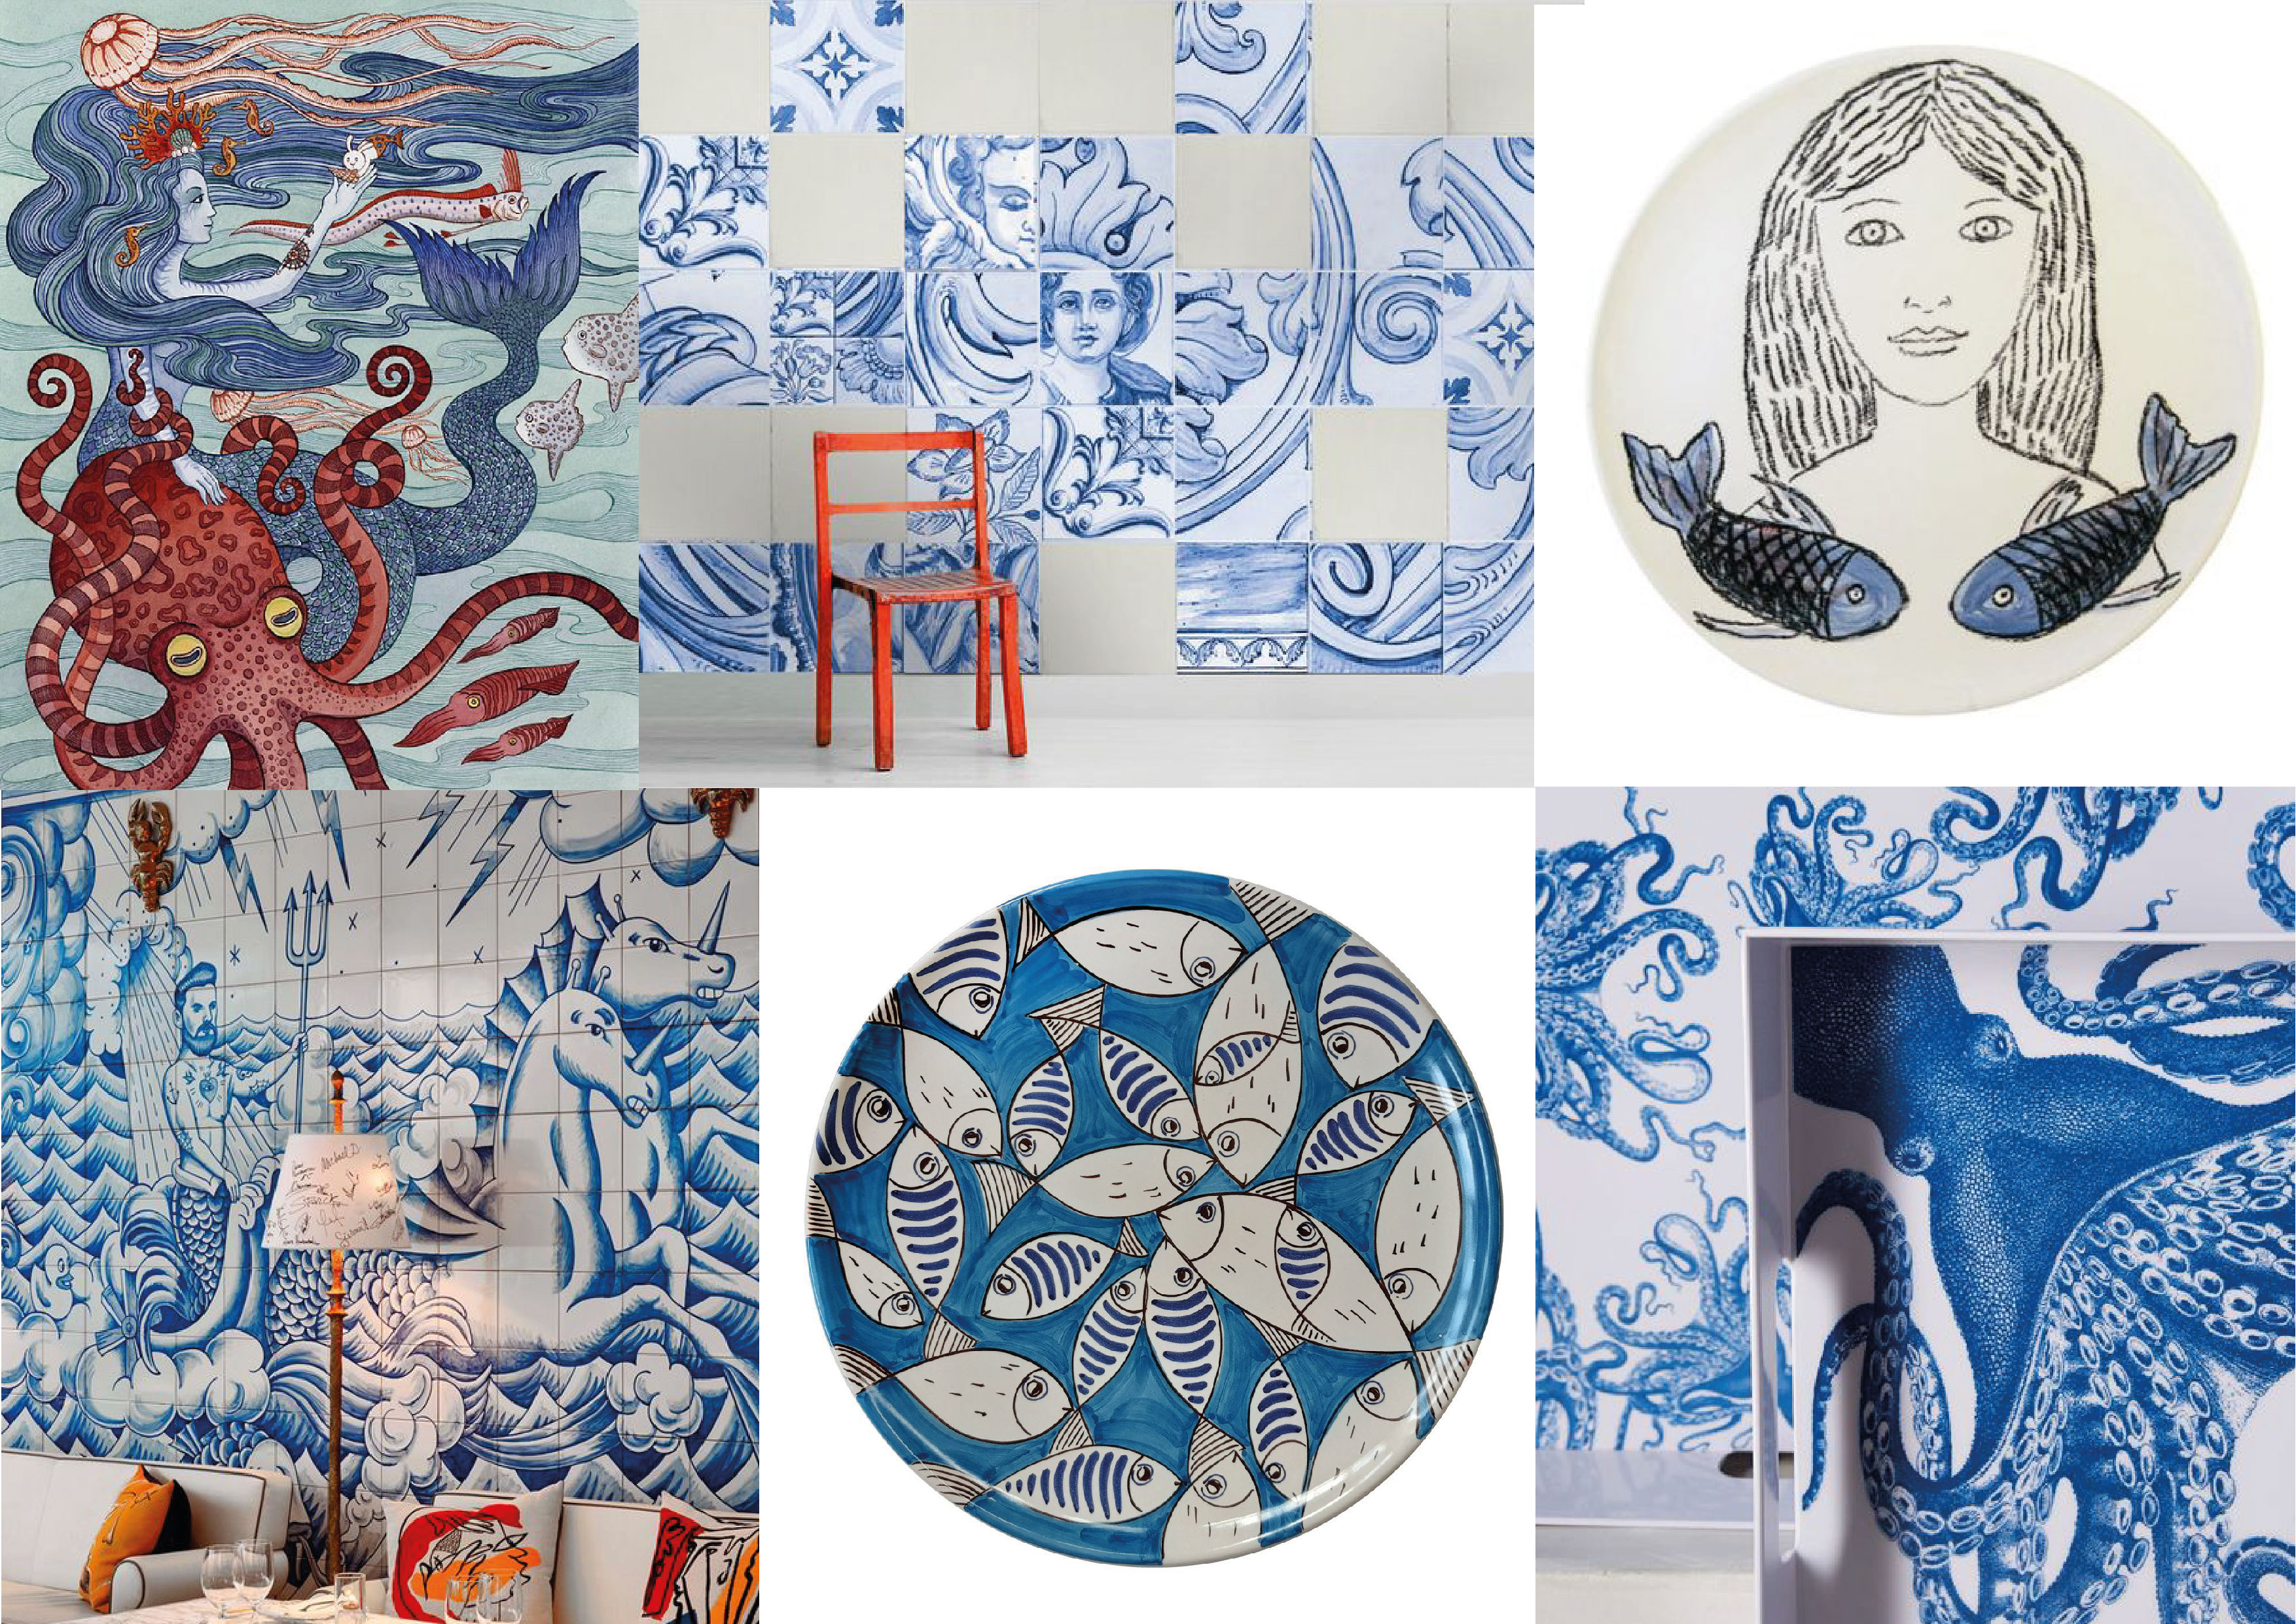
To start with this exercise I went on Pinterest to research the seafood and fish restaurant theme, I imagined it all would evolve around marine them and blue and white colours, but I thought it would be great to see something new and different, some unexpected solutions around that subject.
After doing a little research, I got the impression that most restaurants use blue and white tones, as well as a contrasting colour of pink. The rooms are filled with light and natural colours in the colour palette. One of the non-standard solutions is the application of marine themes on the wall, with images of fish and octopus, as well as installations of fishing gear and nets. I would say that the main purpose of those restaurants would be to bring the quality and freshness of the seafood, making the emphasis on authenticity, rather than posh and sparkly design.
In addition, I created a board with nautical elements that are used in the menu design. The main emphasis in these drawings is on seafood, fish and octopus. I concentrated my research around the ideas for the illustrations, rather than menu designs.
Illustration design for a fish restaurant plays a crucial role in creating a visually enticing and cohesive dining experience. With carefully crafted illustrations, a restaurant can convey its unique seafood-focused atmosphere and highlight the freshness and diversity of its offerings. The idea is to feature vibrant and colourful underwater scenes, showcasing various fish species or oceanic elements. They can also display skilful depictions of fishermen hauling in their catches or chefs preparing mouthwatering seafood dishes. The use of clever and imaginative illustrations helps create a sense of anticipation and excitement, enticing customers to embark on a culinary journey tailored to their love for seafood.
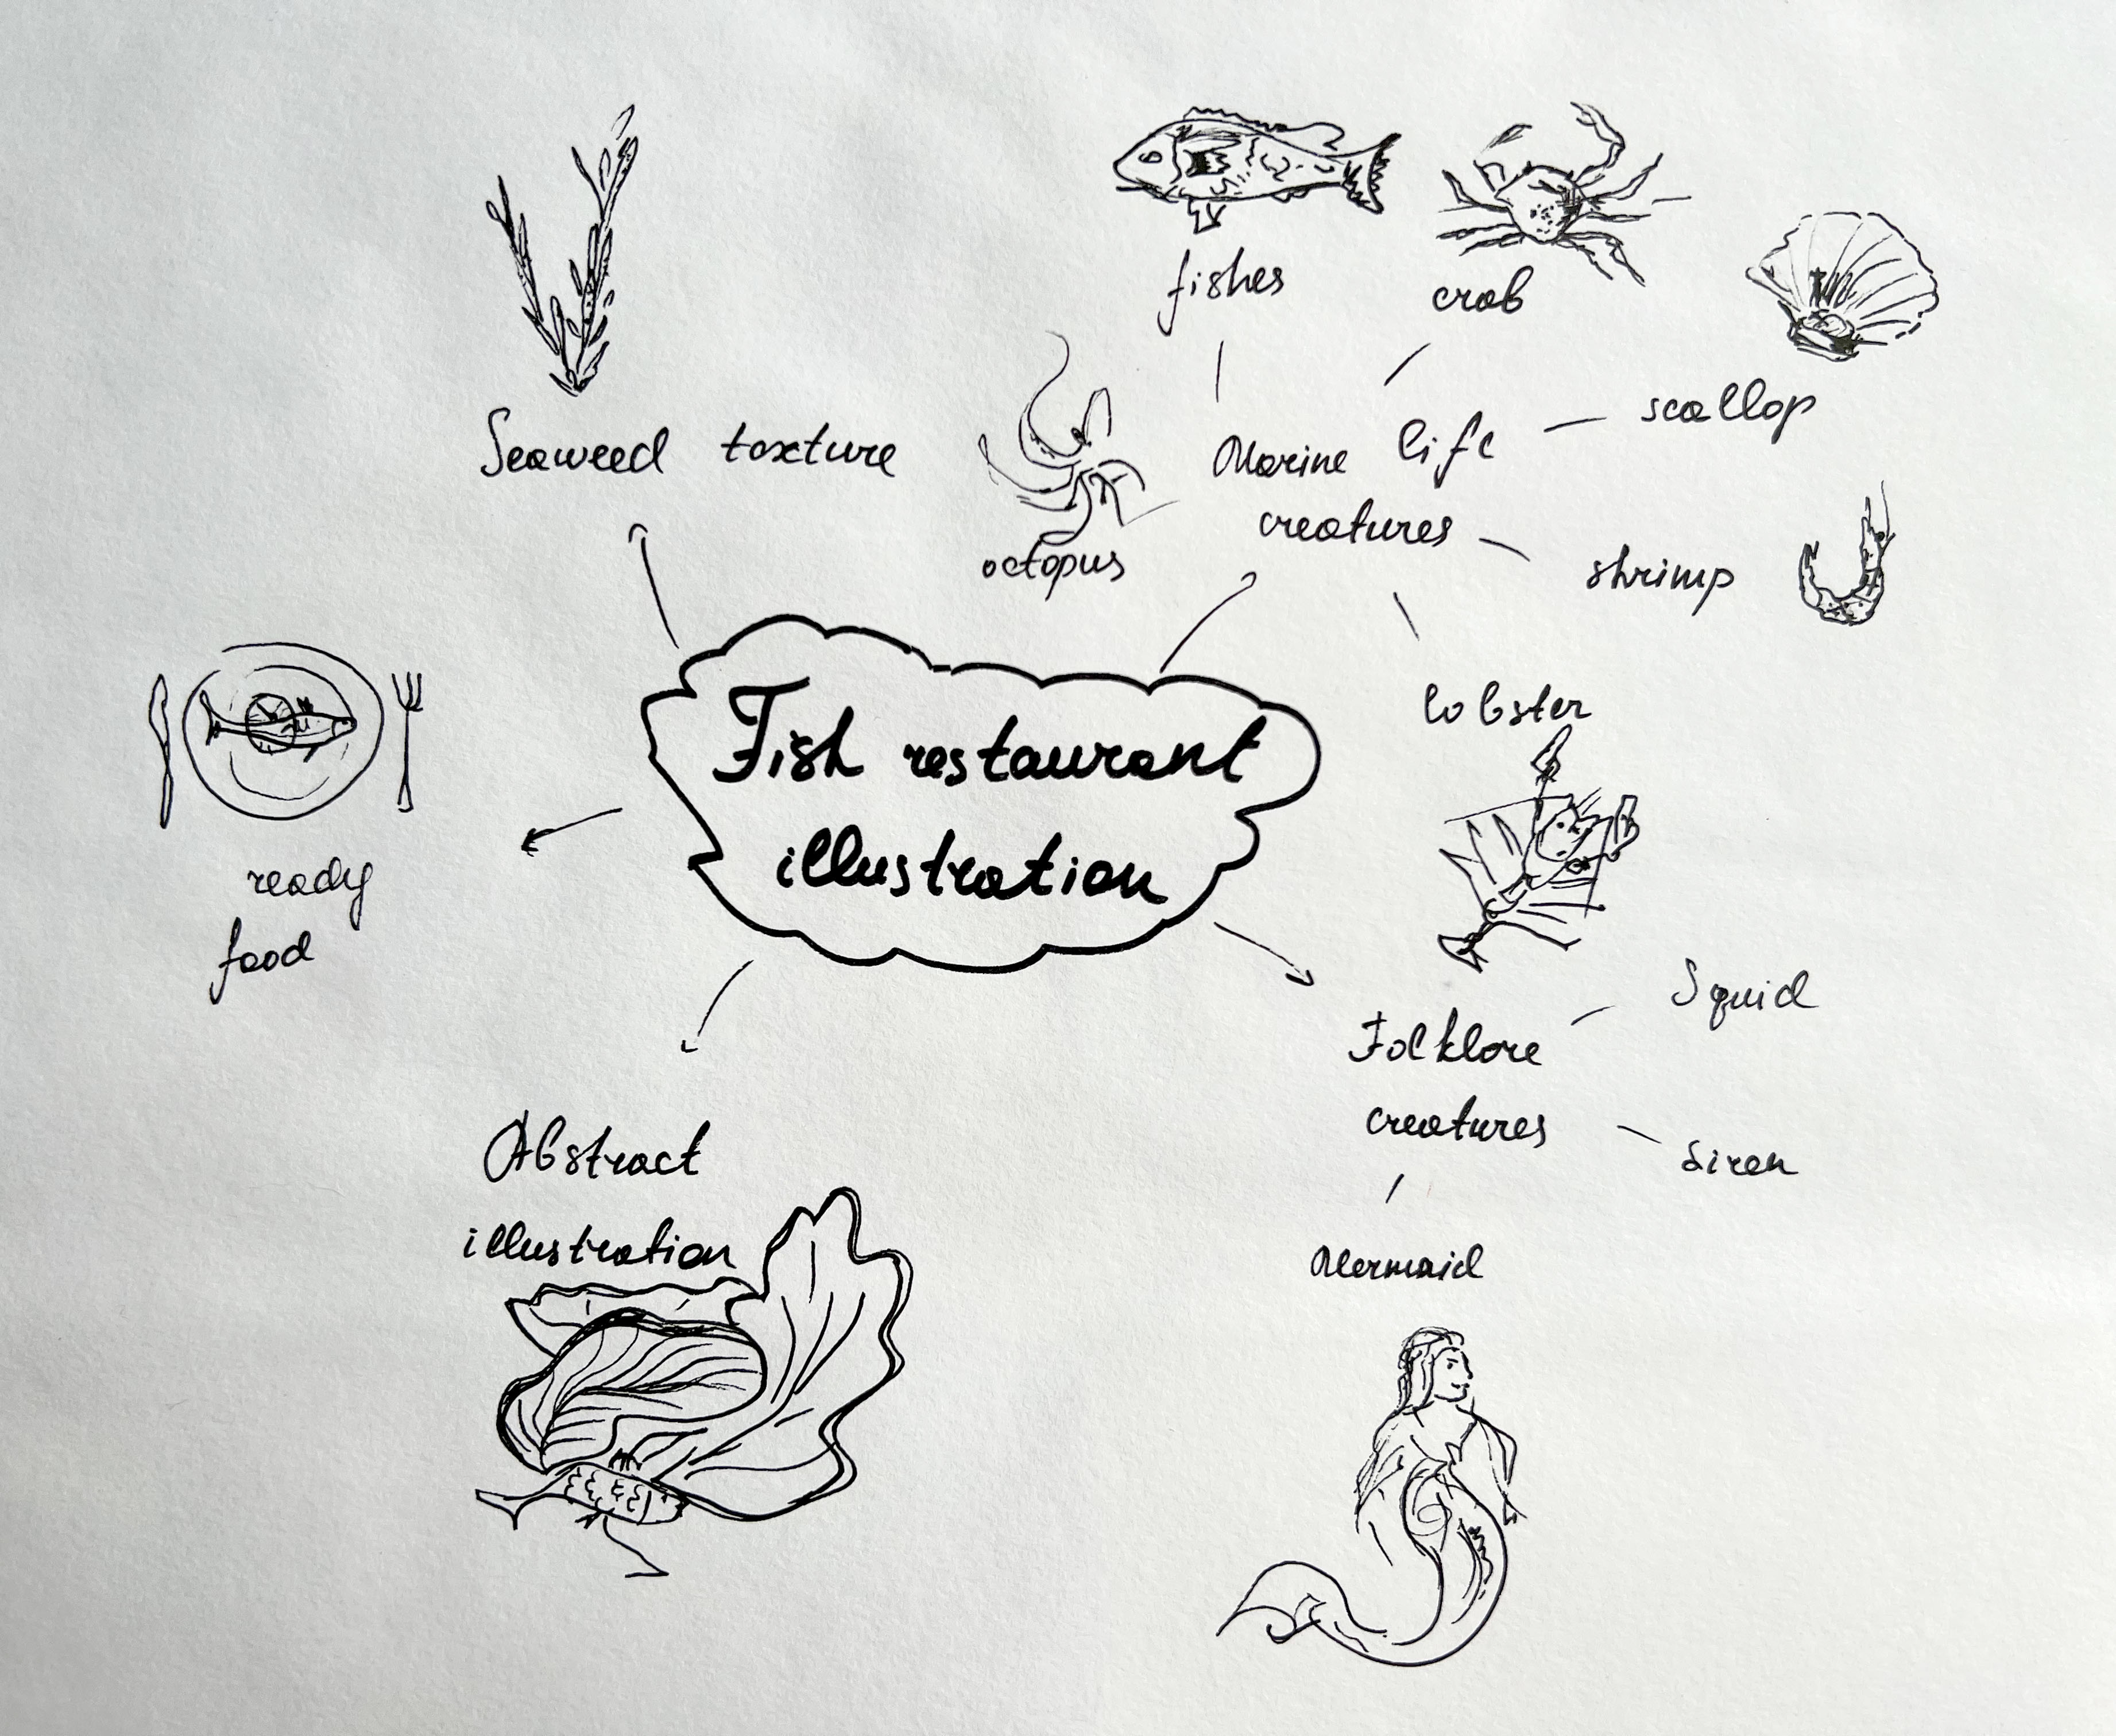
I created a mind map that helped me to organise thoughts and ideas together. By visually connecting various concepts and themes, I started to have the foundation to begin the design process.
Also, I created a spider diagram related to the keywords for the illustration design. It helped me to create a clear overview of the essential aspects that should be incorporated into illustrations, following the rule of creating an image for the modern and sophisticated seafood restaurant atmosphere.
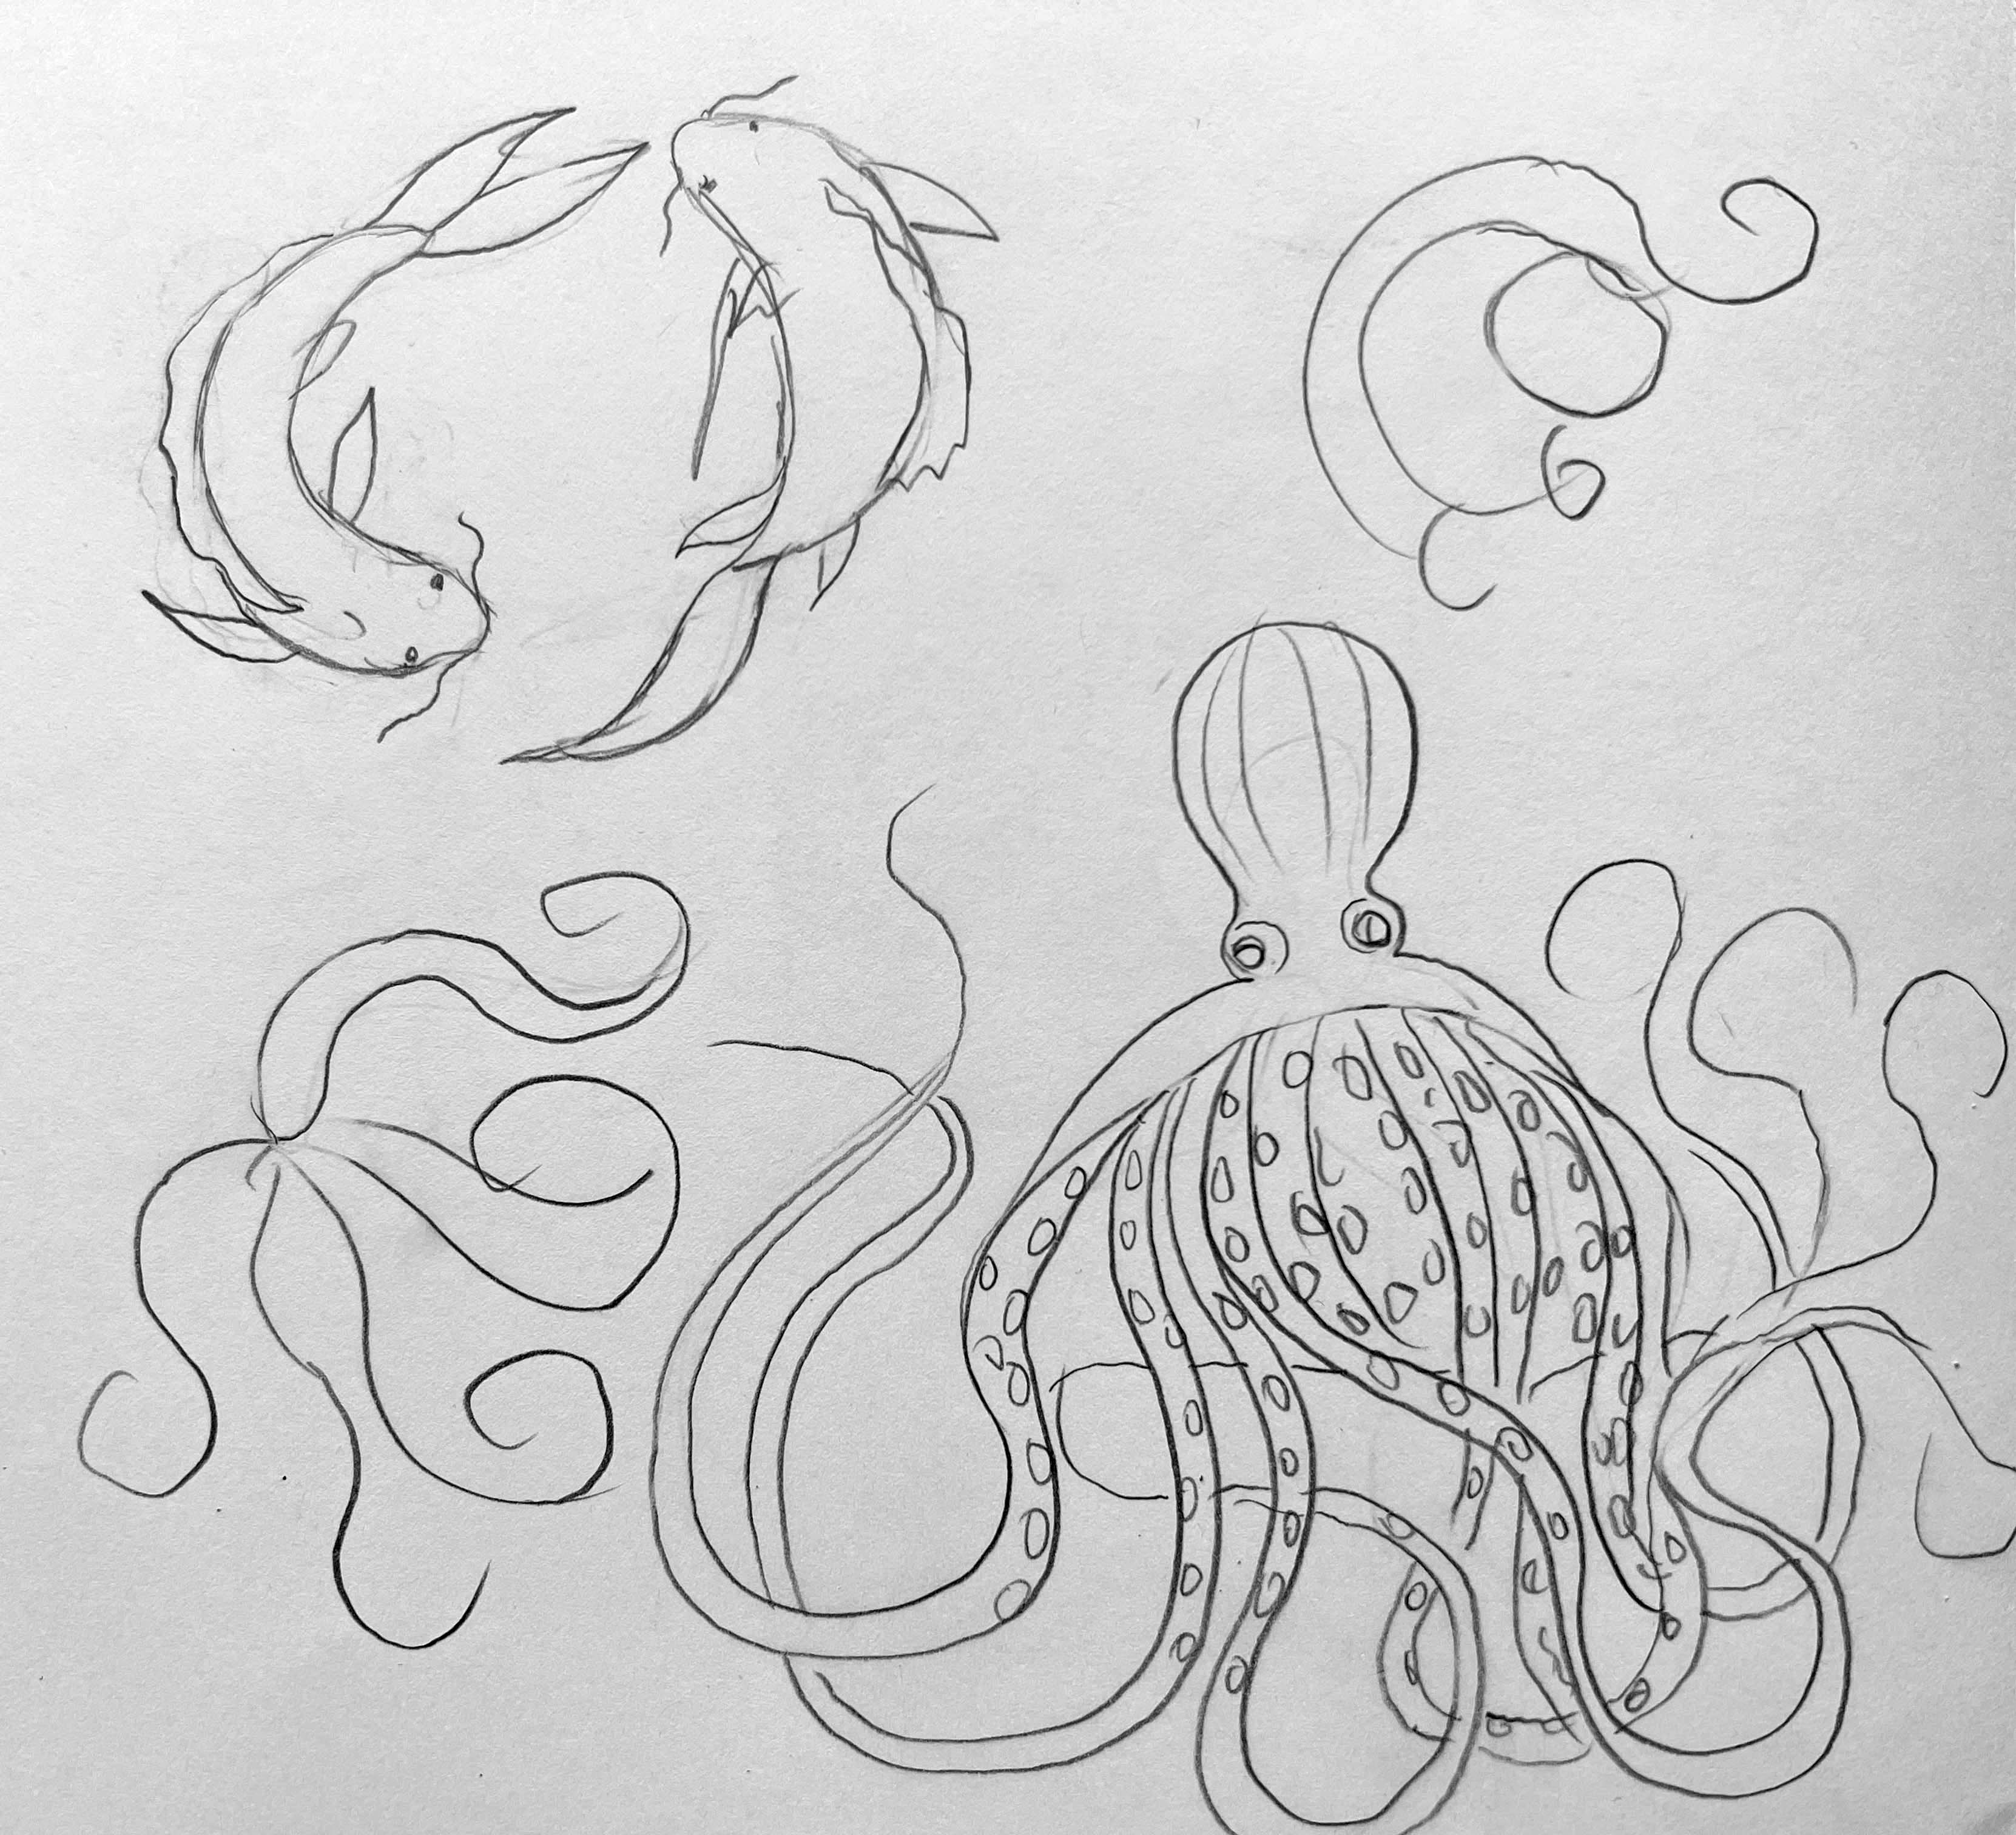
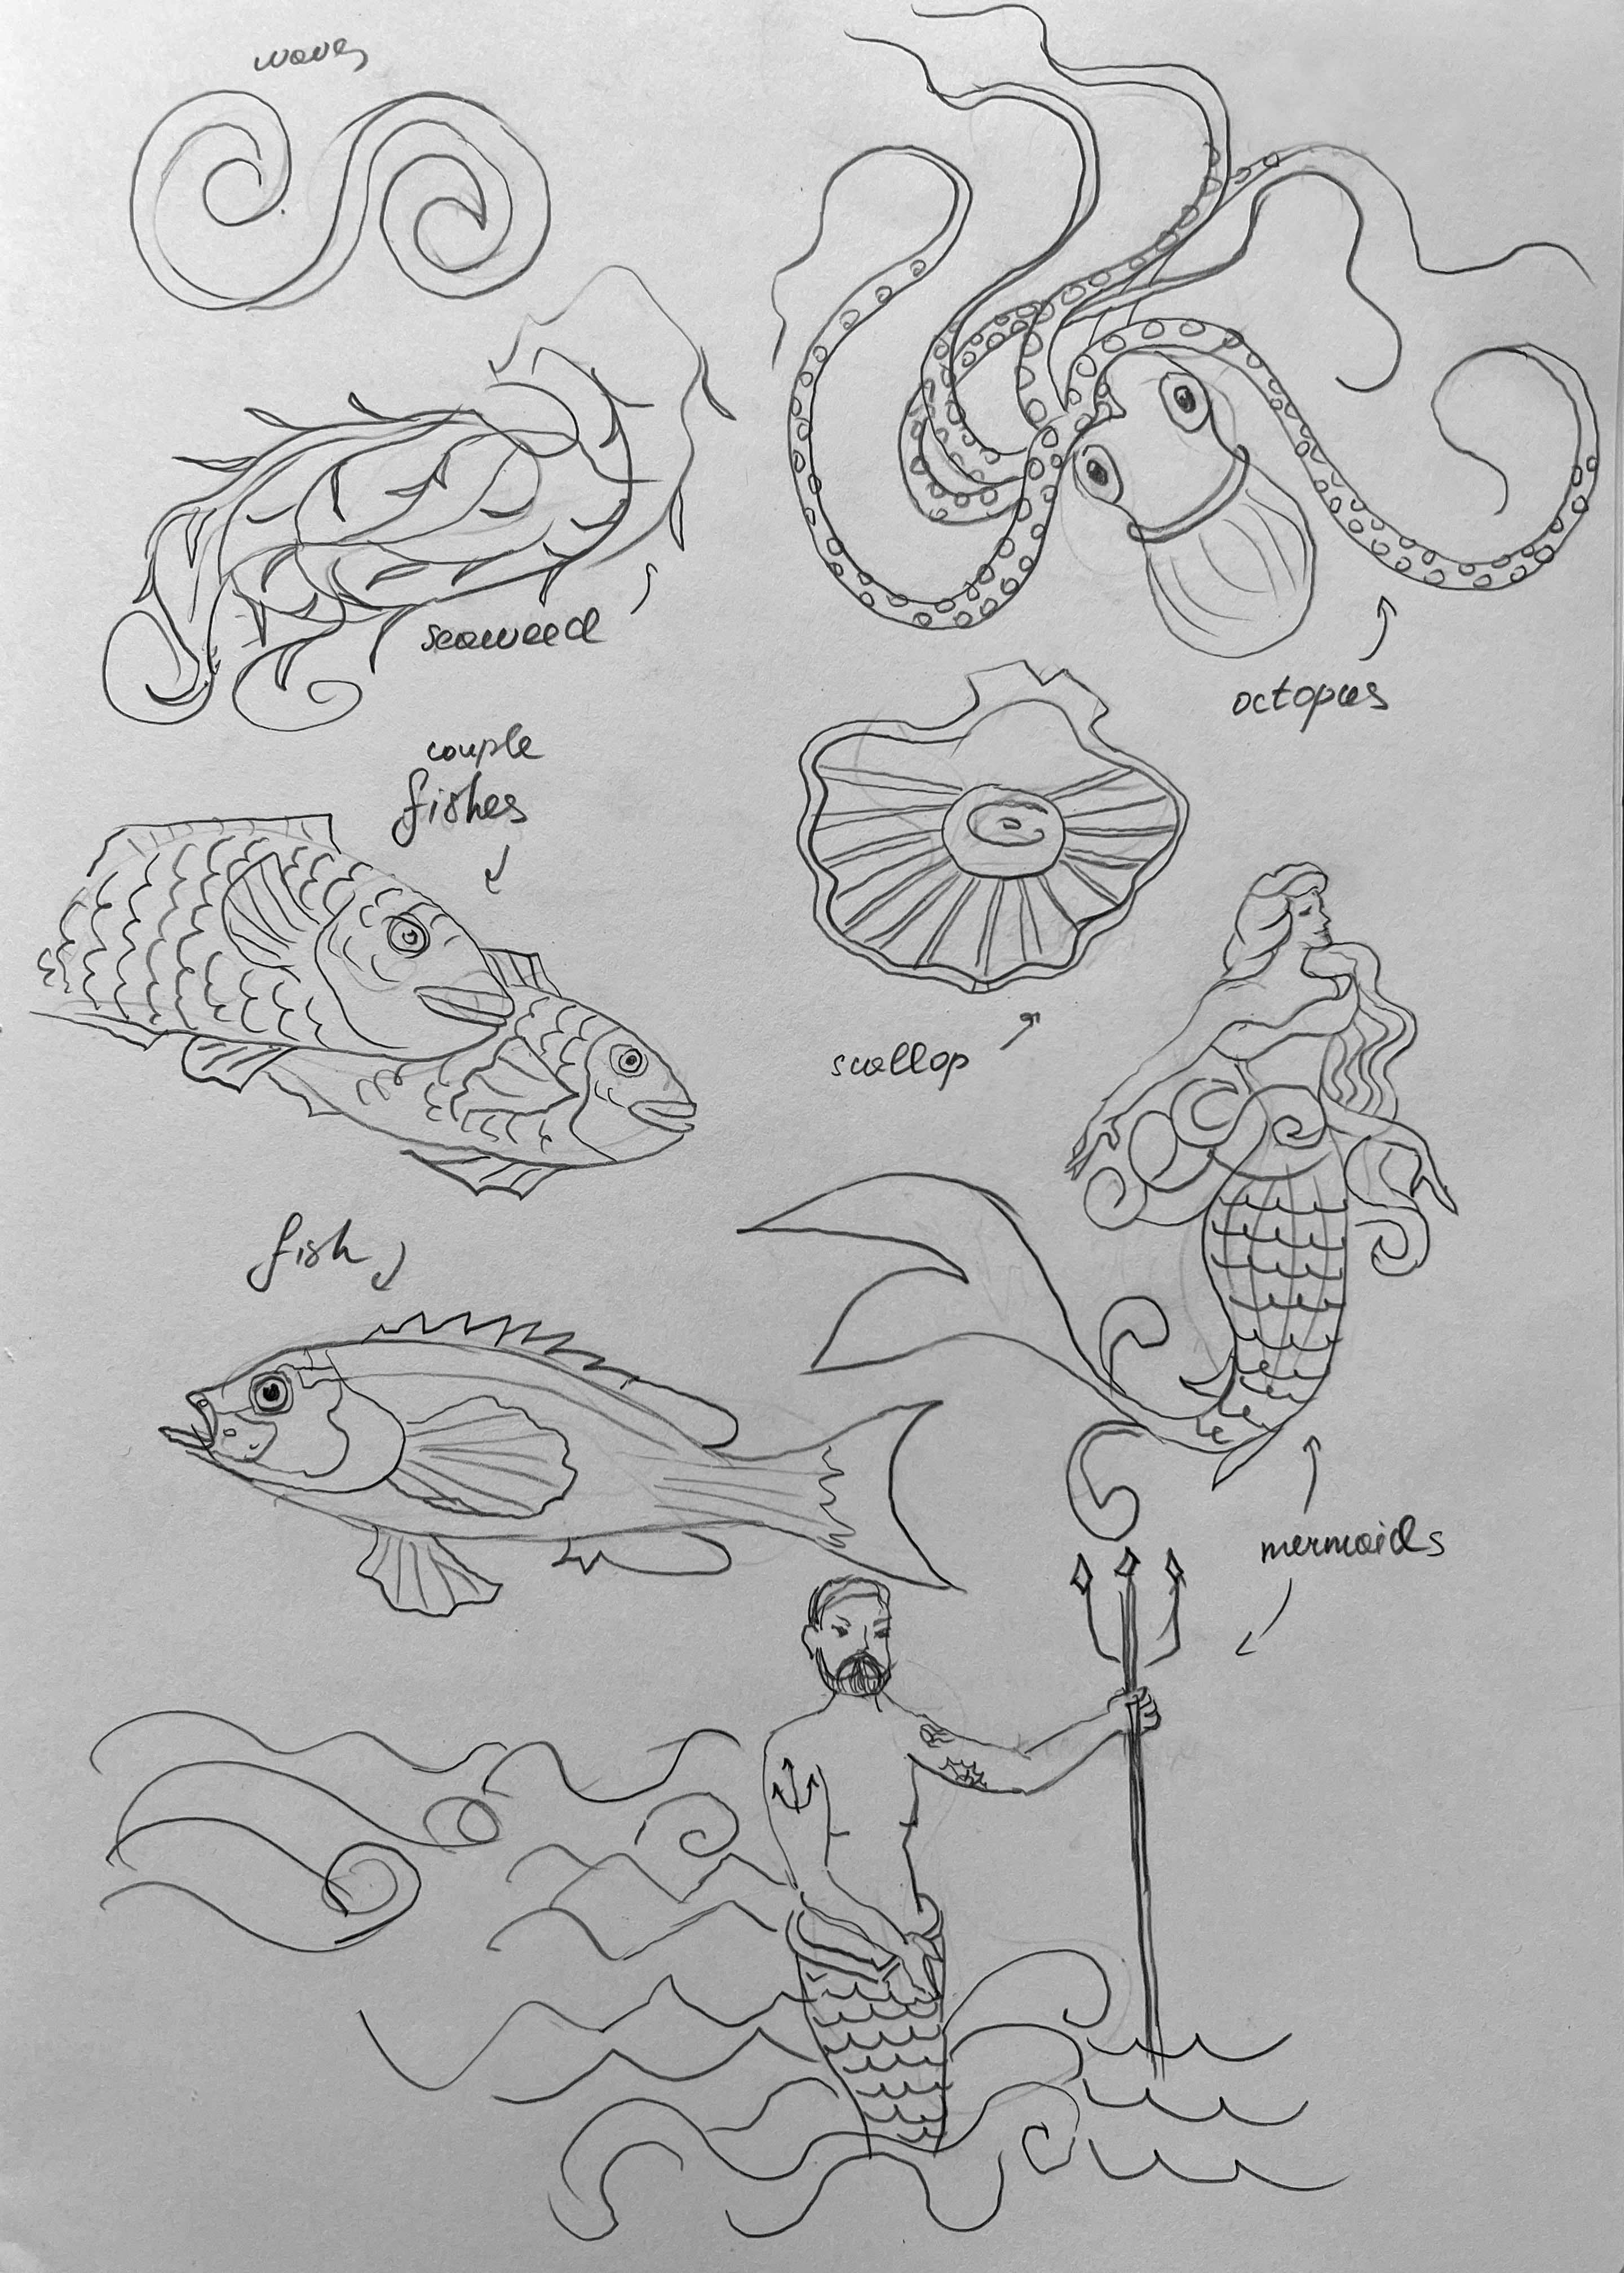
Sketches
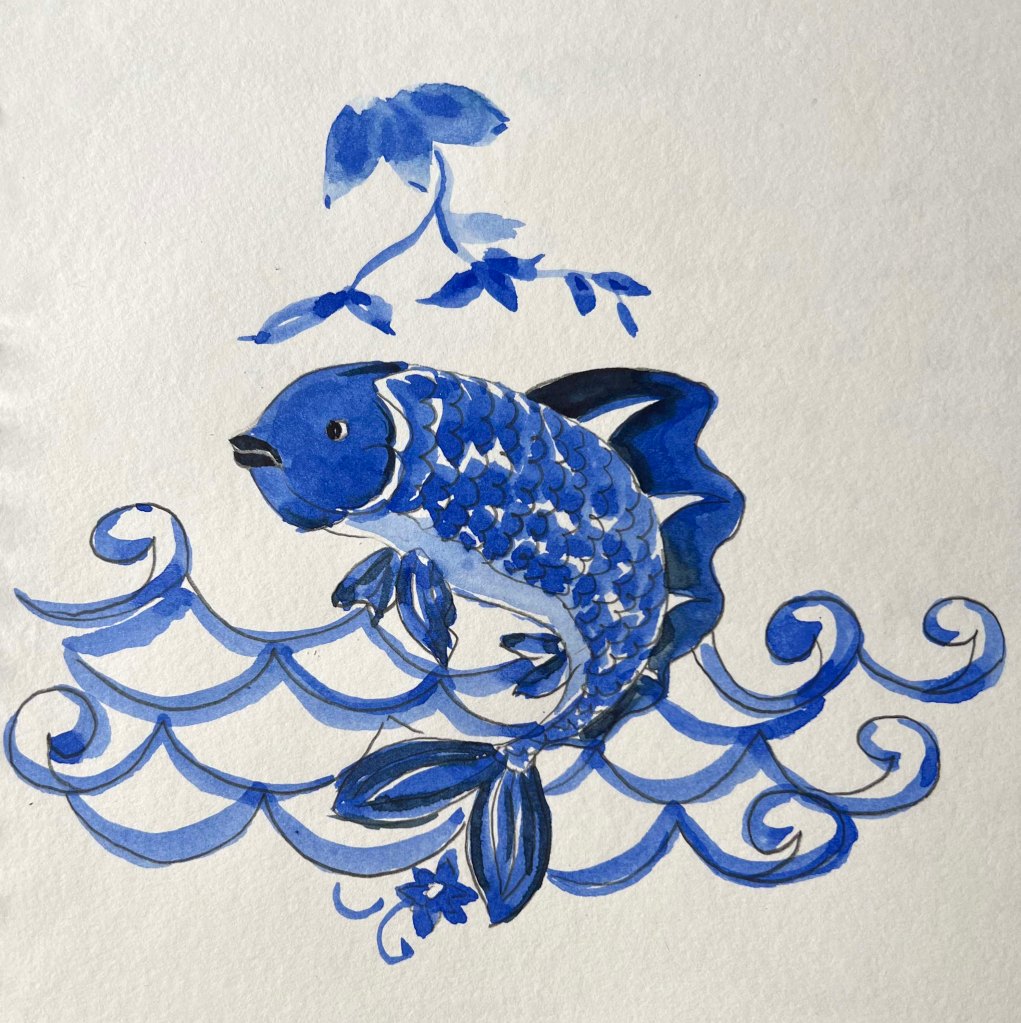
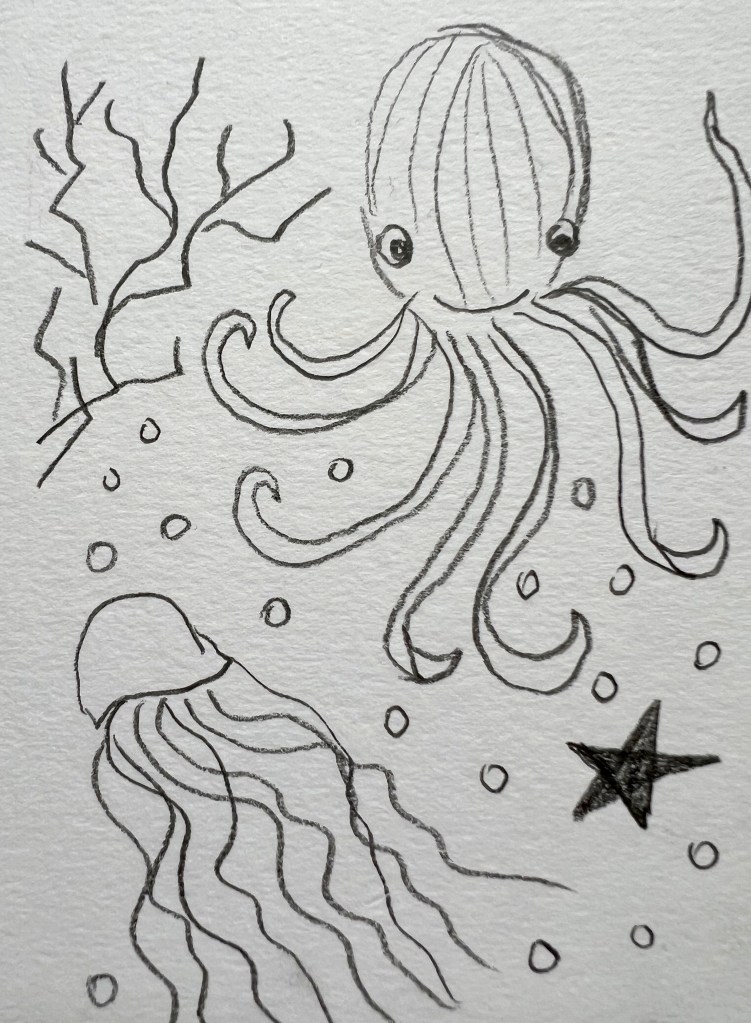
After general research and a mind map, I proceeded to the next step, actual sketches. I loved the idea of illustrating a big octopus with curly long tentacles, that dominates the space, like it owns the place. I made some sketches of fishes in the circular, with the idea of making them like Yin Yang. Also, I was thinking of showing curls and waves of the sea and making some dynamic image that represents the flow of the sea and ocean. The advantage of the octopus with curly tentacles is that it would look great in colour and just a black-and-white outline.
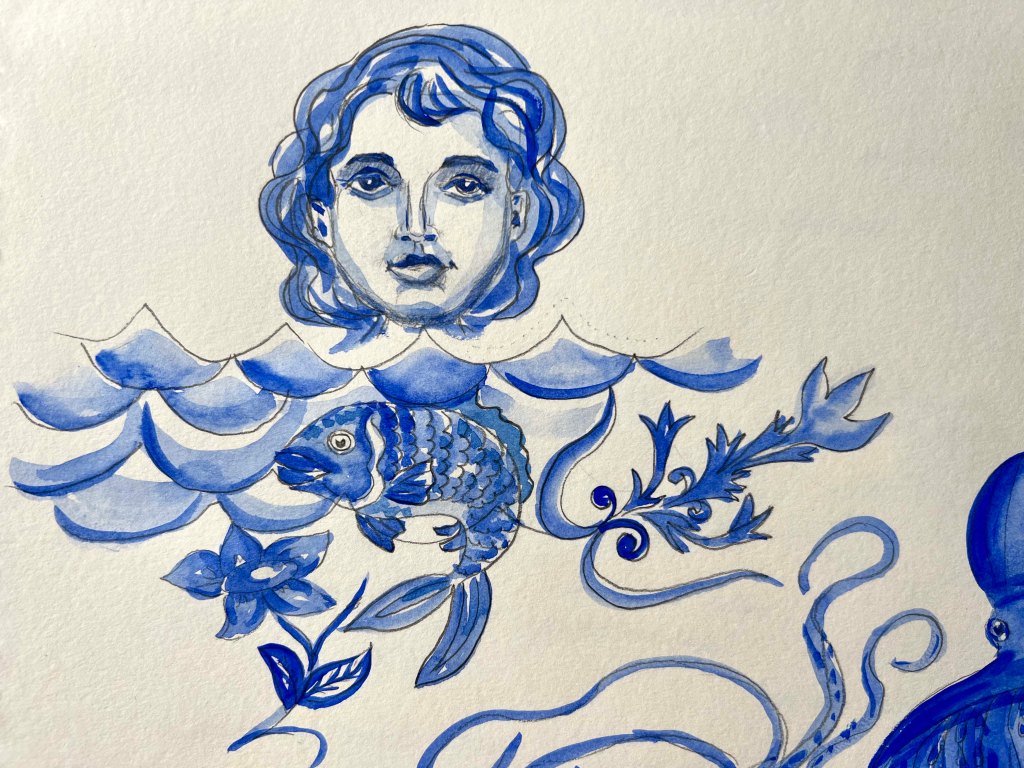
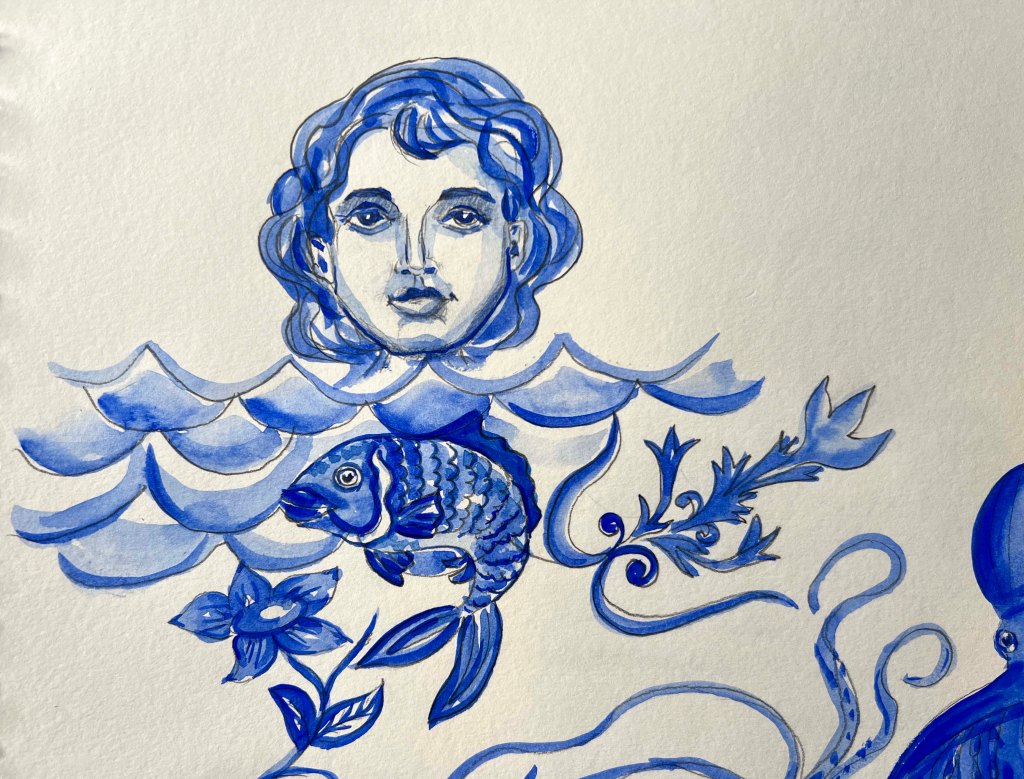
Another idea I had was to create a folklore creature for the illustration, like a mermaid or King Poseidon, the king of the sea, and complement them with marine elements. I wanted the illustration to be artistic and have a feel of mystery. Also, I was thinking, shall I use only one character for the illustration, or can it be collected, and contain several elements, like sea, seaweed, mermaid and fish, or fish, sea, decorative elements? Or shall it be only a singular object? Something to think about.
At this point, I started to form the idea of the feel and style I would implement for the illustration. The first illustration will include an octopus with curly tentacles, and another illustration will evolve around folklore marine creatures, with additional marine elements.
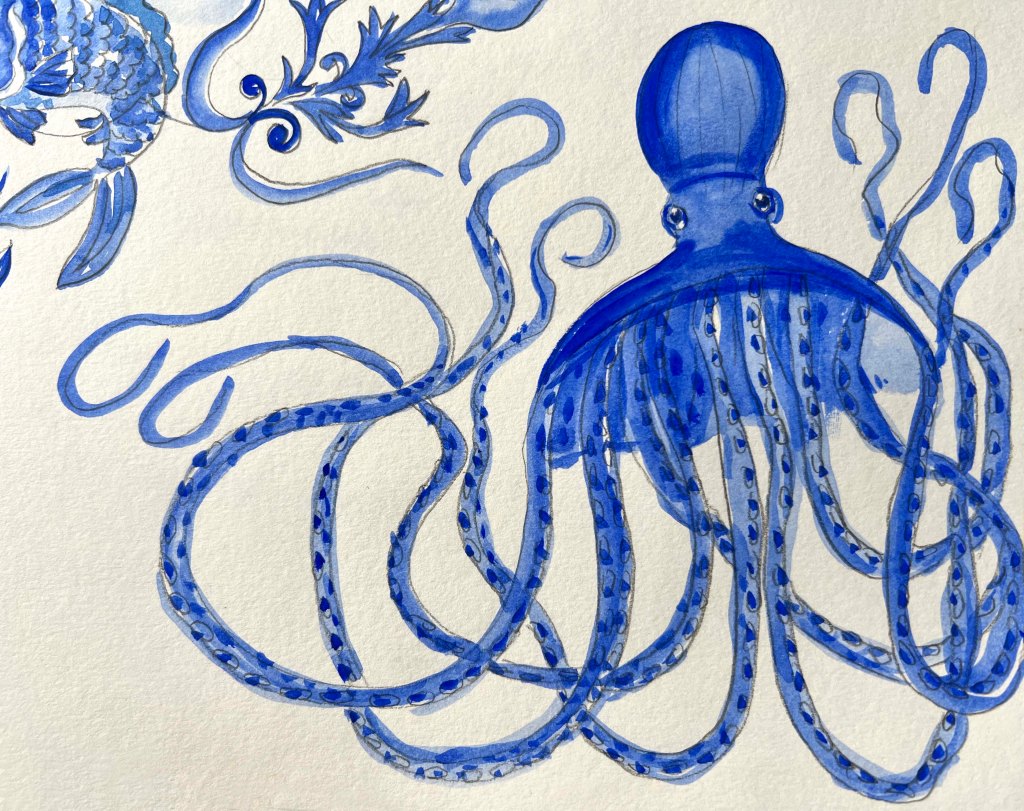
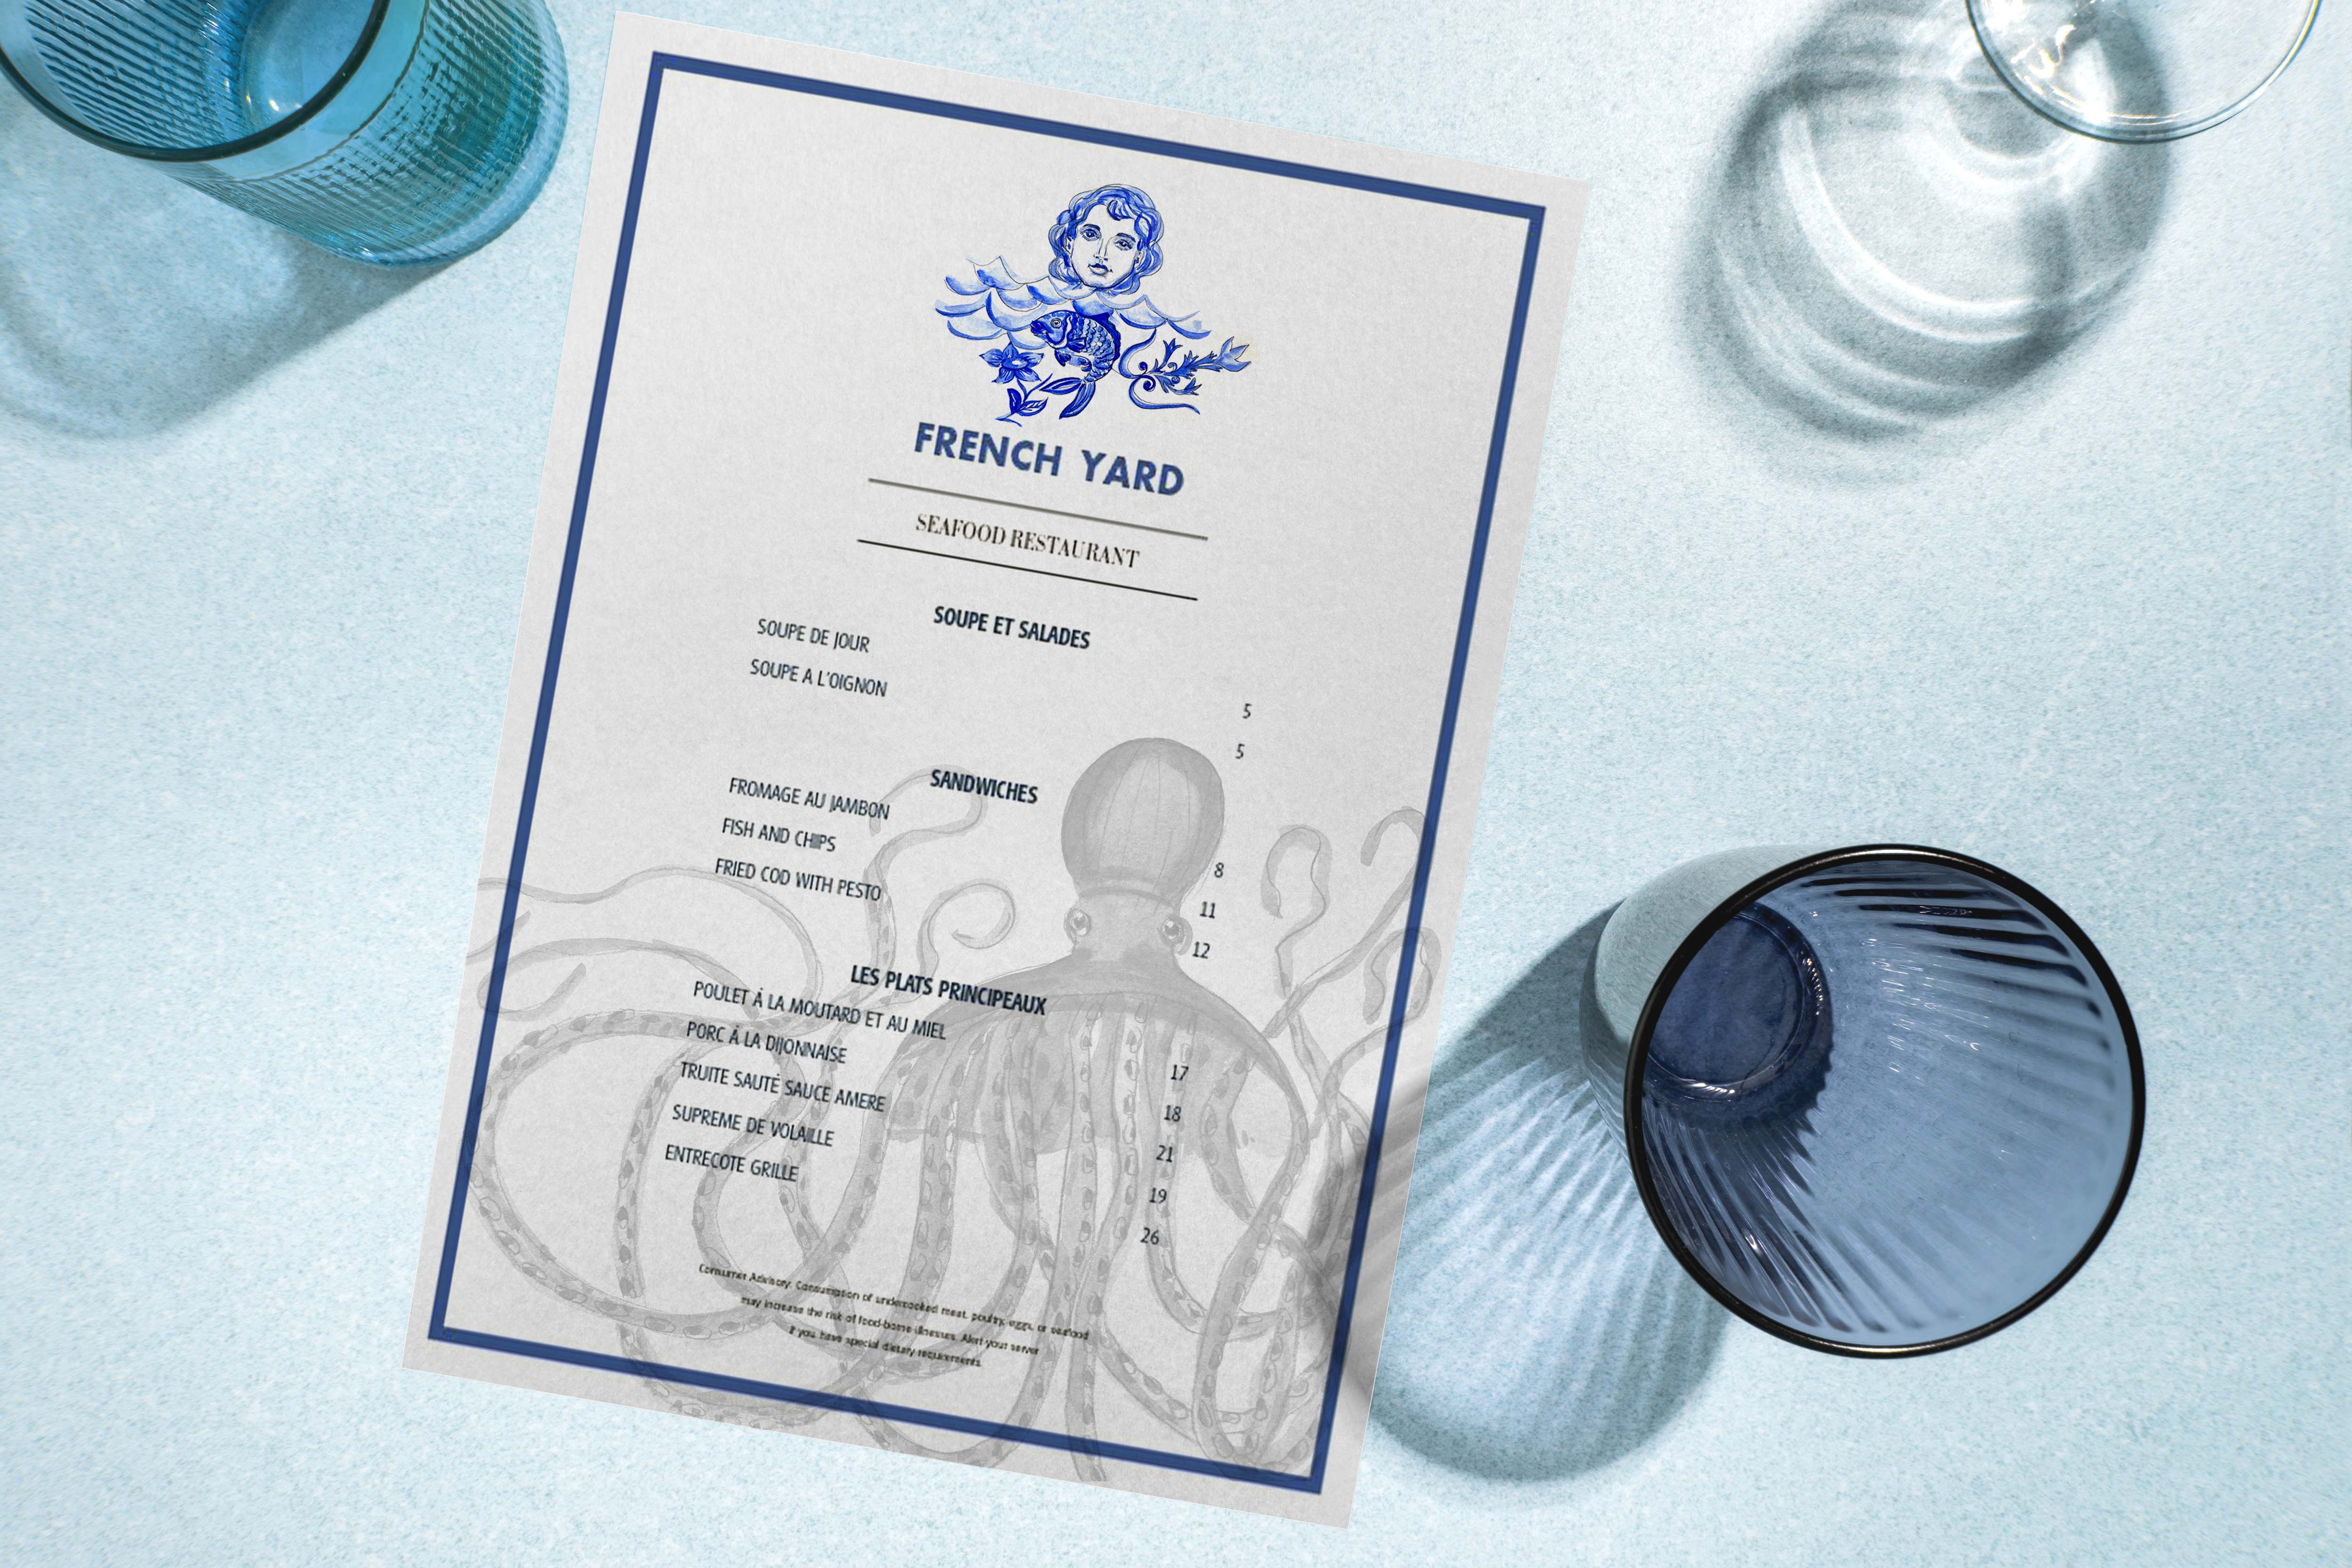
I created this octopus in the bright ultramarine blue colour, which would bring some freshness to the style of the restaurant. The advantage of this illustration is that it could be used on a wall, menu, transport, and business card, quite a versatile image.
For another illustration, I tried several options, with decorative fish with waves, and with a girl mermaid. The unique feature of the illustration is that it has additional elements borrowed from classical Italian designs, with plaster-like plant shapes and flowers. I think it creates an original assemble for the marine theme, and it supports the elegance of the design.
For the final touch, I tend to try my illustrations for the mockup, it helped to see how the image would look like in real life, on a smaller scale 40×40 mm, or like a printed version. The illustration itself turned out to be quite complex, but by adding some contrast I could highlight some main details that could create a logo feel. I tried both illustrations for the menu card design, and to place it on the car. I loved how those images worked together, the octopus and mermaid creature looked like a part of the one set, and those characters can be a running theme for several locations within the restaurant. I left both illustrations as a final choice, as I believe the image of the mermaid with fish and the image of the octopus could work as a part of the set. They are made in similar styles and colour combinations, and they have similar themes. I chose the image of the mermaid as a logo version where the octopus is played as a background image.
Overall, I truly enjoyed this exercise. As being illustrator with a graphic design background, it brings me utter pleasure to create unique illustrations and convey them into usable designs. That’s my unique experience, where handmade illustrations become digital objects, which is always valuable. I’m happy that I could experiment and do research on the fish restaurant theme, which is quite versatile nowadays. I think those illustrations have a good potential appeal to adults, they are made in an elegant style and also they meet the brief. I believe I created designs, that would attract the audience and could be approved by a customer.
For this exercise, I was asked to produce a cover illustration for a natural history book for children (ages 7–11) entitled Animals from Around the World. The image is to be used as a full-colour front jacket to encourage children to choose this book from the library shelf.
I should draw up at least three ideas as coloured client visuals. The final pieces should include information such as the size of the book cover, format and the name of the book’s position.
I started the exercises with a mindmap and analysis of the significant points for the book cover. As the target audience is children, illustrations should be bright, bold, and eye-catching, also, they can be done both in natural ways and more cartoony style, as soon as they are recognisable animals.
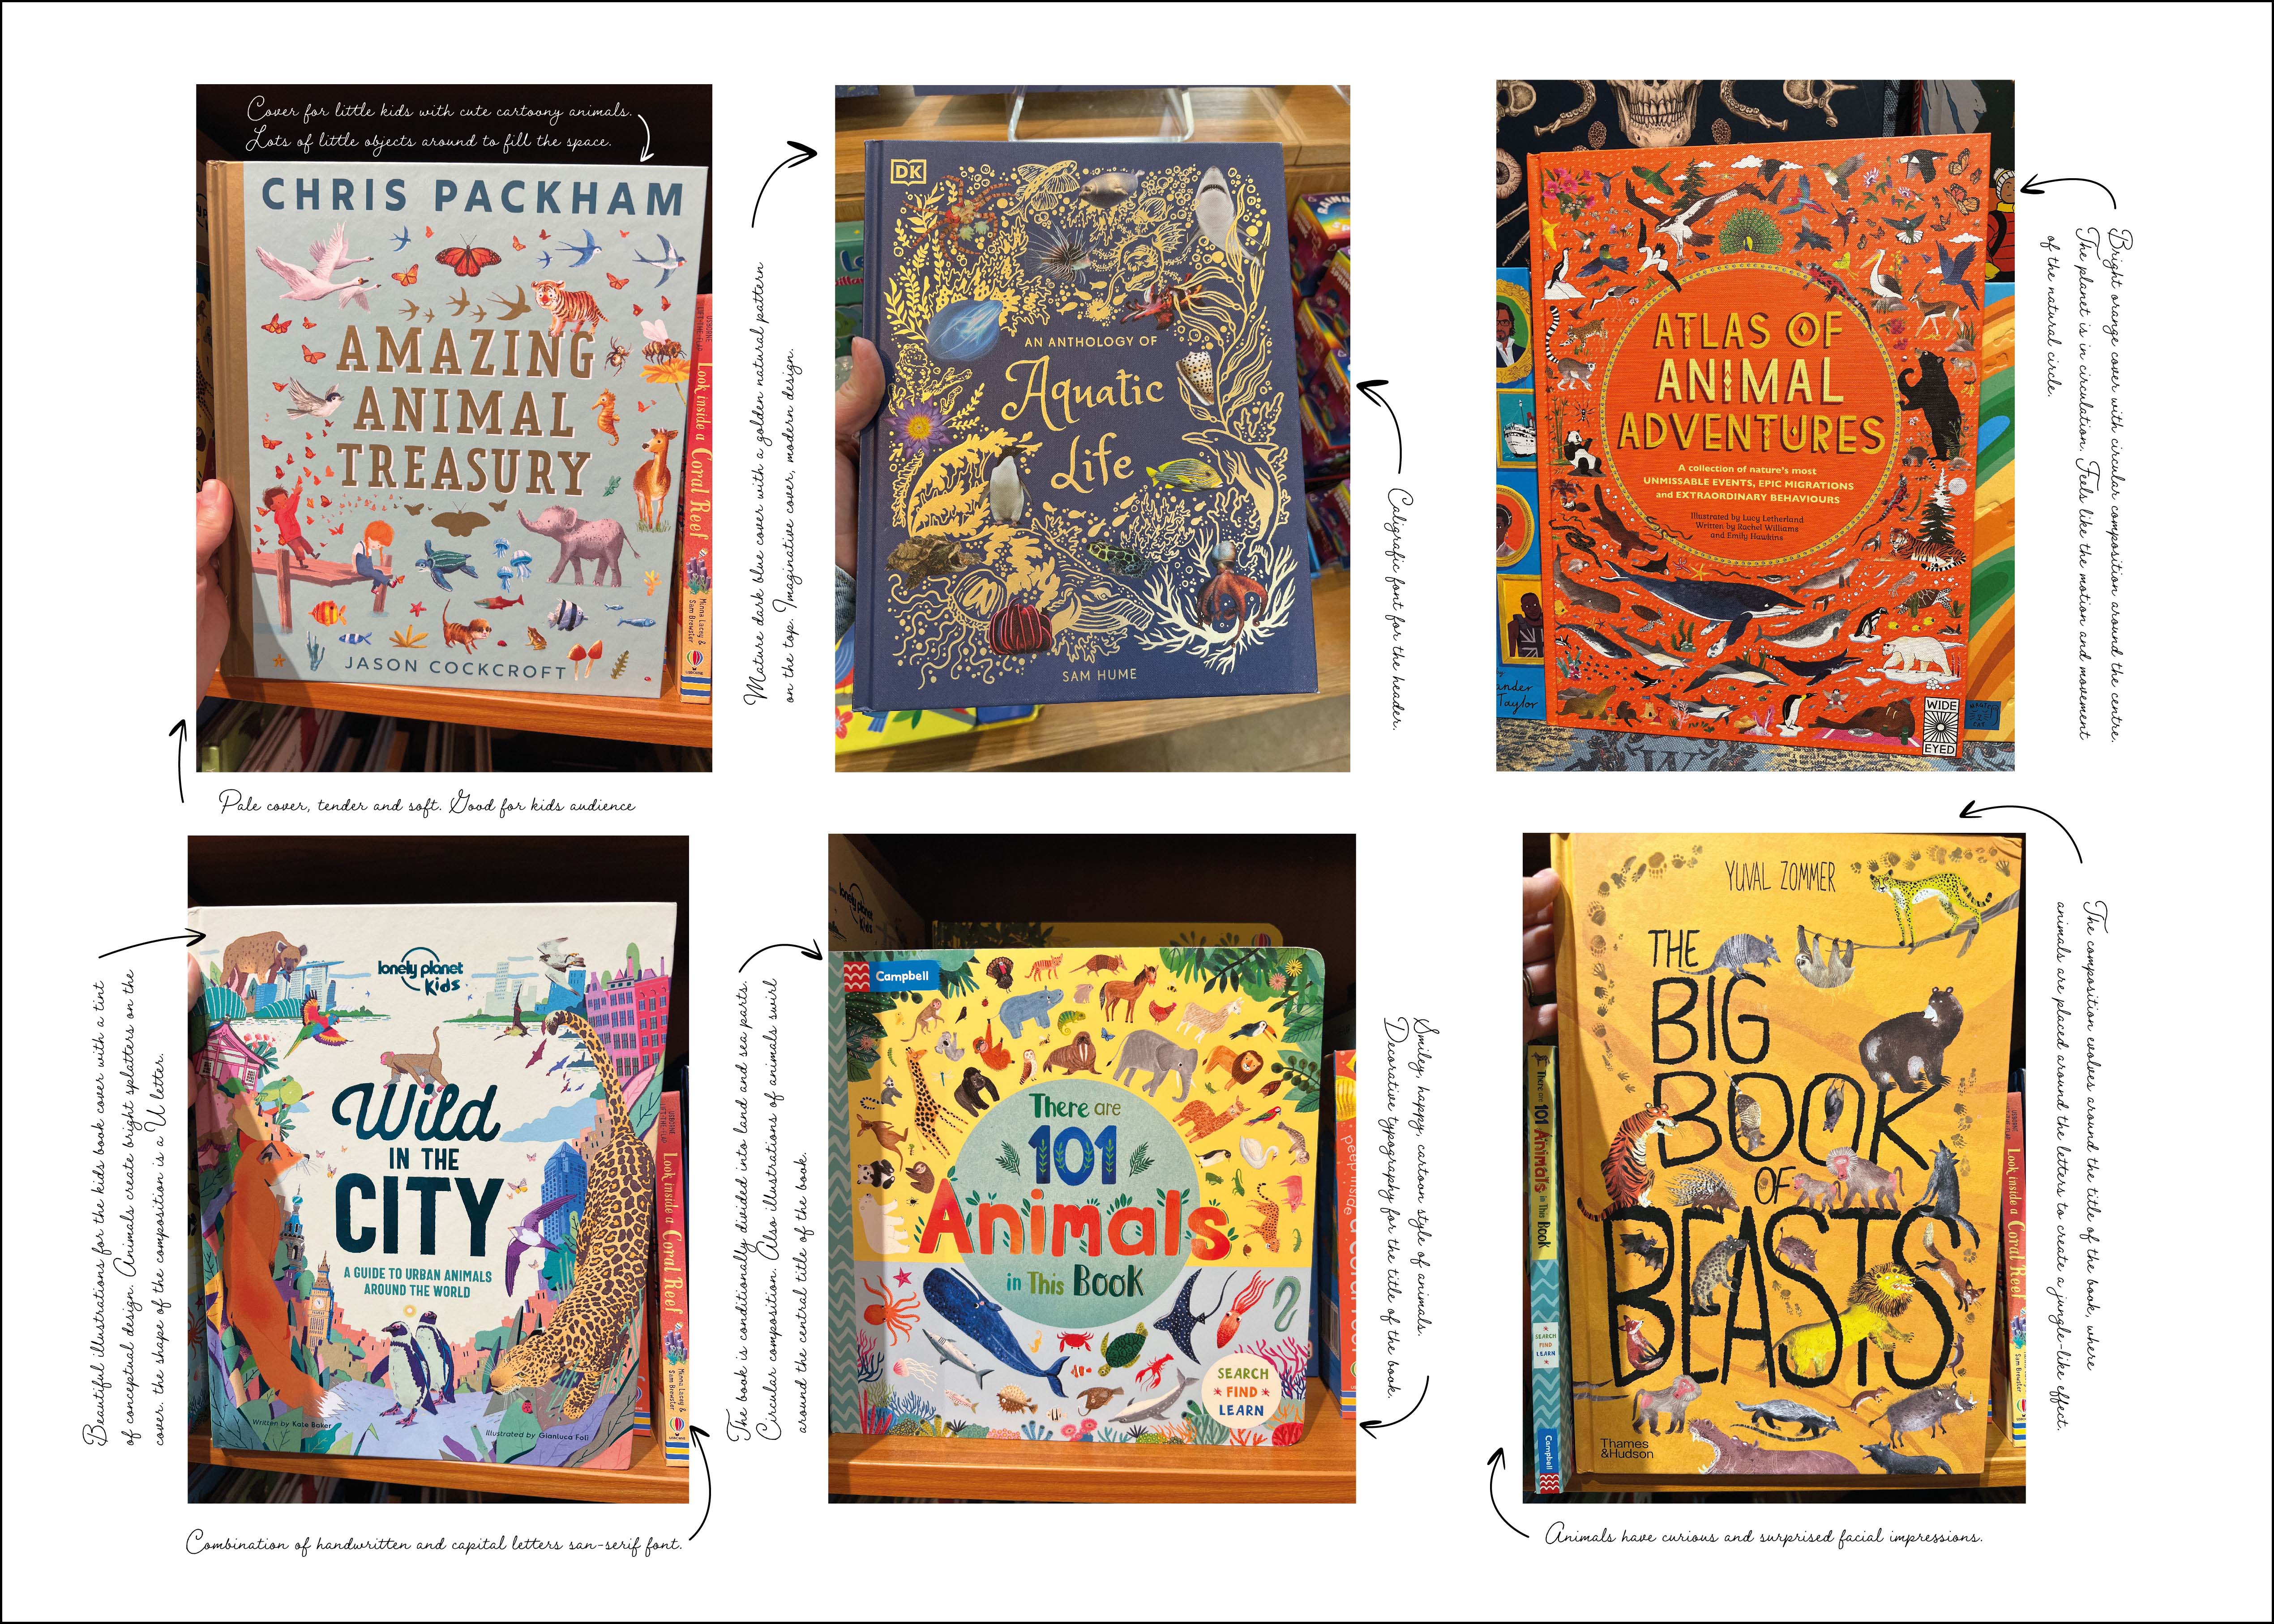
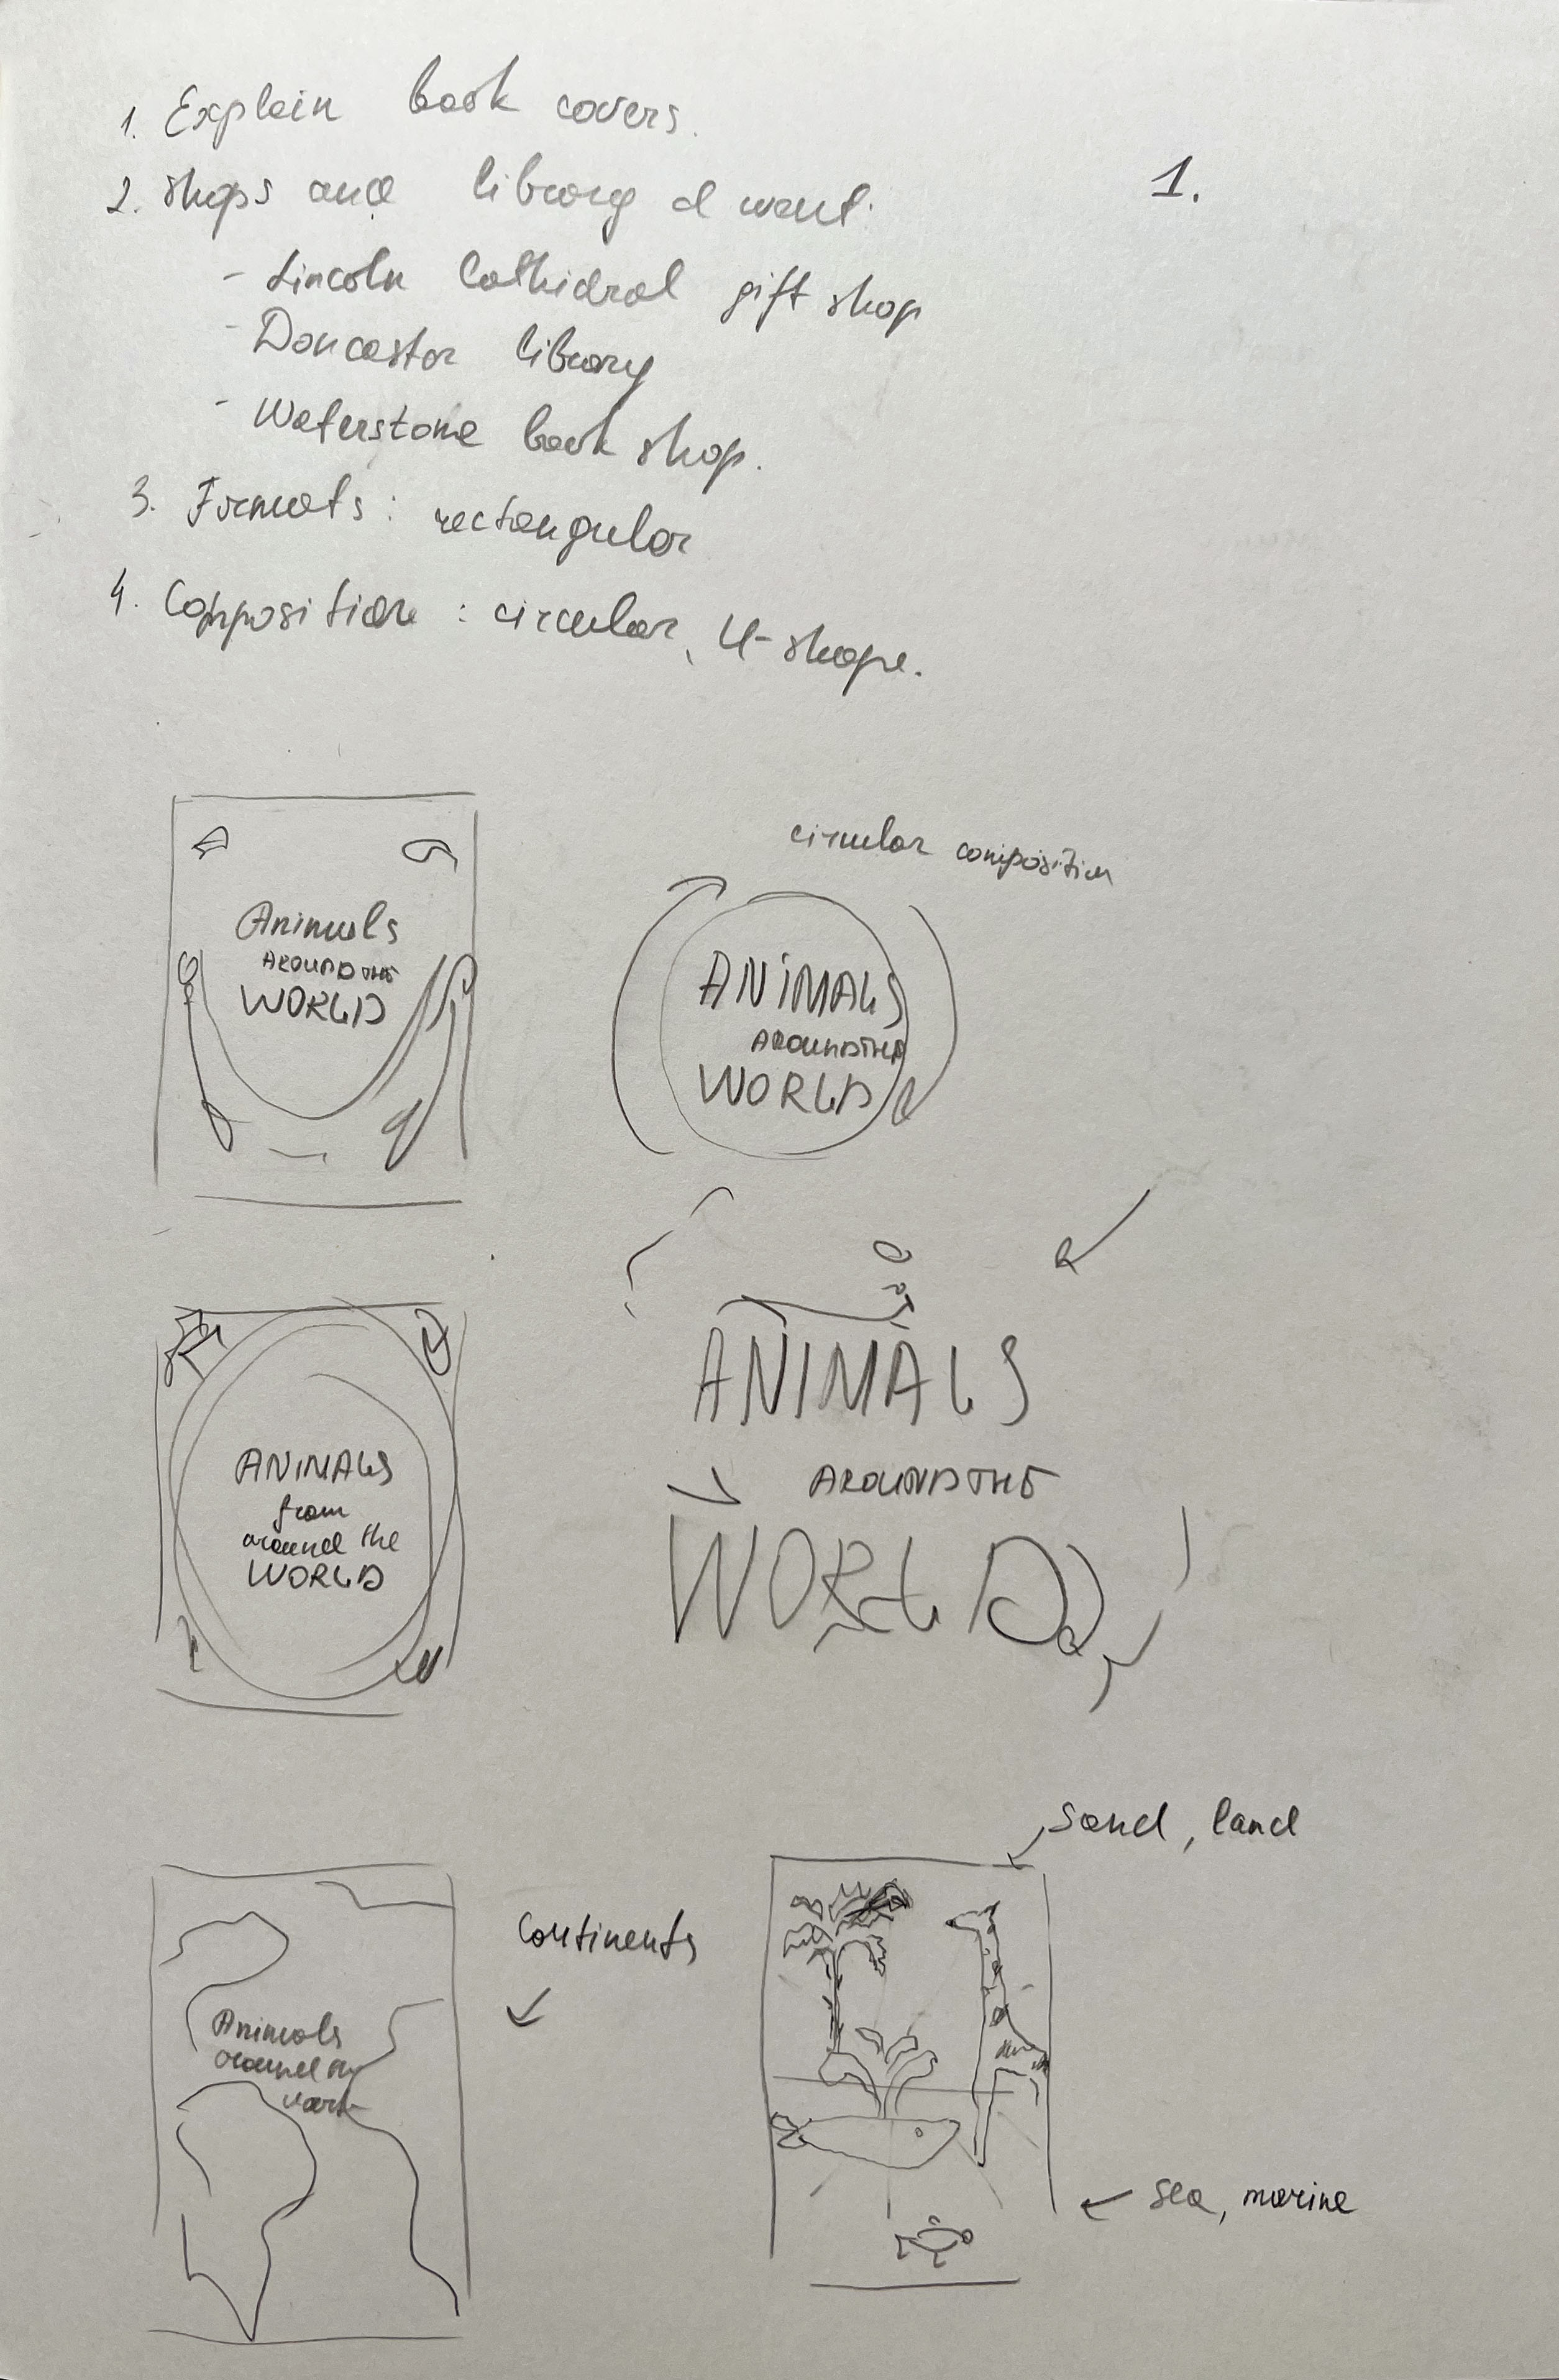
Designing book covers for kids is quite an interesting field to learn about, as they attract both audiences, adults, who actually buy them, and kids, who enjoy reading those books. Throughout time, children’s books evolved in style and design. I was curious to see what the modern tendencies for the book covers, as the brief specifically mentioned to attract the modern audience. My best bet was to go to the bookshops to do some research. I went to a few locations for my research, Doncaster Children’s Library, Lincoln Cathedral gift shop, and Waterstones. I took some pictures of book covers designed to learn about animals, wildlife and their natural environment.
From my research, I could see that most book covers were filled with numerous wildlife representatives, big and little creatures from around the world. Composition wise they were arranged in a circular spectrum, to demonstrate the dynamic and movement of the natural world. Some of the covers had animals placed around the book’s name, similar to the jungle trees, and some covers were divided into land and water, to show the separation between two worlds, maritime and land.
Most modern book covers are bright and eye-catching, they attract the reader with colour combination, and the task is to impress potential buyers with the variety of information that can be found inside the book. I quite like the book Aquatic Life, which looks the most modern to me, it has a dark blue cover and a beautiful golden pattern, which creates that needed contrast. The cover itself does not have many animals around, but the message of the book is clear. The rest of the book covers were busy with animals. I loved the book cover which was divided into yellow and blue colours, as earth and the ocean, and the style of the animals was cartoon, playful, but still recognisable for kids. Quite an important feature of most book covers is the circulation of life, dynamic and circular structure. I thought that I could try to apply this principle as well.
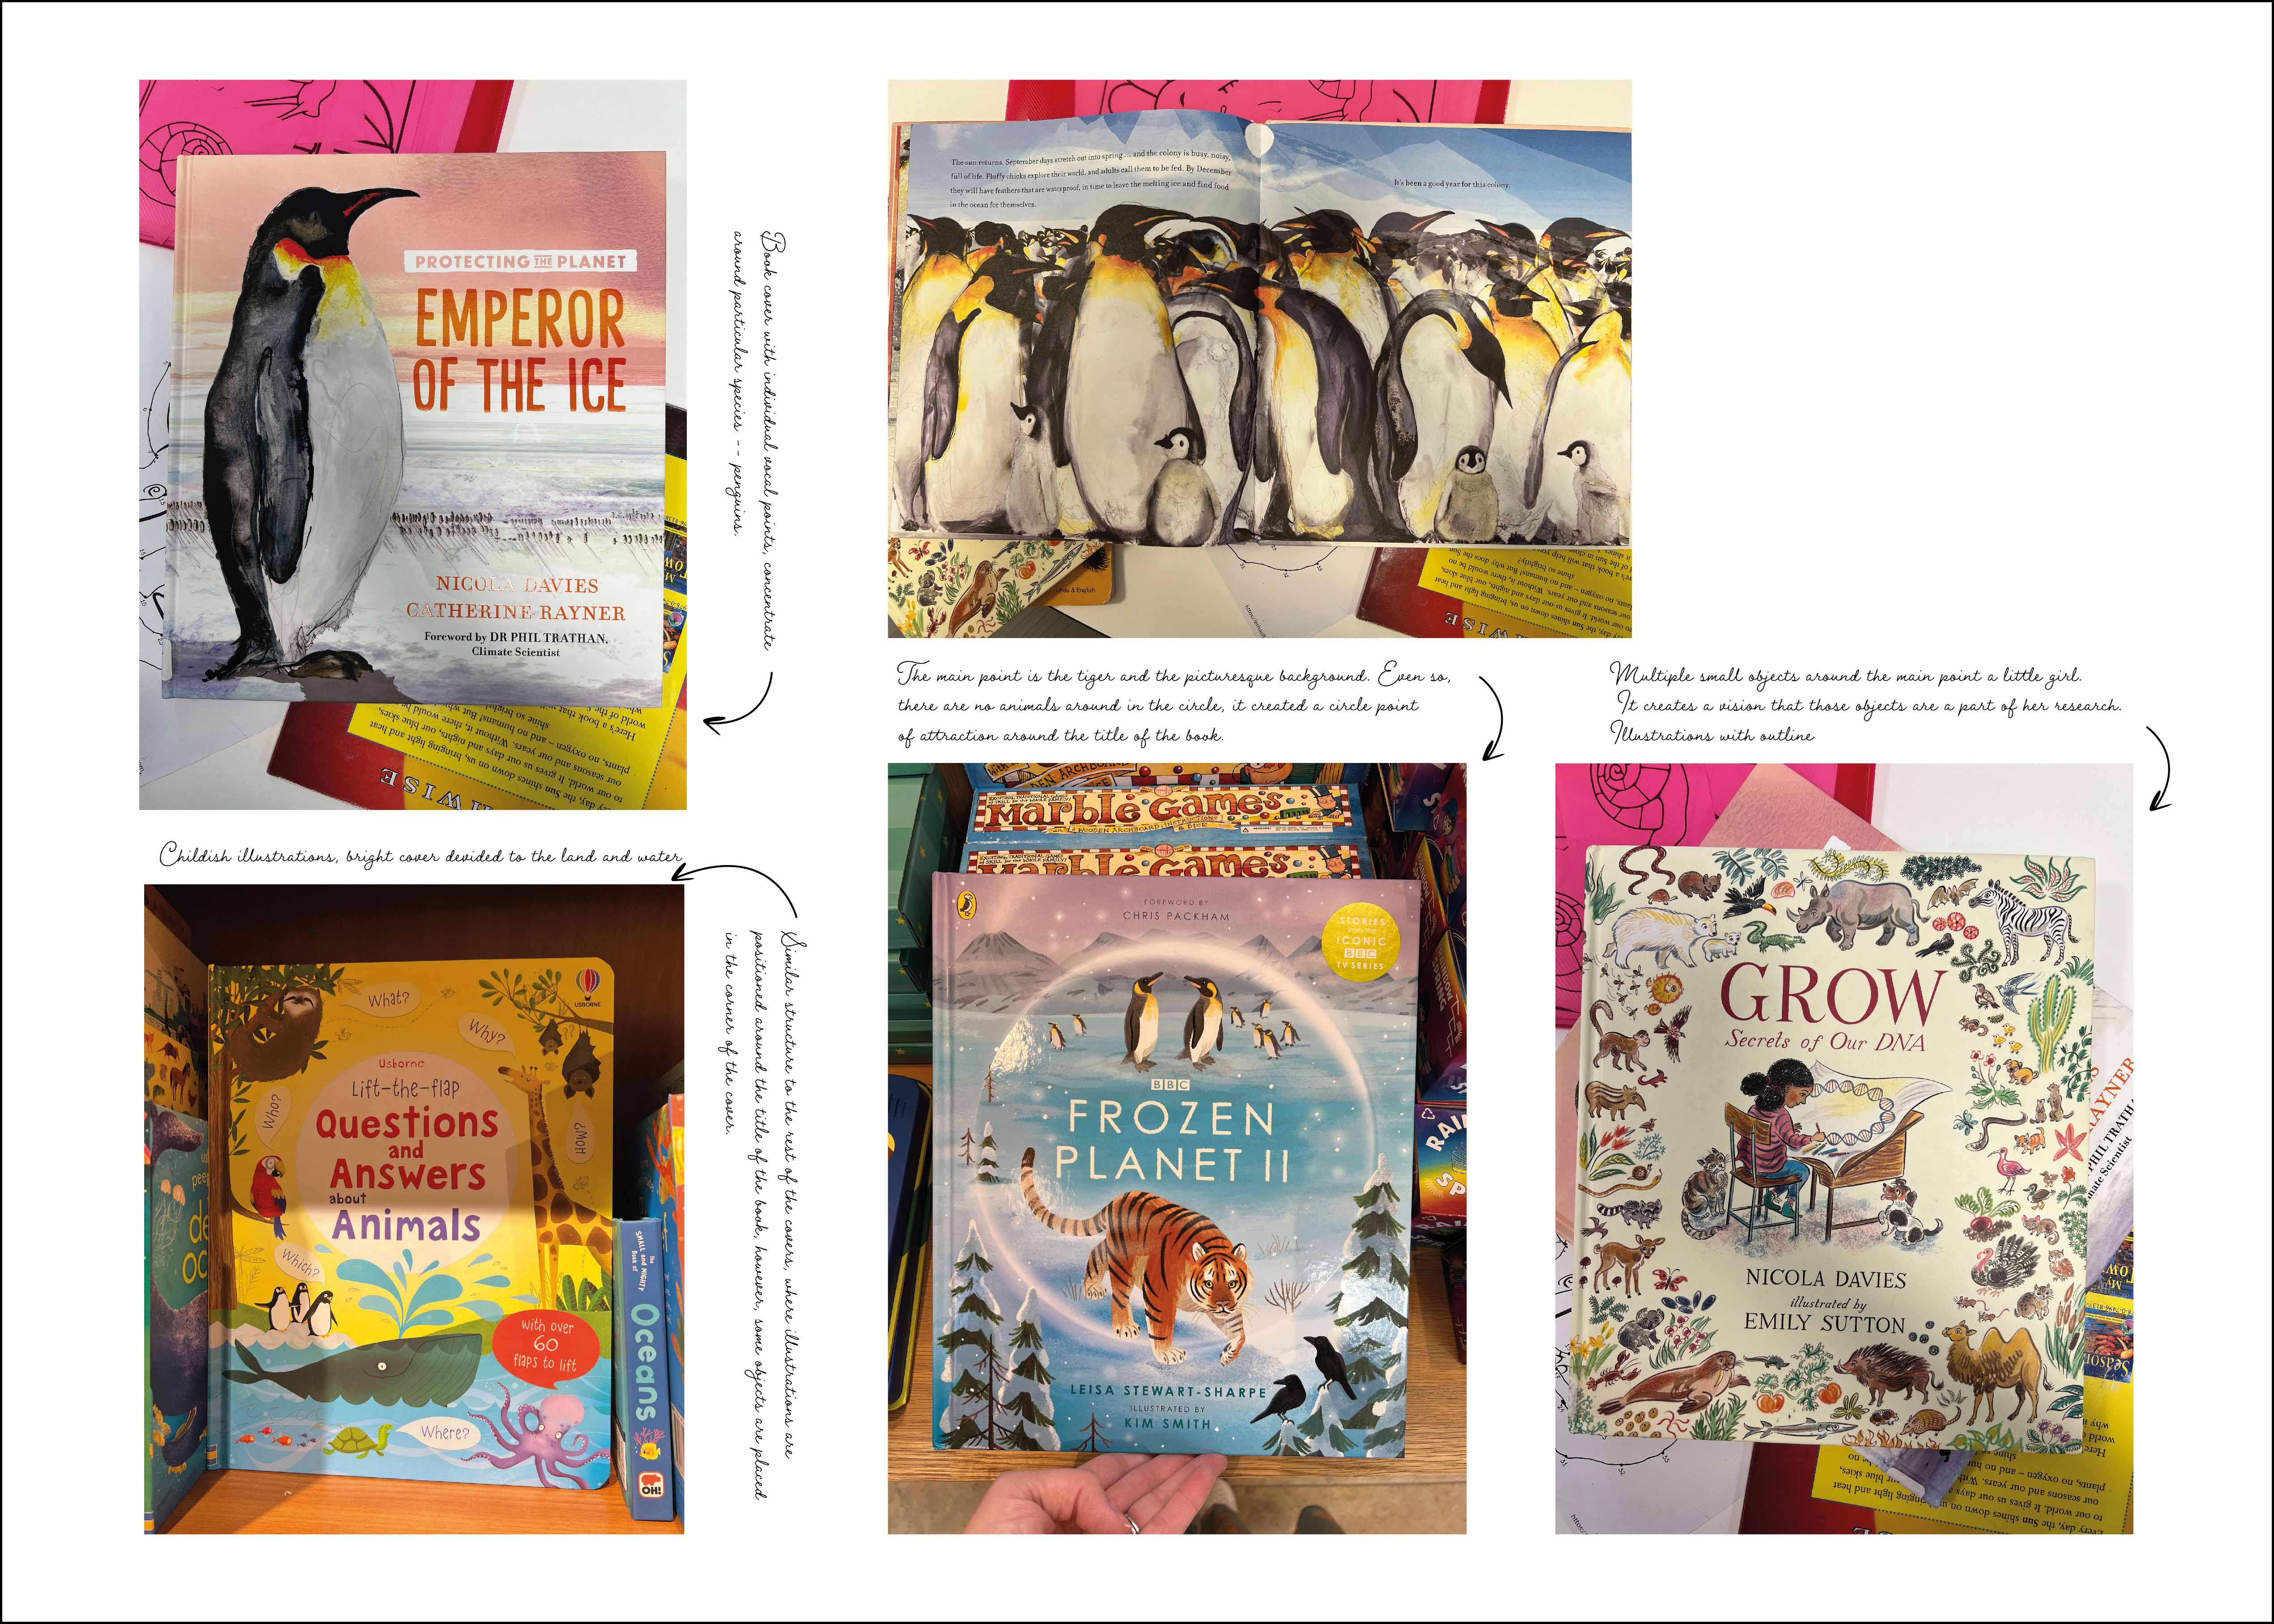
A couple of book covers slightly different to the style I was looking for, Emperor of the Ice, and Frozen Planet, which had only a couple of animals mentioned. It is an excellent example of a modern book cover. The good thing about those covers is the beautiful illustrations and pleasing colour combination. As my task is to create a cover that would evolve around the word world, I can’t illustrate only one animal, otherwise, I will miss the message of animals around the world, so there should be more creatures on my cover, that’s for sure.
Also, I created a Pinterest mood board with some traditional book covers and cartoon-style animals for reference.
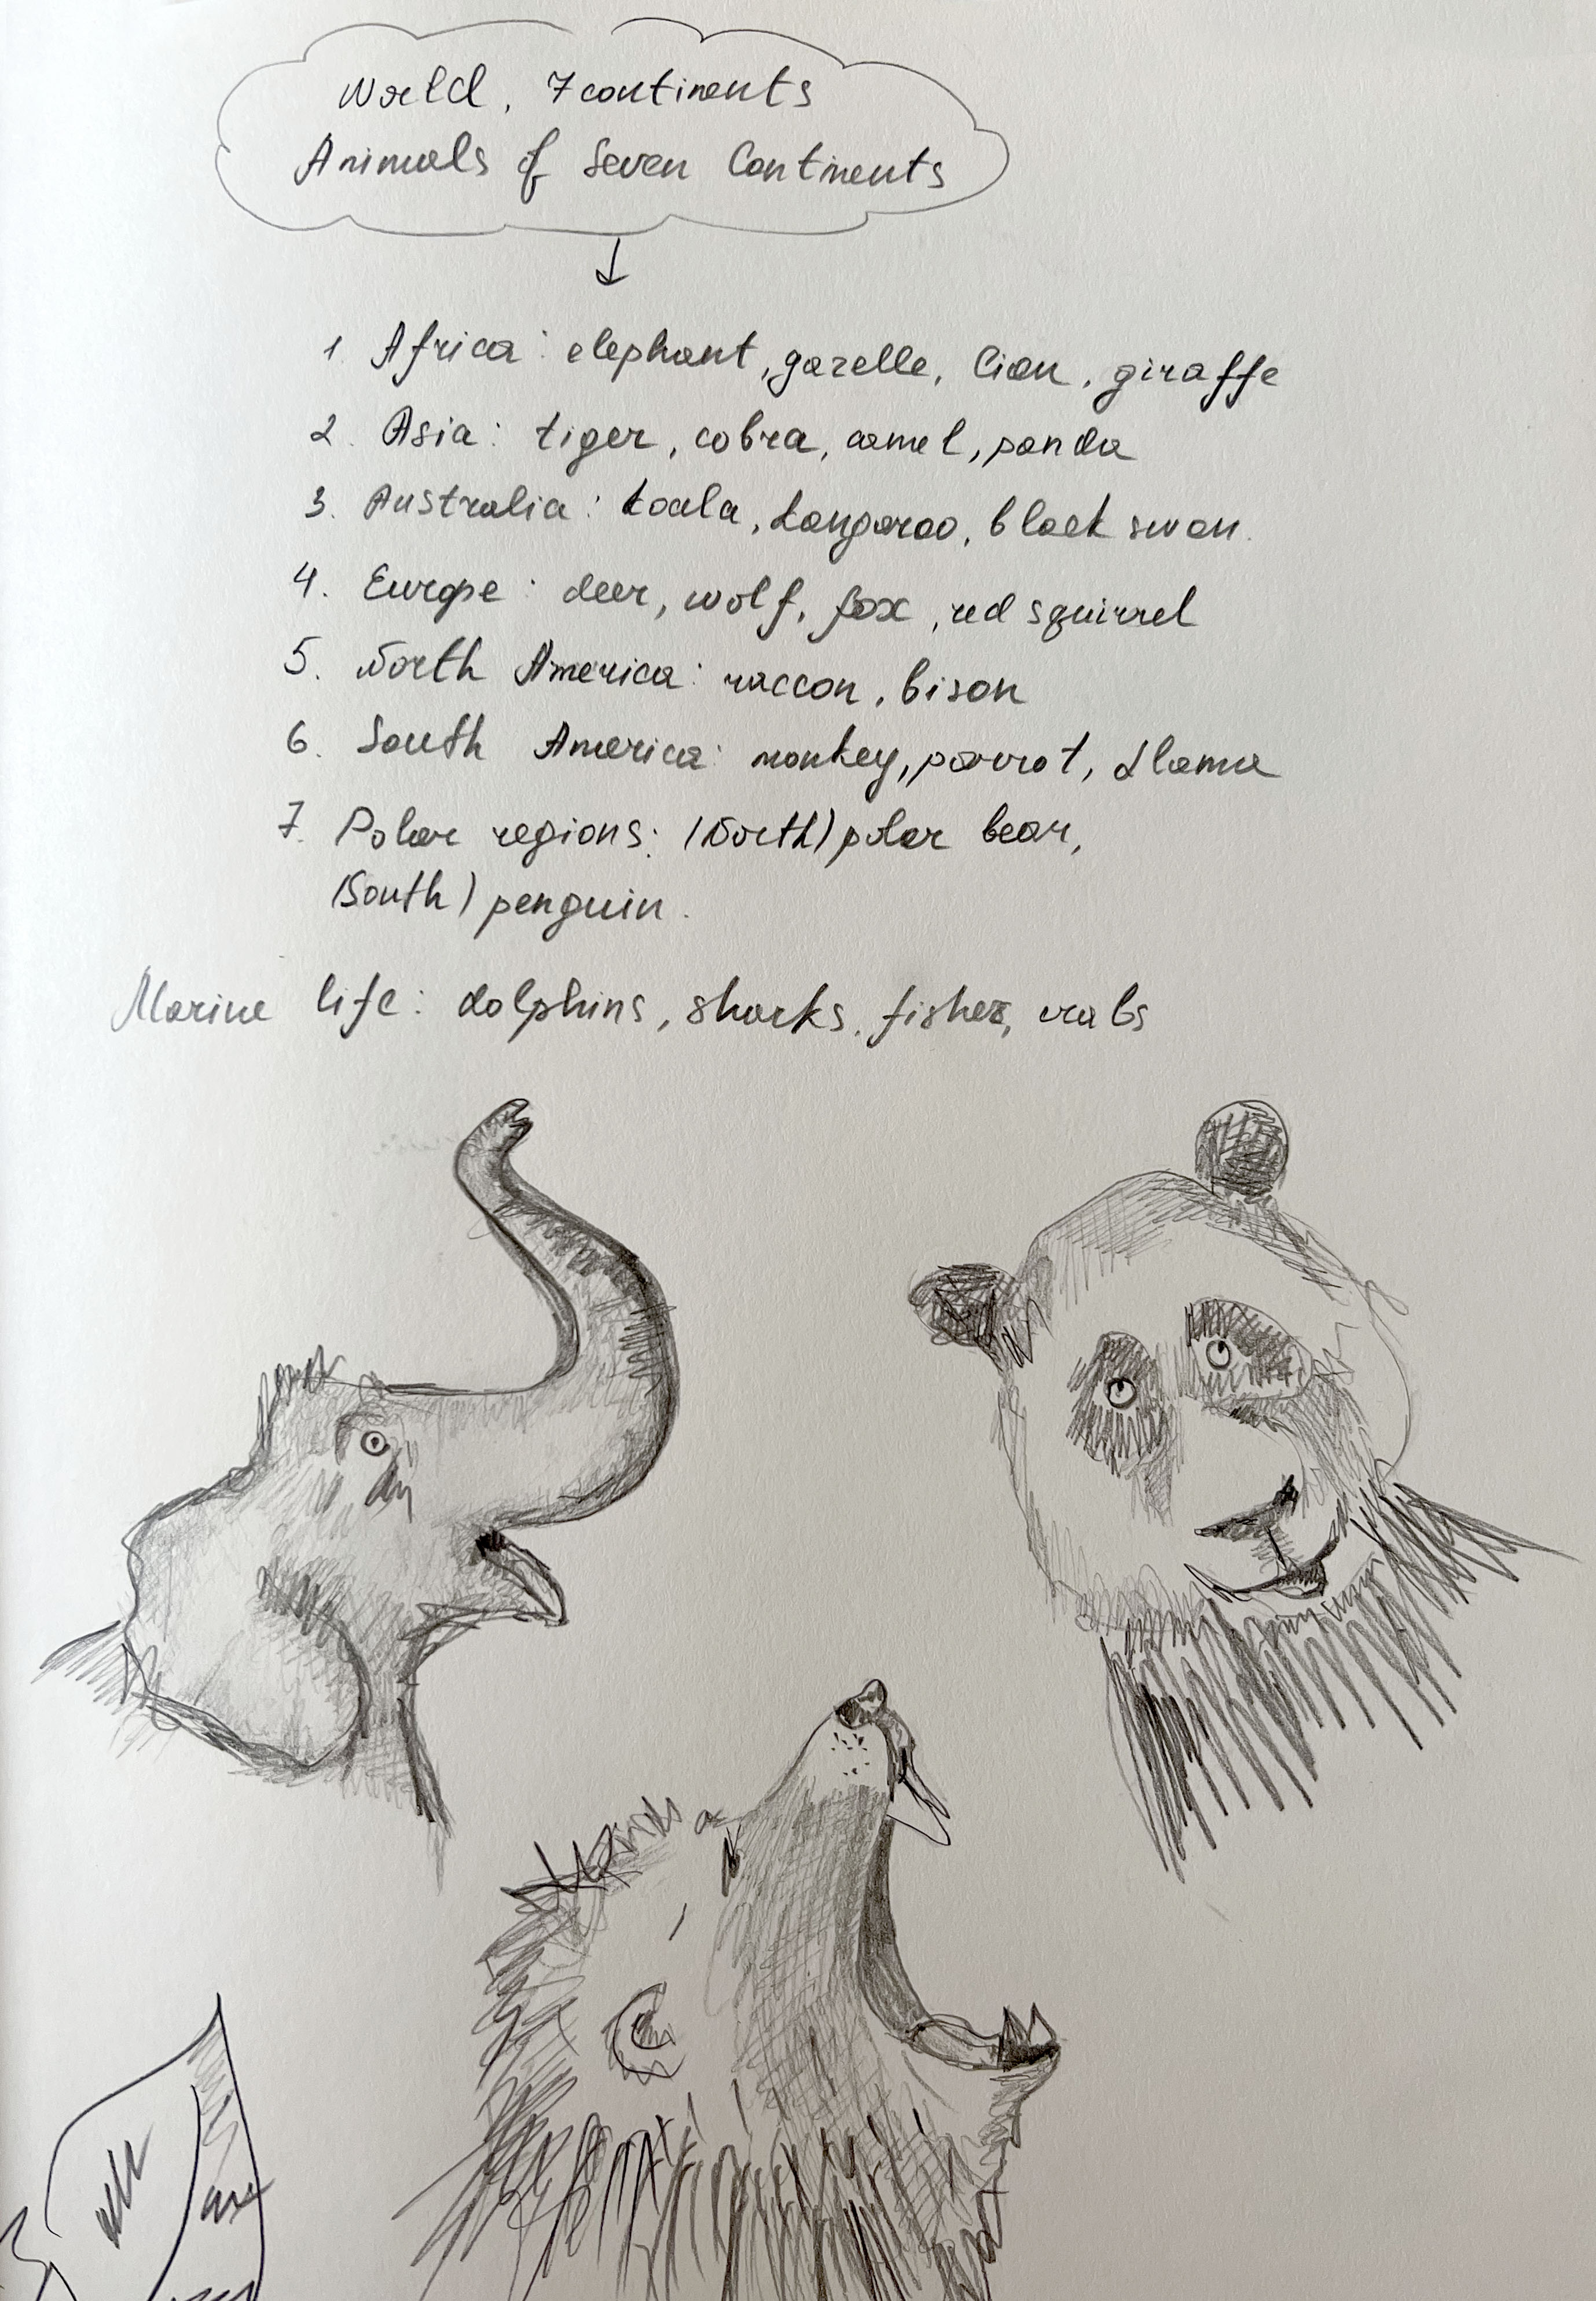
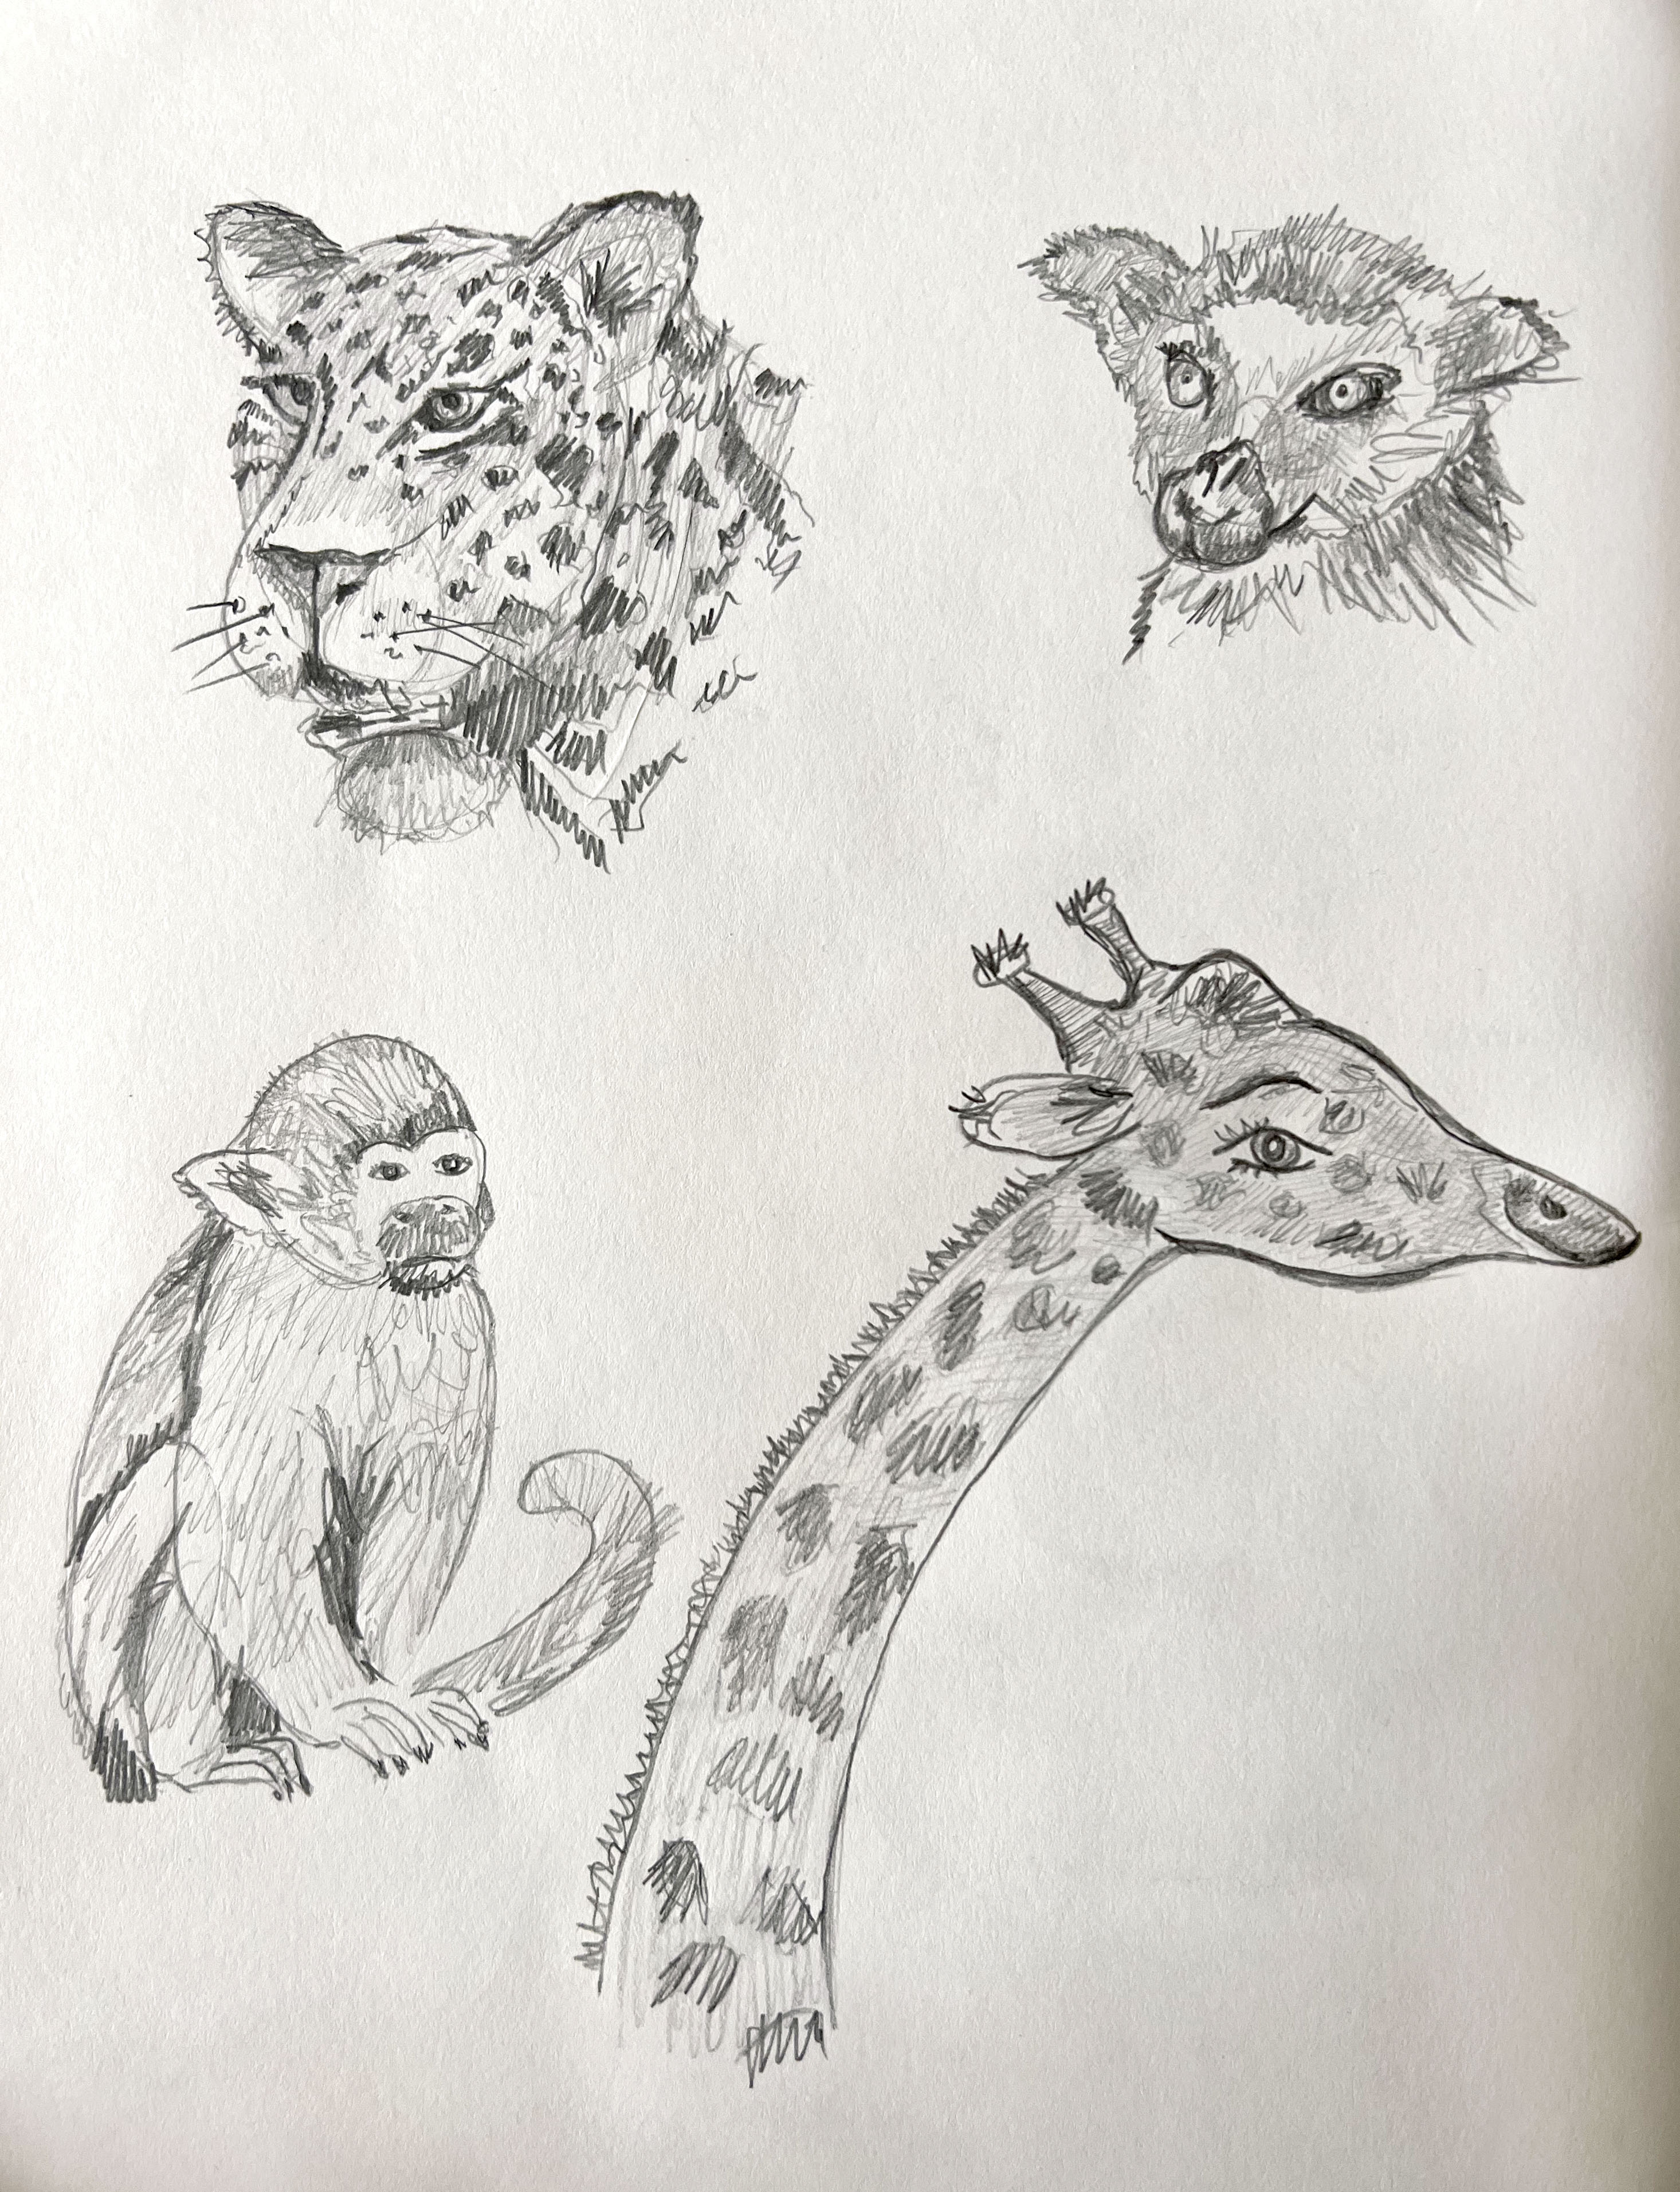
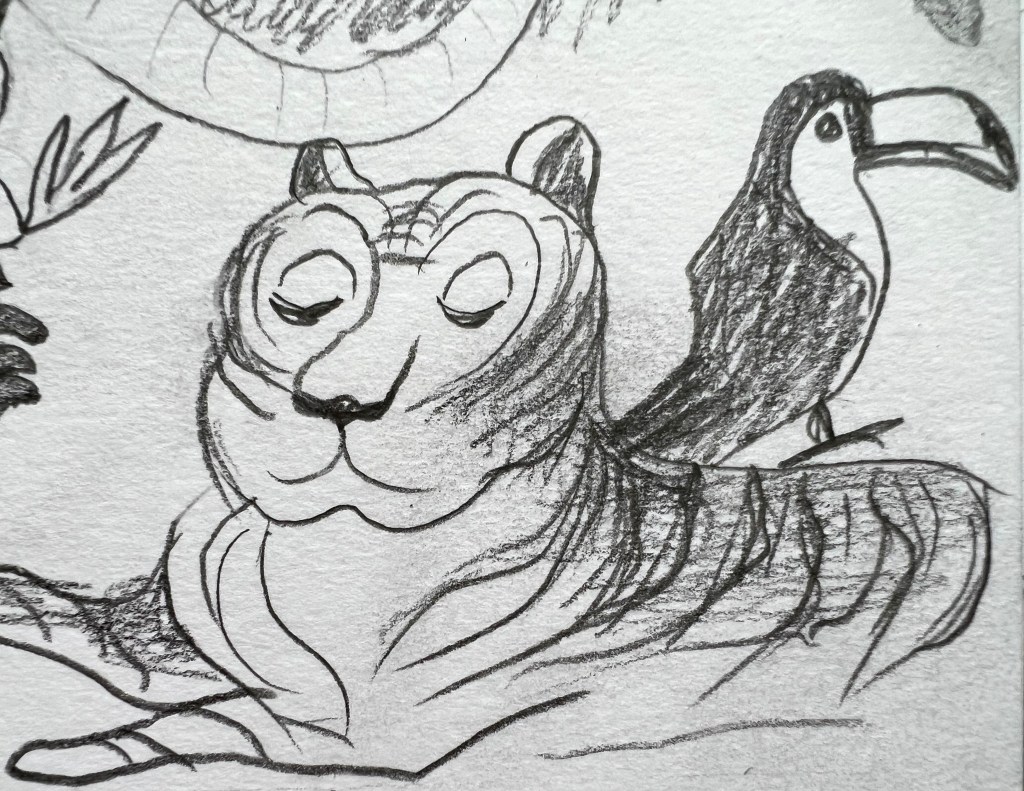
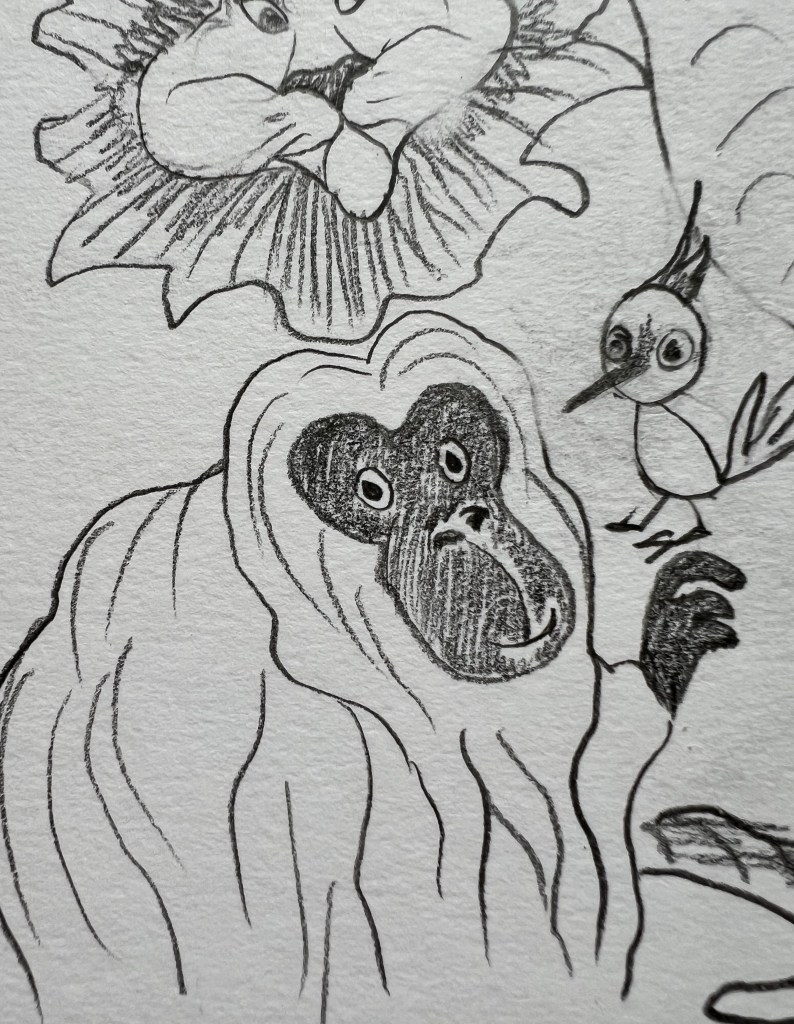
I had the idea of evolving the concept of the book to cover all continents, or the theme of animals around the globe, mentioning the most recognisable species presented in our world. For this book cover, I wanted to illustrate the most iconic animals, that could catch an eye, like tigers, monkeys, giraffes, lions, etc. At the same time, I made some quick sketches of wildlife, trying to bring them together, whether animals should be all happy and smiling, or just realistic images and how we see them in nature.
Next, I created some ideas in the sketchbook. They are brief sketches for my book covers with some technical parts that I would include in them. To support the name of the book I could also use globe, or continents for the background. My keywords for this brief are circulation, world, dynamic, globe, land and marine life.
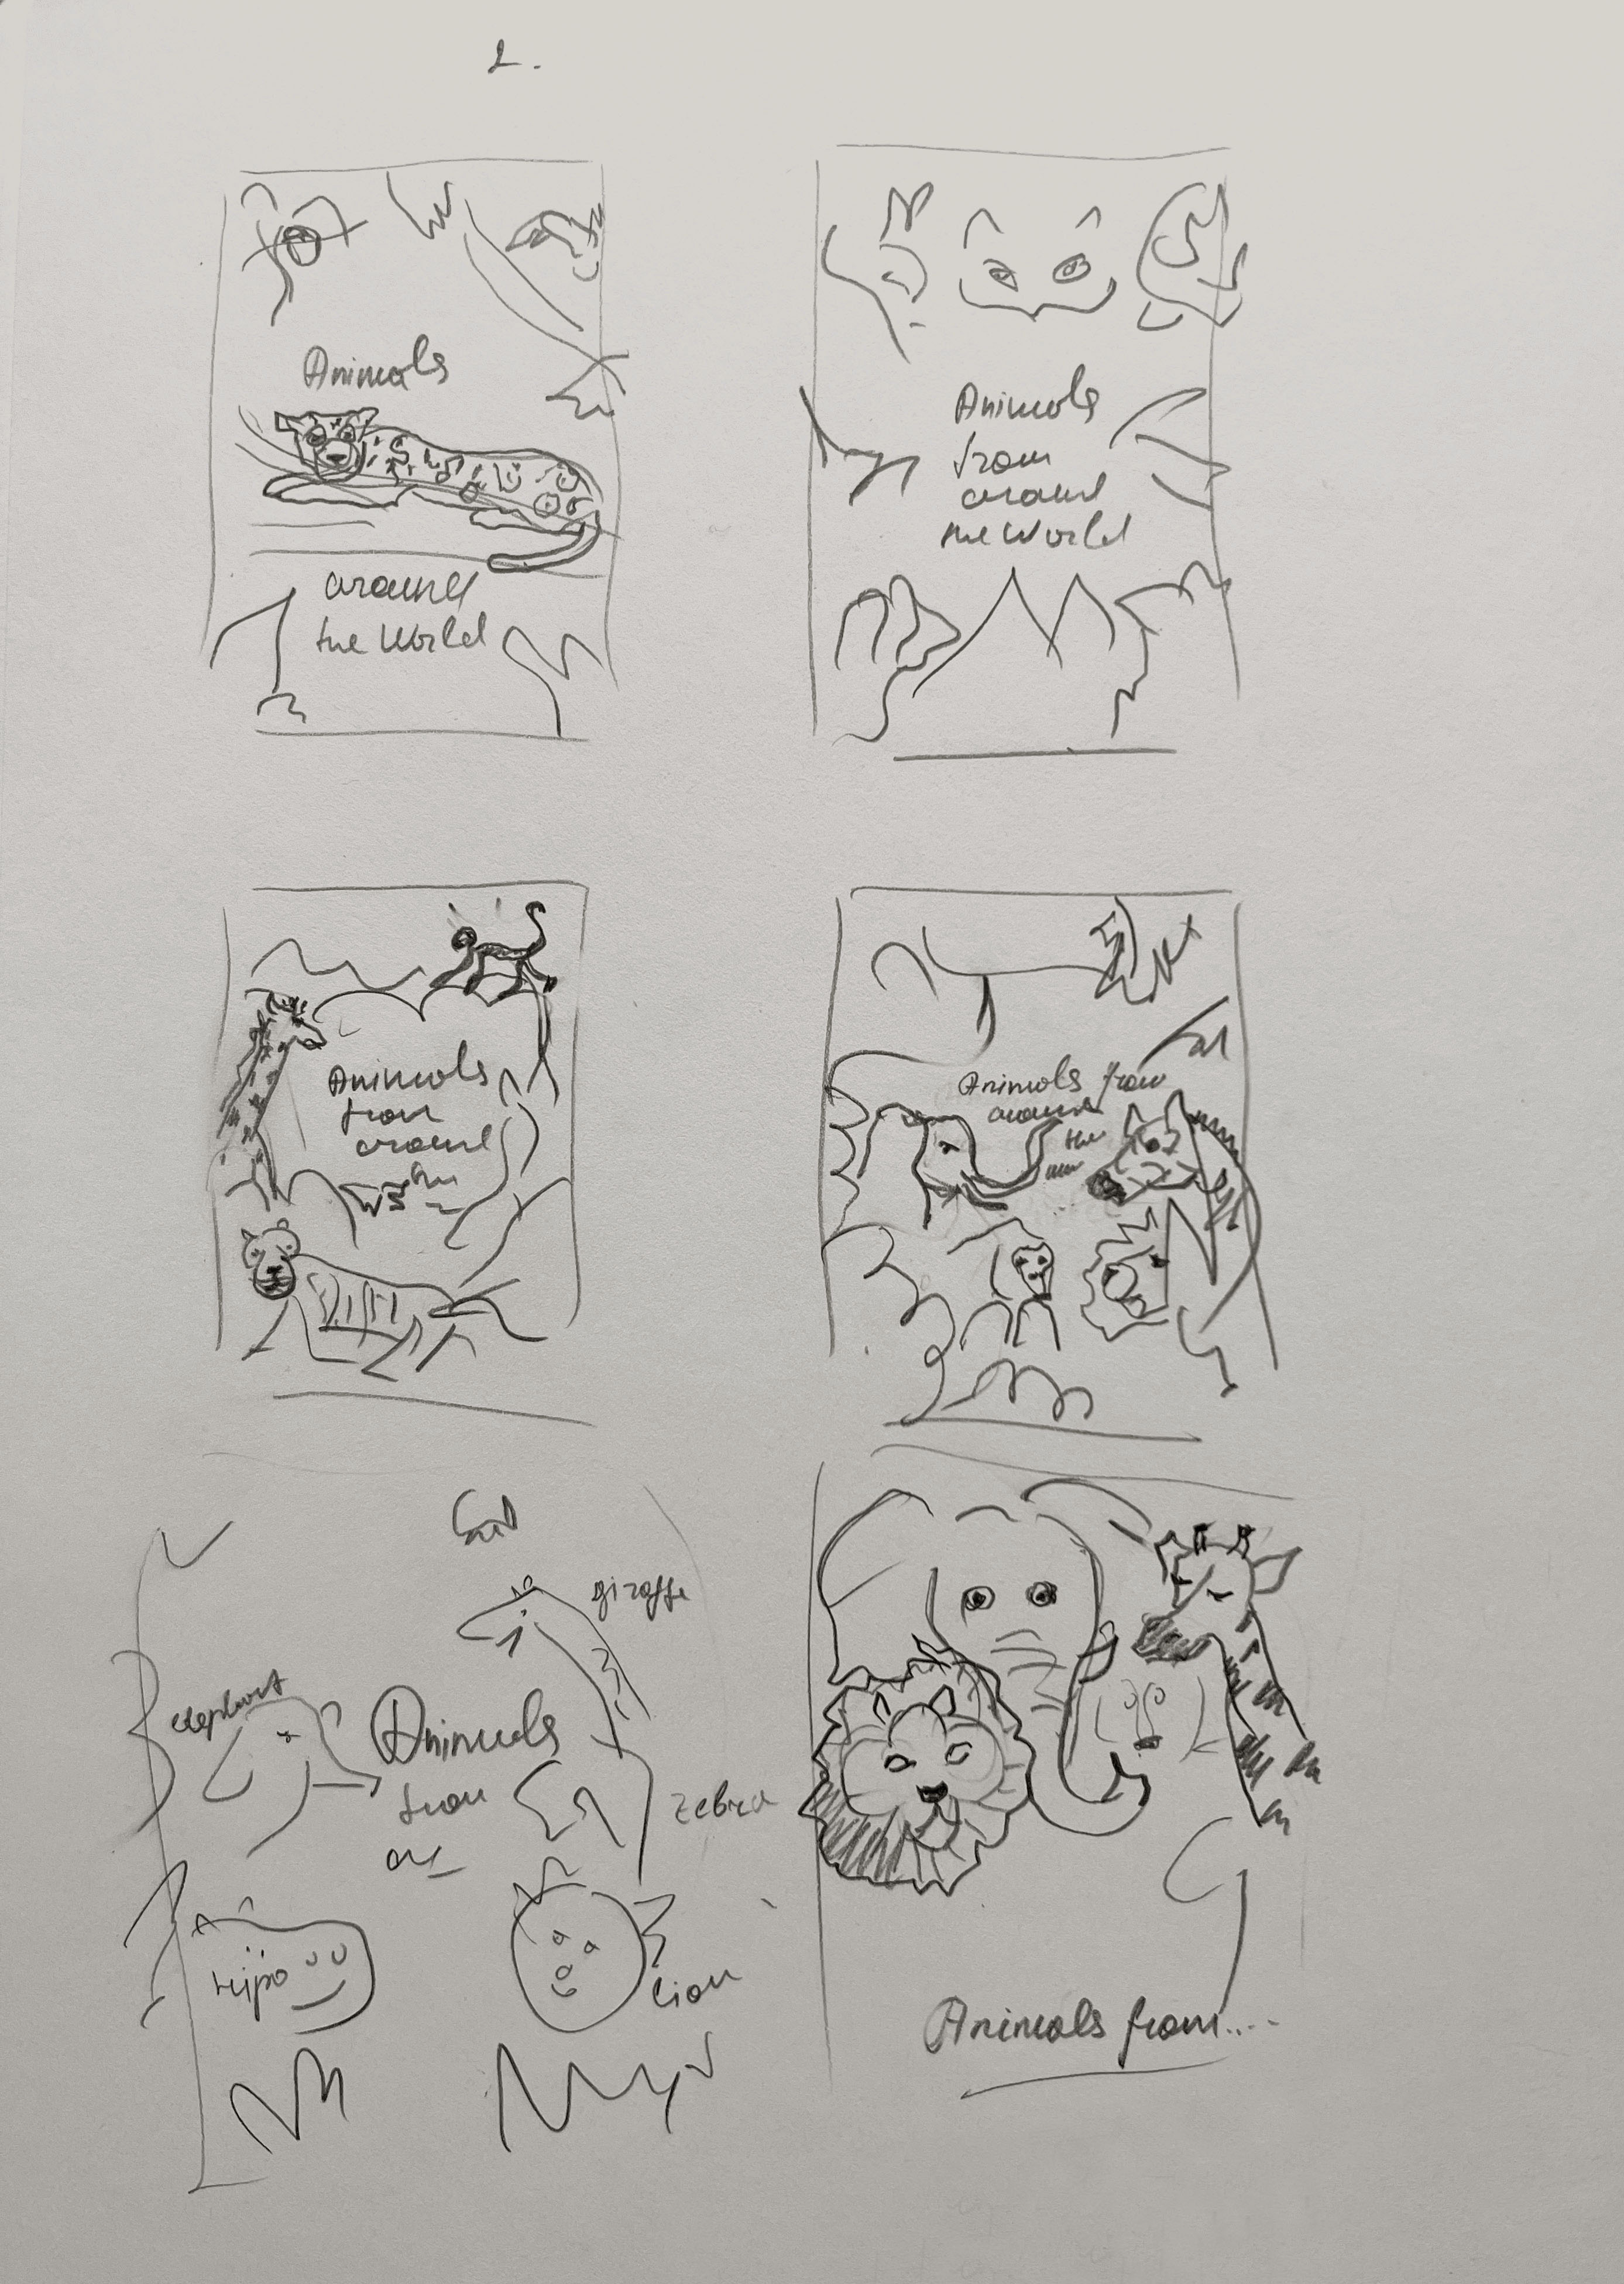
Based on my brief sketches I created some more clear drawings that I could use for the book cover. All the covers that I analysed before had multiple animals in them, mentioning practically every noticeable animal from around the world. For my book cover, I can minimise the selection of animals down to up to ten creatures. I think, here is essential to bring the idea to support the name of the book and be visual with my interpretation.
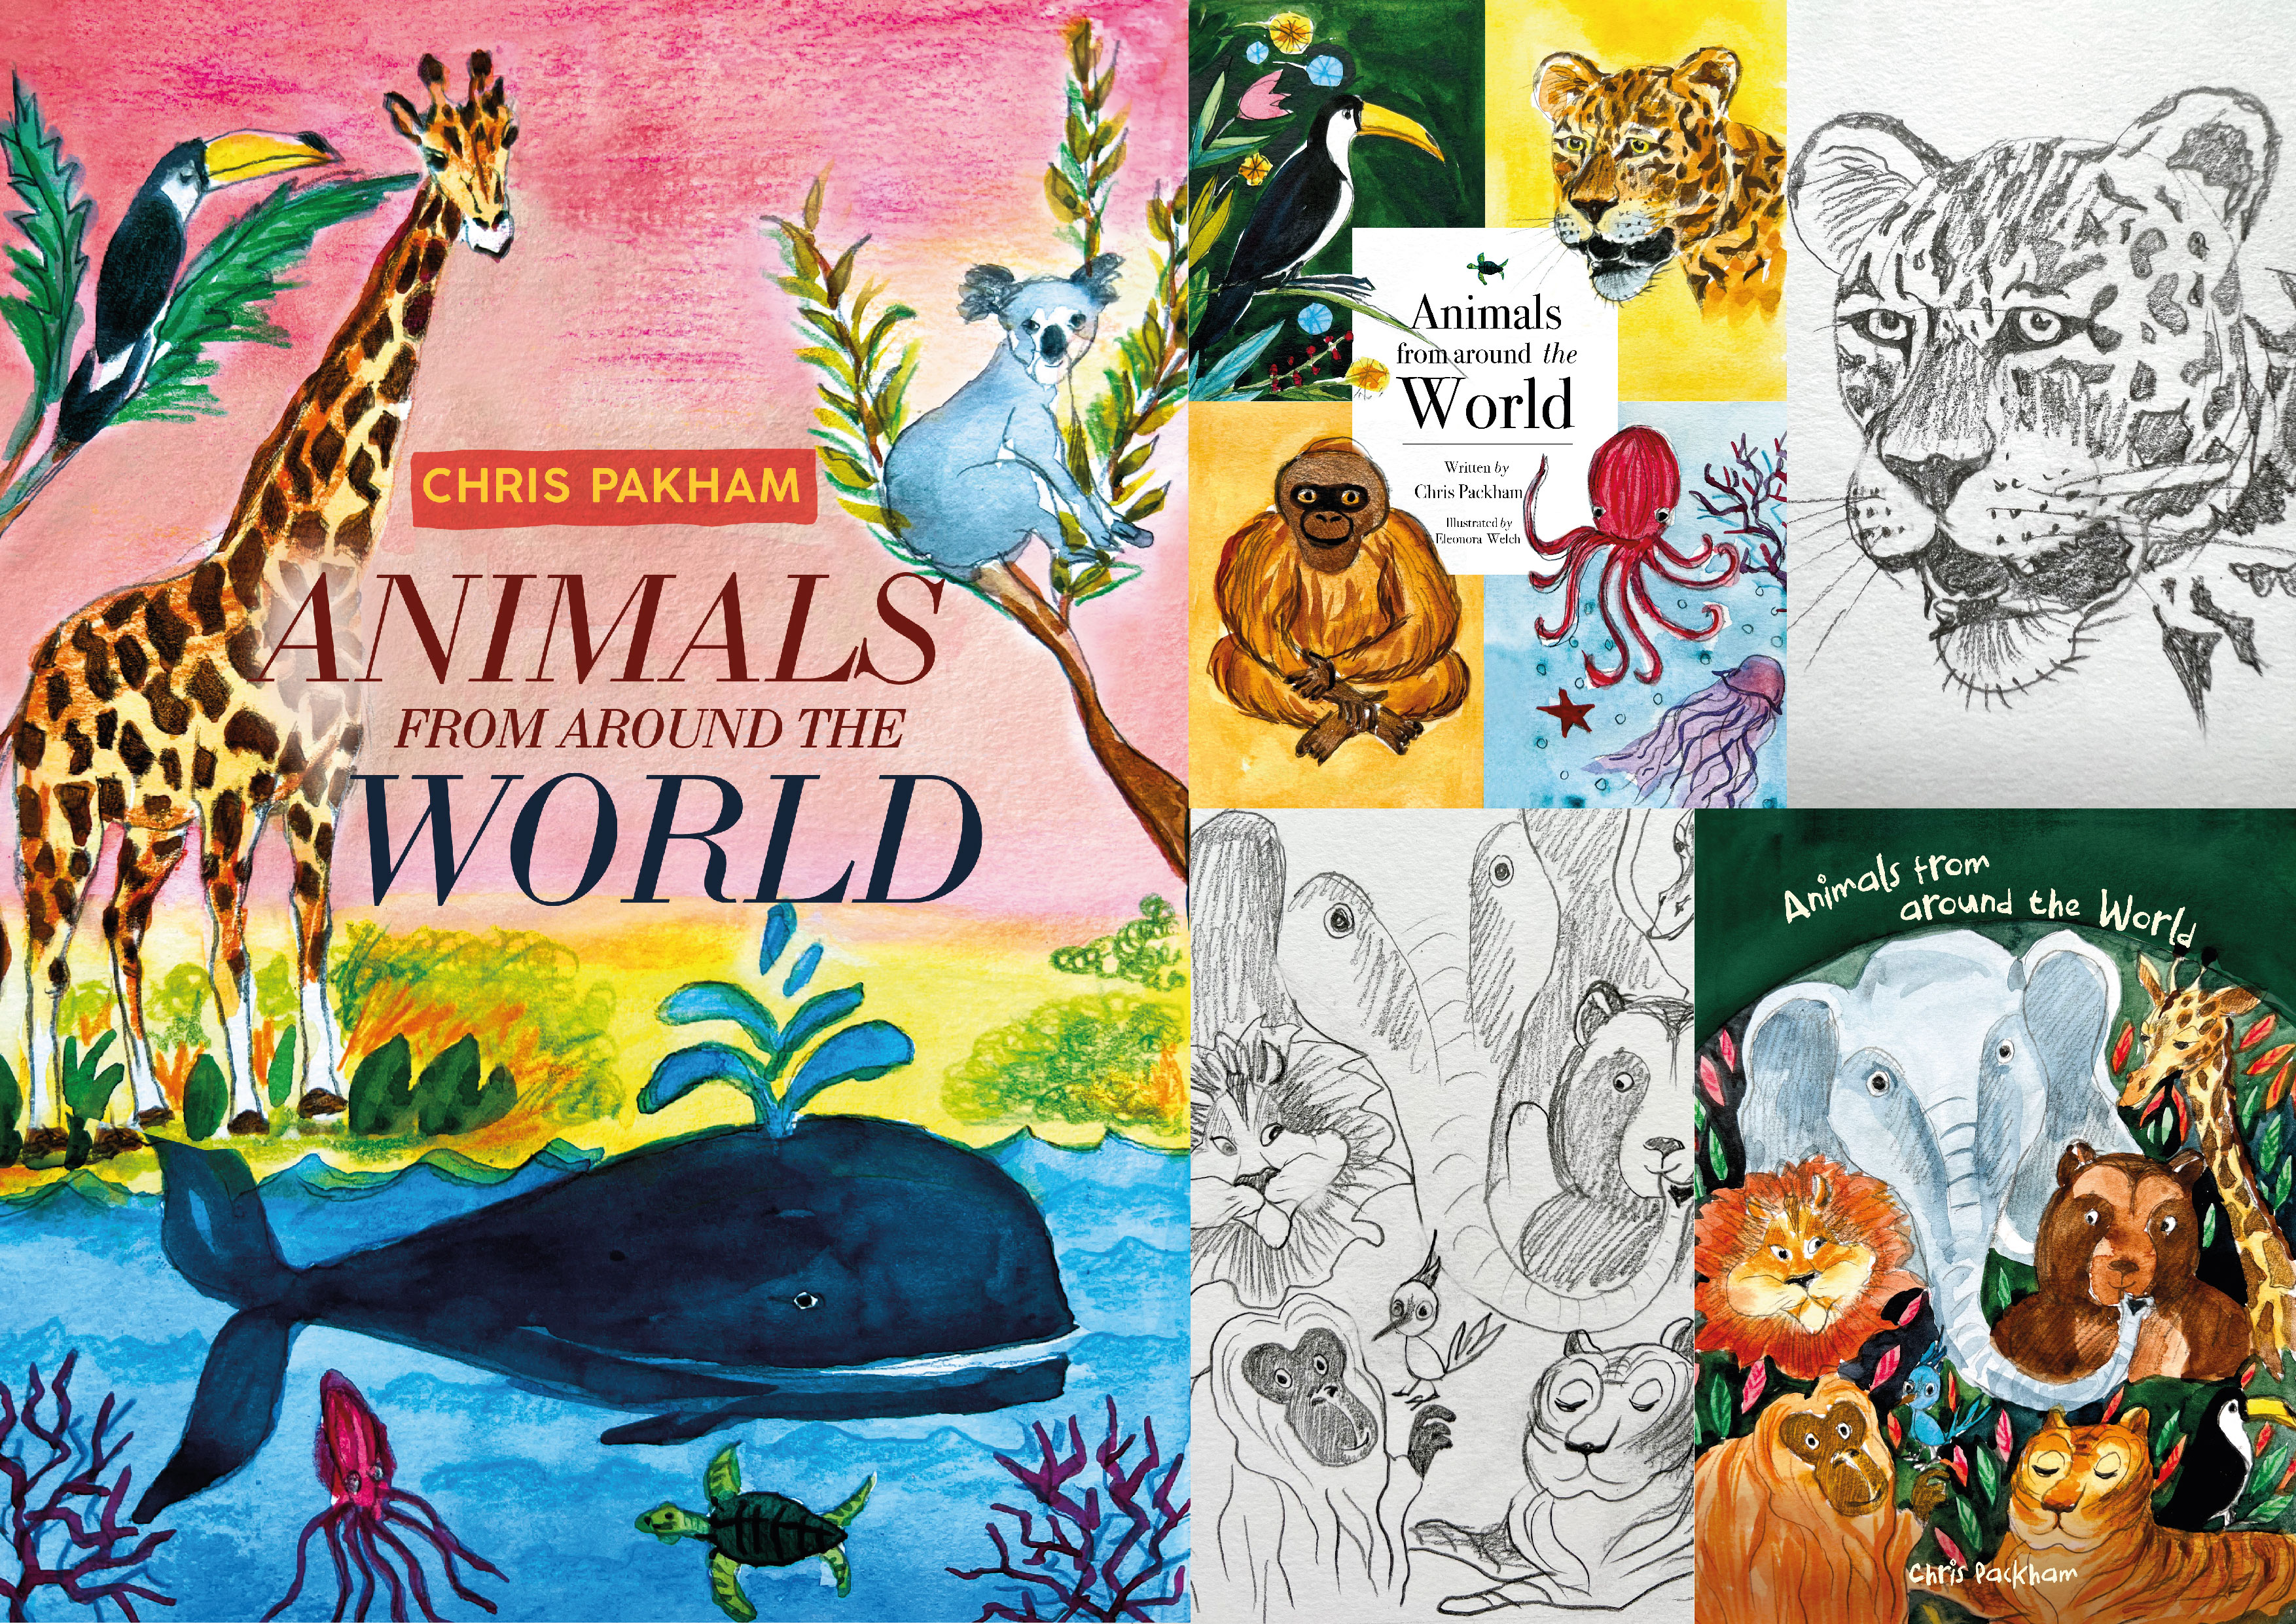
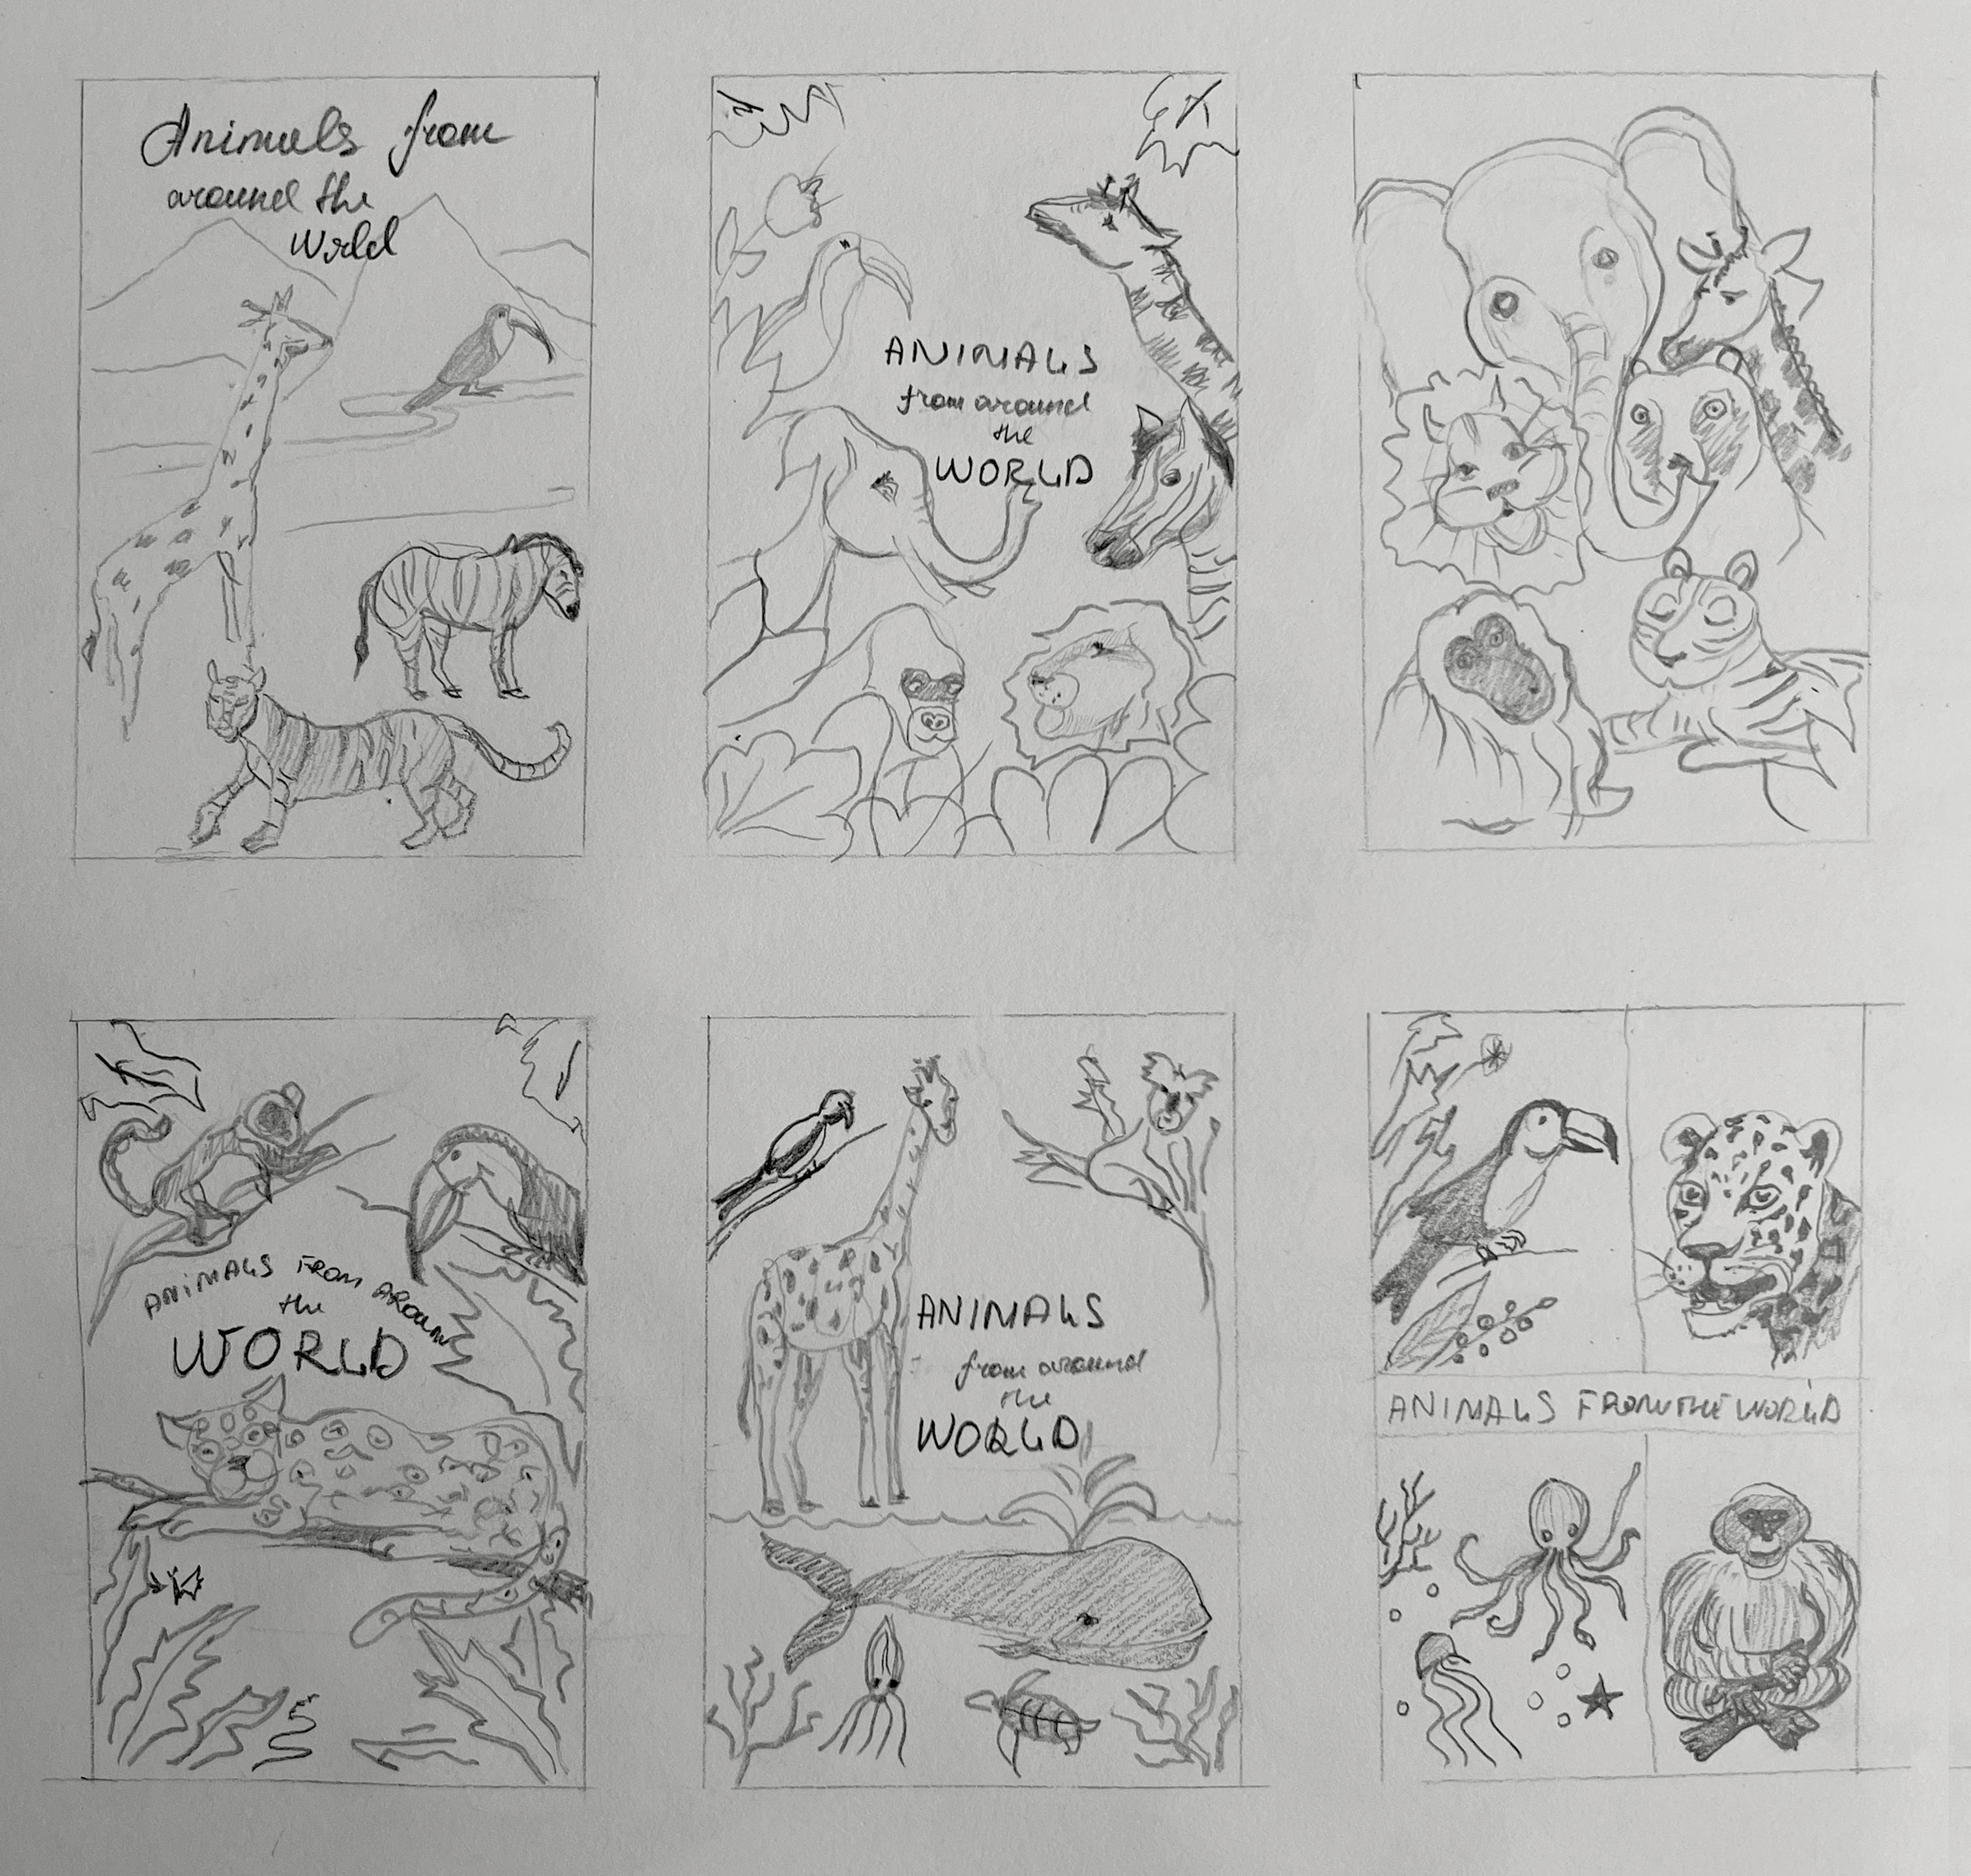
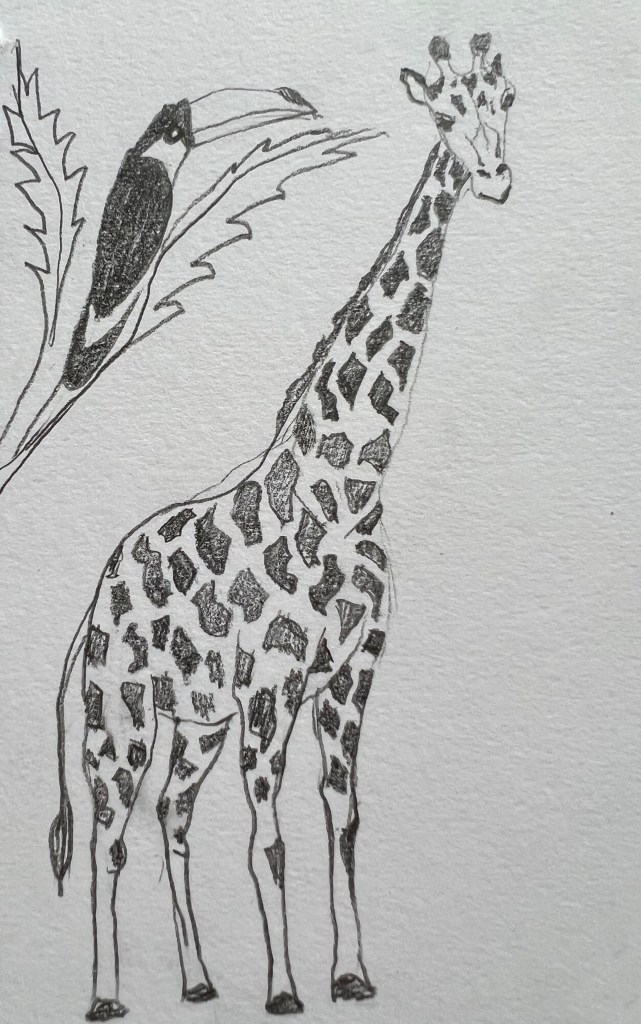
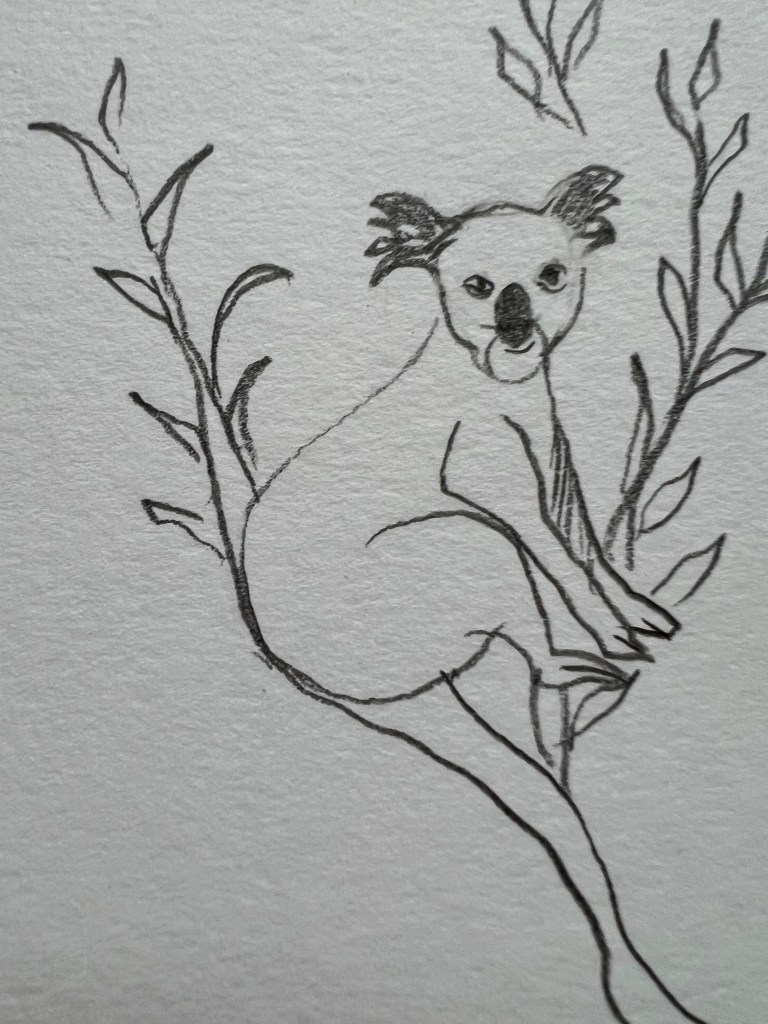
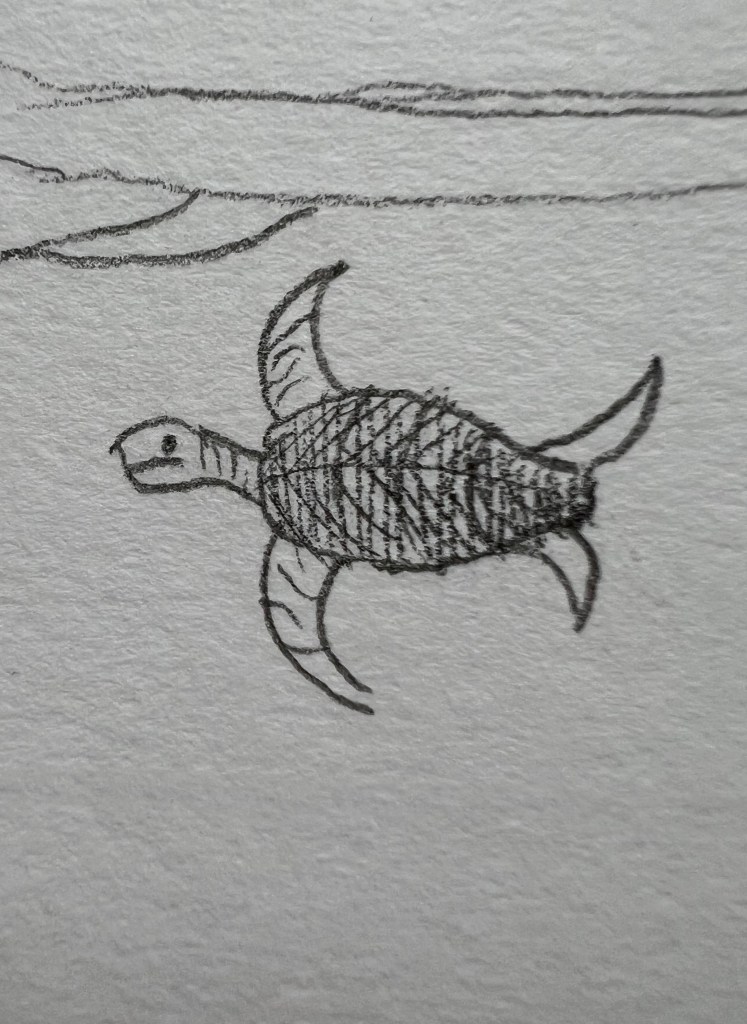
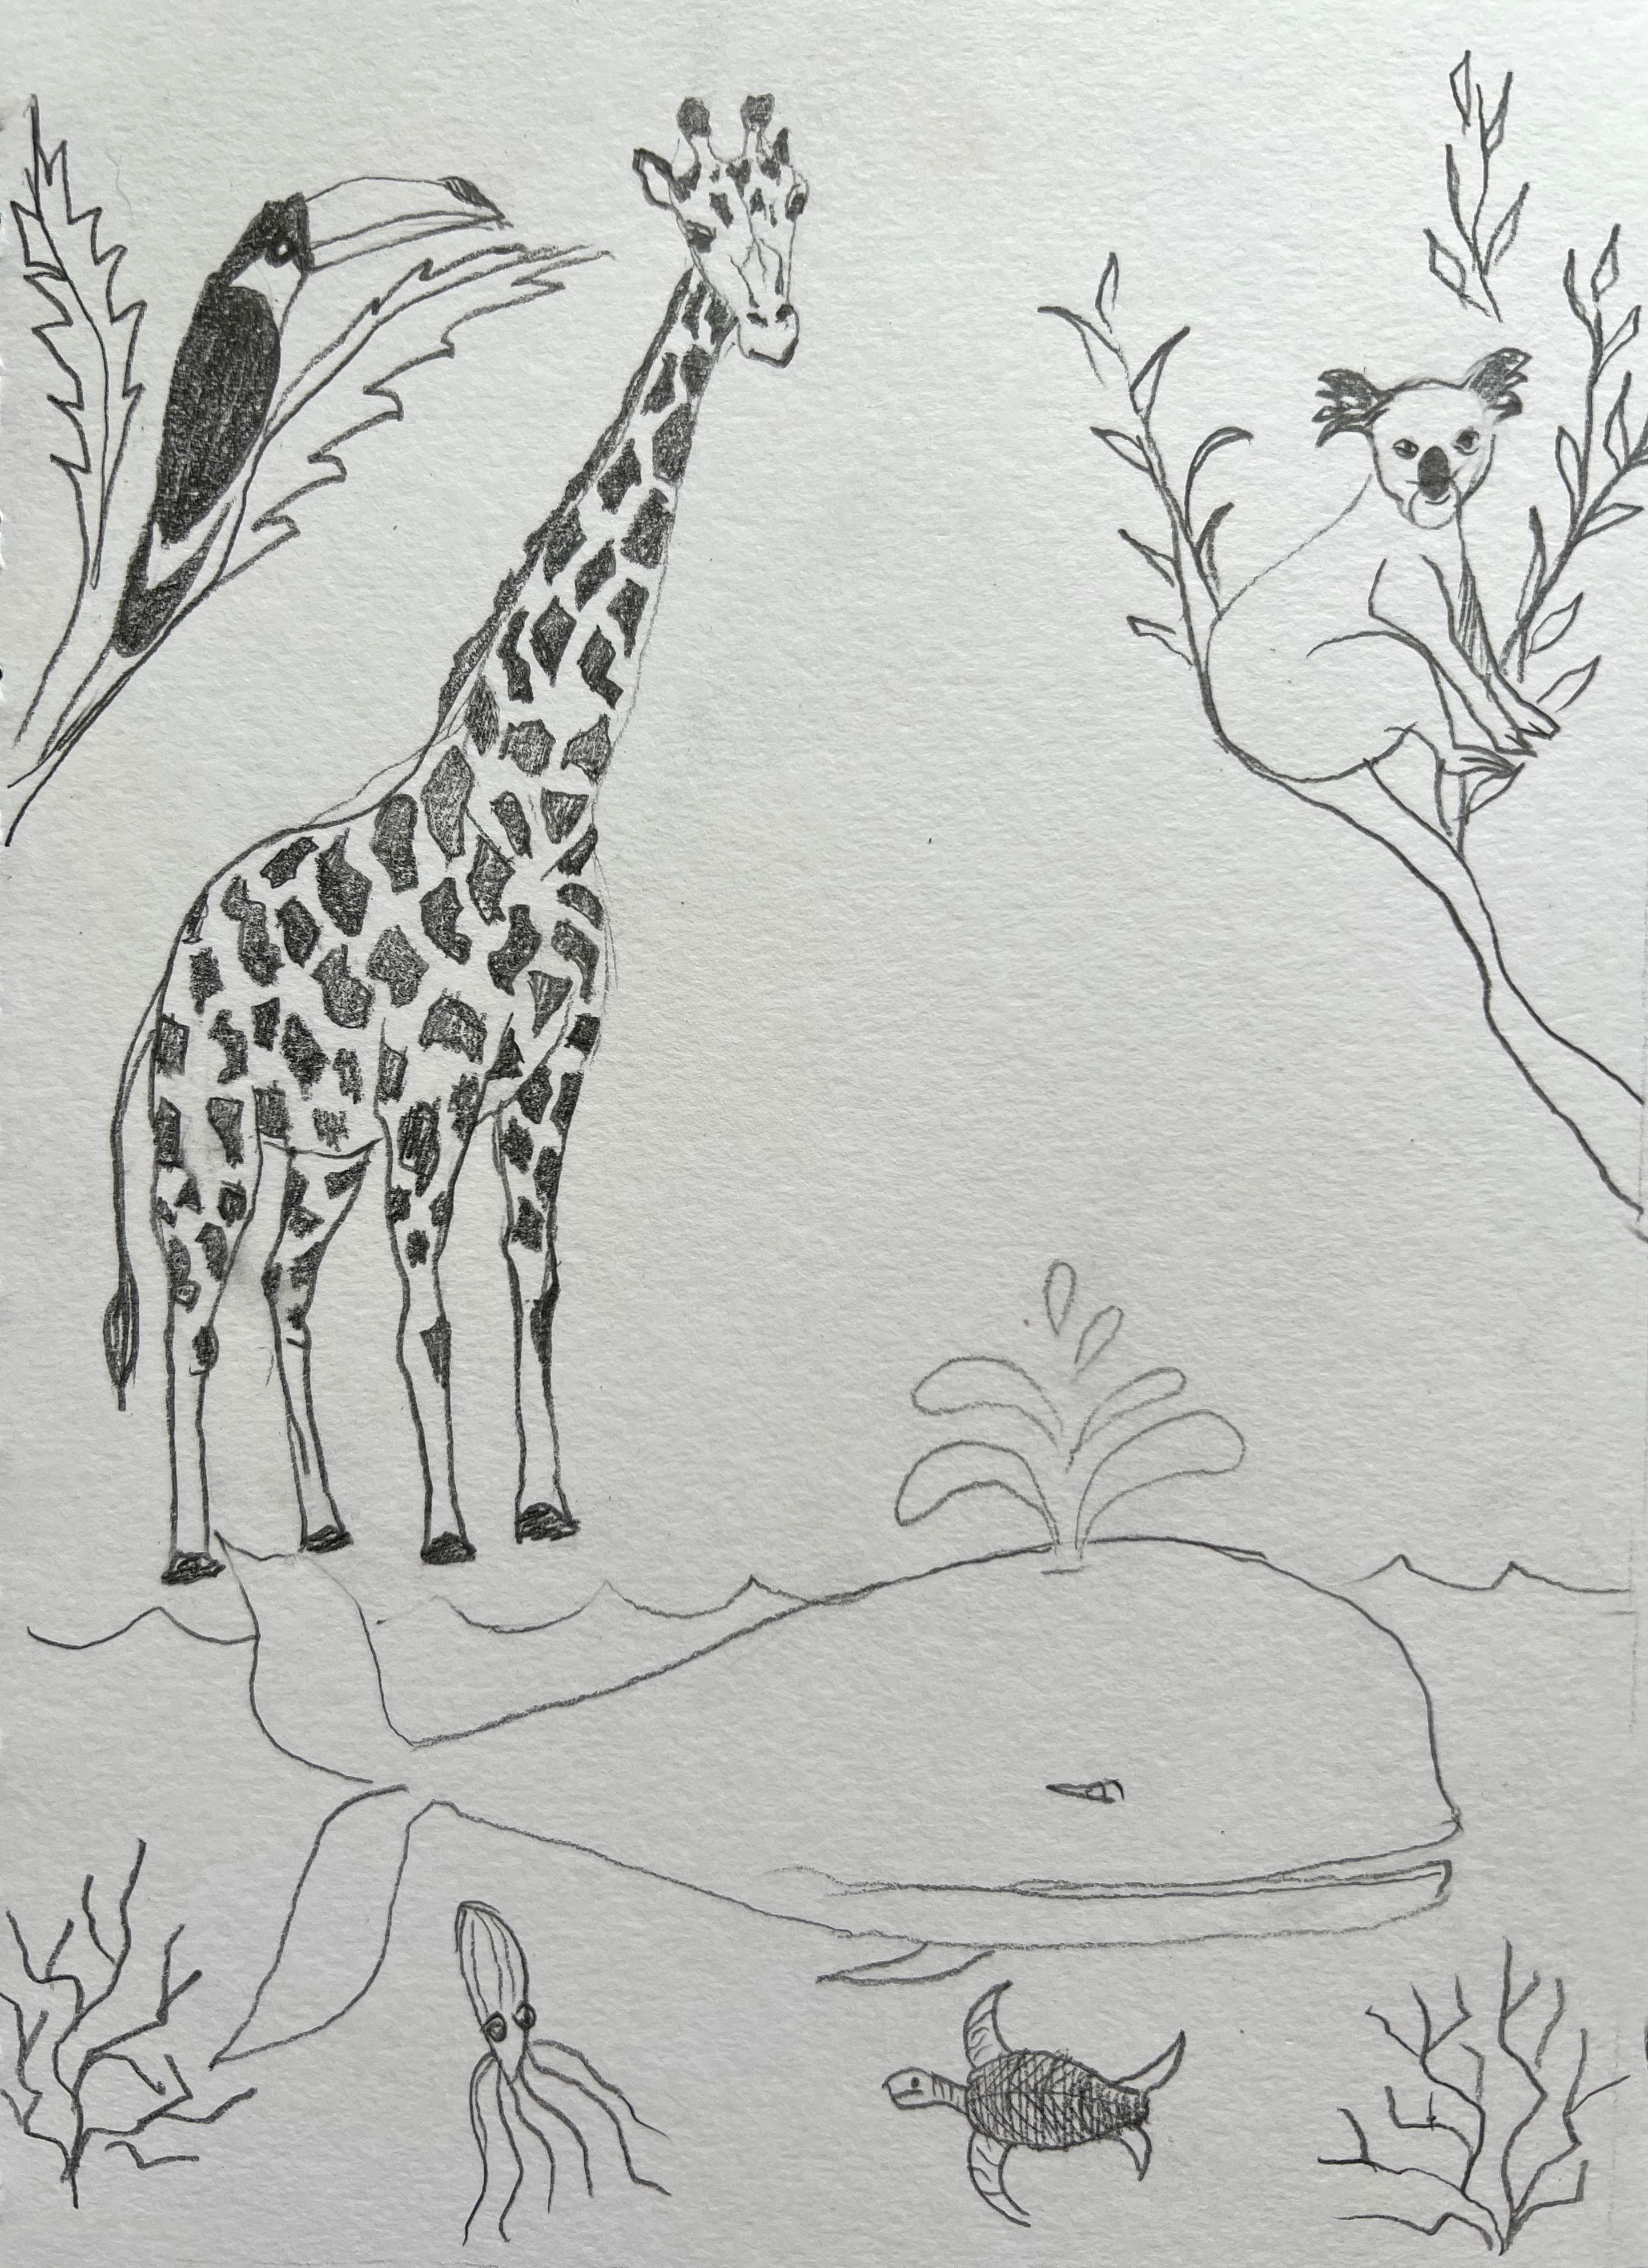
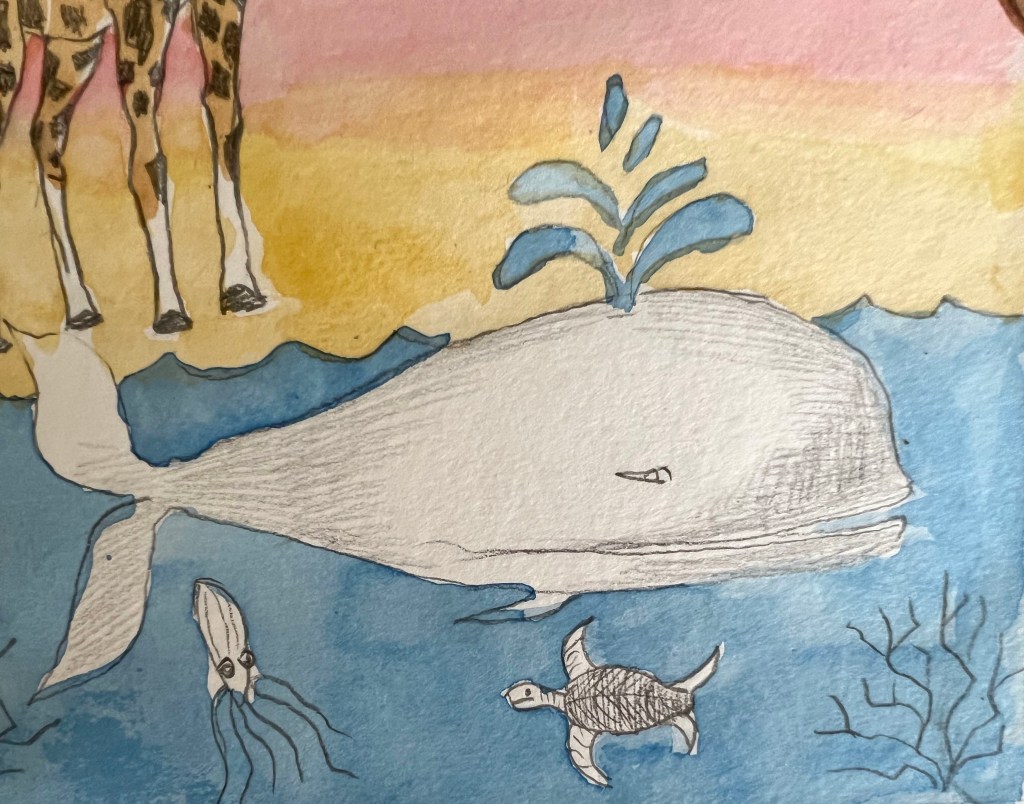
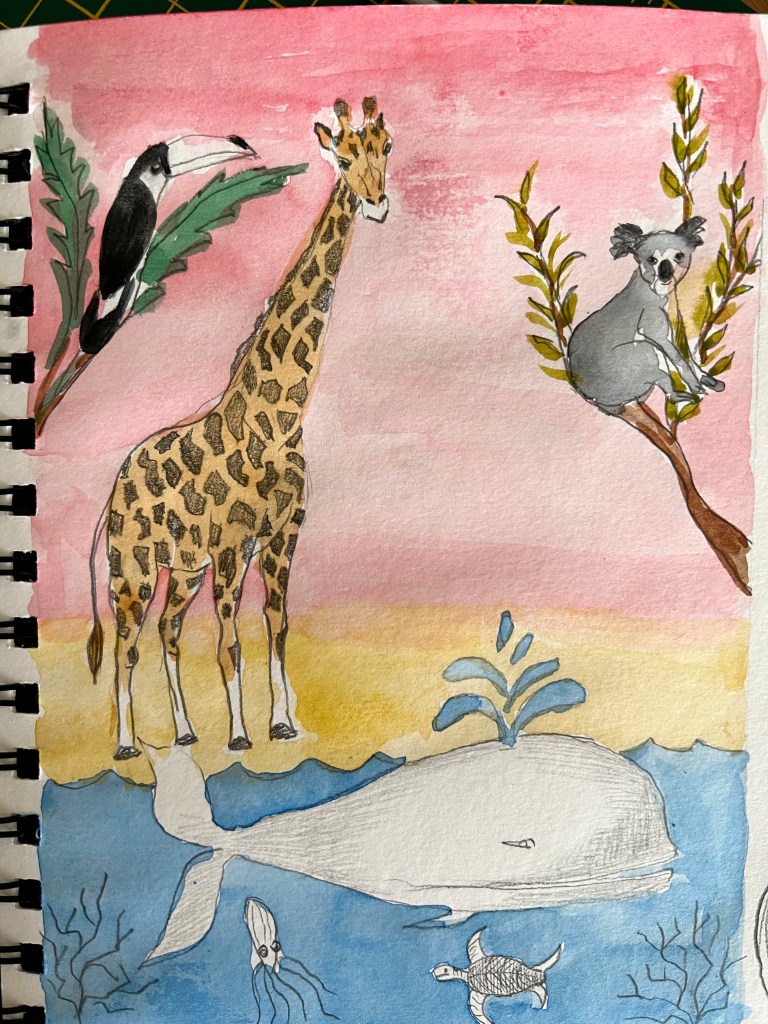
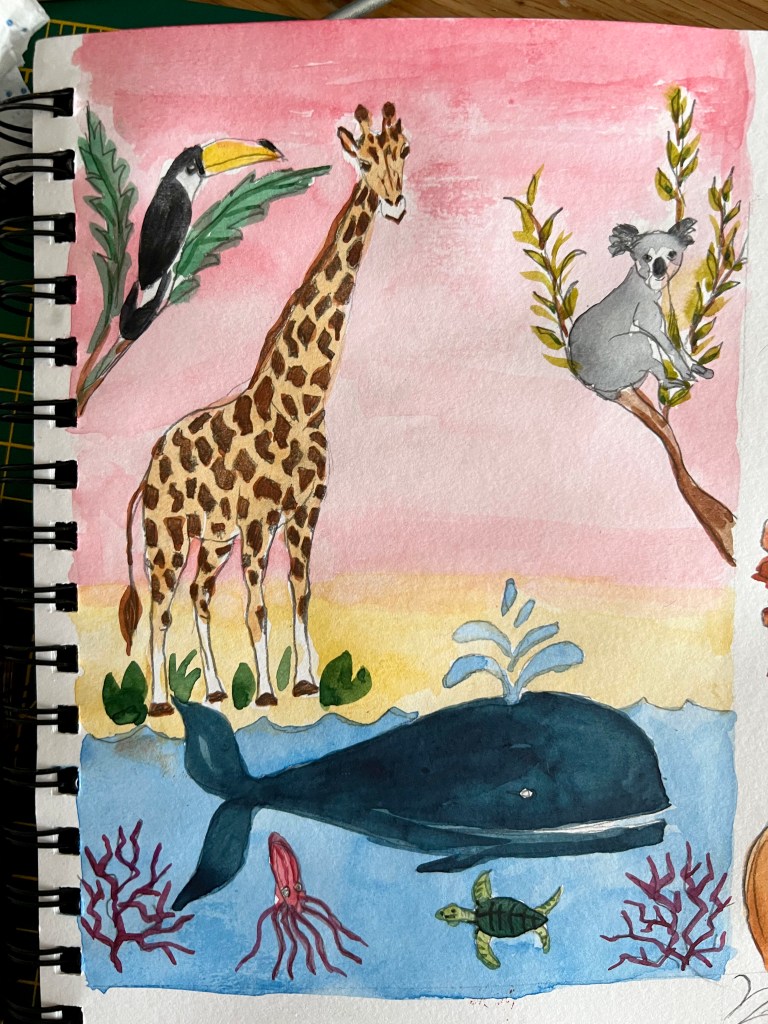
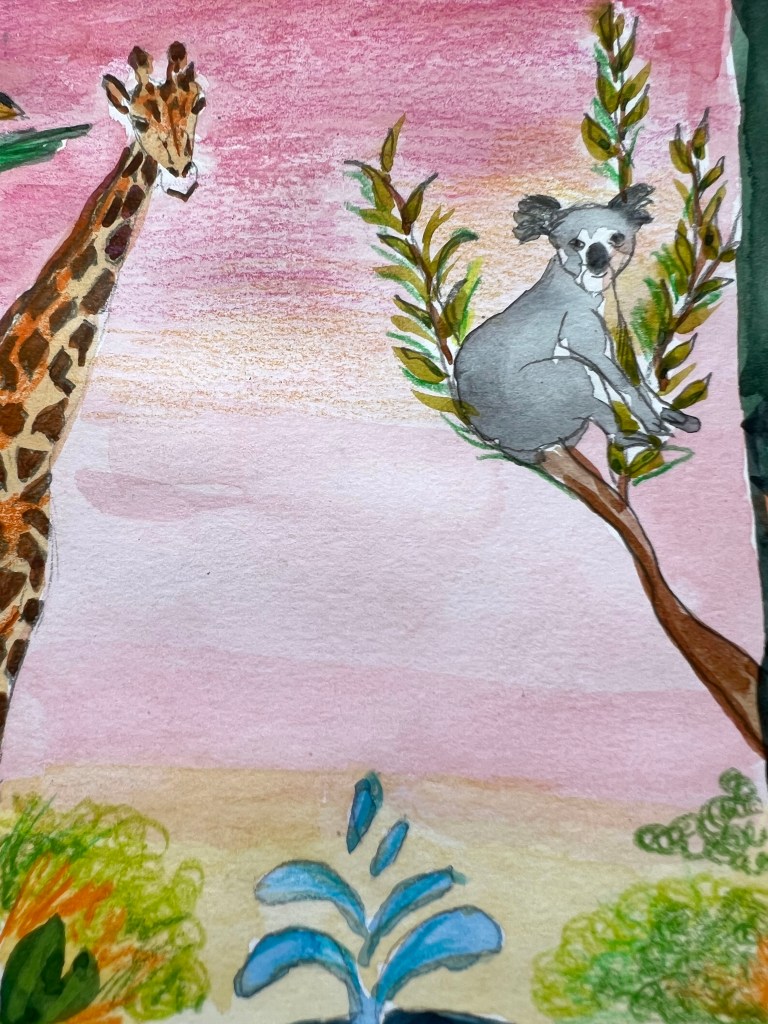
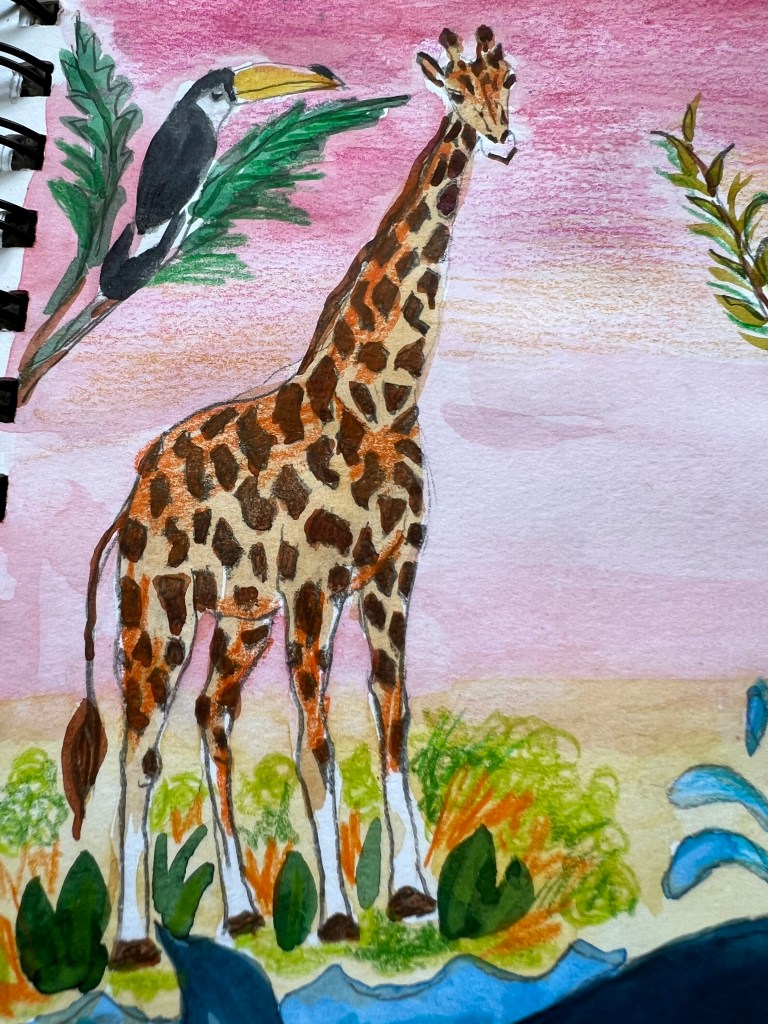
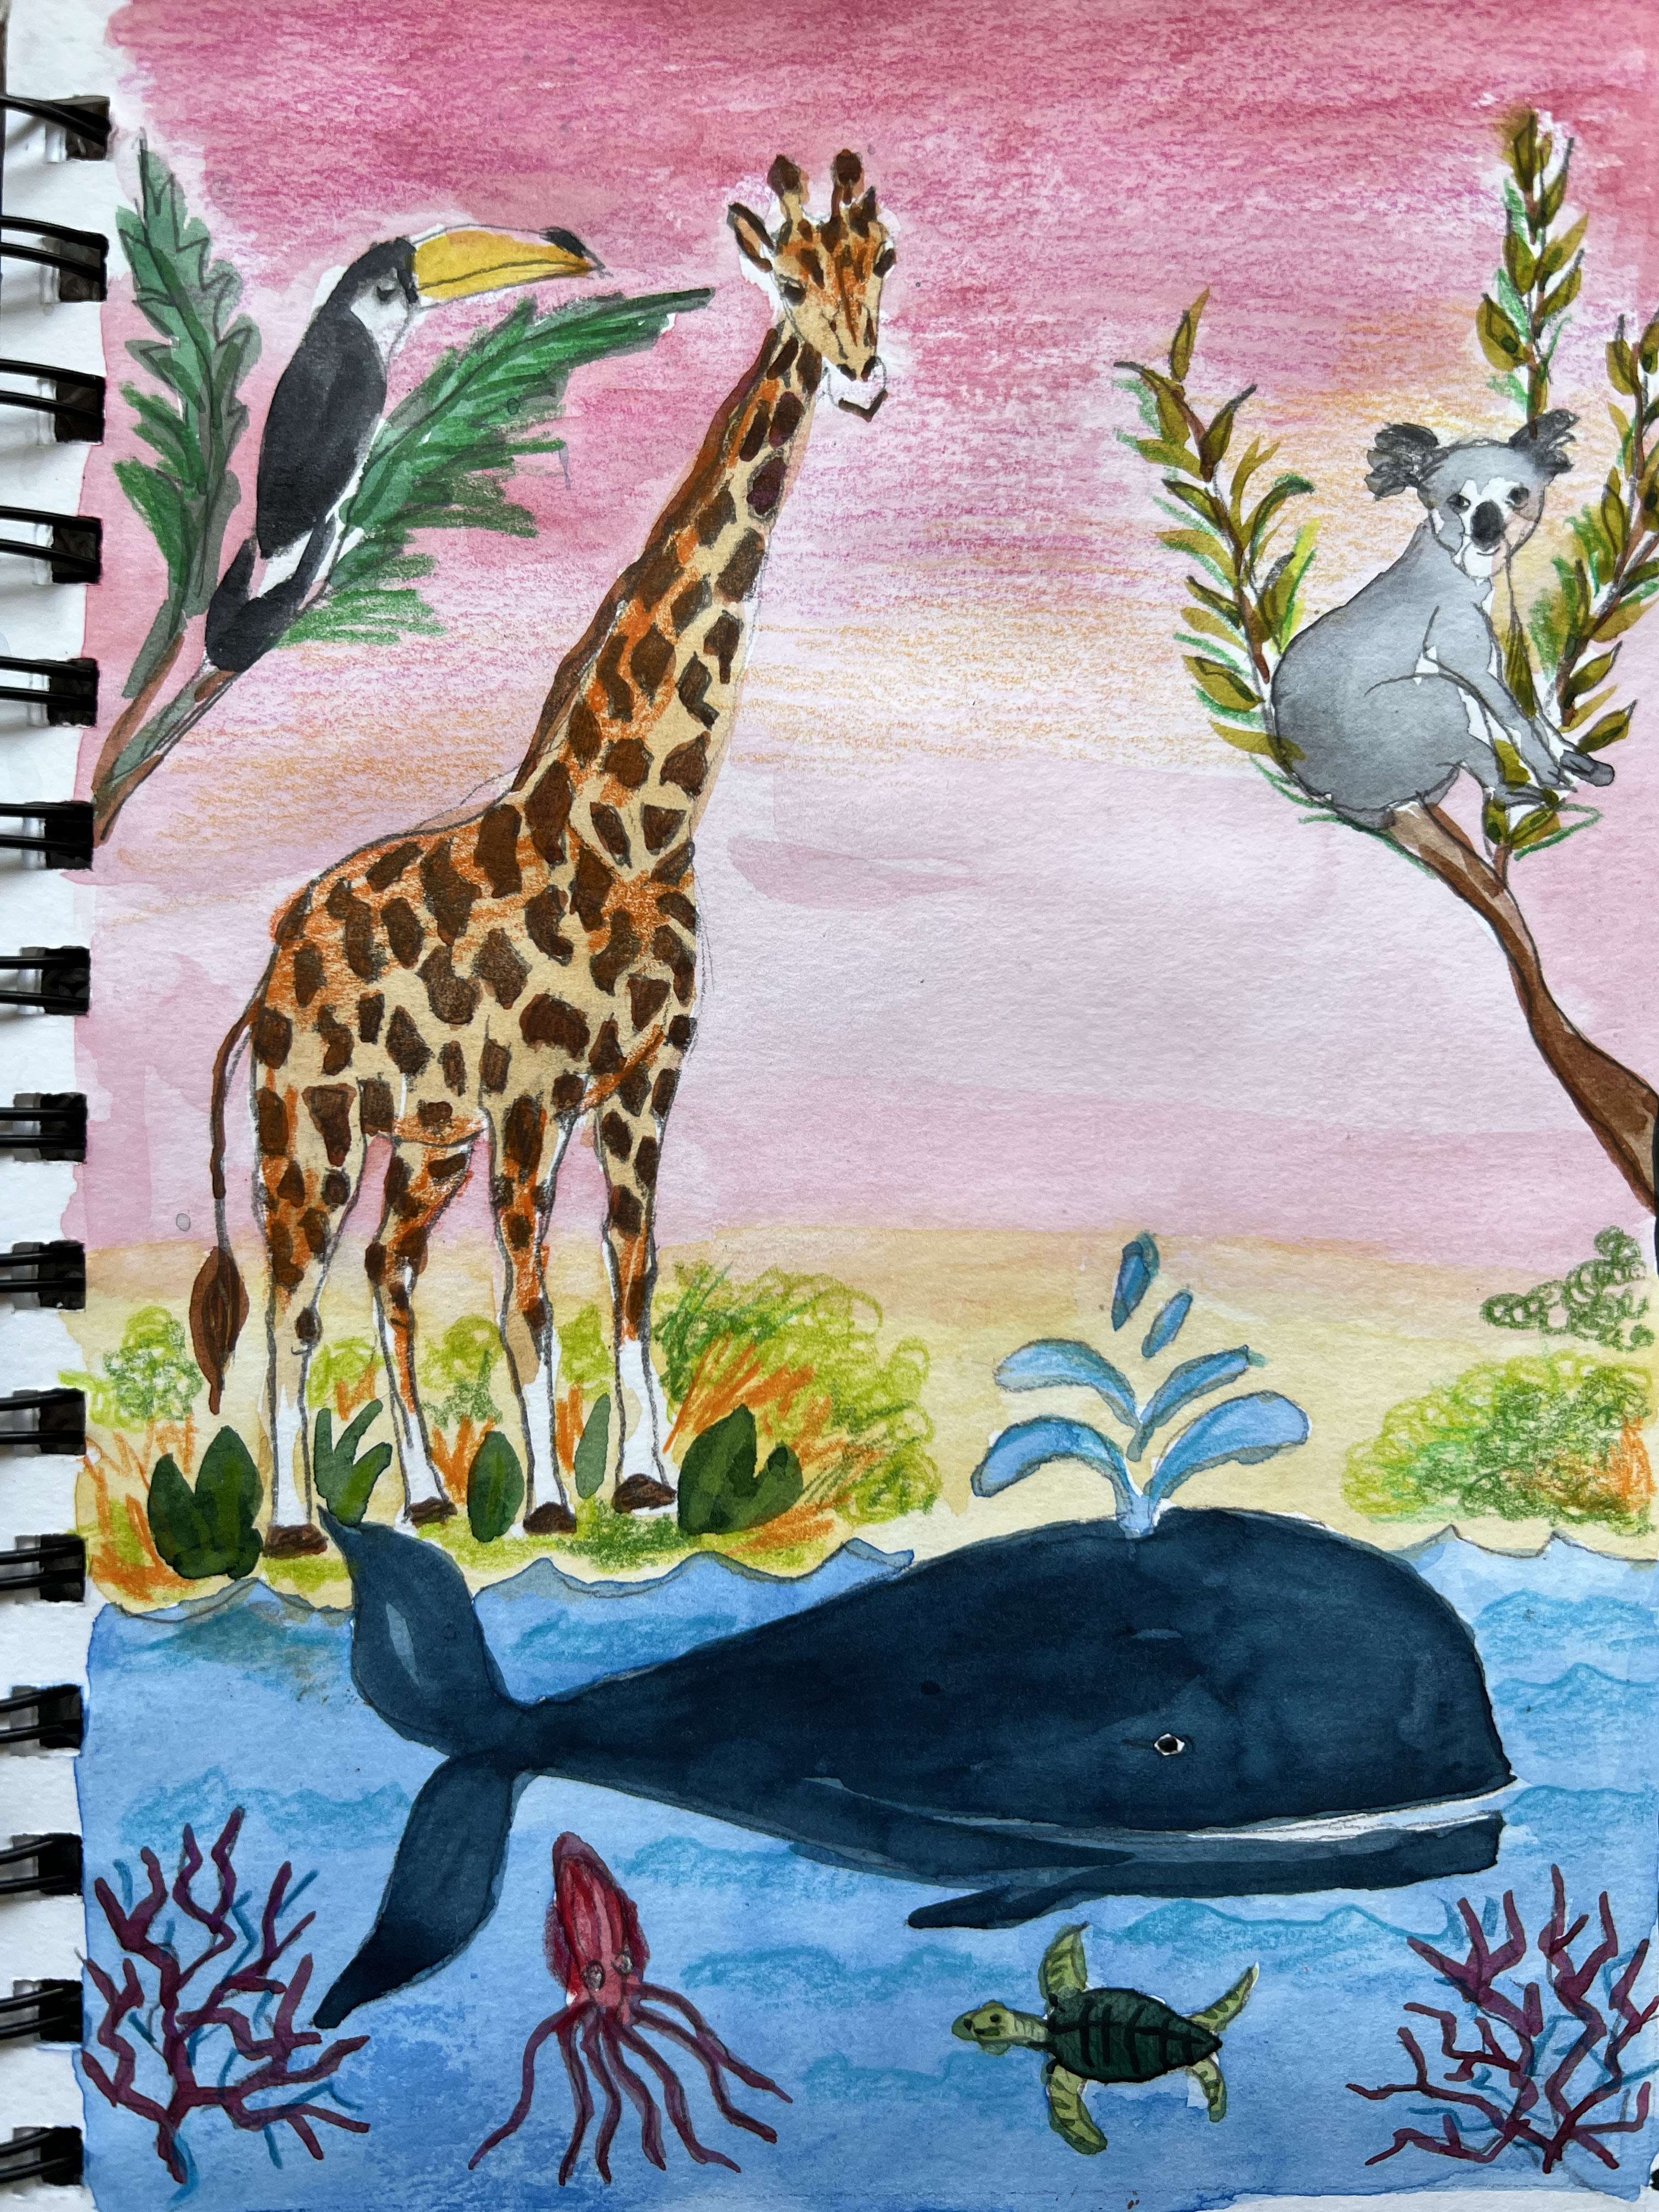
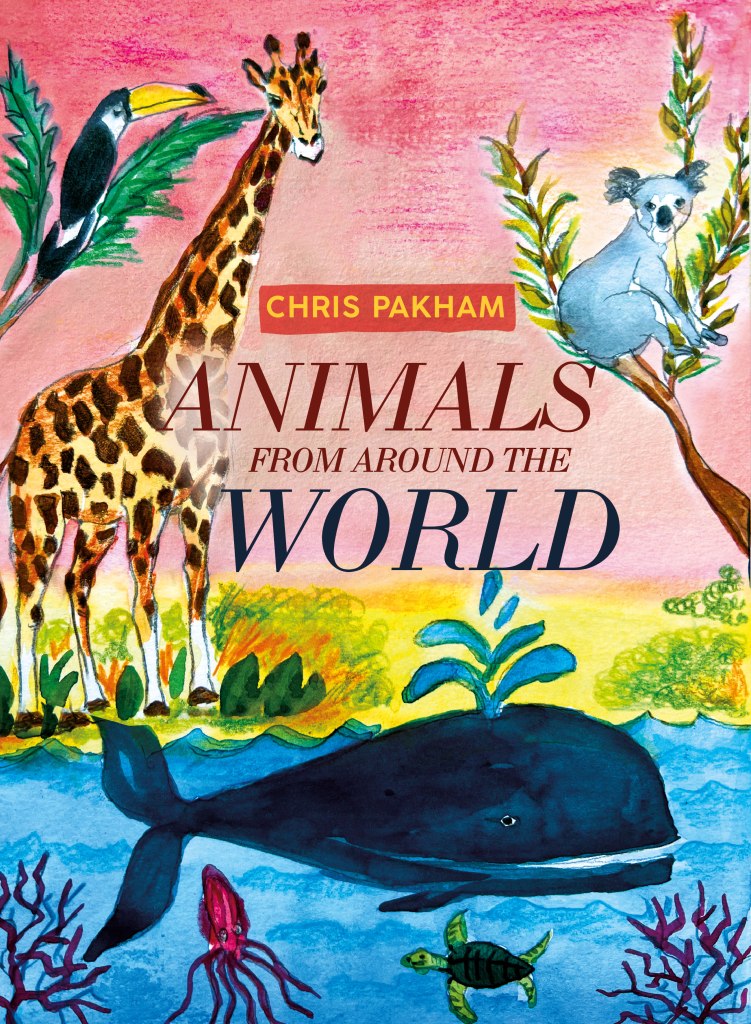
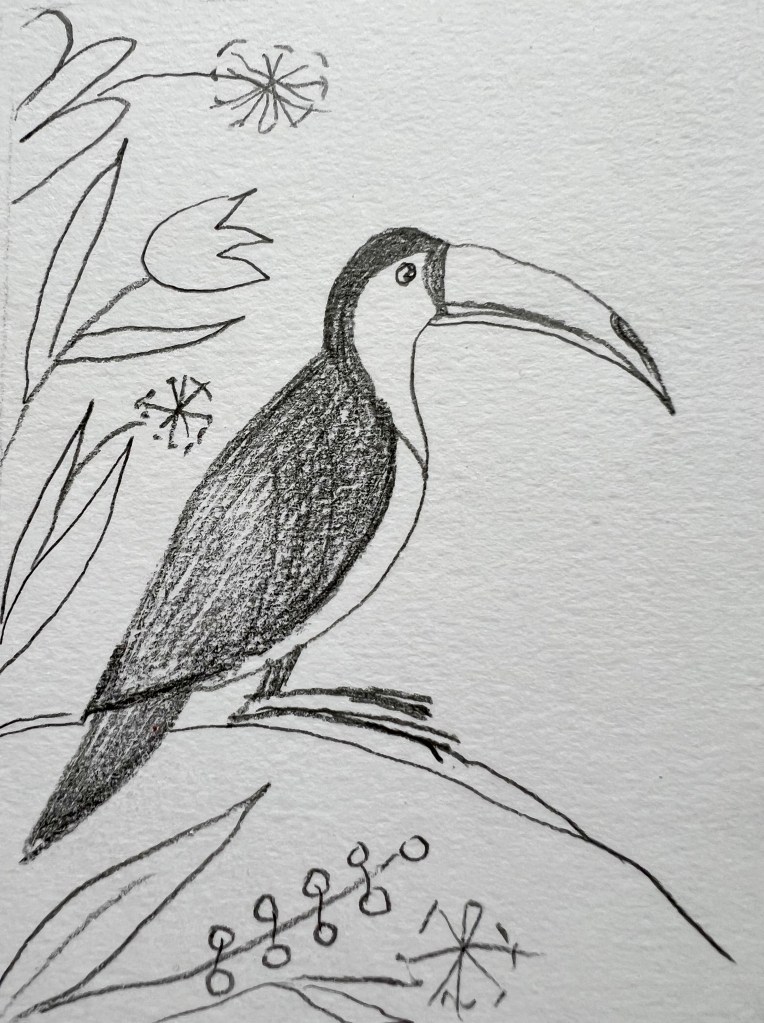
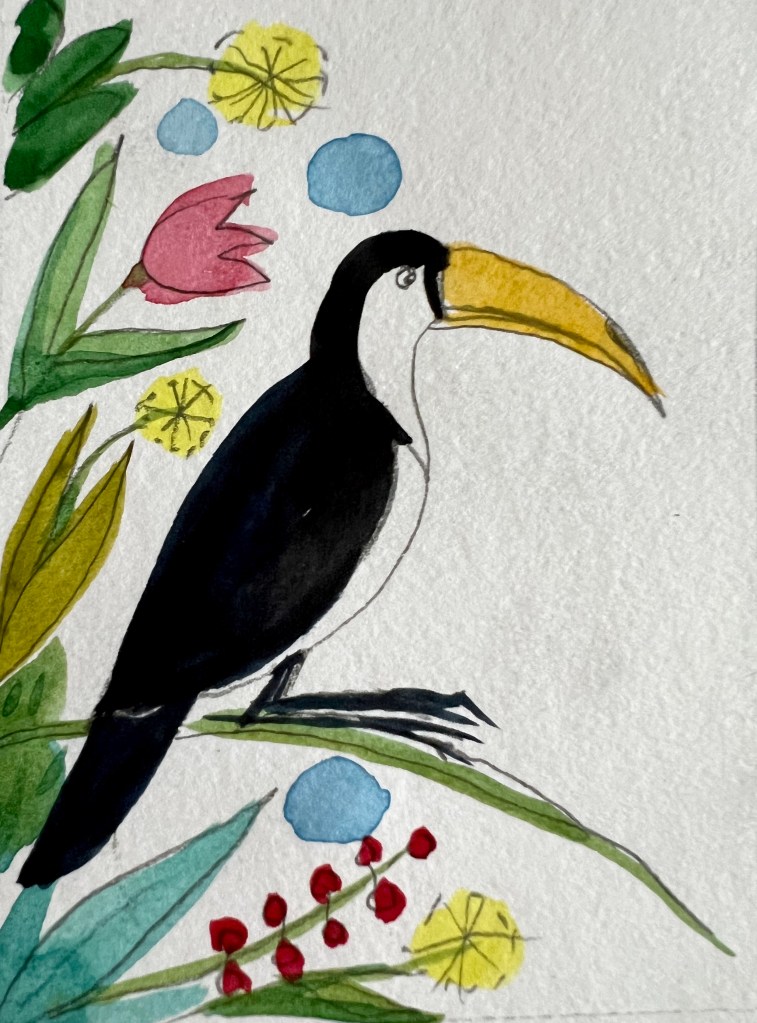
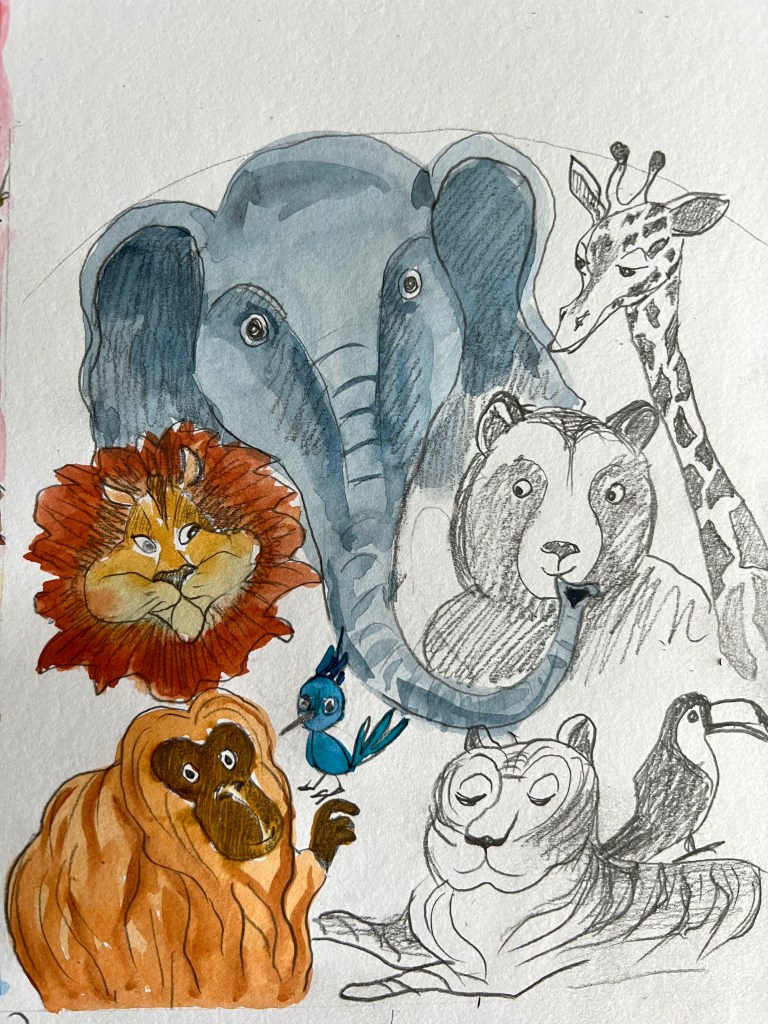
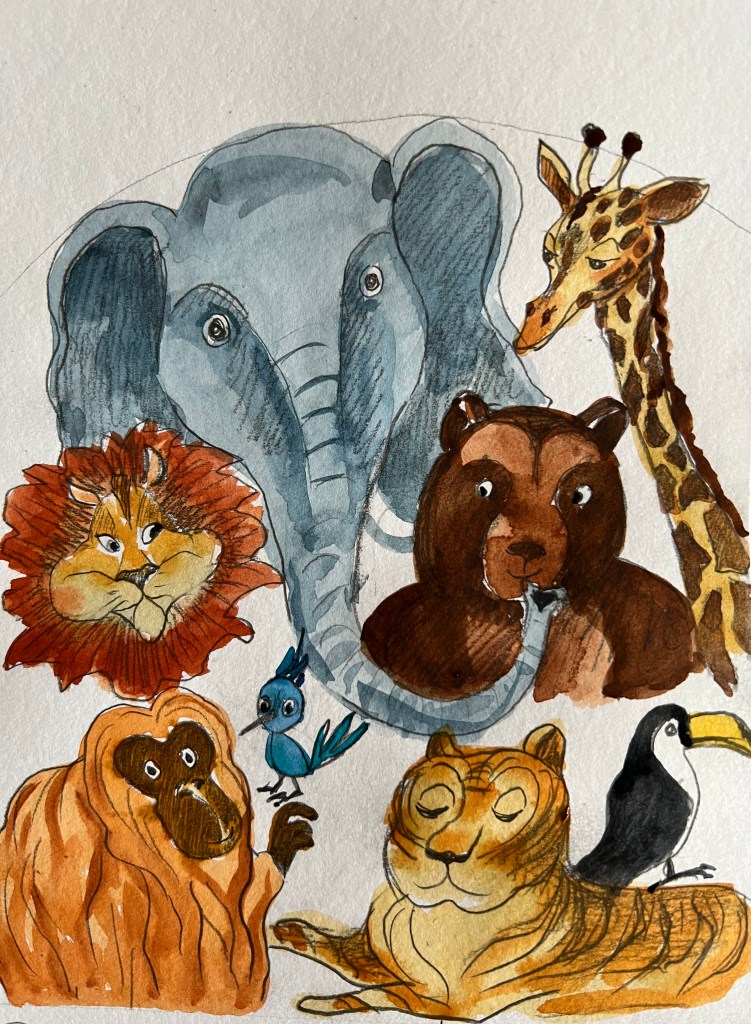
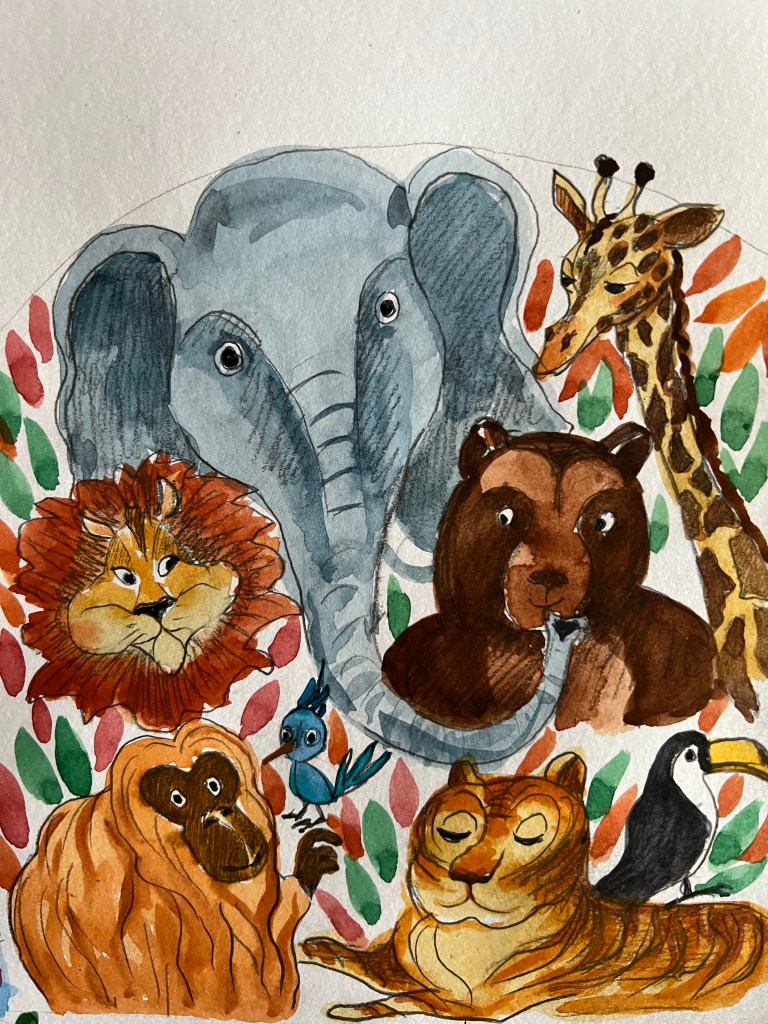
After producing sketches, I selected the three ideas I was going to design for the book cover. I had a vision of designing the book cover with representatives of the air, terrestrial and animal world. So, I placed in the corner a tucan, a bird from South America, a koala bear from Australia, a giraffe from Africa and some marine creatures from the ocean. For my illustrations, I was going to use line drawings with watercolour and crayons. The idea was to make illustrations bright, bold, modern, recognisable and classy. I made compositions around the central part, like animals in the corners and marine creatures in the bottom, but the name of the book would have to be located in the centre. I realised that the giraffe was positioned too much in the middle, so I was going to make those adjustments in Photoshop later.
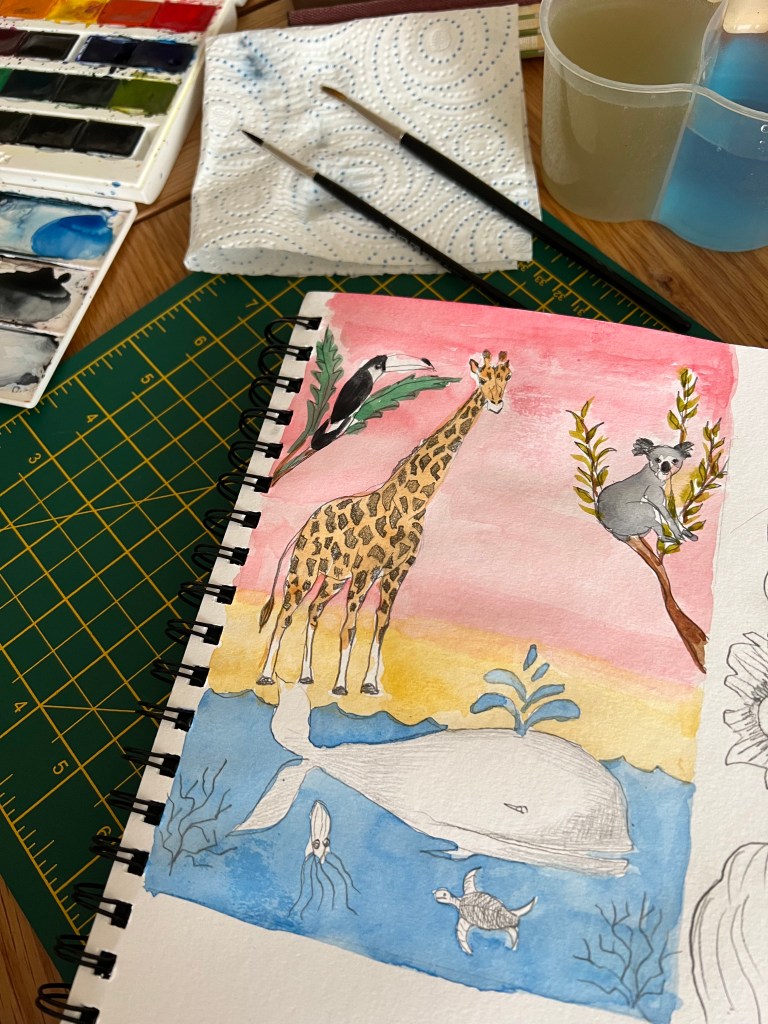
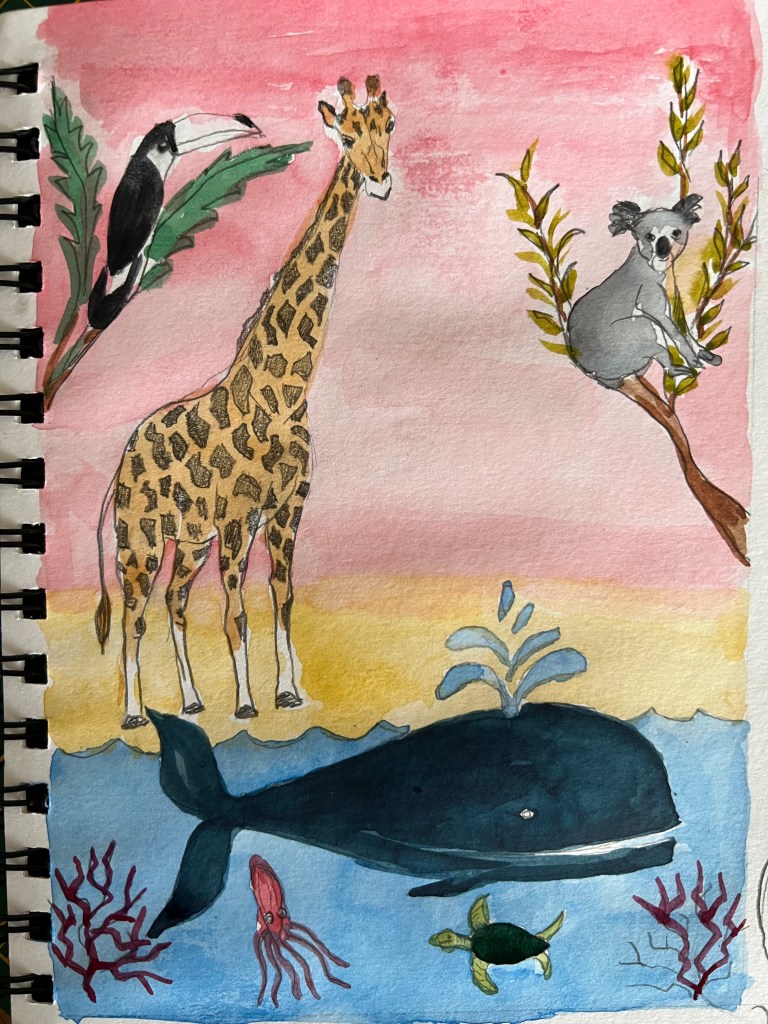
The next part was colouring. During the painting I decided to add a special feature to the cover, the beautiful pink sky, to symbolise the sunset, which also would make a good contrast to the blue ocean at the bottom part of the book cover. After I completed the illustration with the watercolour, I added some crayon curls and added pencil strokes into the sky. I think the illustration came quite well. It has a modern vibe and the illustration has a stable and clear composition.
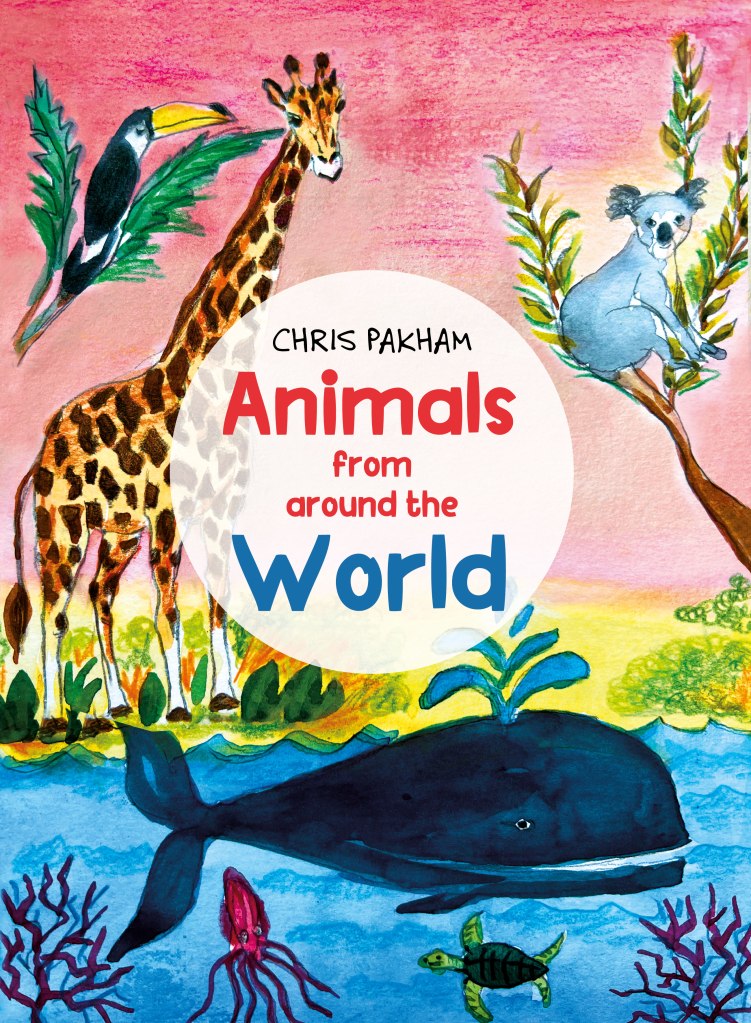
When I moved the design into the digital version, I needed to decide on typography for the name of the book. I created a selection of fonts, that I was going to use, and I started with the classic version of the font with serifs Bodoni Italic. Also, I used the name of Chris Packham for the author’s name, as I’ve noticed there were a few modern books in the library and bookshops written by him. I hope, that’s okay, as I needed a real name for the author, that made the book cover look more like the real deal. For the word Animal, I used brown shades from giraffe tones, and for the term World, I used dark blue from the whale. As a result, I had quite a modern and eye-catching book cover, which I was pleased with. In addition, I did an extra option with bold decorative font Plastic Toys. I placed the font on the white transparent circle, it was the only way to make it stand out. Consequently, that font choice and its arrangement changed the age audience to the younger kids, which is quite fascinating, that same illustration can be slotted into slightly different age groups of kids. From my point of view, the second option with more decorative font for the cover, makes the book look more suitable for smaller kids.
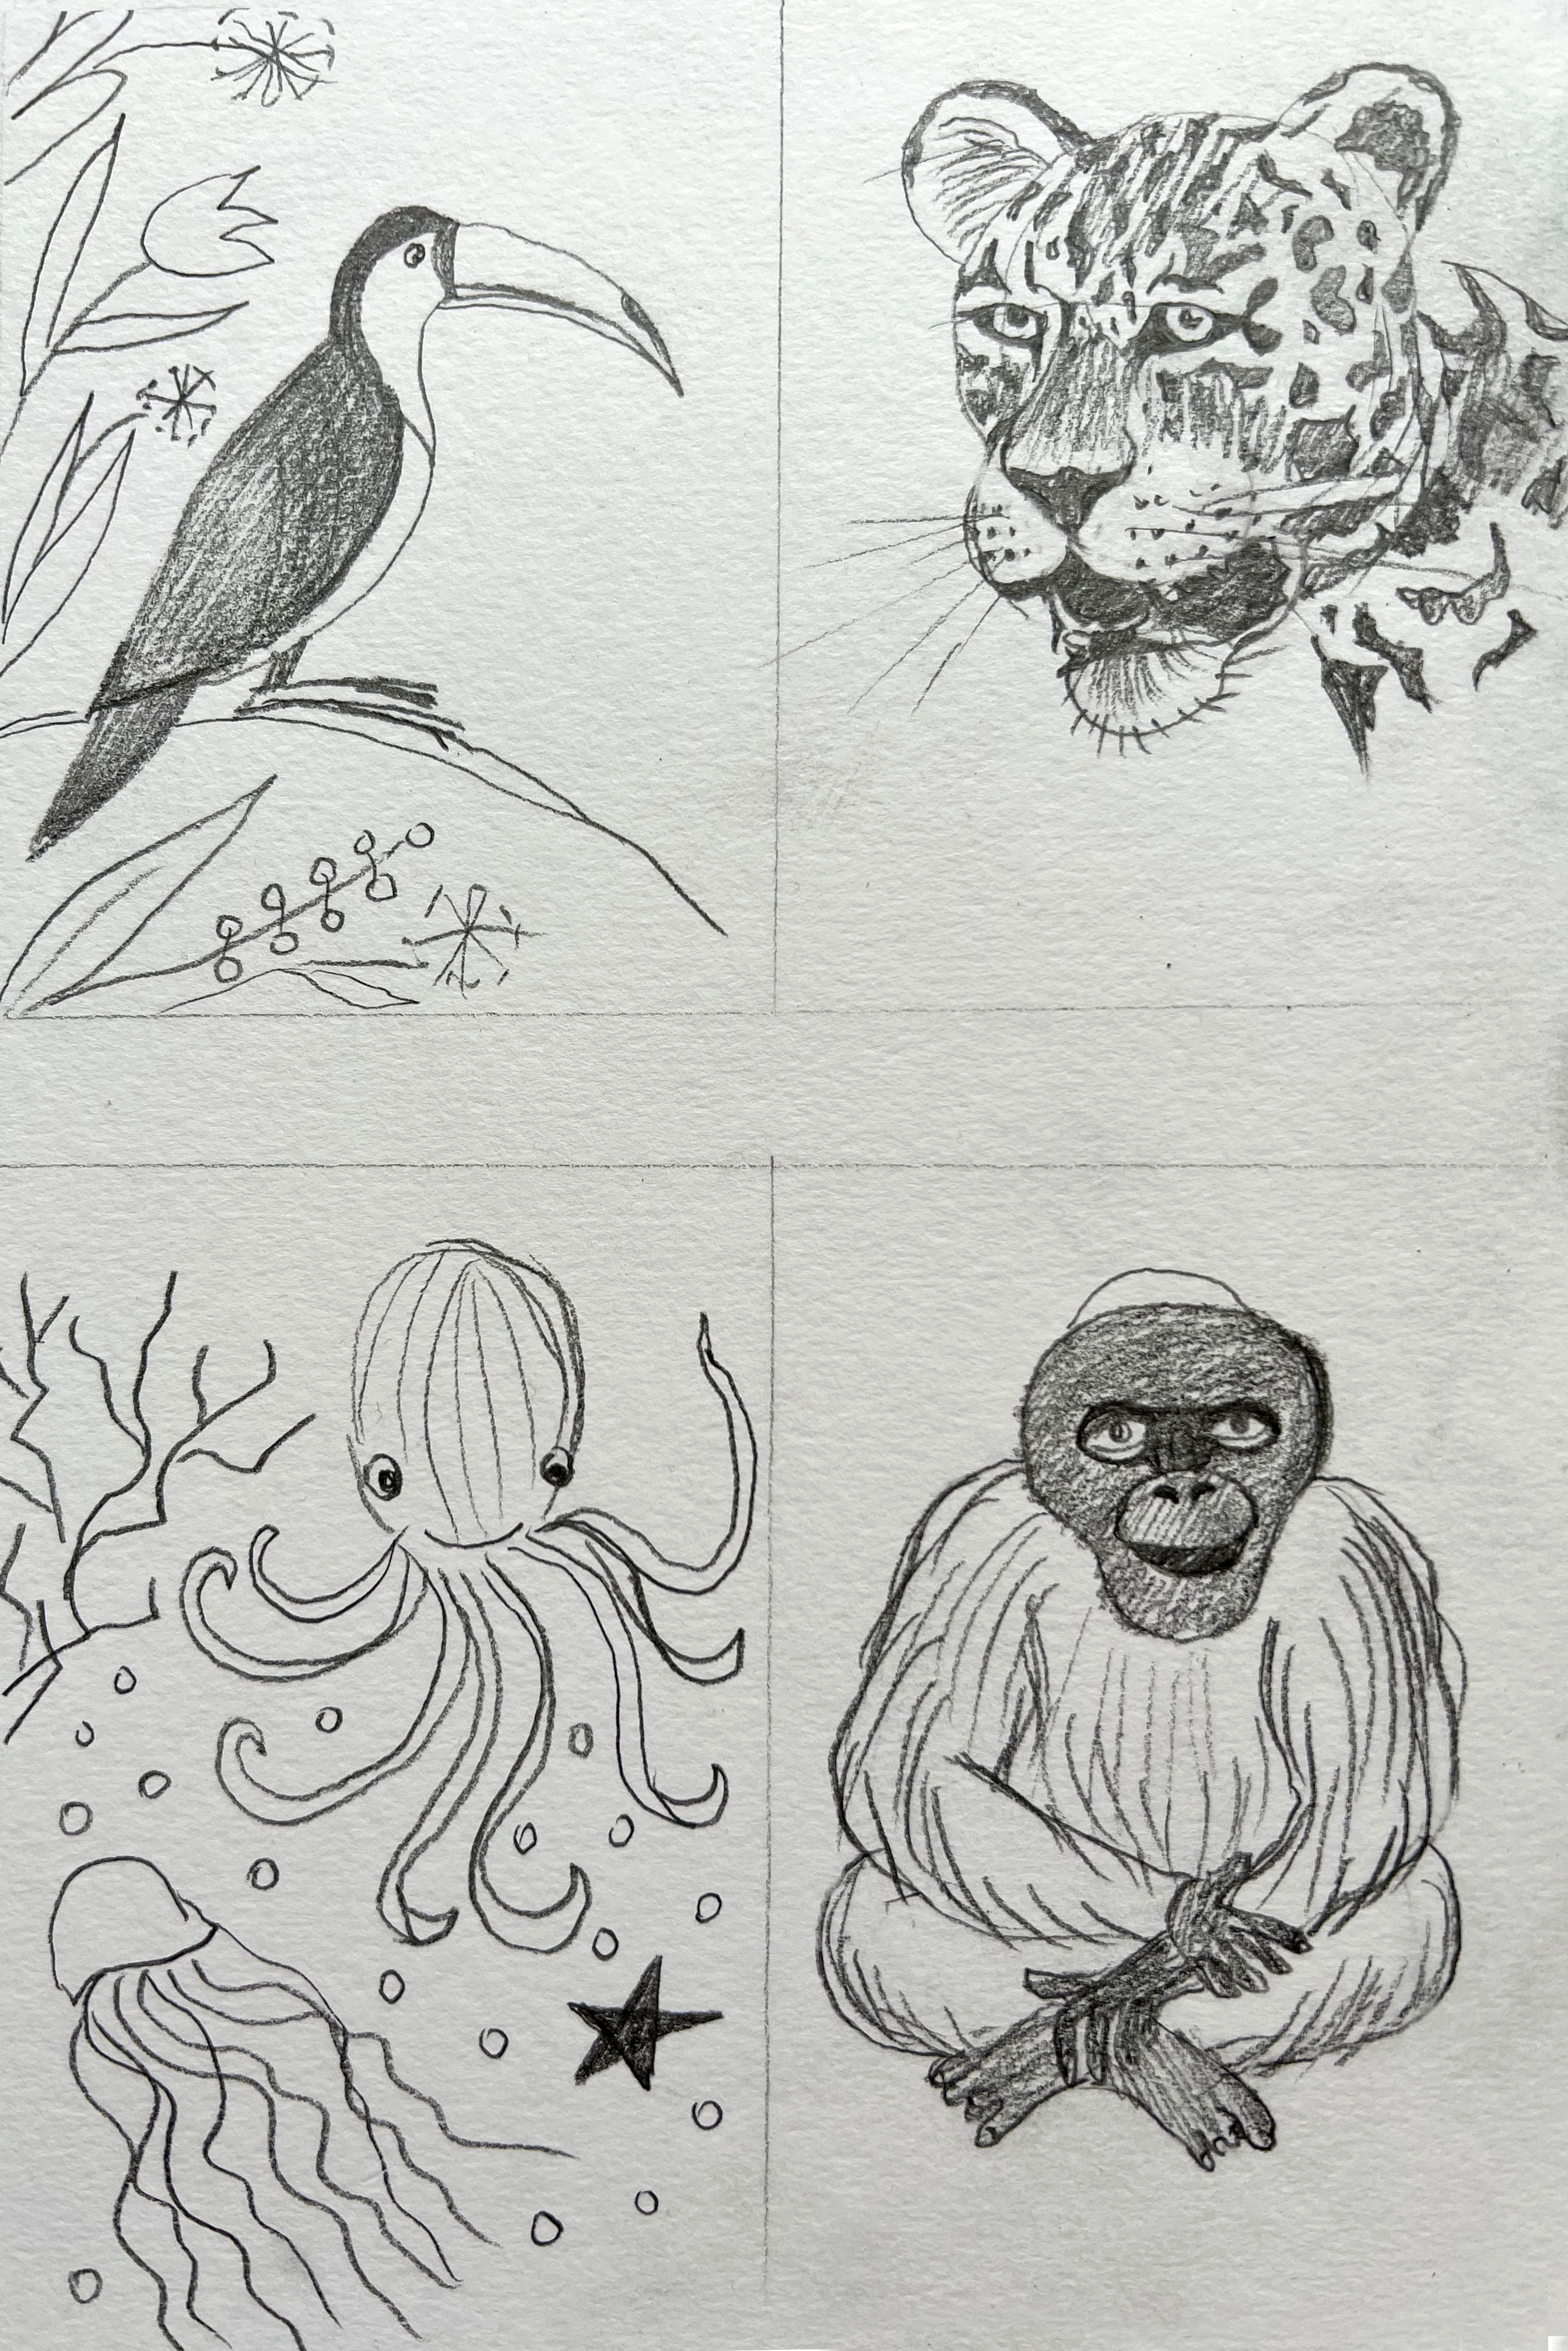
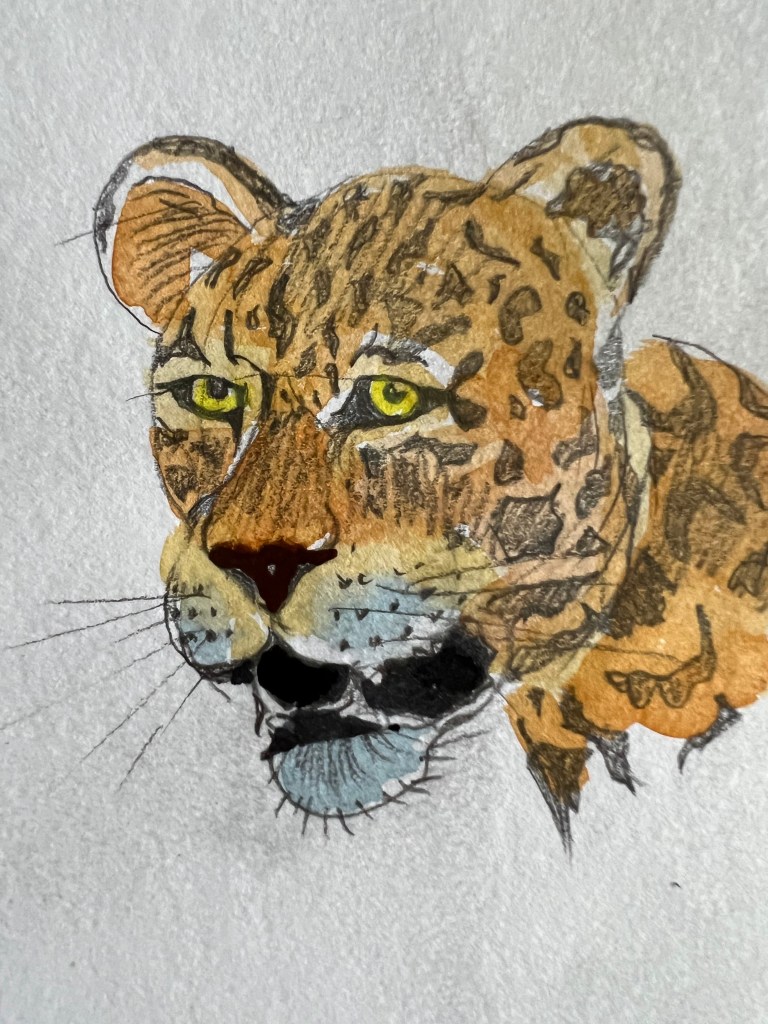
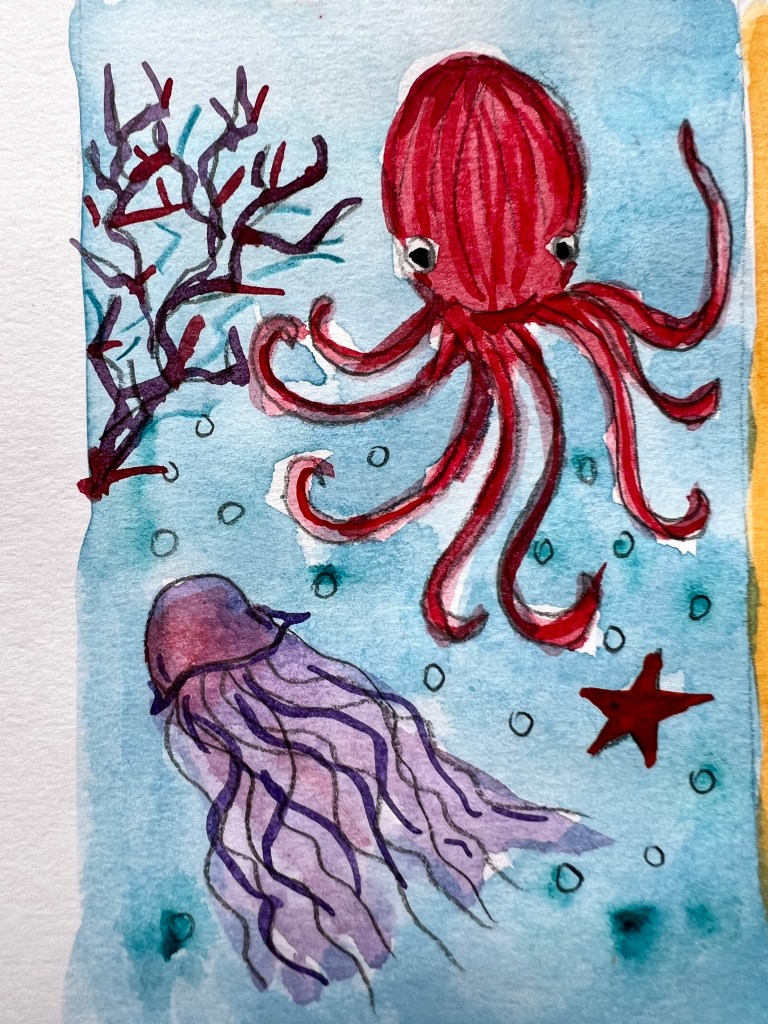
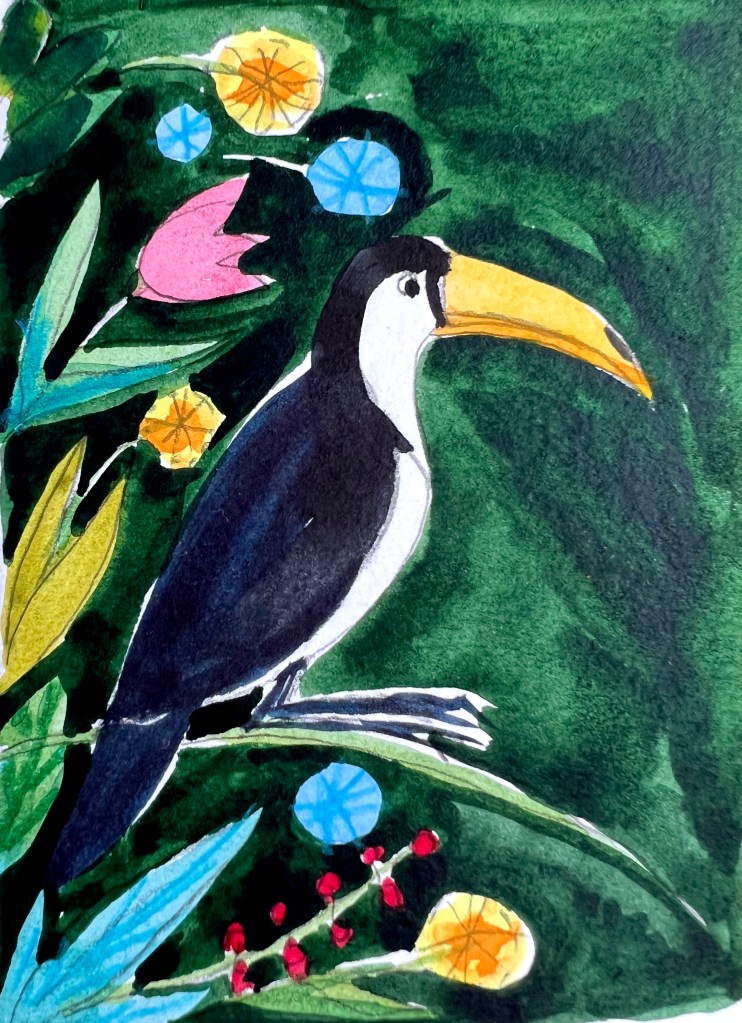
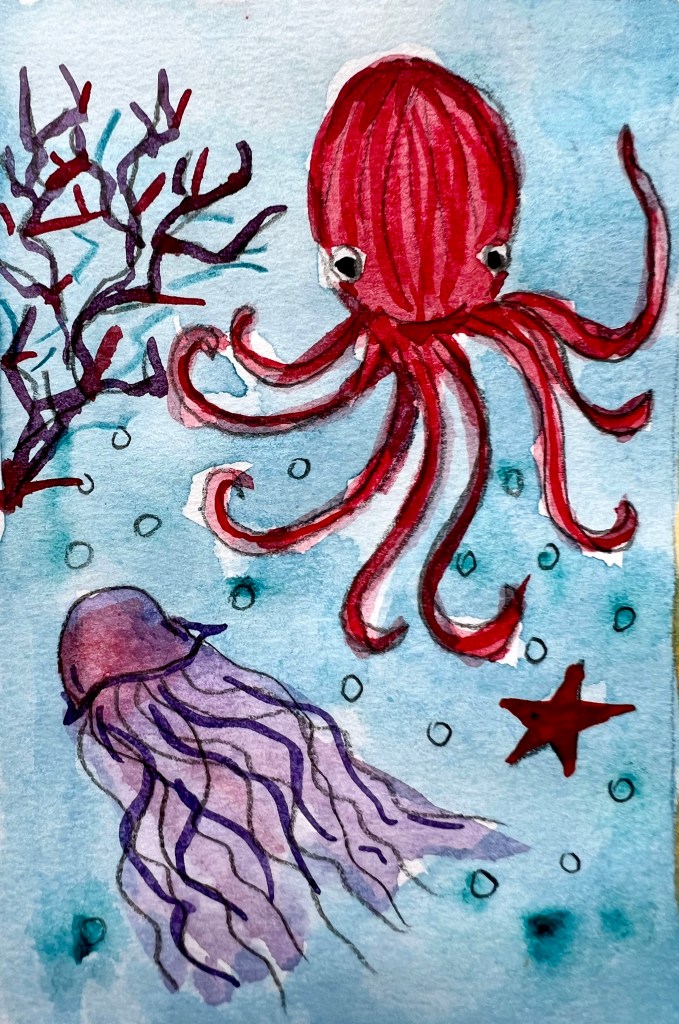
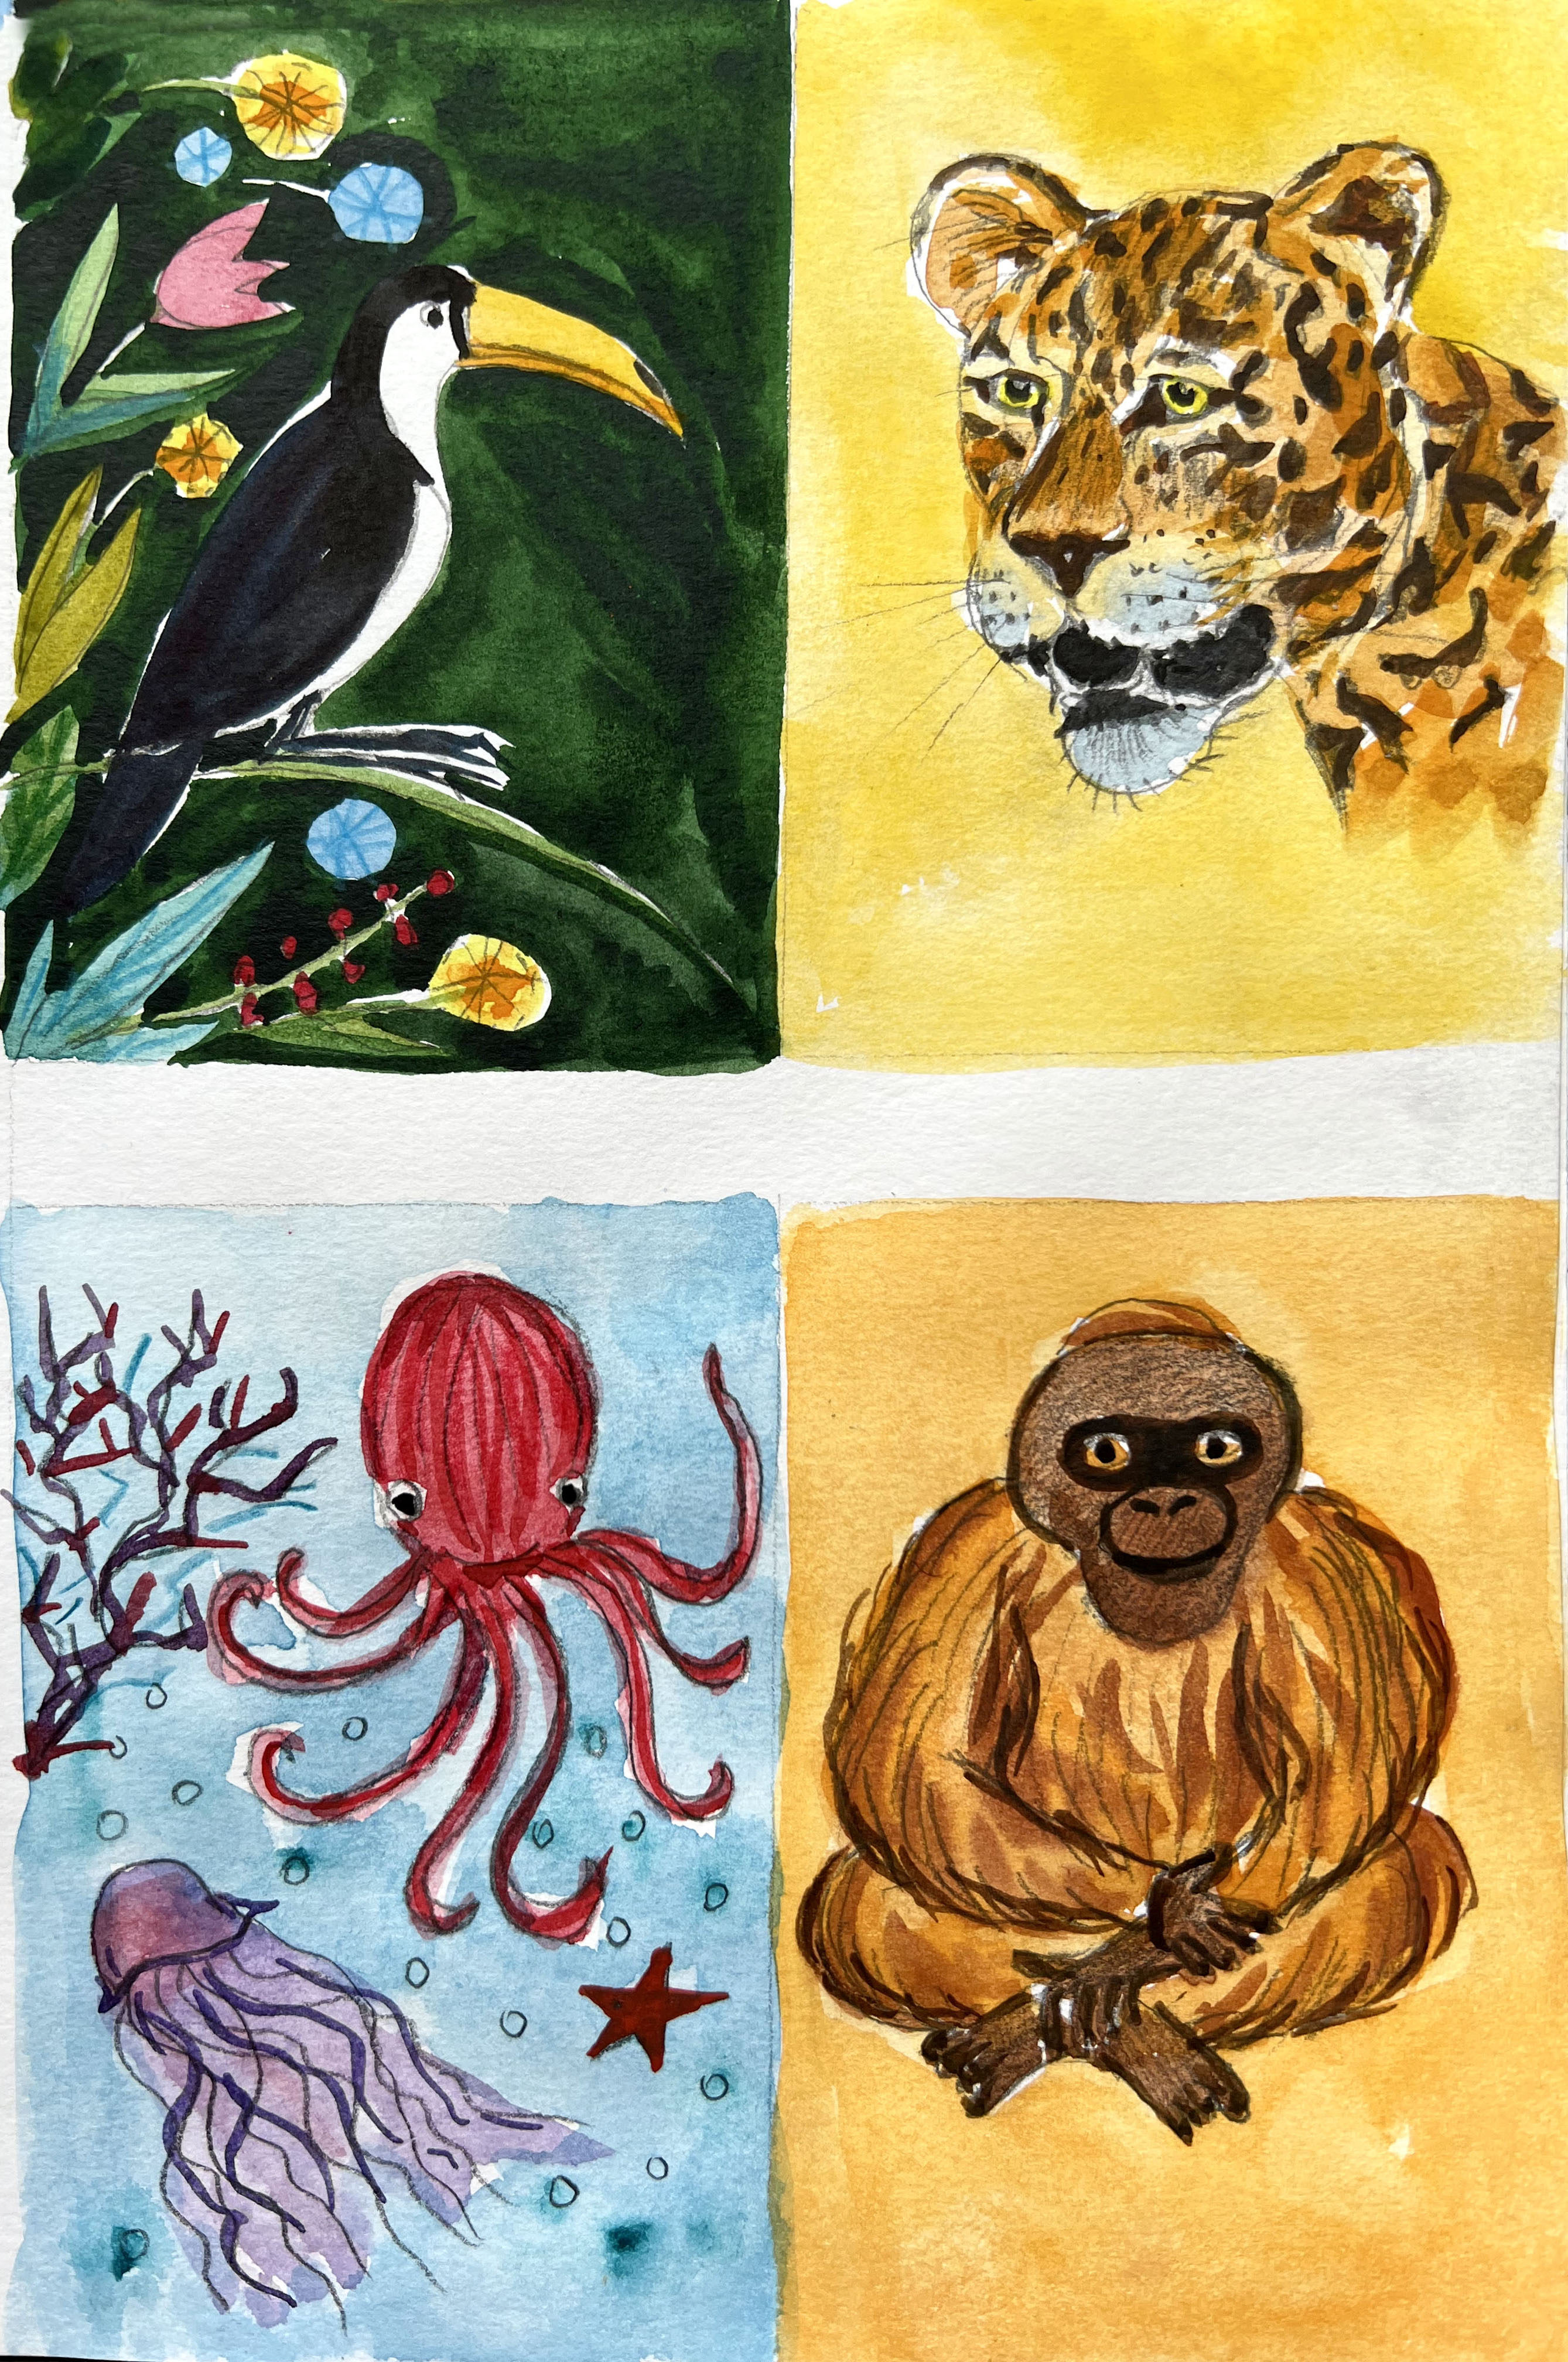
After I designed the first book cover, I moved to the next option, which was based on a different approach, here I was going to use square composition. The idea was to divide the space of the cover into proportional four parts, and in the top two places animal that flies, an animal that fast, a marine life animal, and an additional wildlife animal, that is the most recognisable. Here I used iconic animals, tucan, leopard, monkey and octopus with jellyfish.
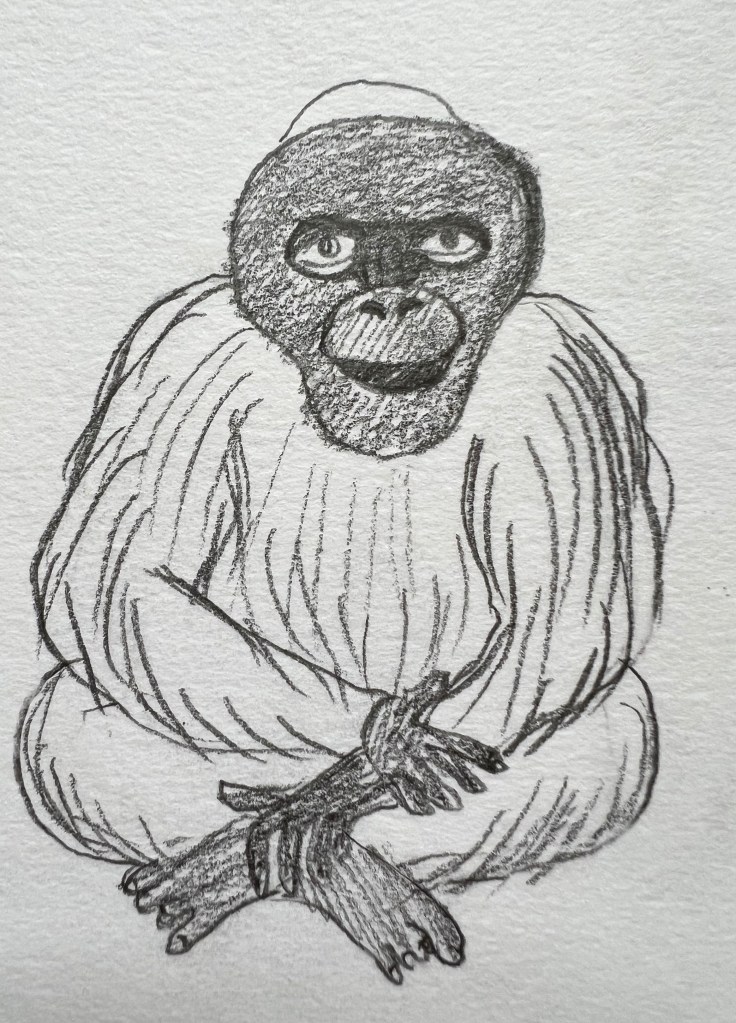
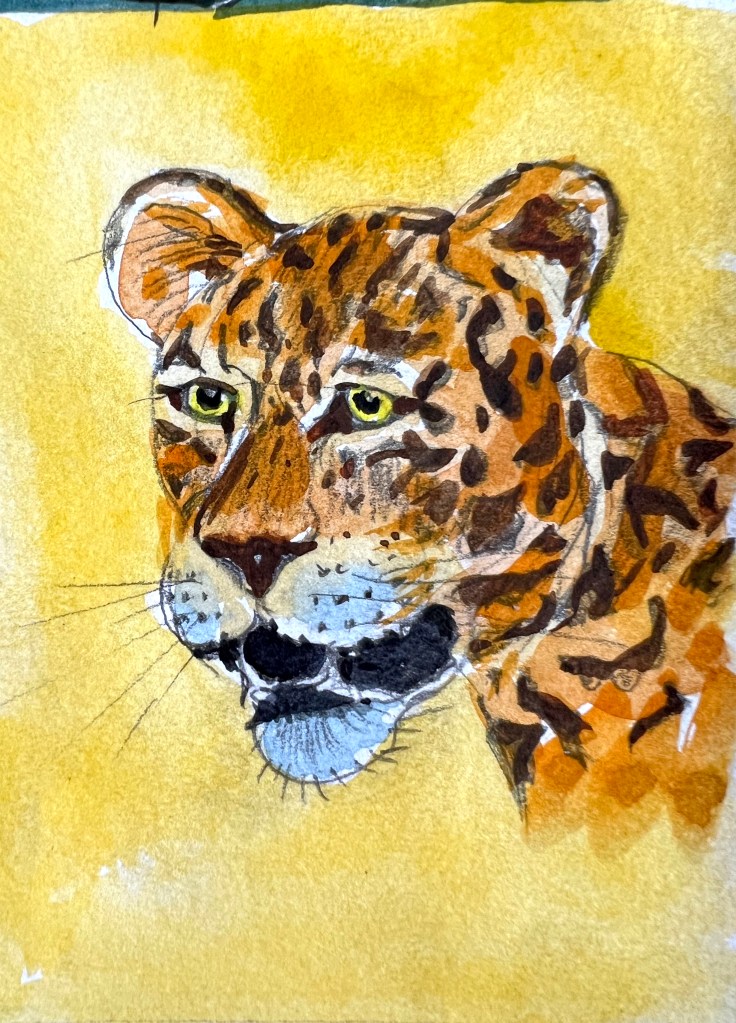
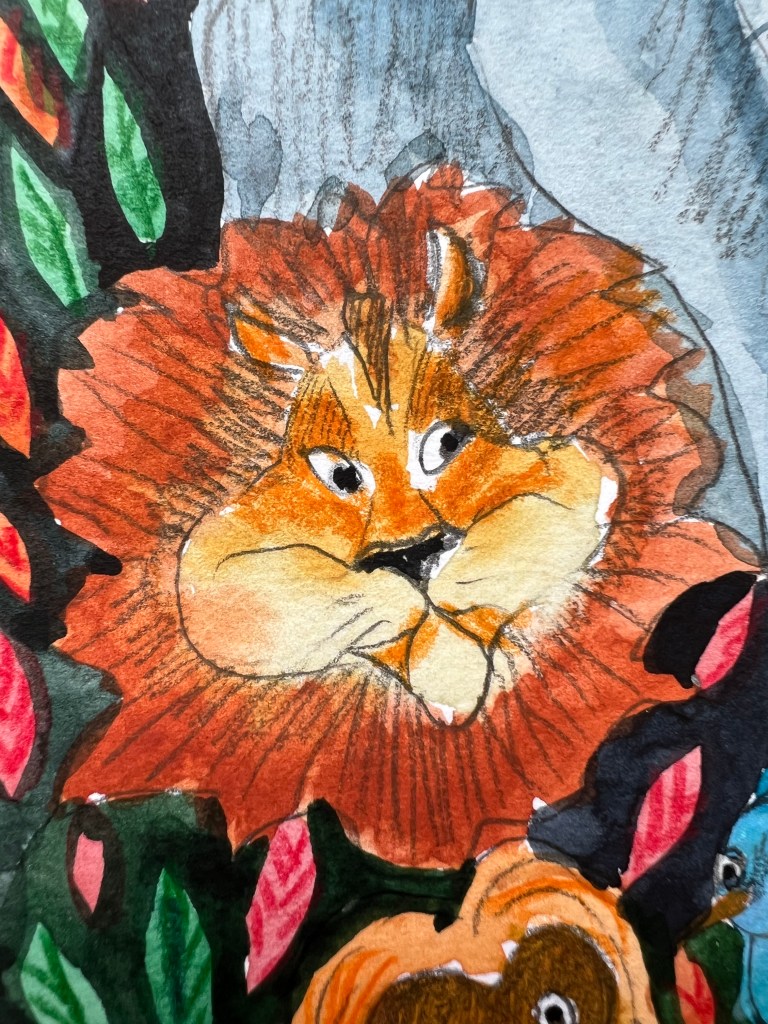
What I’ve noticed about my illustrations, is that here I brought little personalities into the faces of the animals. The bird and leopard look serious, the octopus is happy and smiley, and the monkey is inquisitive. It was hard to bring the same mood for those different animals, I was planning to make the look of the leopard a bit kinder, as it could be too contrasting to other animals.
I left the space in the middle free, as I needed a free area to place the name of the book, but later I realised that part would have to get adjusted, as the name of the cover felt quite claustrophobic and tight between those blocks. I thought I could create the area in the centre of the cover and fill it proportionally to the size of the book.
I started slightly adding the colour to the animals. I was thinking, about how I could join them into a coherent theme. Maybe I should leave the background blank, or shall I add a different background colour? I thought that the most logical would be to make the jungle background for the bird, a dark green colour; yellow – the colour of the sand for the leopard; the blue ocean for the octopus; and warm orange for the monkey.
Here are all four blocks of animals altogether done by watercolour, and sketch underneath. I added contrast for the sketch on the top of the illustration as well. I changed the facial expression of the leopards to a kinder way, which helped to create coherence between the animals on the cover. I just needed to adjust this illustration in Adobe Photoshop and Illustrator for the final touches.
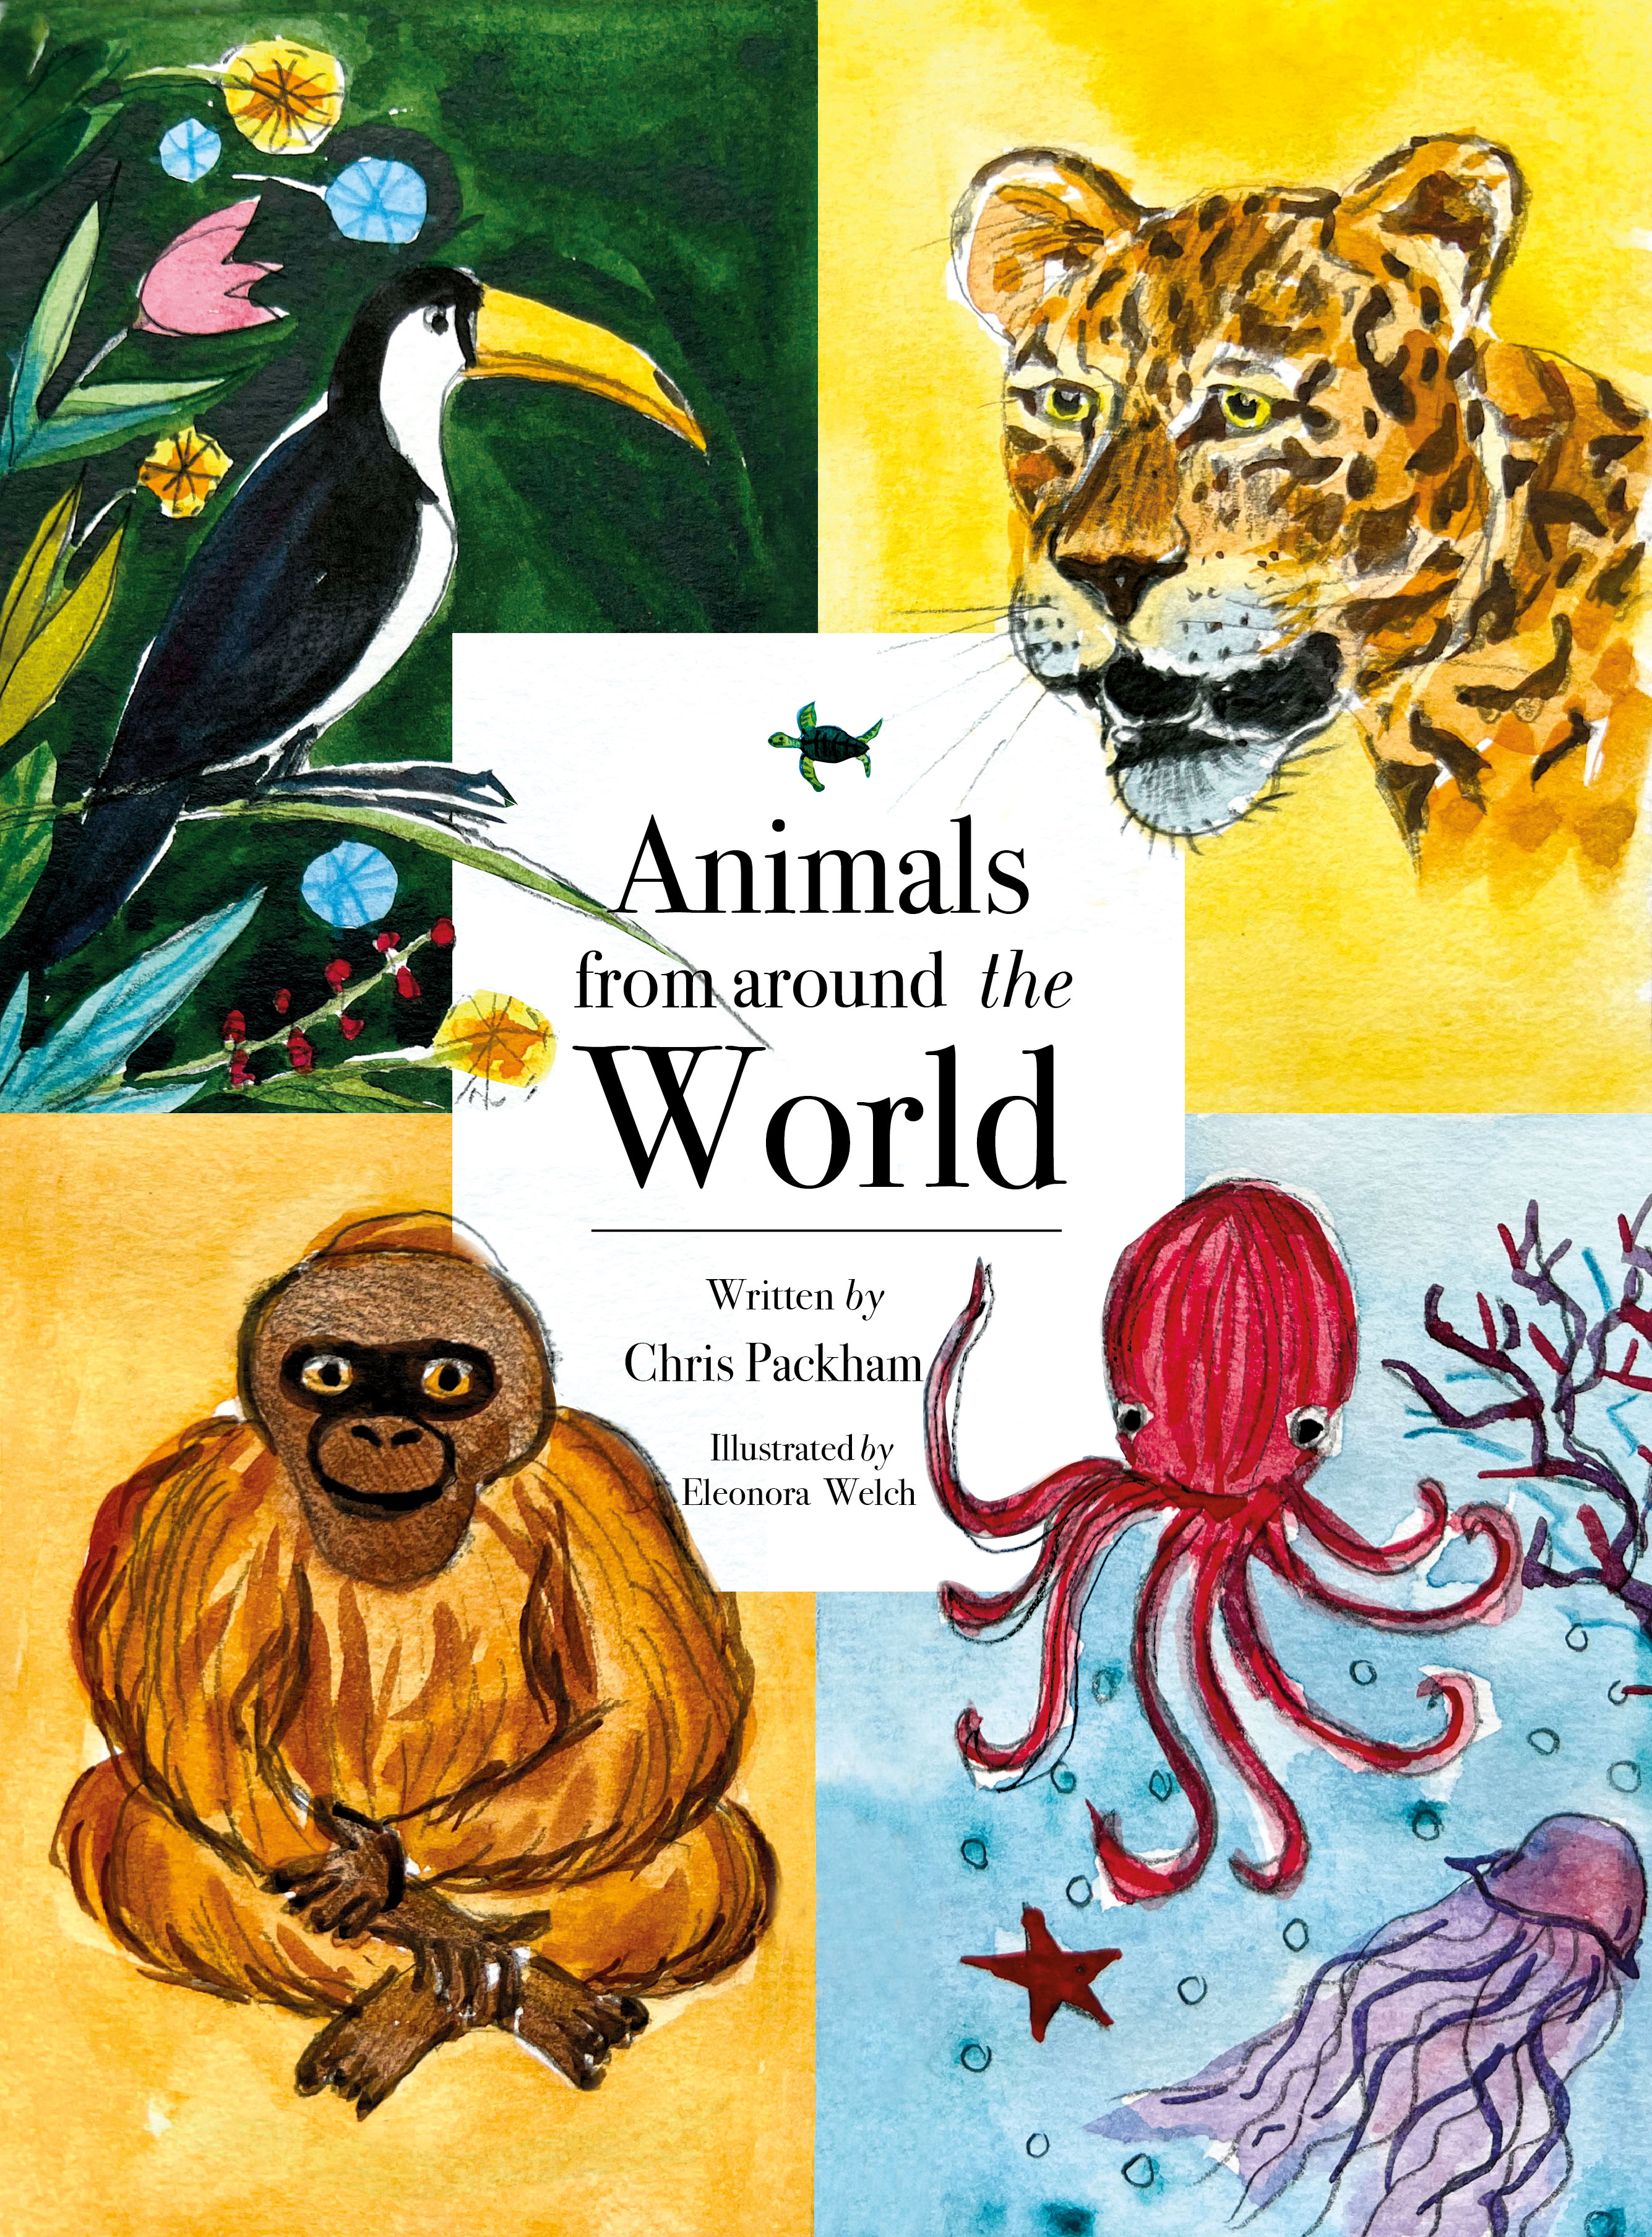
I made all the lines neat and proportional, and in the centre, I placed a white rectangle for the name of the book cover. To make the name of the book more engaging, rather than keeping it on the flat white colour, I placed some elements from each animal in front, that little touch made the cover more engaging. Also, I placed a little turtle in the top, as a little brooch. For the font, I chose the classic Font Bodoni, and Bodoni Italic, and positioned the name of the cover and authors all the way from the top to the bottom, which helped me to create a well-balanced composition between the illustration and the name of the book.
To start with, I was not sure whether this idea was going to work, but I’m glad I tried it, as it turned out quite well. I liked how the illustration supports the name of the book, and how images cooperate with each other. Also, it was good to bring some details to the front, as it creates some deepness in the layers.
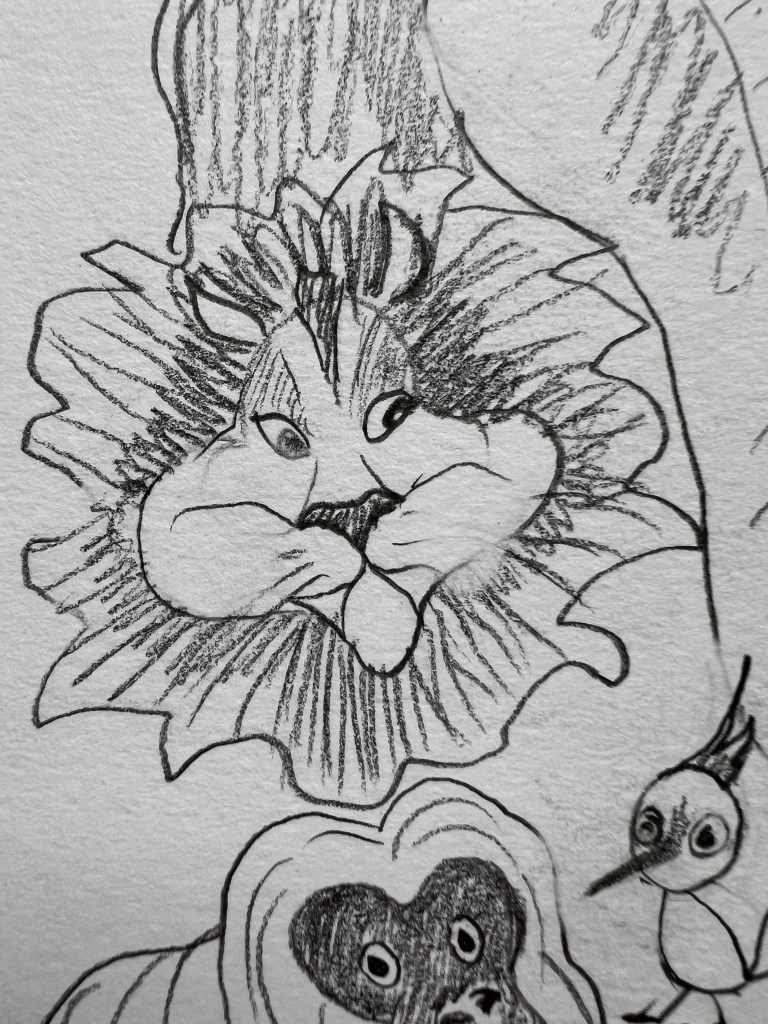
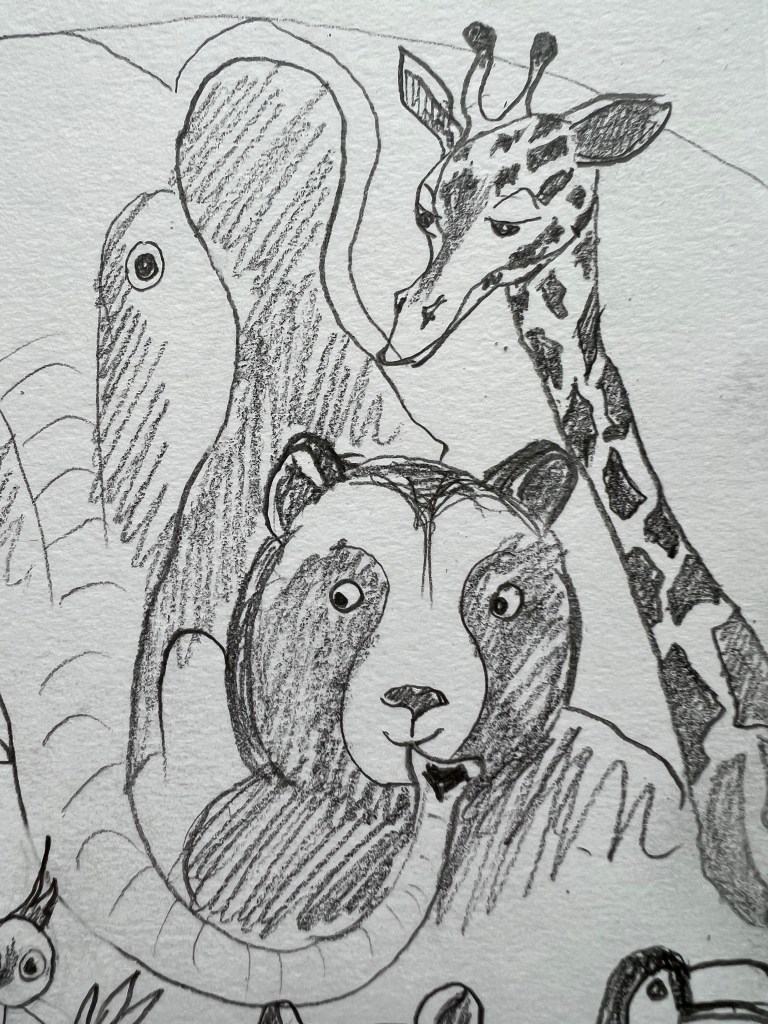
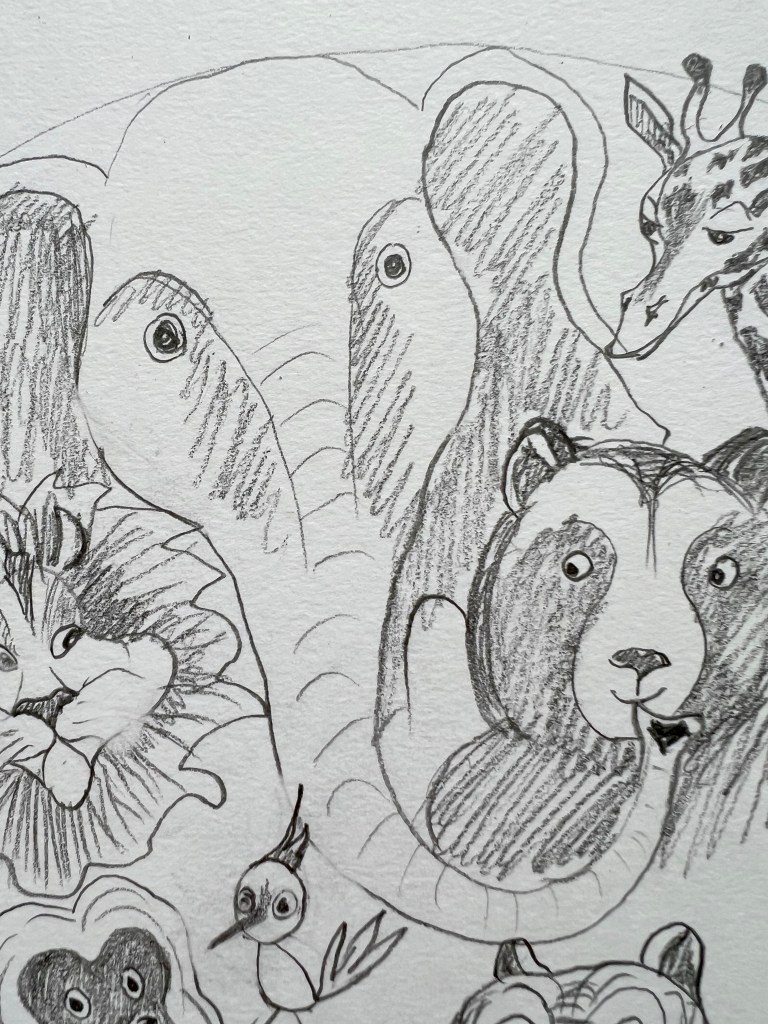
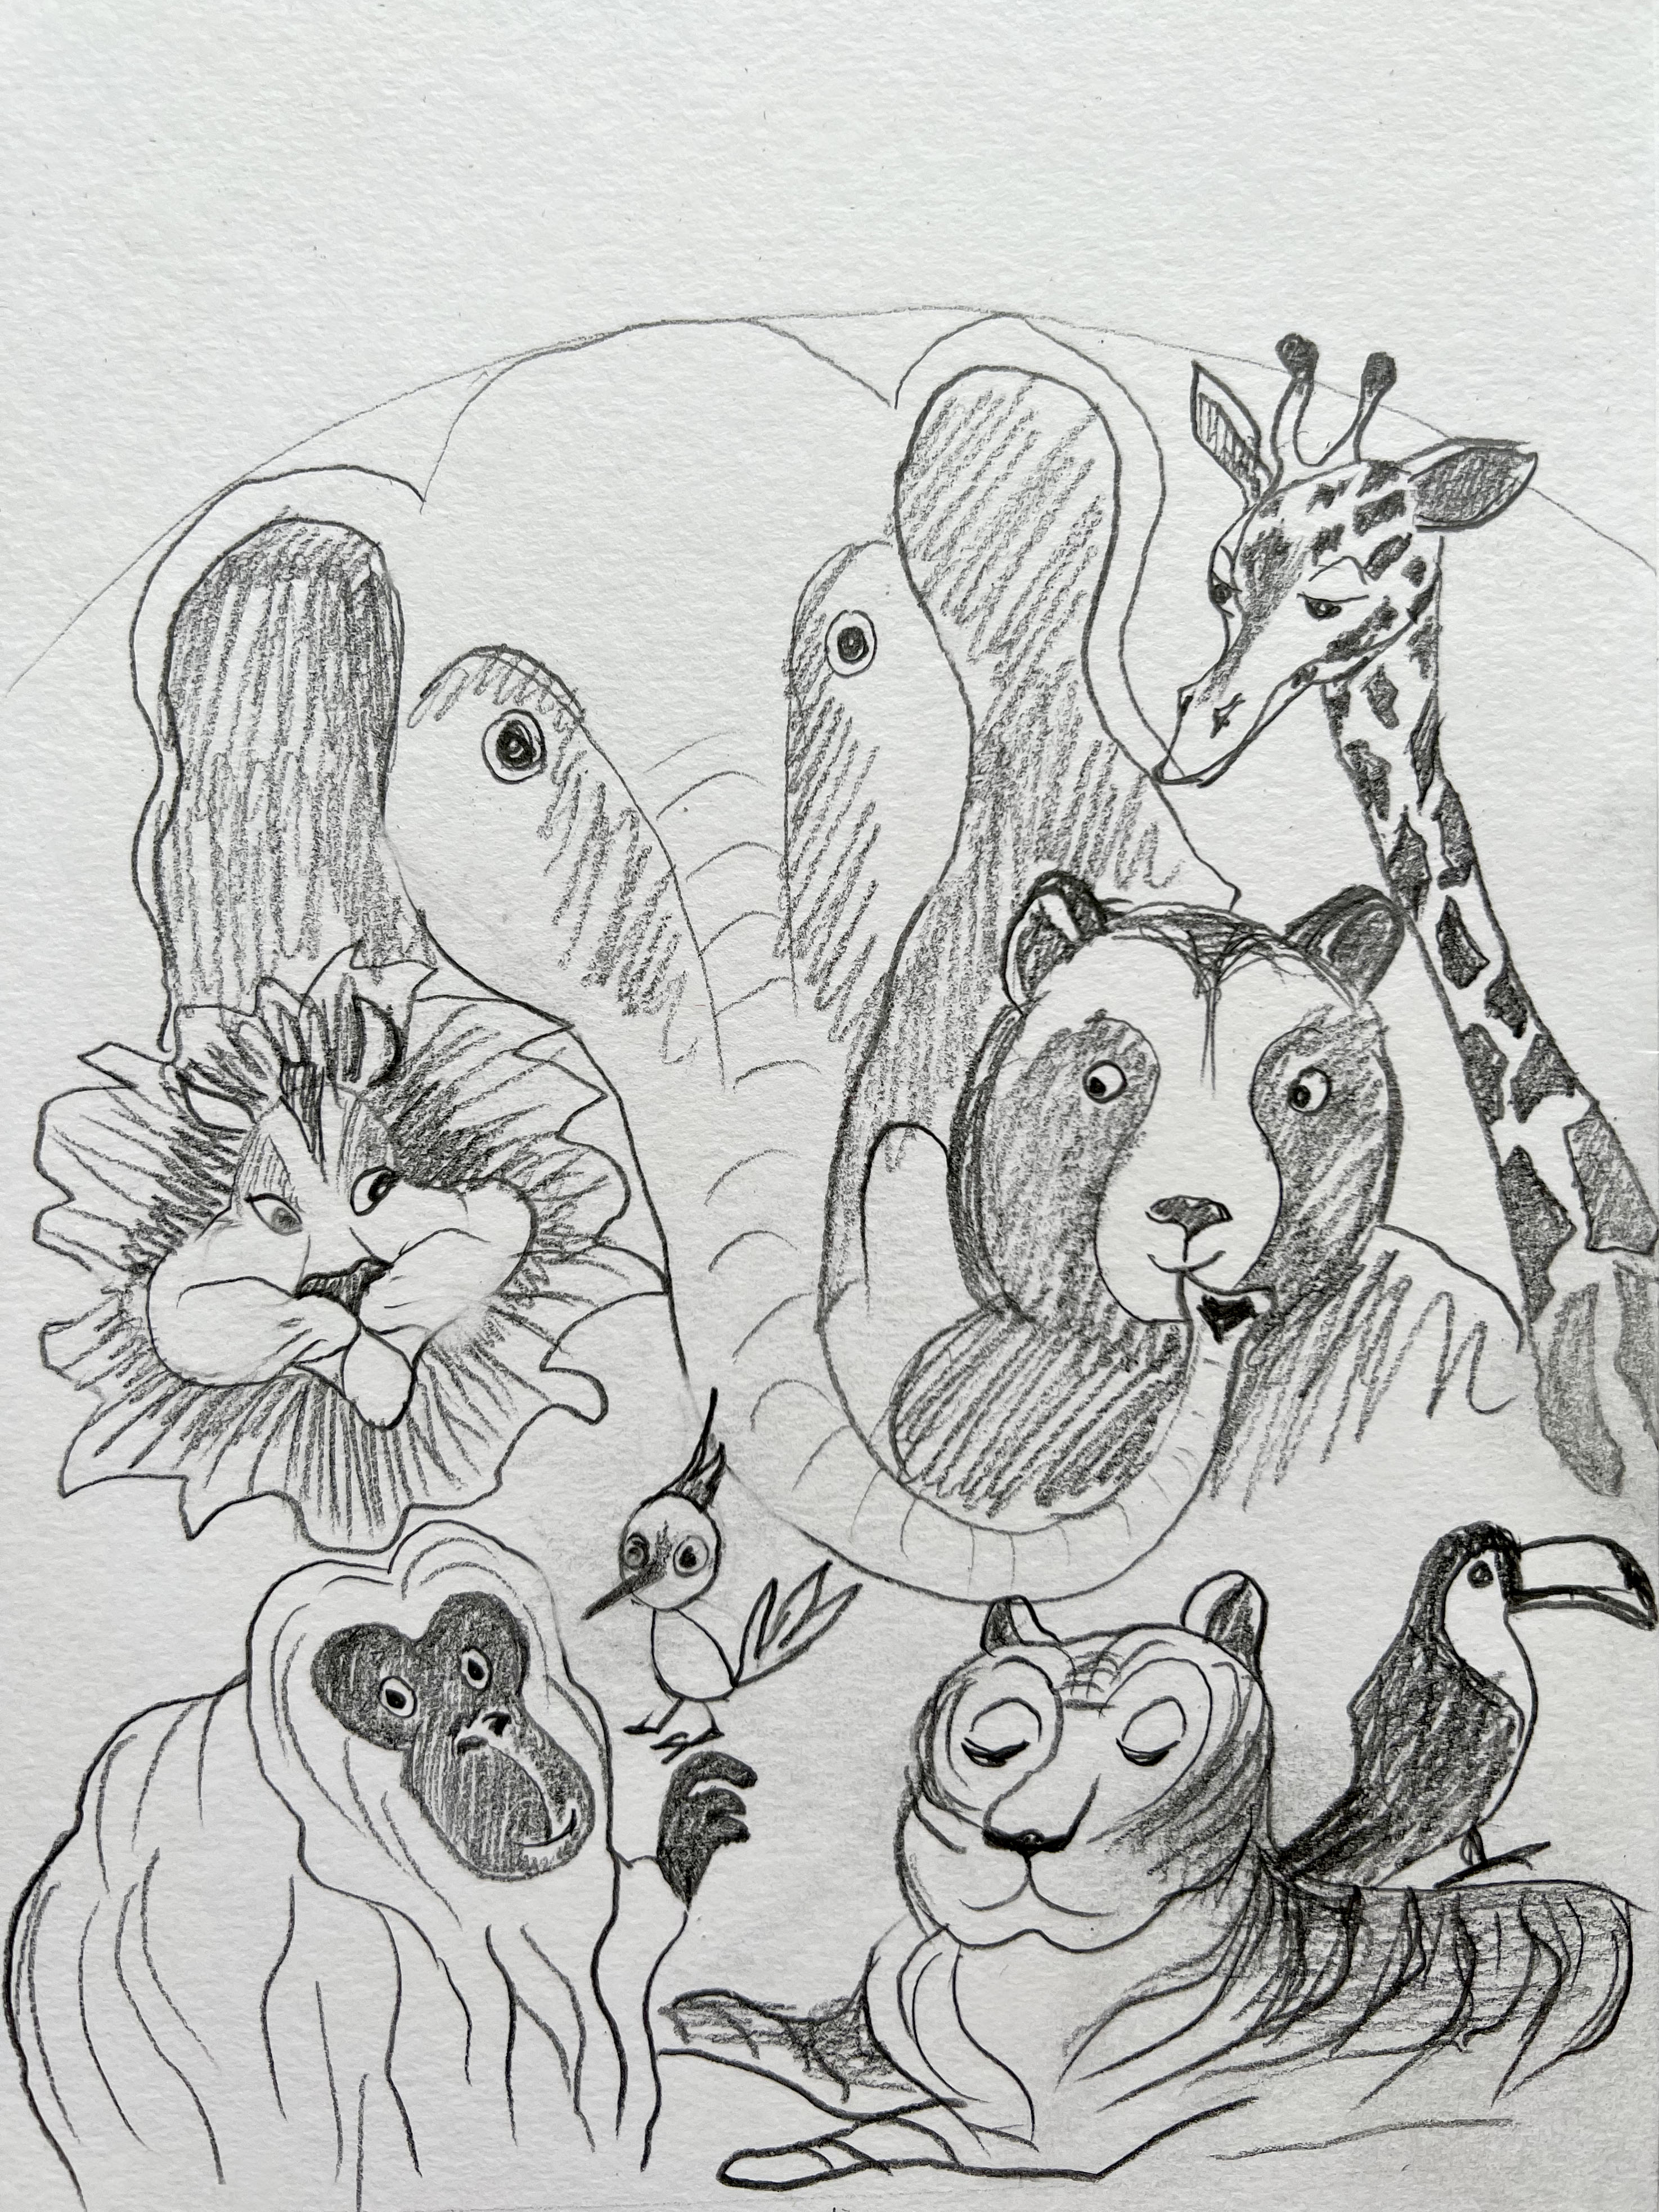
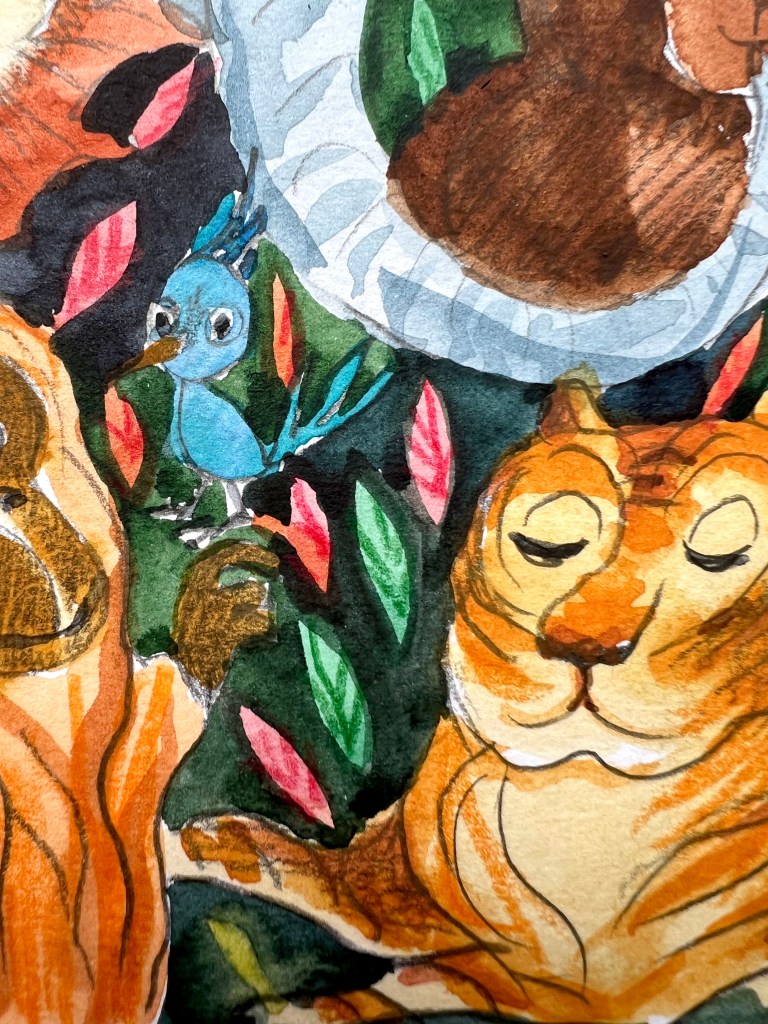
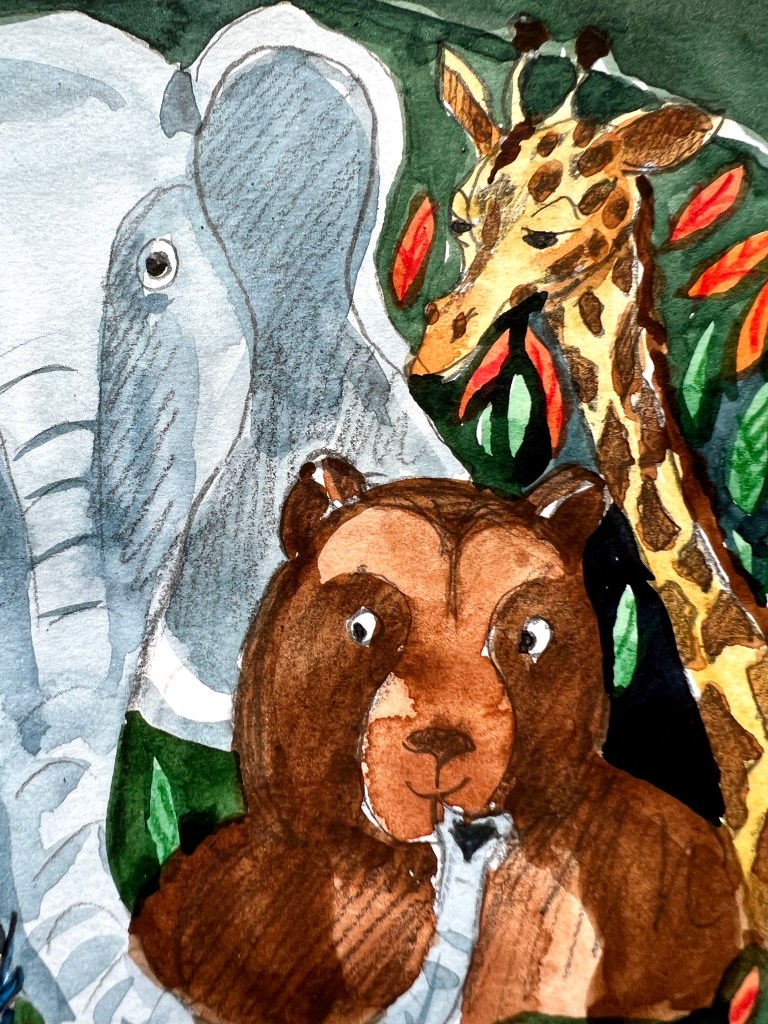
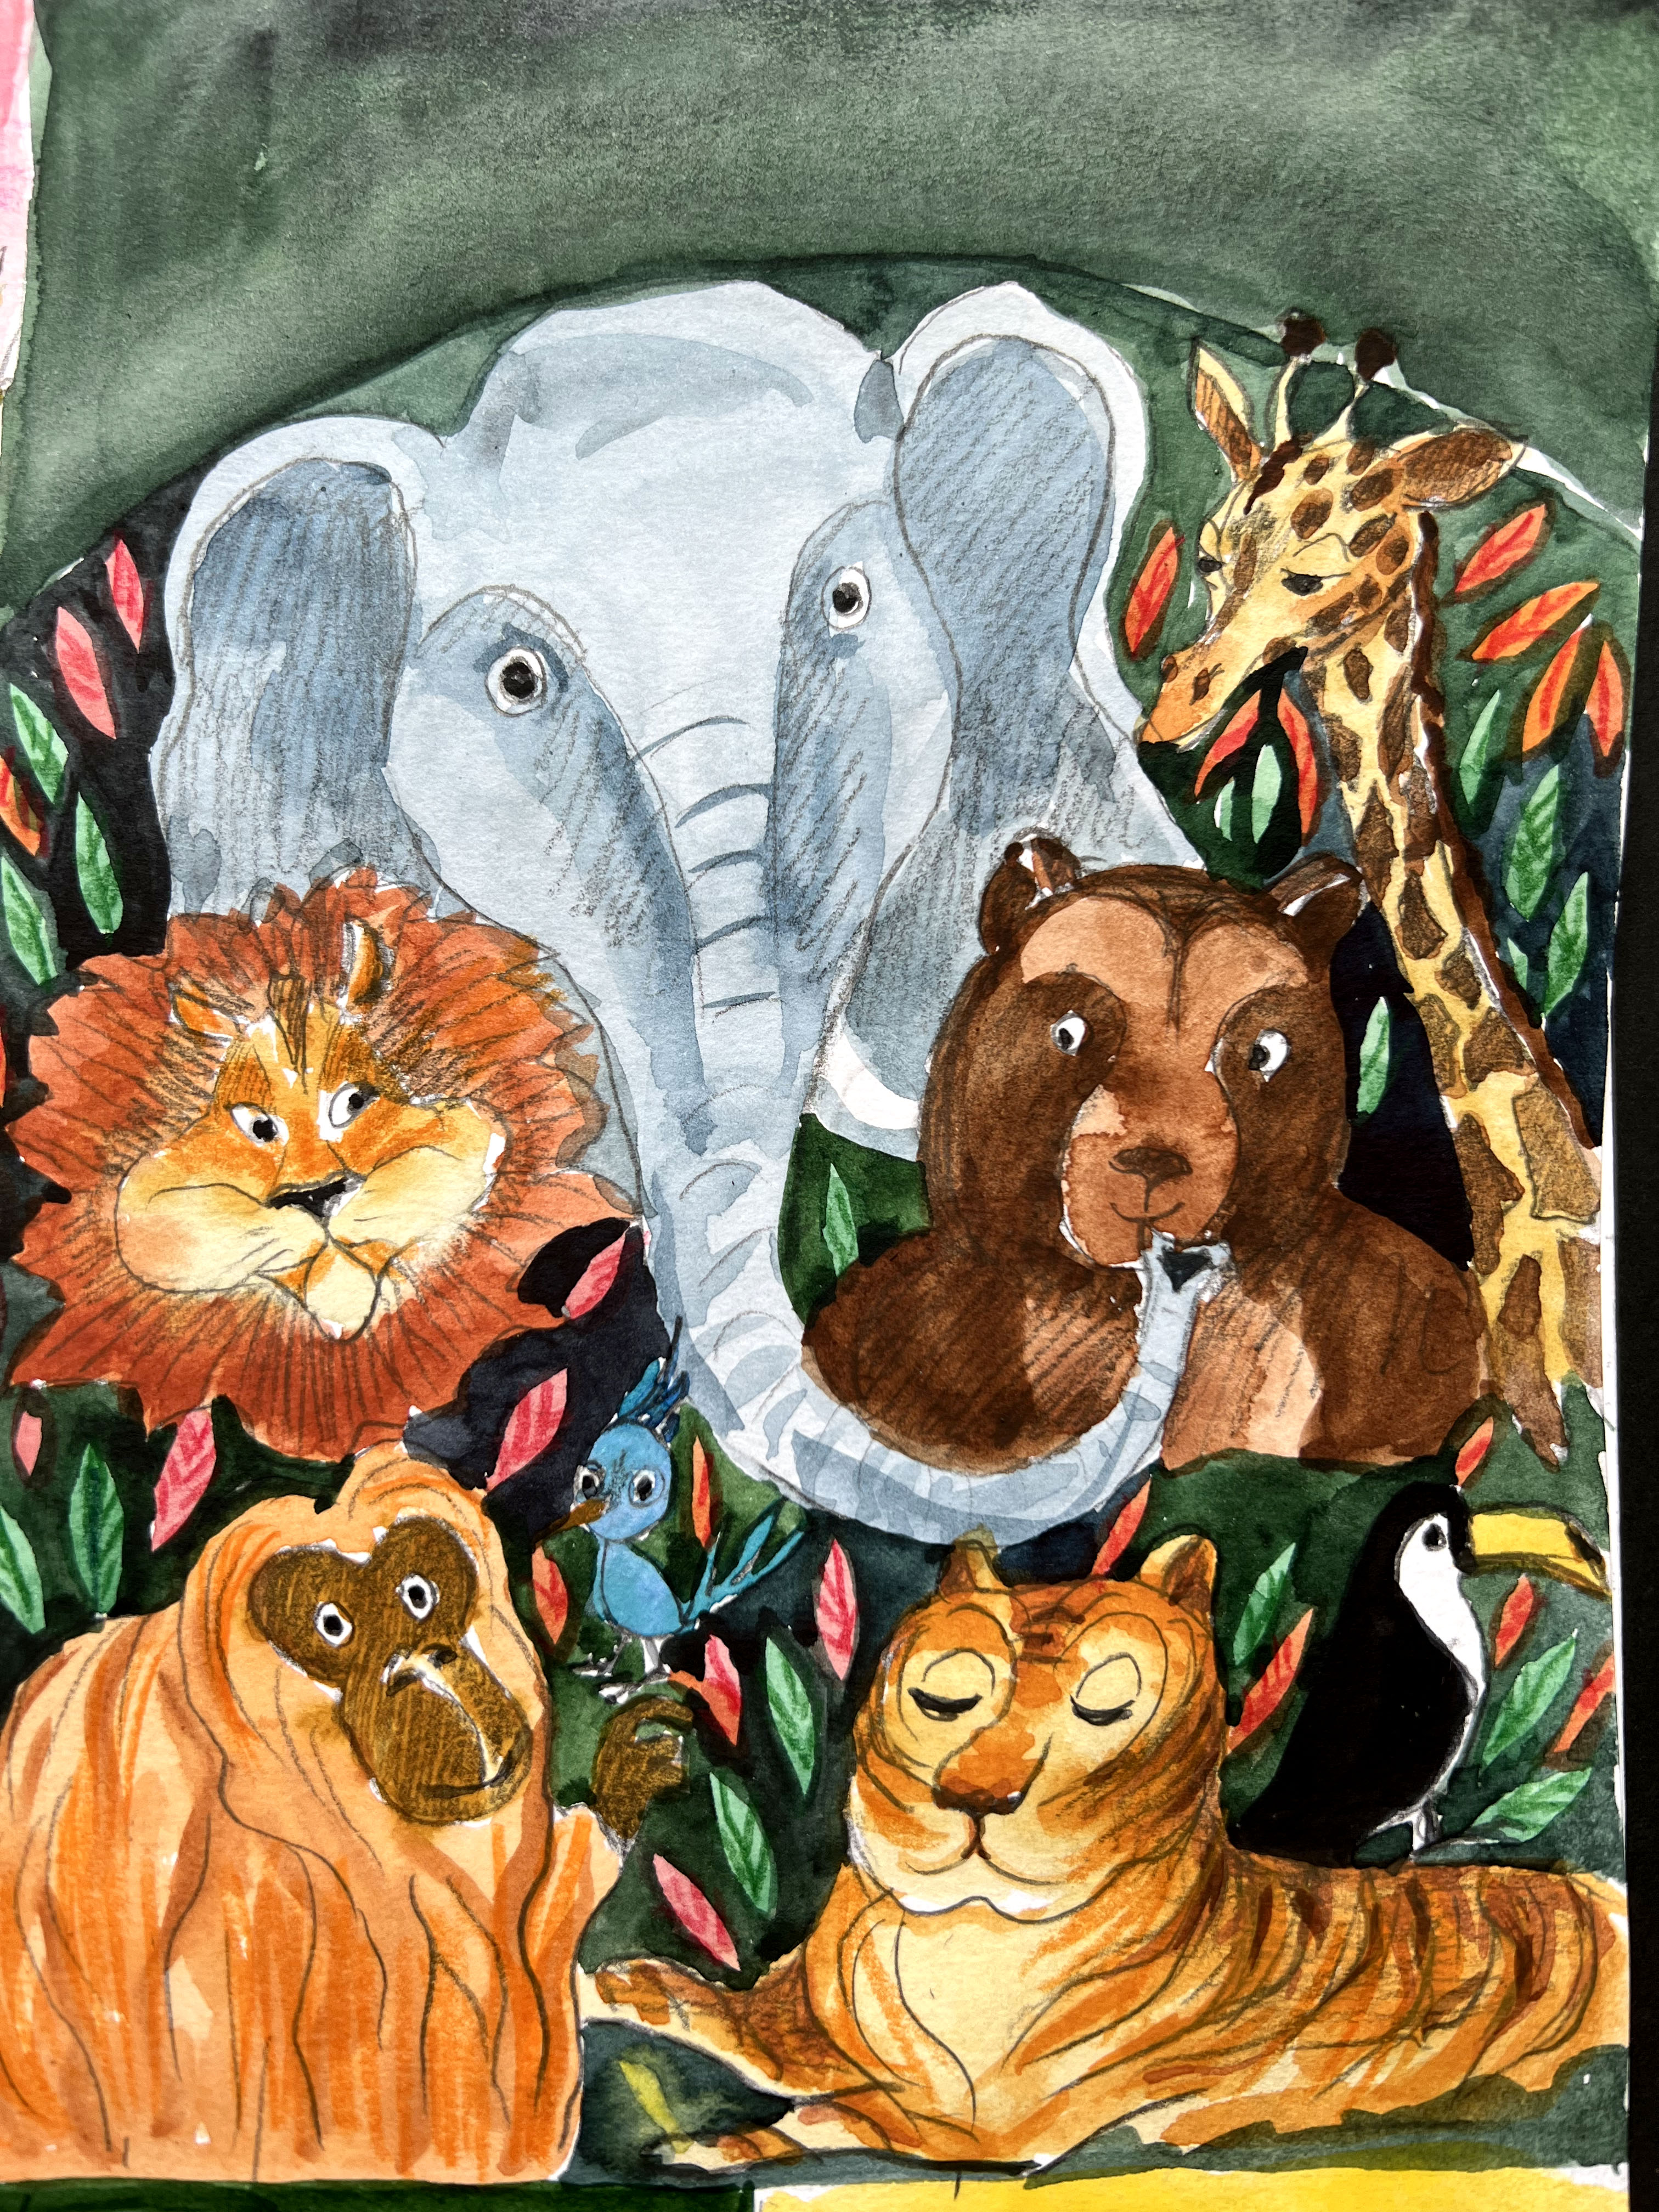
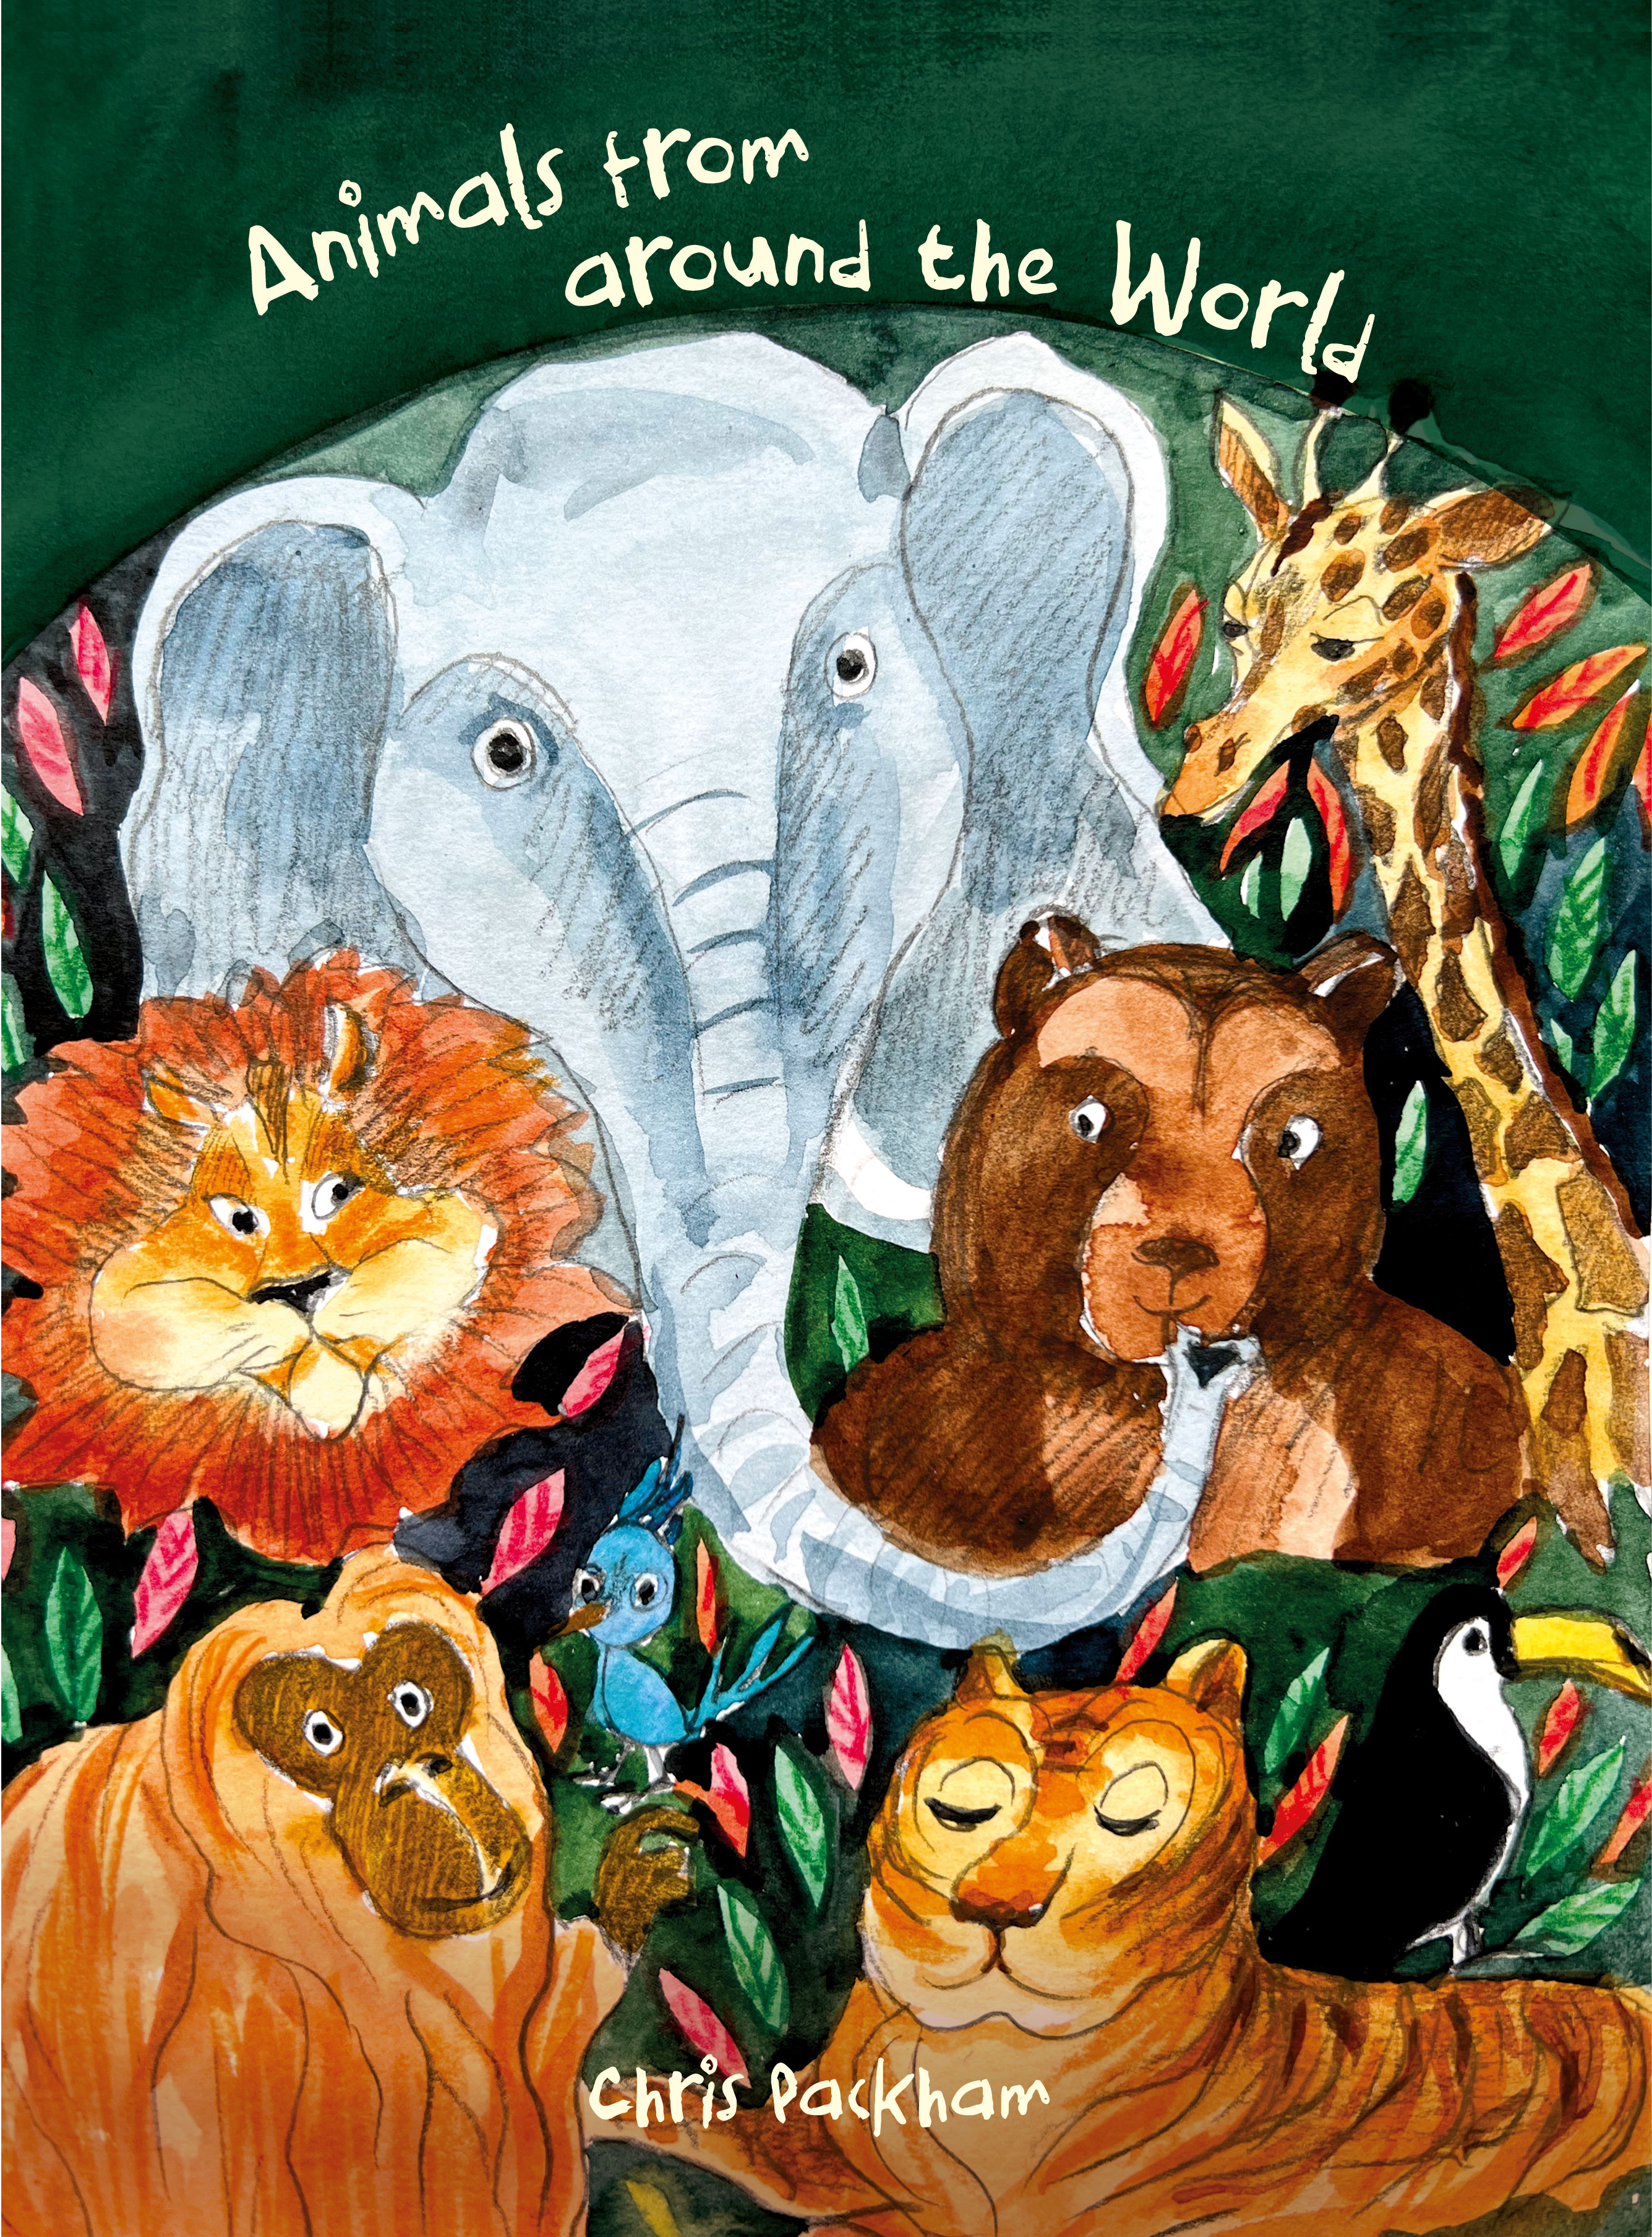
For the third and final book cover, I went for the option with a group of animals, featuring a cheerful and amiable group of animals, which I believed would greatly capture the attention of children. Here the idea was to bring the wildlife together and create the connection between them. The top of the book I made with the arch, as I wanted that writing to bend round. As the style of illustrations is quite cartoony, I thought some handwritten playful font would add some nice touch to the design. I chose Boredom font and placed it on the top, but I had to place the author’s name at the bottom, as it was a tight fit at the top.
I believe that the final cover served as a fitting conclusion to the efforts I put into this exercise. The book cover showcased a diverse range of animal illustration styles and compositions, which proved to be effective. Additionally, I experimented with different typographic choices to complement the illustrations, and I found it to be a valuable exercise in creating educational materials for children.
Having an understanding of the audience is essential for the successful transfer of messages. Fundamental to this is to know exactly what type of response is required of the audience and whether or not they would buy the message being communicated.
In this exercise, I have been asked to produce three illustrations to be as part of a series of A3 posters to publicise the museum to the following audiences:
Children aged 5–9;
Teenagers (13–16);
General adult audience.
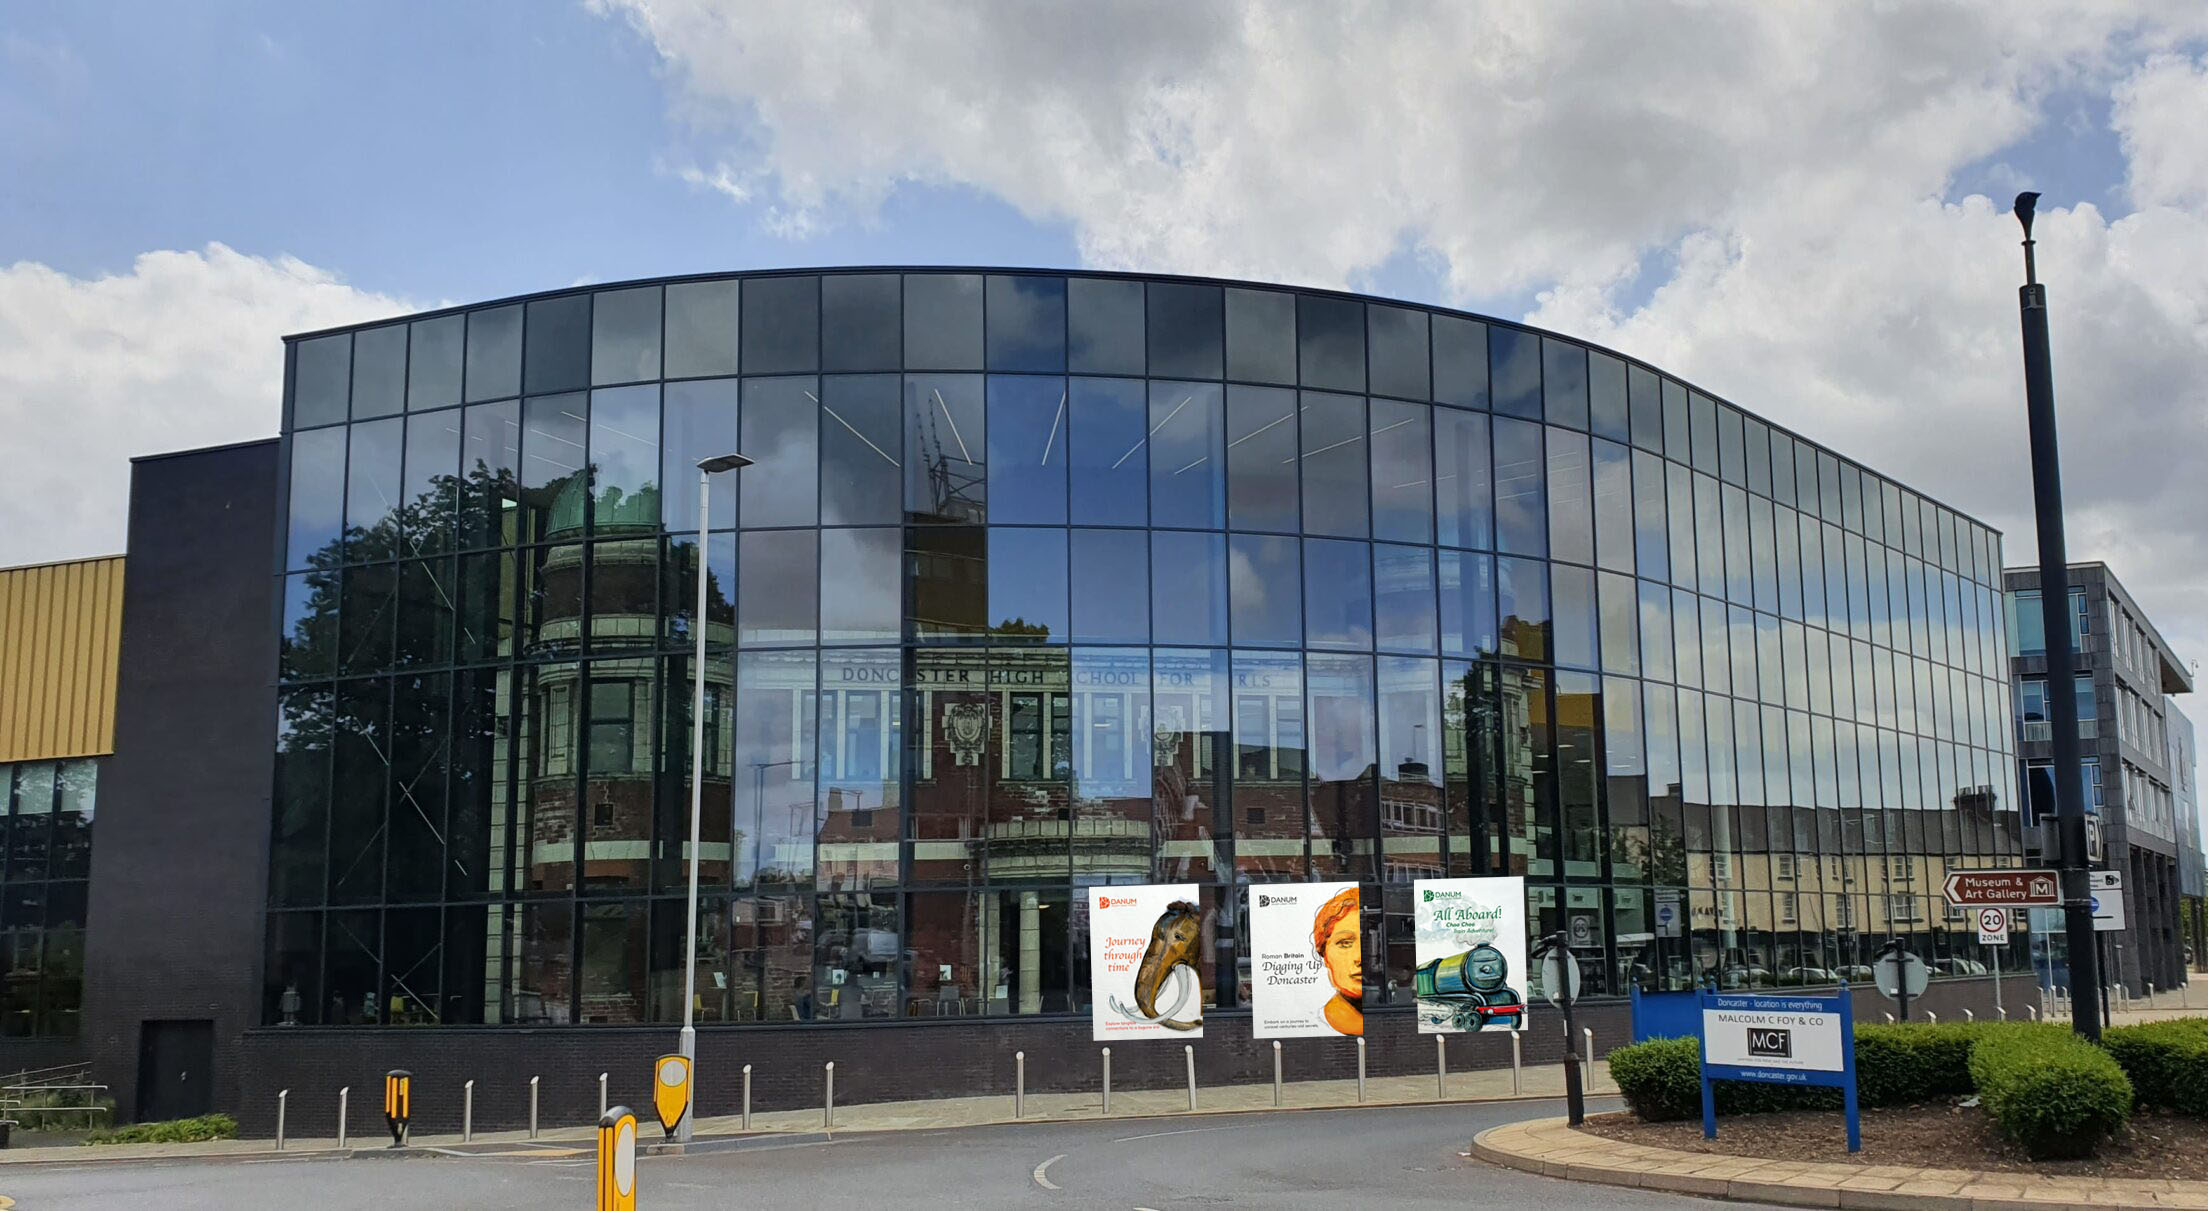
In order to do so, I need to select one object for each audience and create an image centred around that object in a way that I think best presents it to the market. I went to our local Doncaster Museum and Art Gallery, which is based within the historic Doncaster Girls High School building. This place is perfect for a family day out, or a solo trip to explore the history of one of England’s oldest towns. It’s quite a small and compact building, but it has so much going on in it, like Central Adult and Children’s Library, Art Gallery and Museum. It even has a presentation of Green Arrow Locomotive at the ground flour.
The walk-through museum will take the visitor through different decades of life in Doncaster, starting from Roman settlement and progressing through its evolution as a market town and industrial hub. Additionally, the museum showcases changes that have occurred within Doncaster’s natural environment over the course of time.
As I strolled through the museum, I captured photographs of the most memorable artworks, which I intended to utilise for the illustrations in the poster. While the museum may not be enormous in size, it houses a wide array of diverse objects that hold potential appeal for our intended audiences. To maintain the order of the creative process, I categorised the museum exhibitions into distinct sections:
Digging Up Doncaster;
Doncaster Lives. Gresley’s Shop;
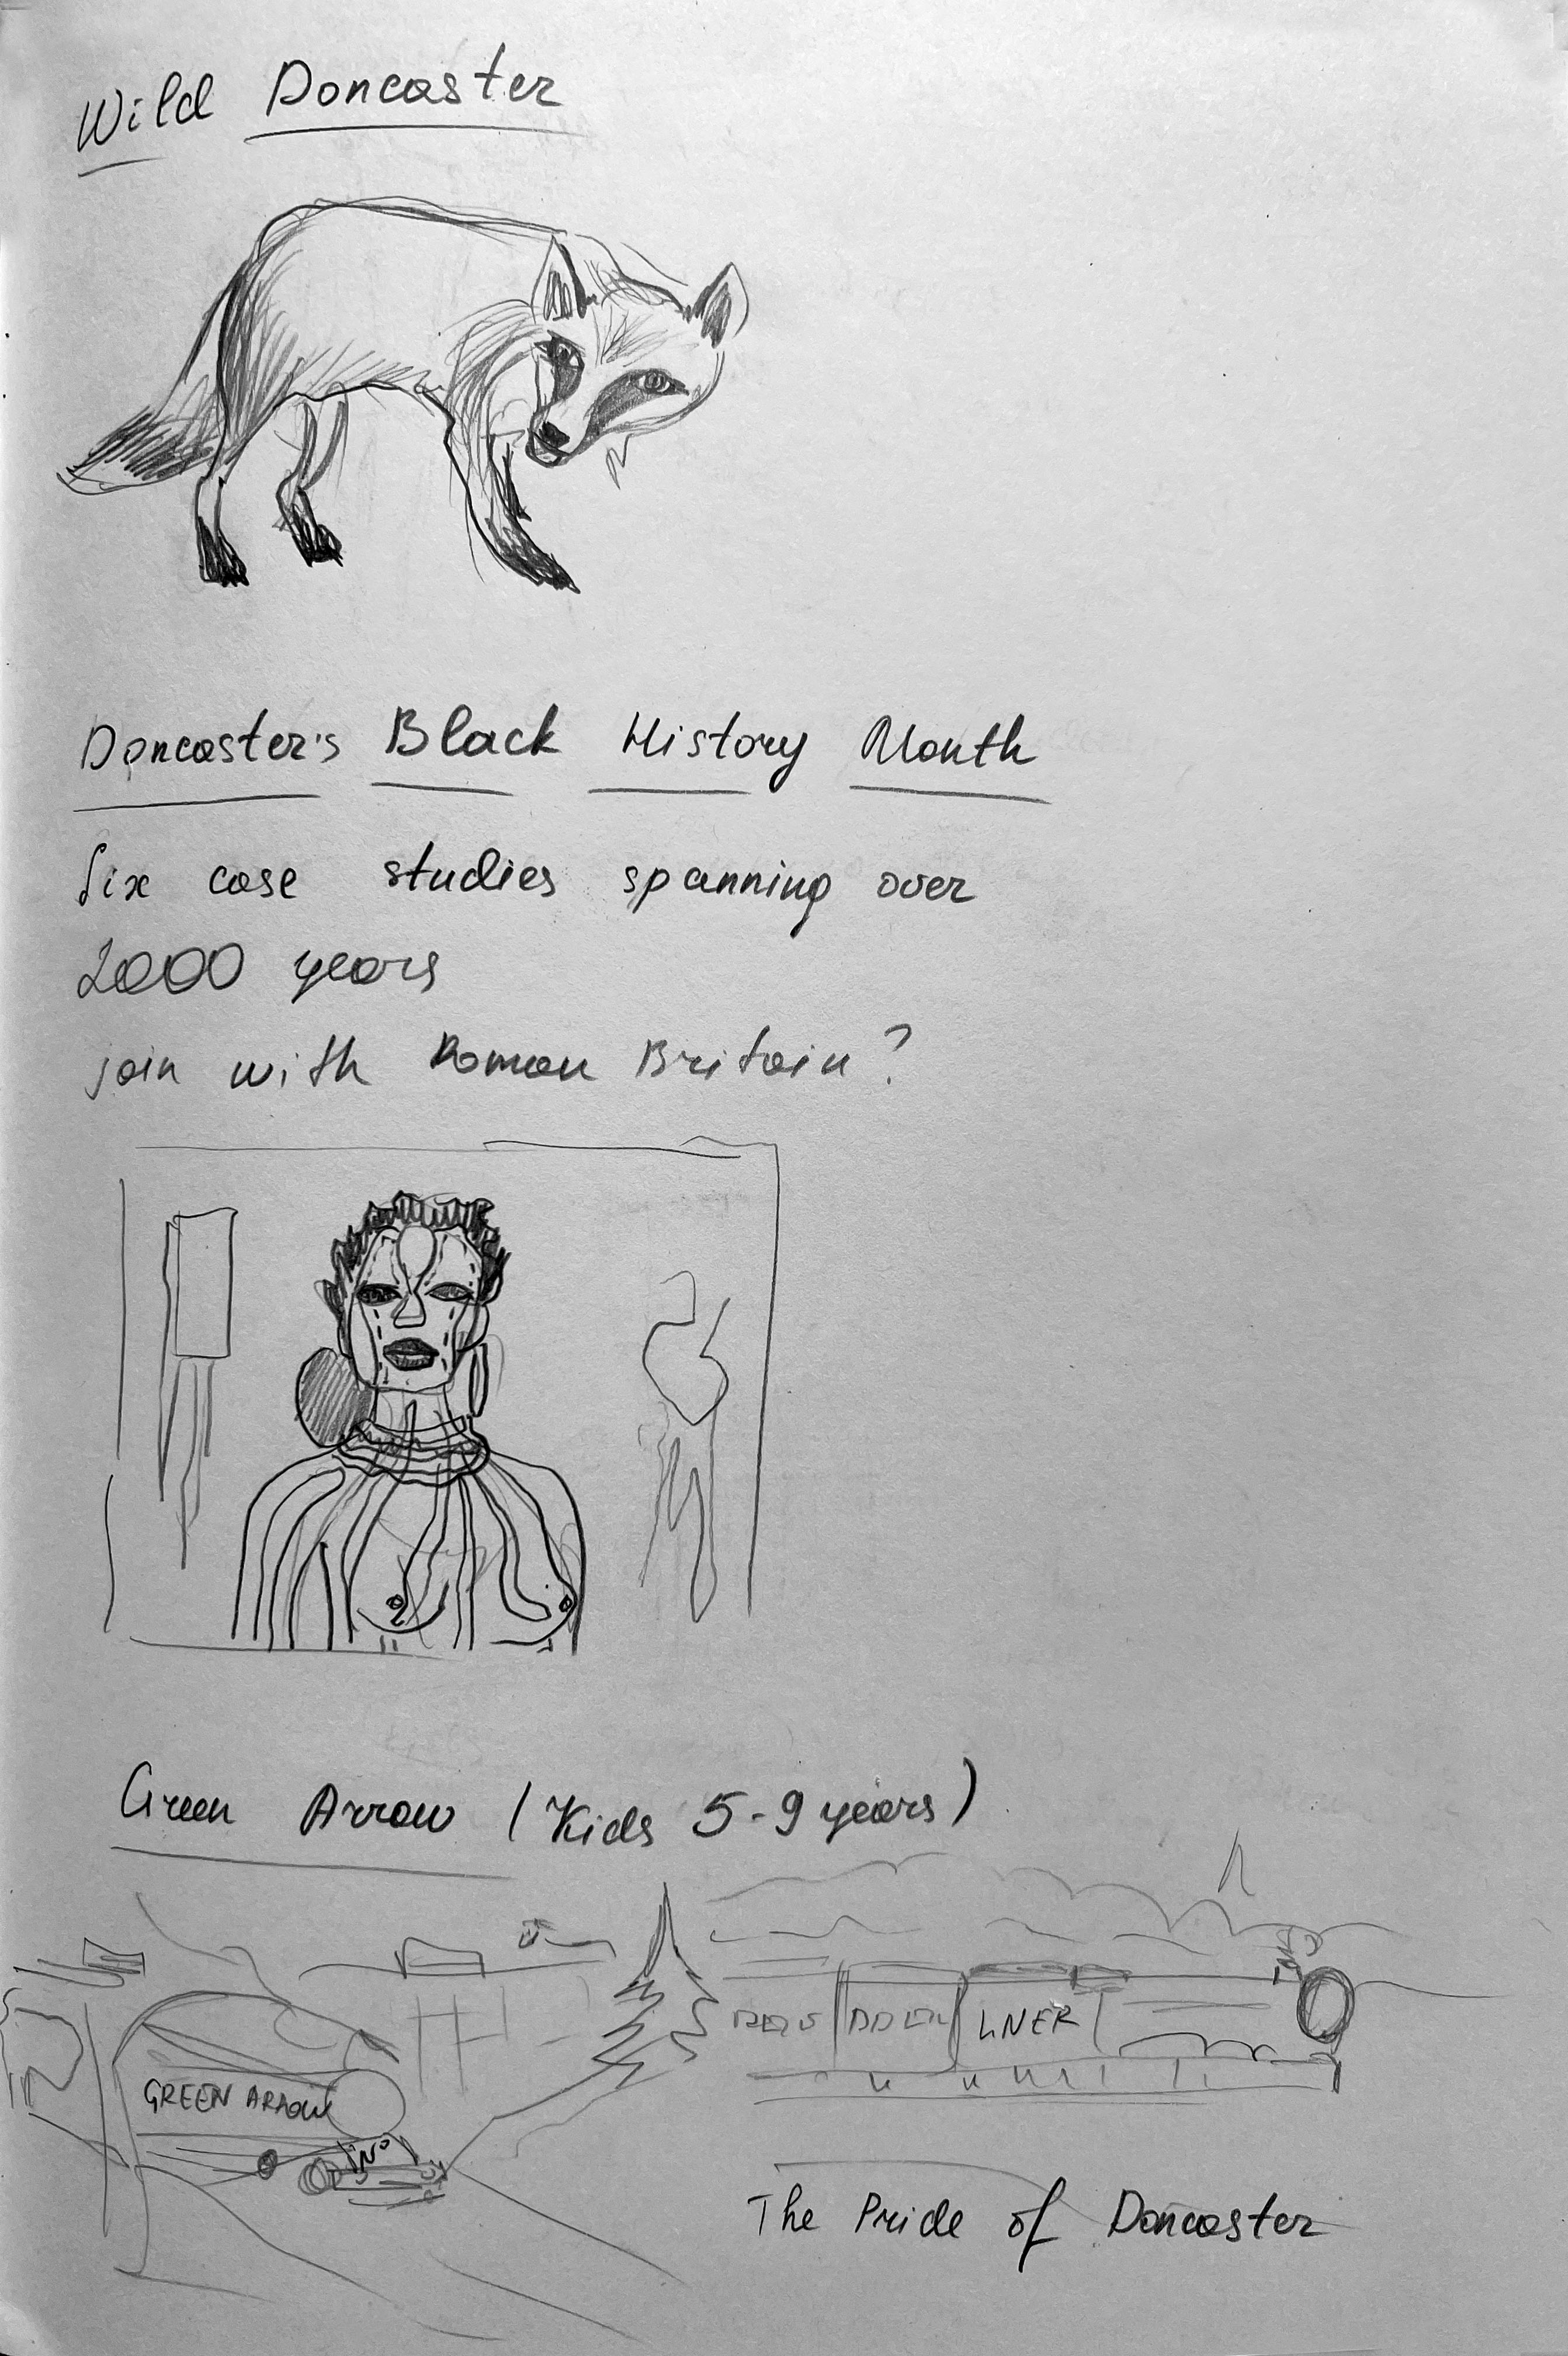
Wild Doncaster;
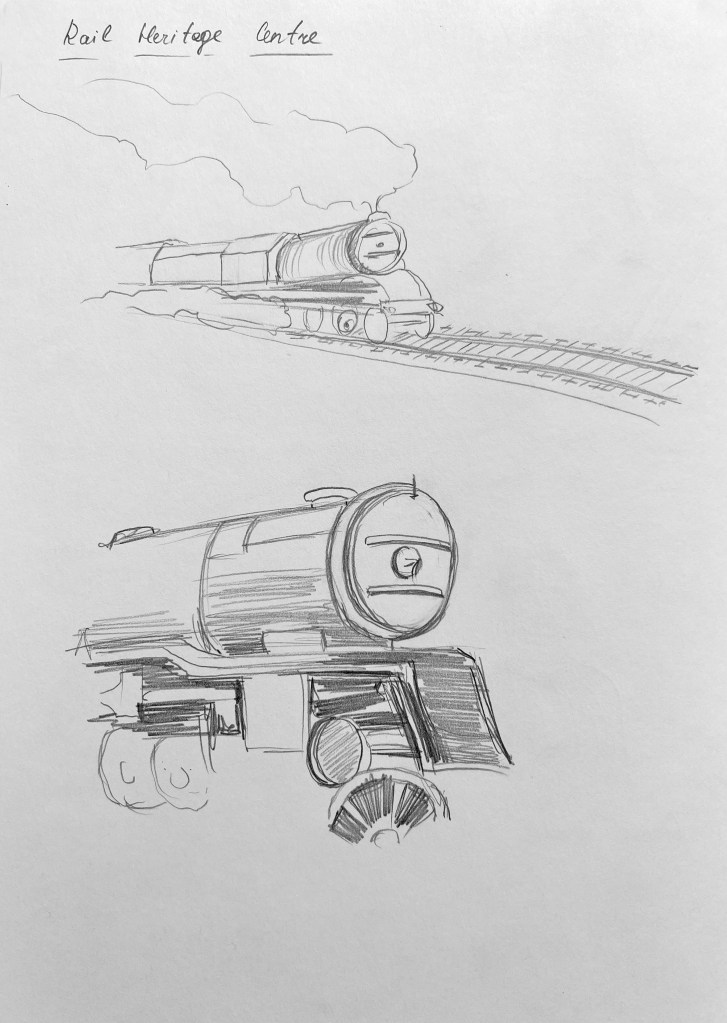
Rail Heritage Centre;
A Celebration of Doncaster Black History Month.
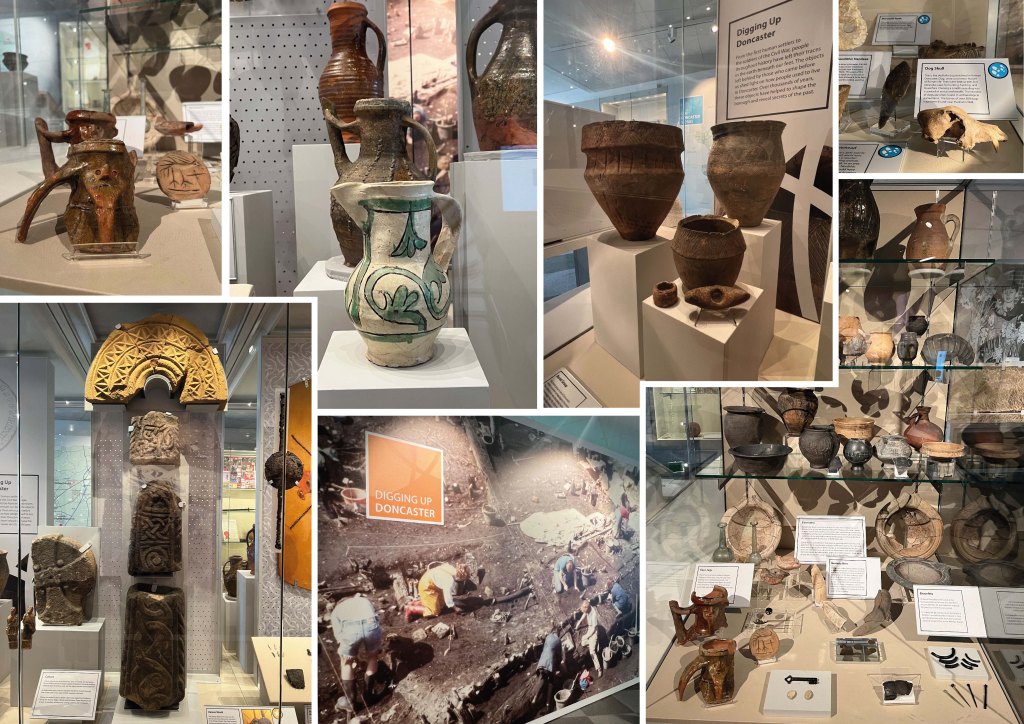
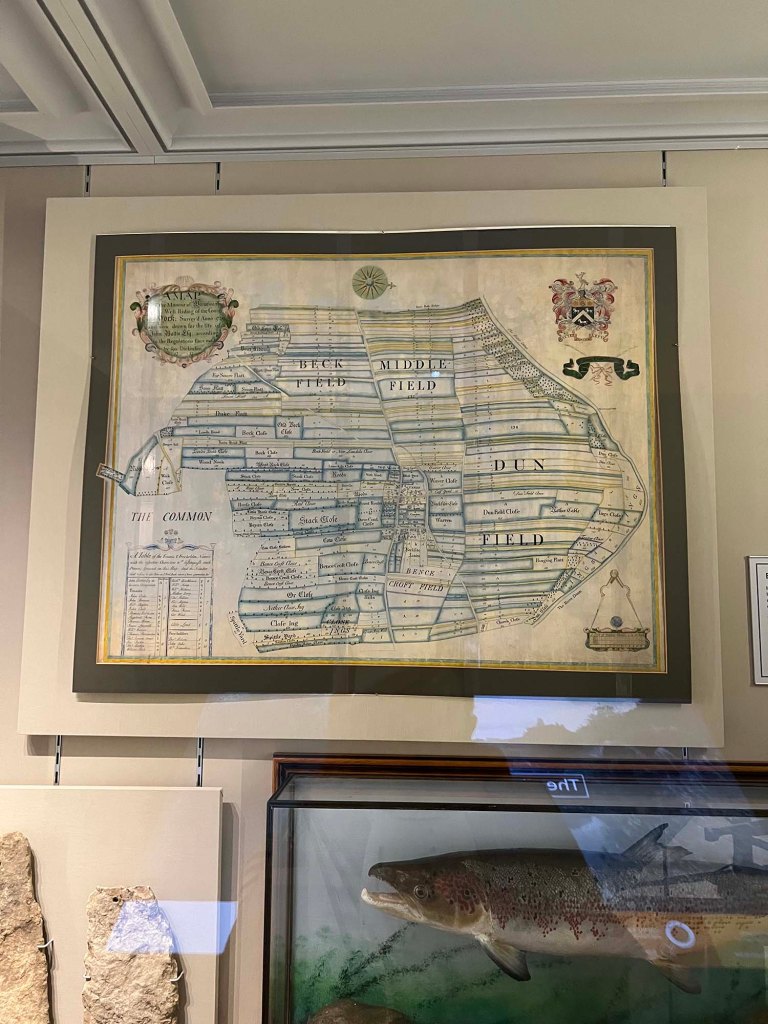
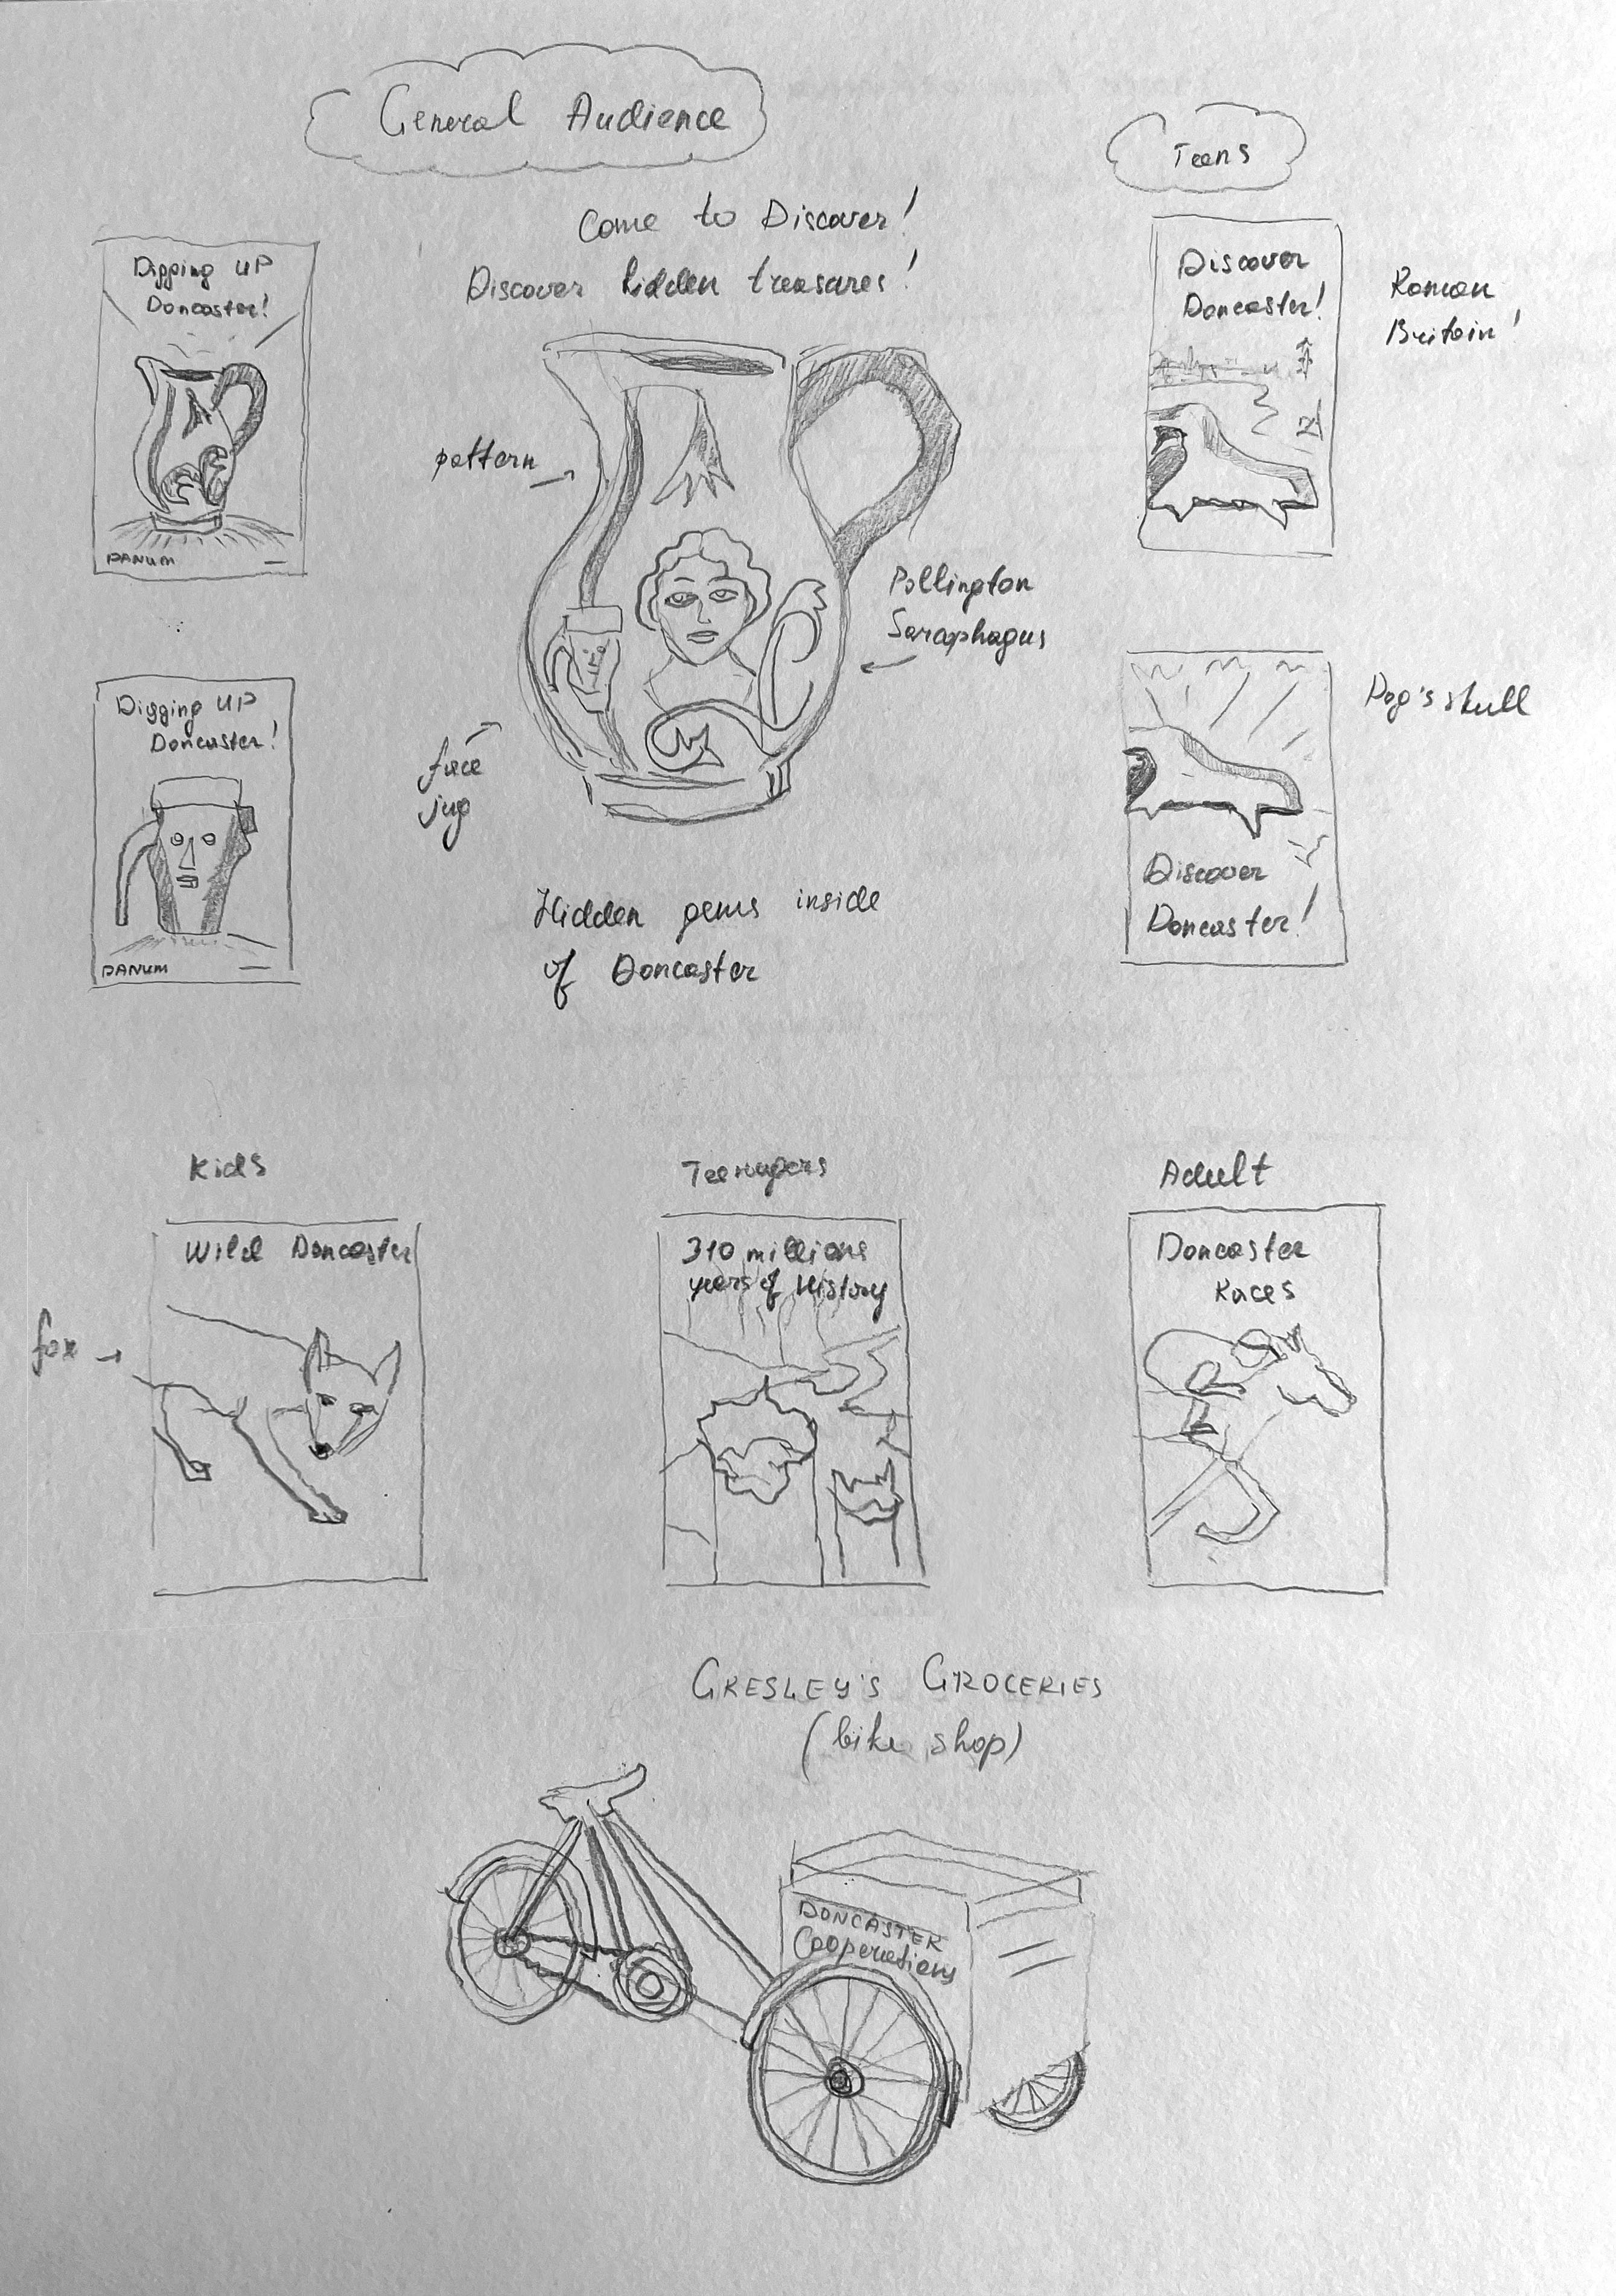
Digging Up Doncaster
The beginning of the exhibition is laid through the expositions dedicated to the “Diggin Up of Doncaster“. Here is showcased a vast array of vases, ancient artefacts, and accessories belonging to the ancestors who once inhabited this region. Over thousands of years, these objects have helped to shape the borough and reveal secrets of the past.
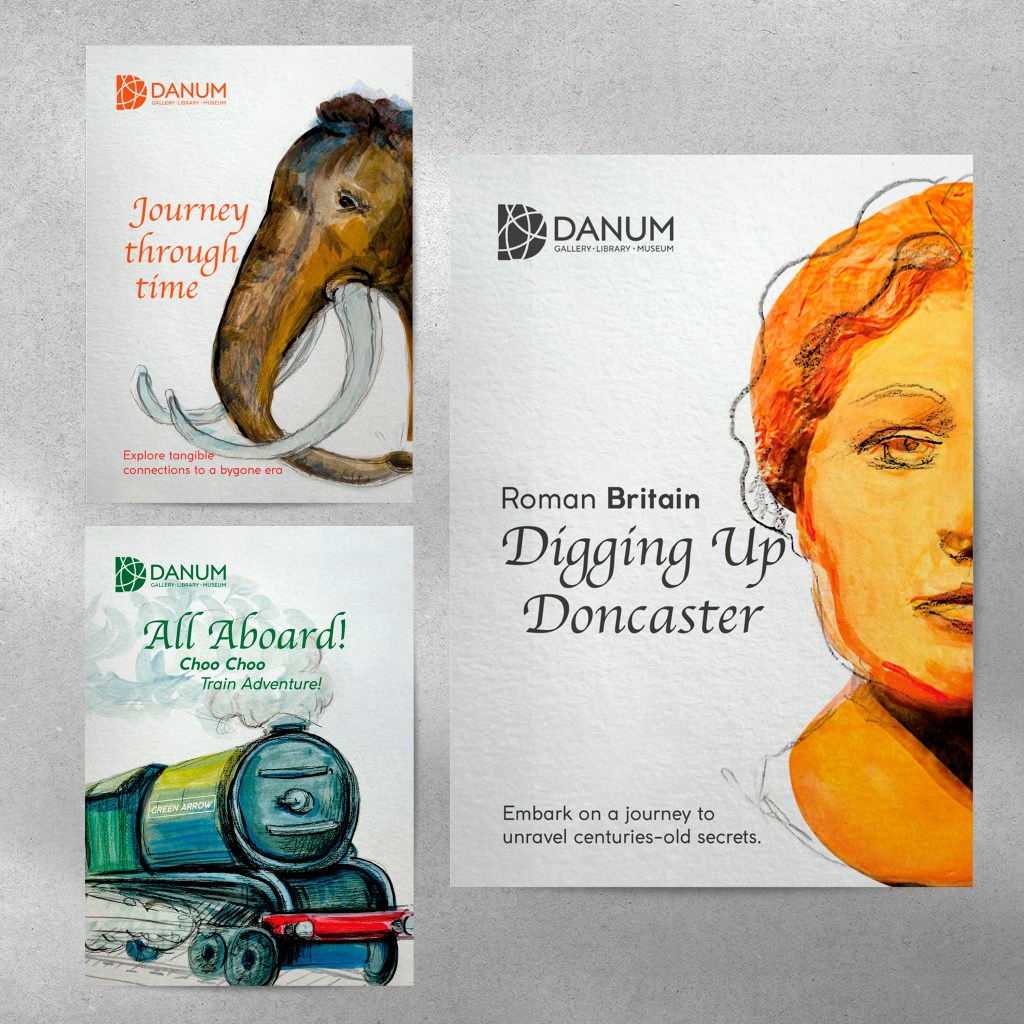
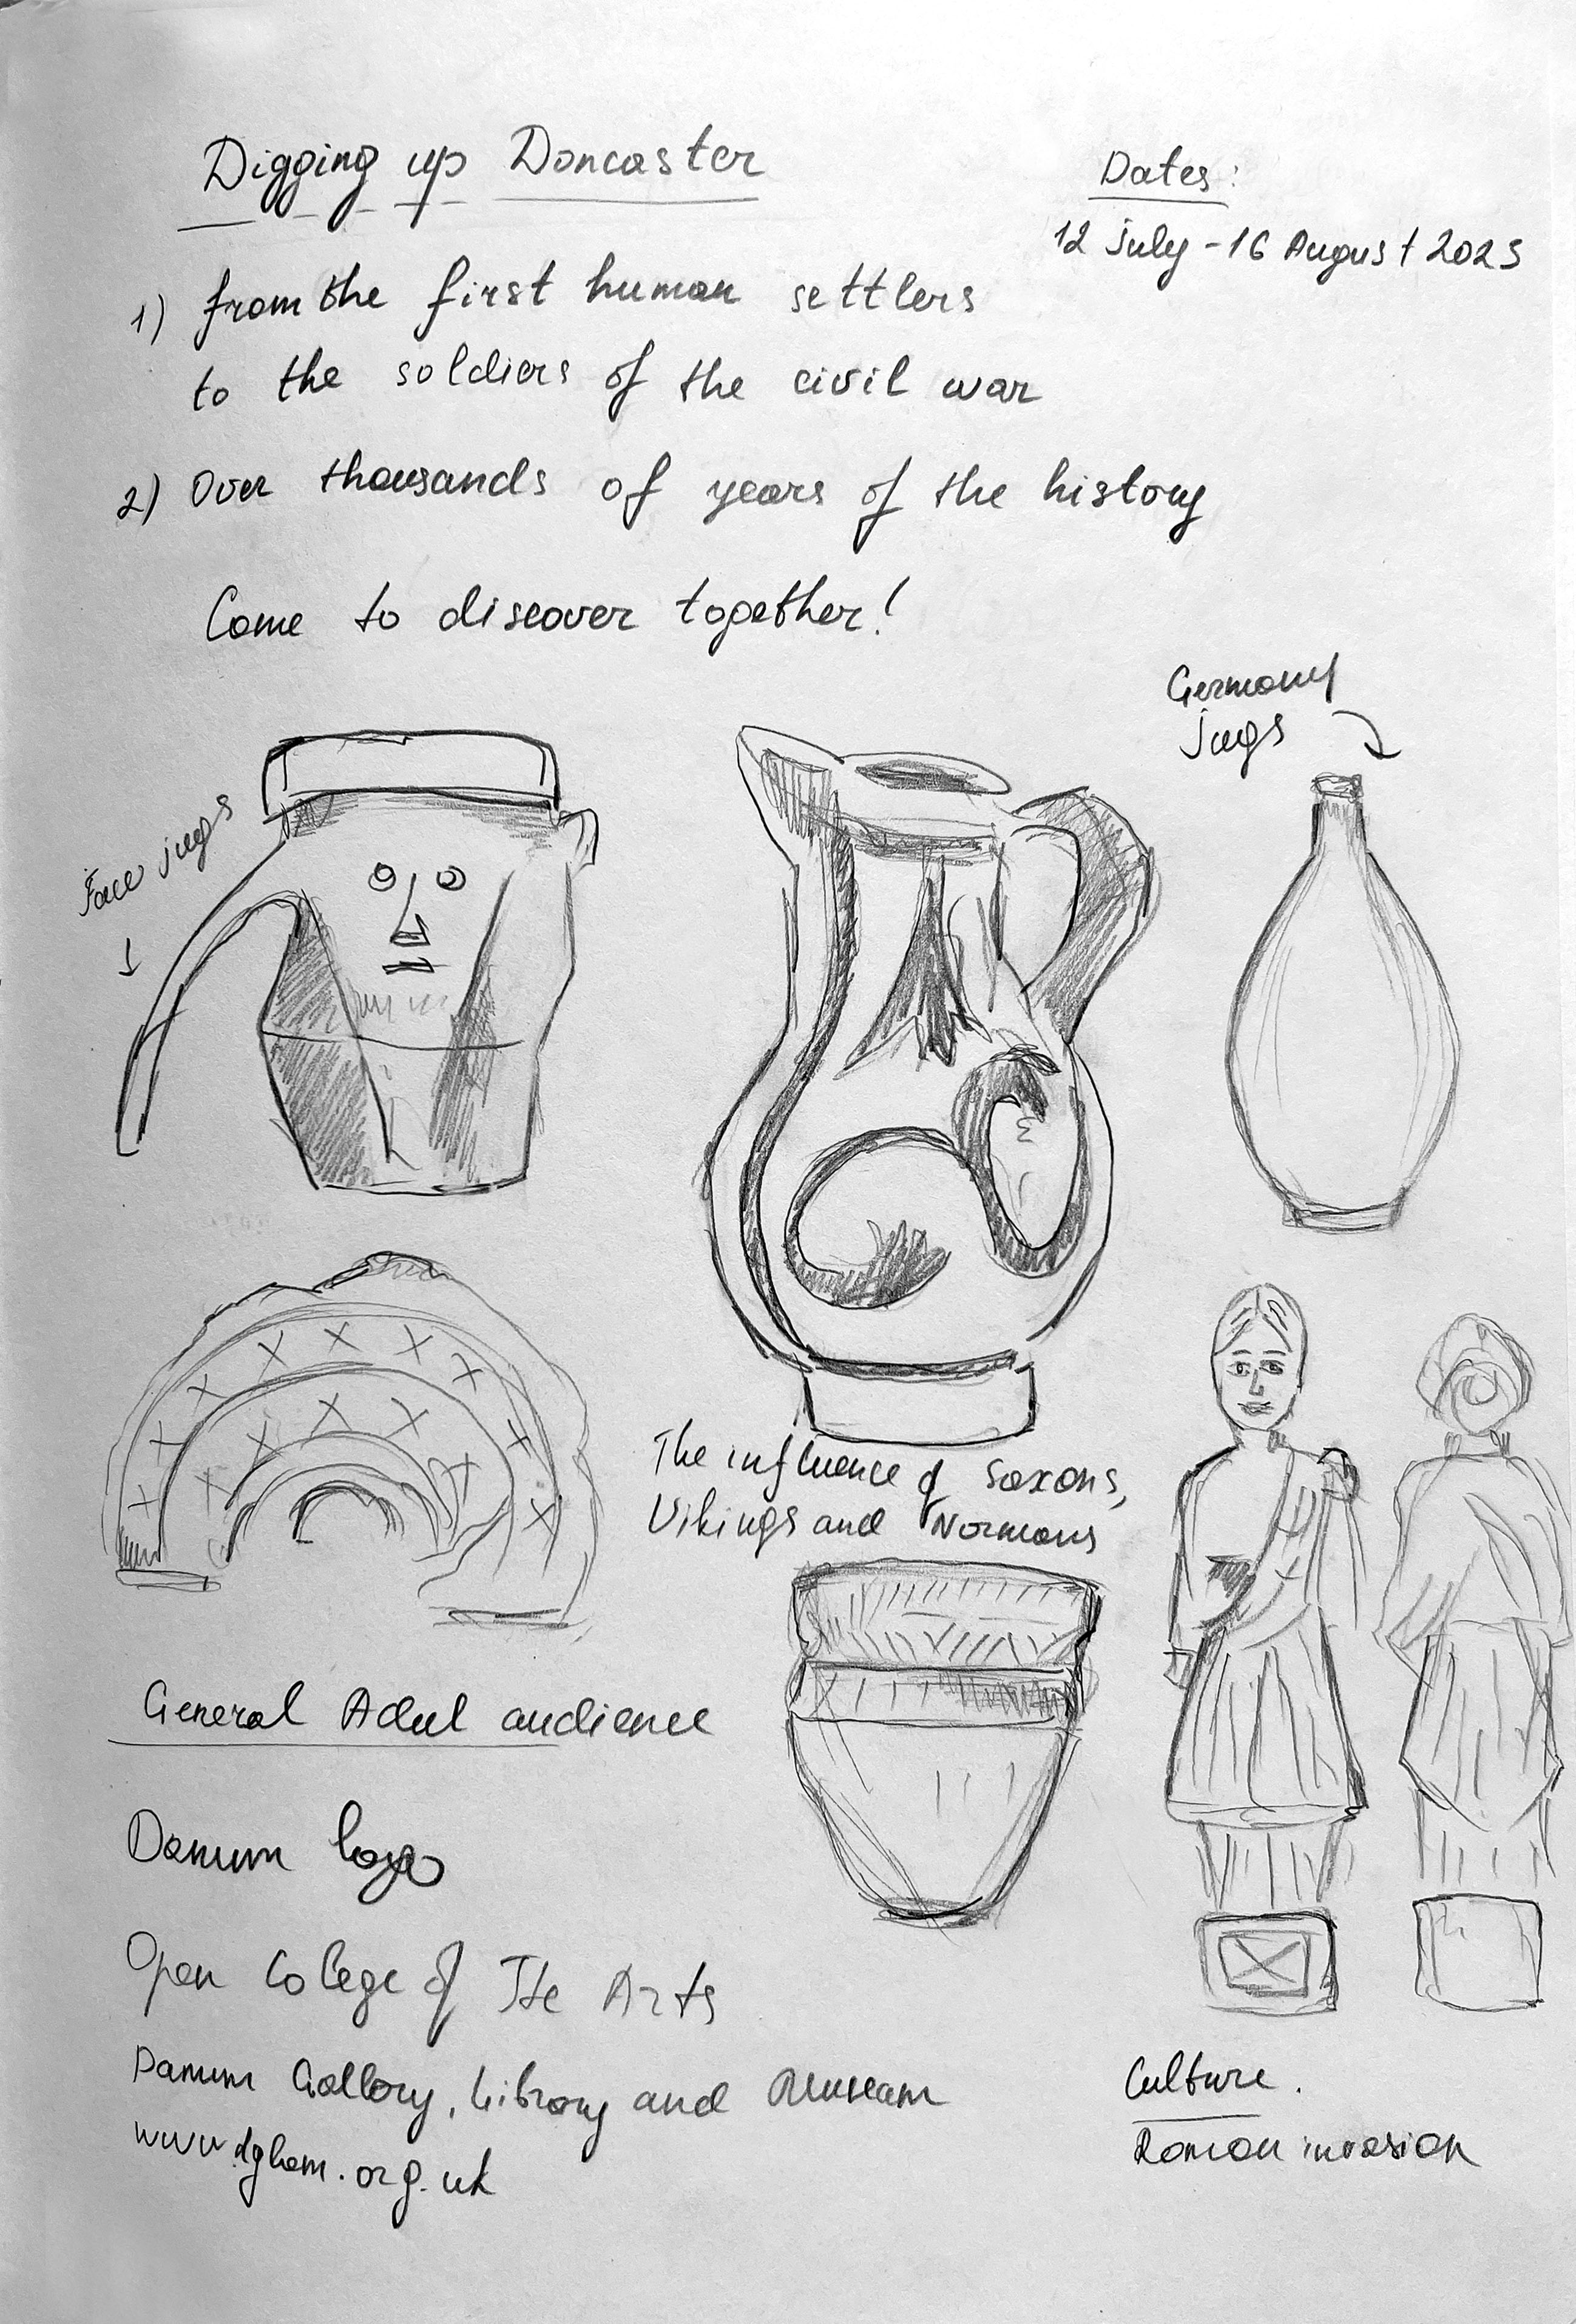
Among these objects, the selected item for poster illustration would be a jar or pot bearing the inscription ‘Digging Up Doncaster! Embark on a journey to unravel centuries-old secrets.‘ This particular section might hold appeal to an adult audience due to its intriguing nature. There were several more similar topics ahead of me, prompting me to mark this section as the starting point for my sketches. Since I had my 4-month-old daughter accompanying me during my visit to the museum, I had no choice but to create rough sketches based on photographs taken from the comfort of my own home. Below I attached sketches I created for this section.
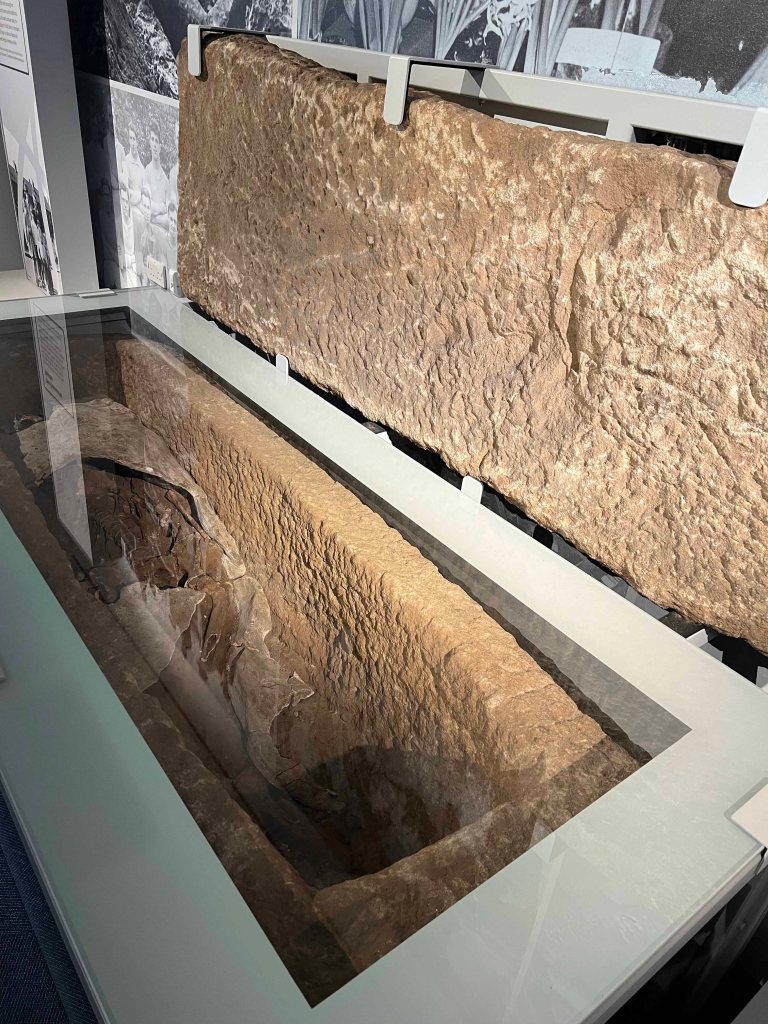
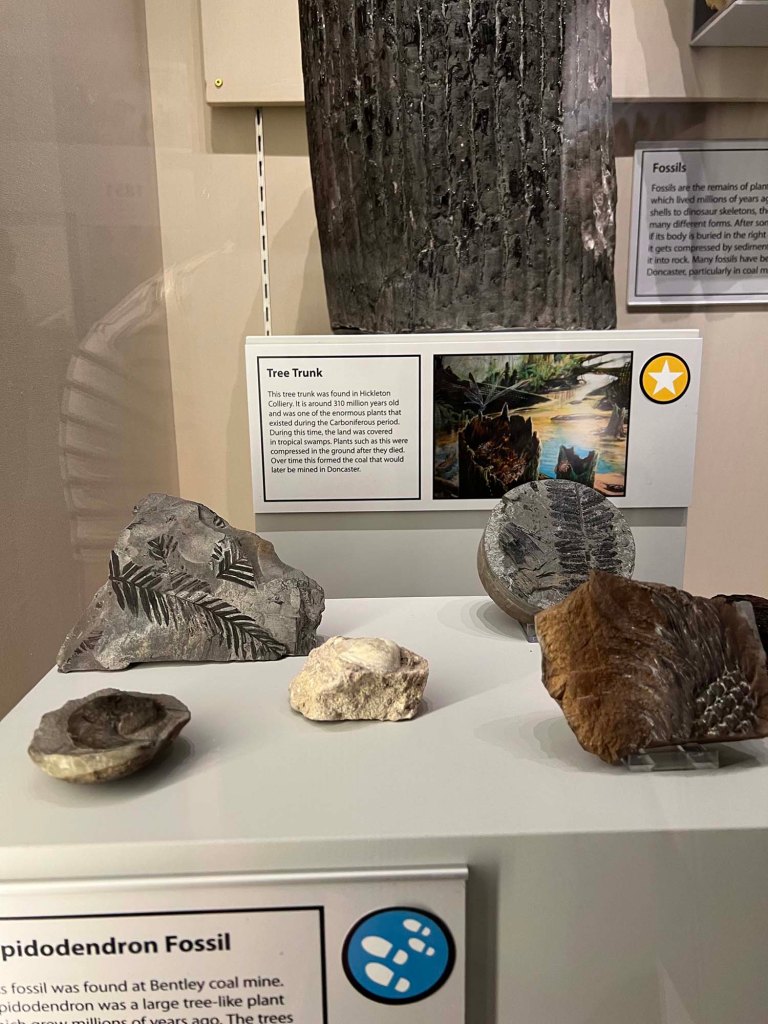
Continuing through the museum, the subsequent rooms are dedicated to the intriguing exploration of sarcophagus excavation, as well as the awe-inspiring display of natural artefacts dating back hundreds of millions of years.
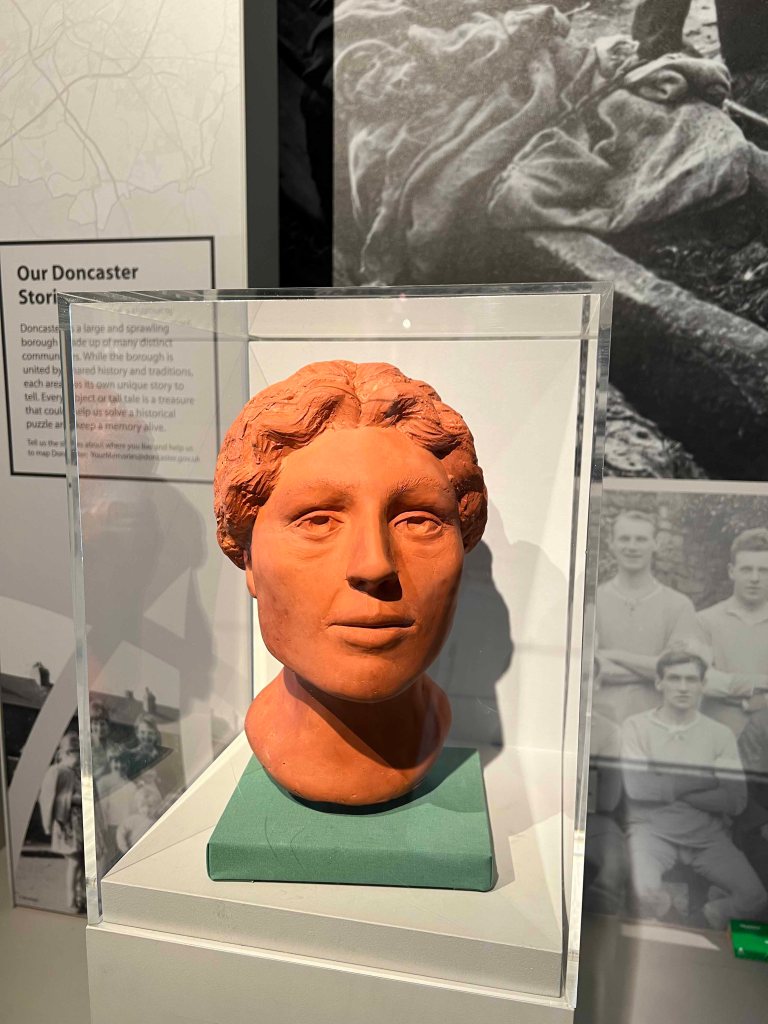
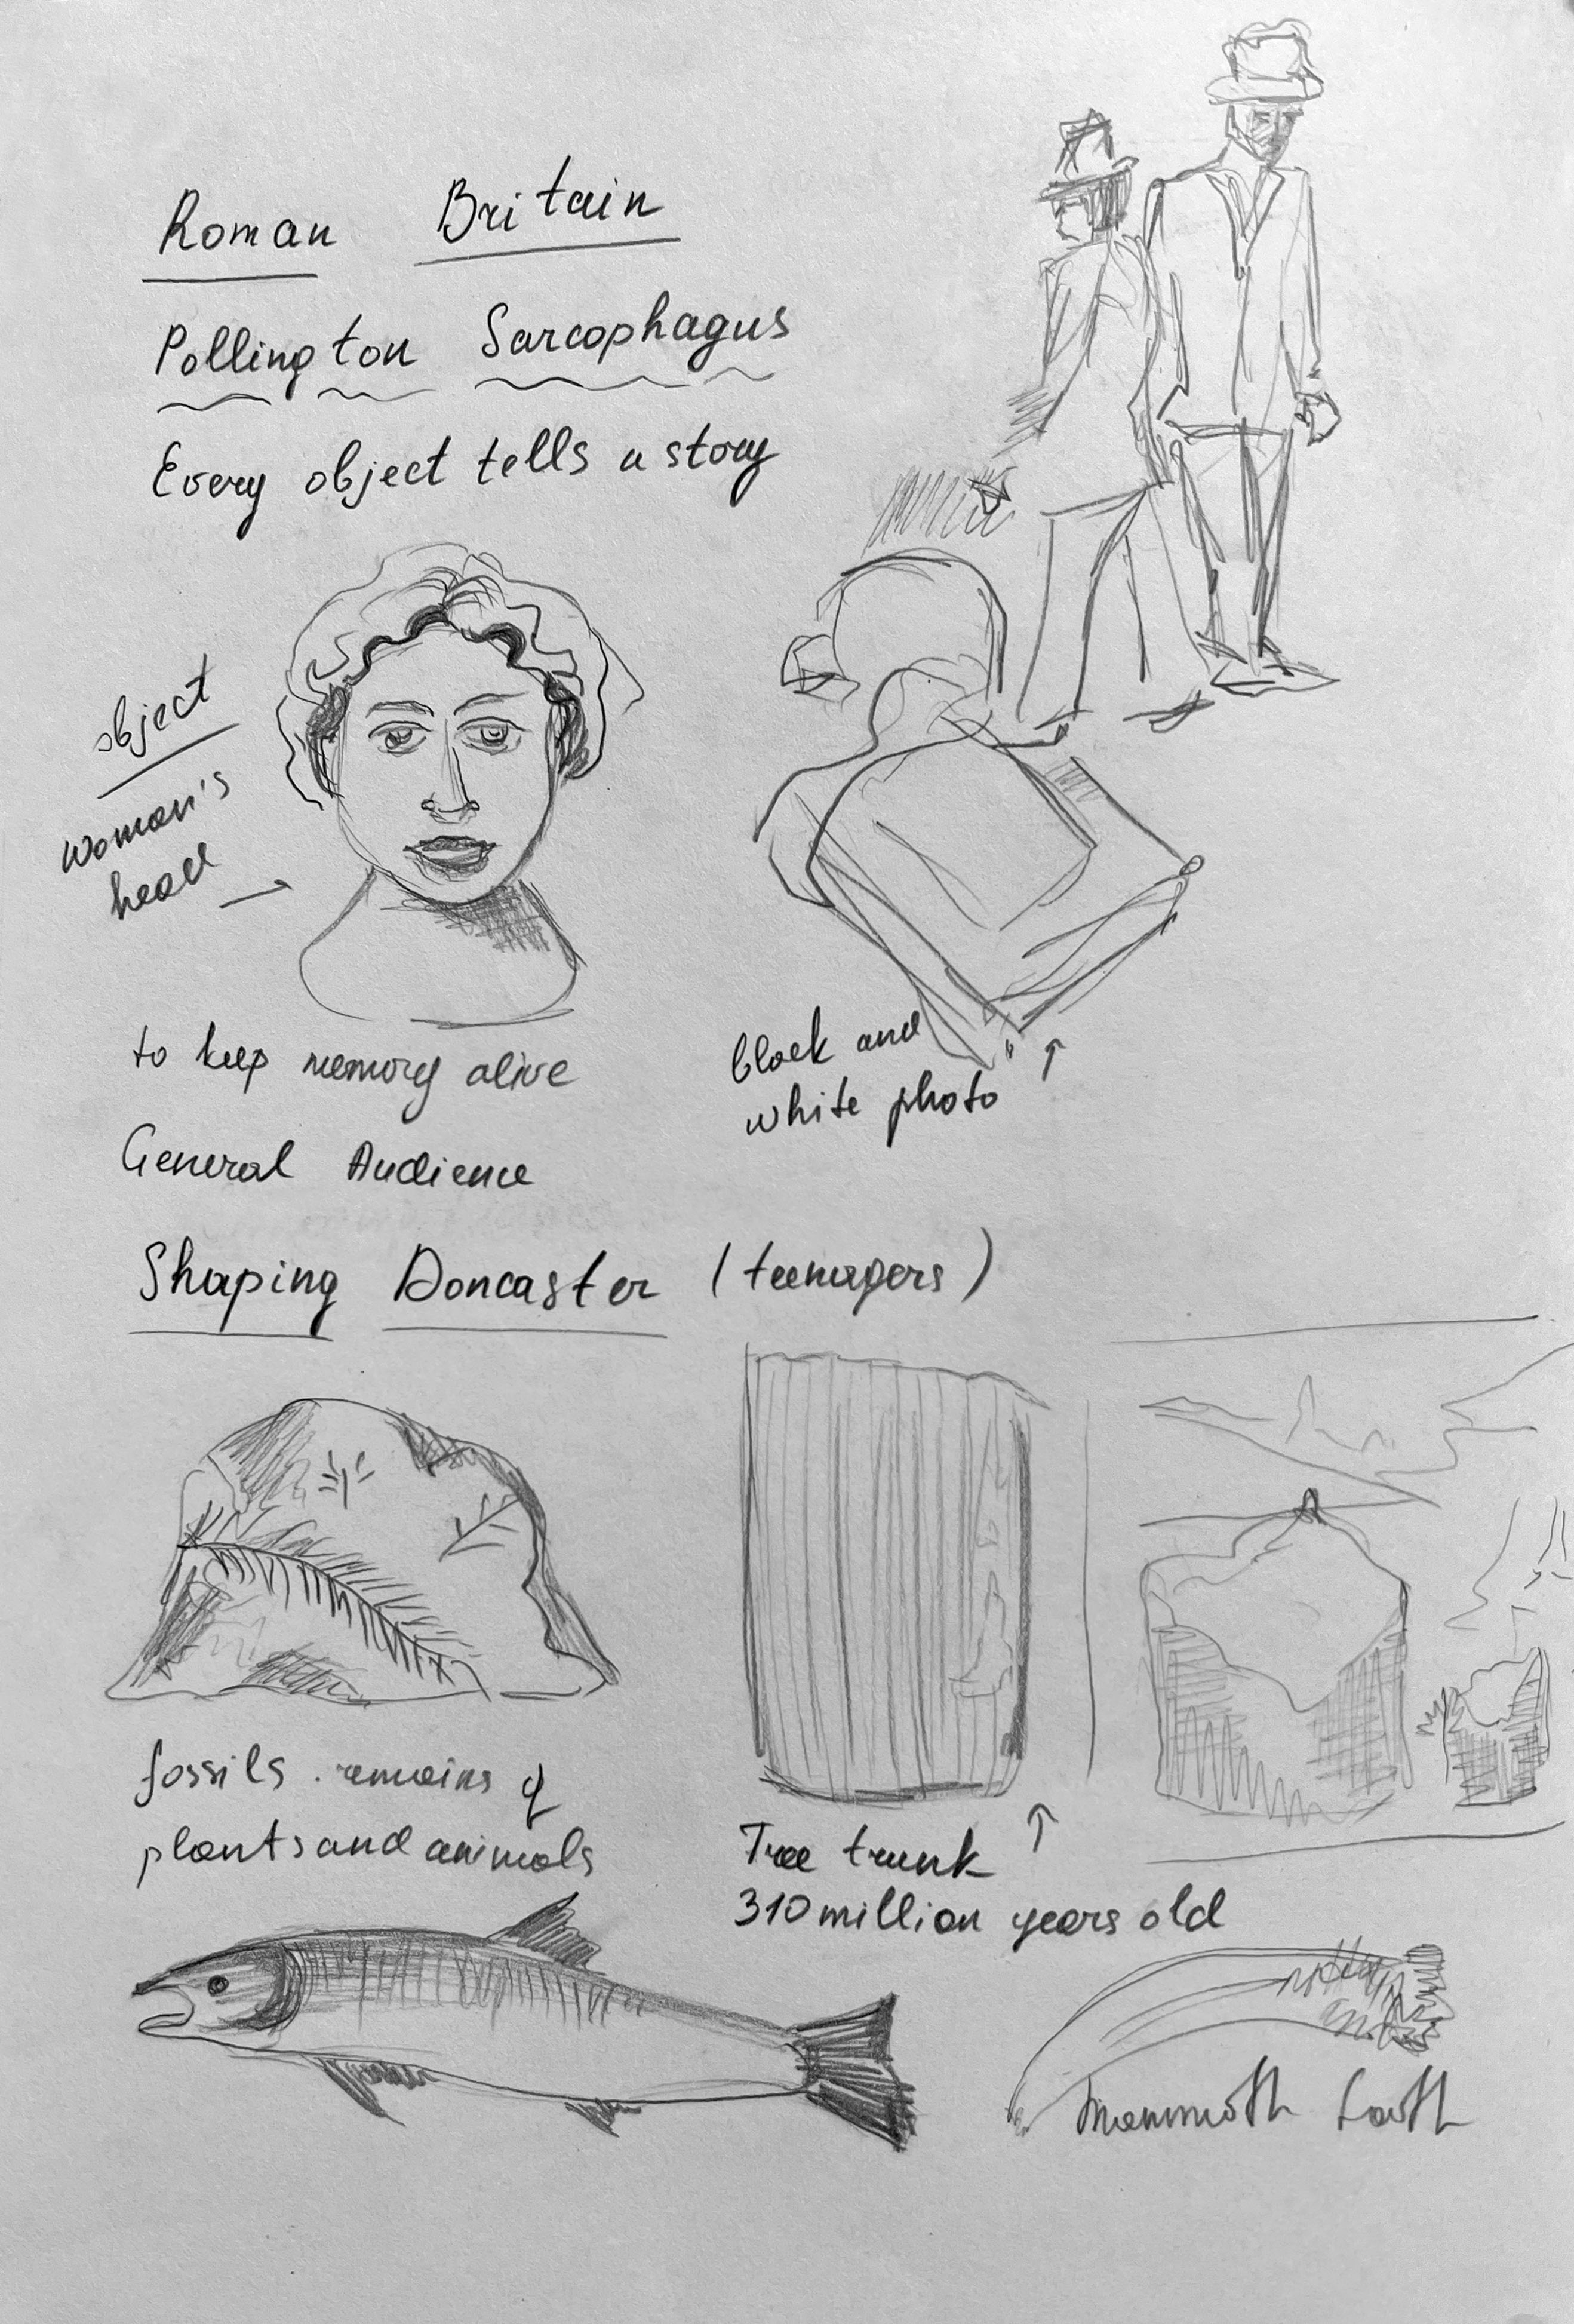
Roman Britain-Pollington Sarcophagus
In November 1949, a stone sarcophagus, or coffin, containing the body of a Roman woman was found in a quarry near Pollington Hall. Scientific investigations on the body revealed that she was most likely of North African descent. This demonstrates that Roman Britain was multi-cultural, with people from across the Roman Empire living there. Scientists believe that where the burial was discovered once belonged to a Roman-British villa from 2000 years ago. They identified that the woman would have been around fifty years old when she died. Her expensive style of burial, suggests that she would have been wealthy. The gypsum would have been used to preserve the body, which is not too dissimilar to the burial traditions of the ancient Egyptians.
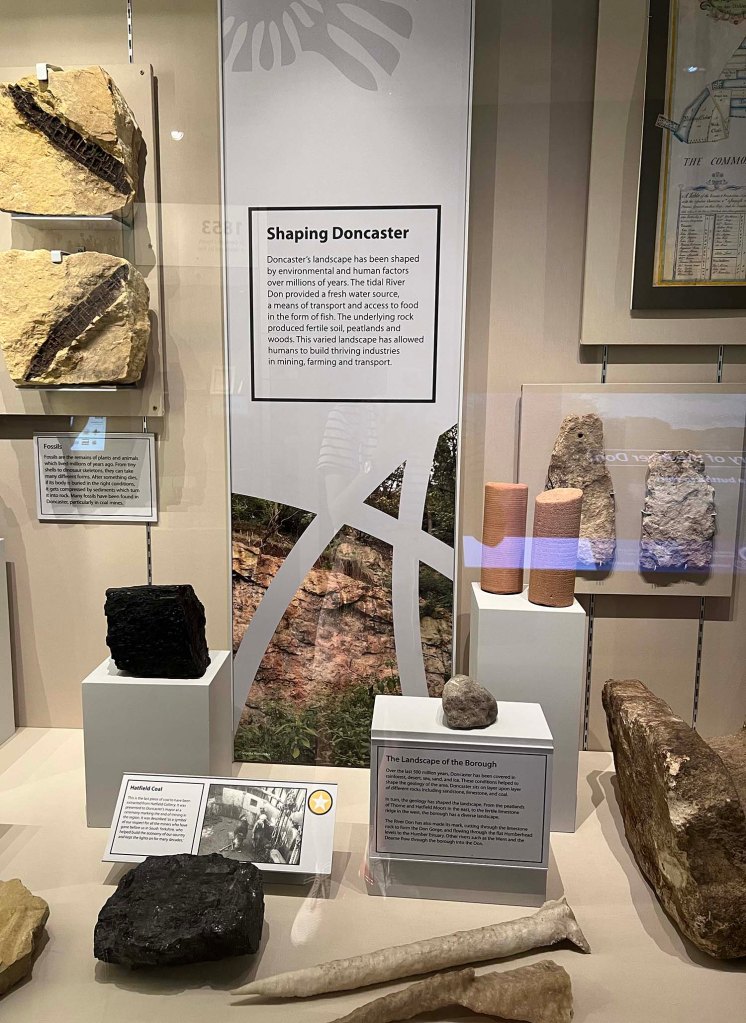
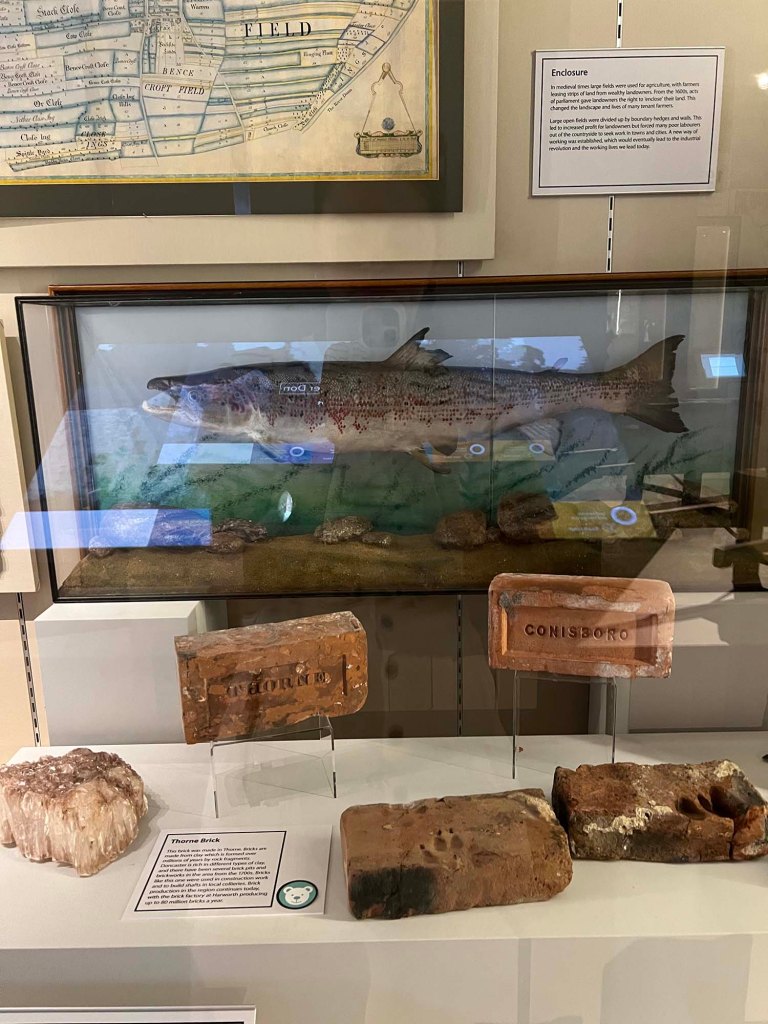
Shaping Doncaster
Doncaster’s landscape has been shaped by environmental and human factors over millions of years. The tidal River Don provided a freshwater source, a means of transport and access to food in the form of fish. The underlying rock produced fertile soil, peatlands and woods. This varied landscape has allowed humans to build thriving industries in mining, farming and transport.
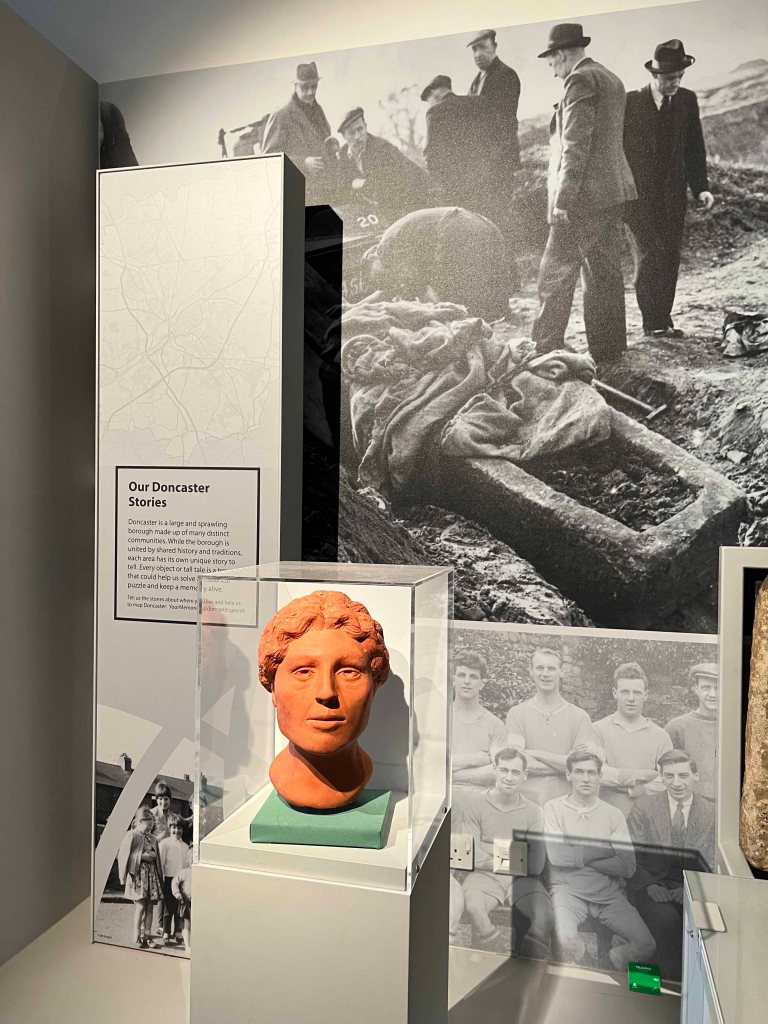
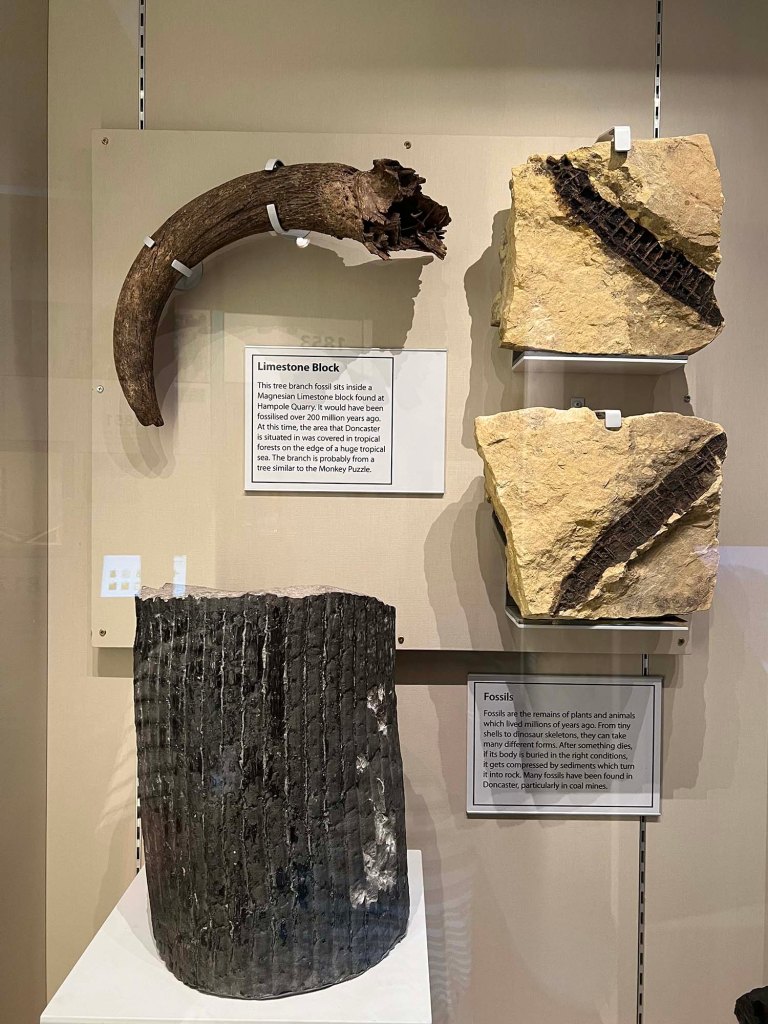
Within these sections, two particular objects capture attention for potential illustrations. In the ‘Roman Britain – Pollington Sarcophagus’ section, a captivating choice for illustration would be the bust of a woman, intricately carved and rich with historical significance. Meanwhile, in the ‘Shaping Doncaster’ section, a compelling option could be an illustration of a tree trunk, a mammoth tooth or a portrayal of the area as it may have appeared countless millions of years in the past. This tree trunk was found in Hickleton Colliery. It is around 310 million years old and was one of the enormous plants that existed during the Carboniferous period. During this time, the land was covered in tropical swamps. Plants such as this were compressed in the ground after they died. Over time this formed the coal that would later be mined in Doncaster.
I think that in the case of the bust poster of a woman, it could be used for an adult audience poster, while the excavation of natural materials was more suitable for a teenage audience.
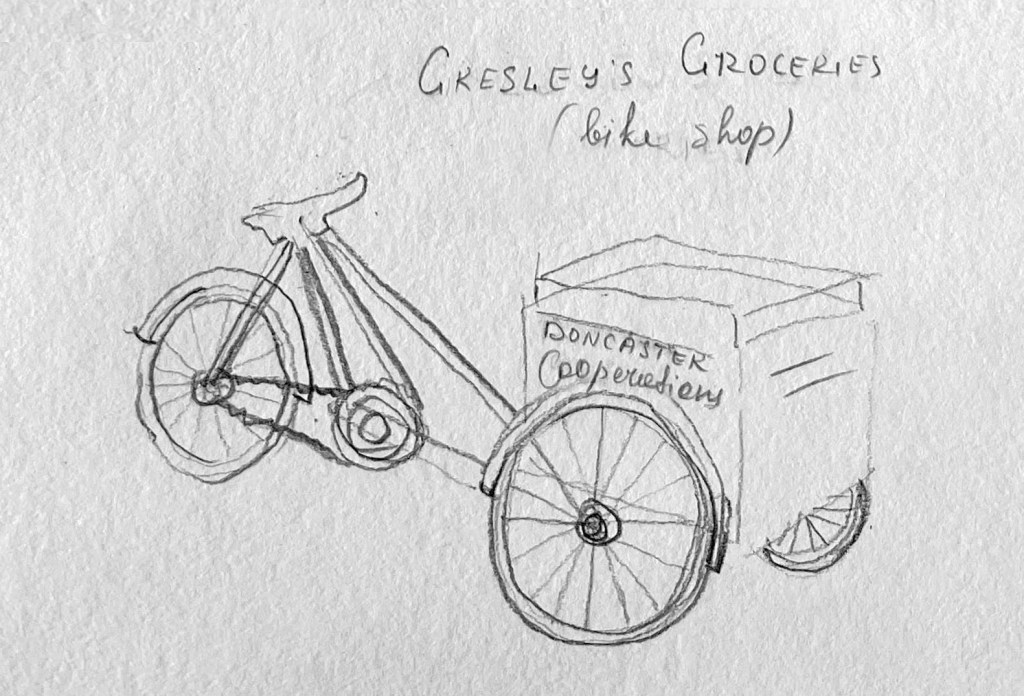
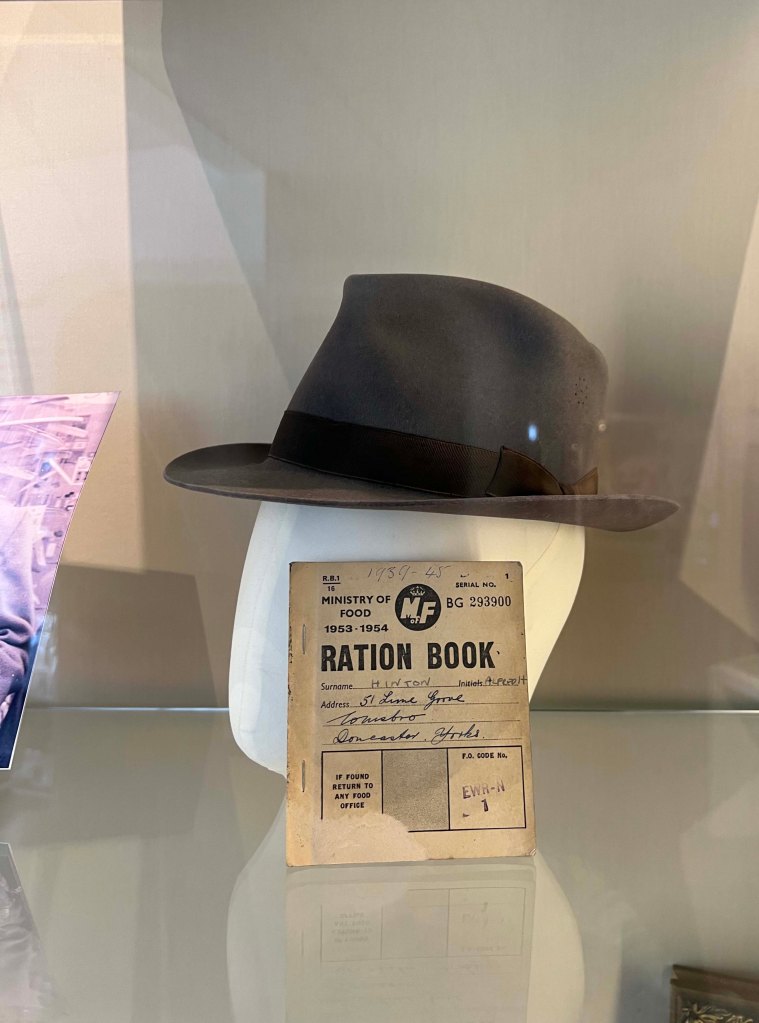
Doncaster Lives. Gresley’s Shop
One of the parts that caught my eye within the museum was Gresley’s Shop. I took some pictures, as the shop looked quite authentic and historical, but I did research on it when I was back home.
In the bustling town of Doncaster, Gresley’s Shop stands as a beloved landmark, holding within its walls the tales of countless lives that have passed through its doors. For generations, this shop has played an integral role in the lives of locals and visitors. Gresley’s Shop has witnessed the flow of time, reflecting the evolving tastes and desires of the community. Its shelves were filled with a colourful array of goods, ranging from artisanal crafts to delectable treats. Stepping into Gresley’s Shop is like stepping back in time, as its rich history intertwines with the present, weaving a tapestry of Doncaster lives that continues to captivate and inspire.
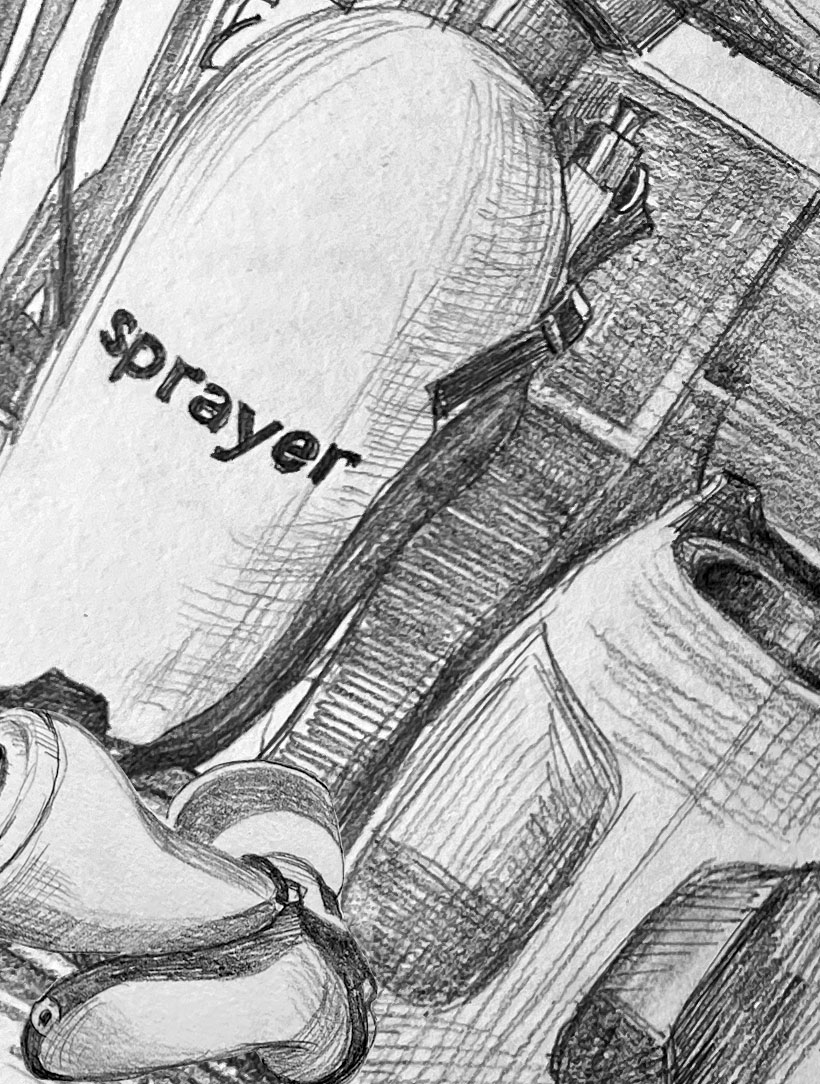
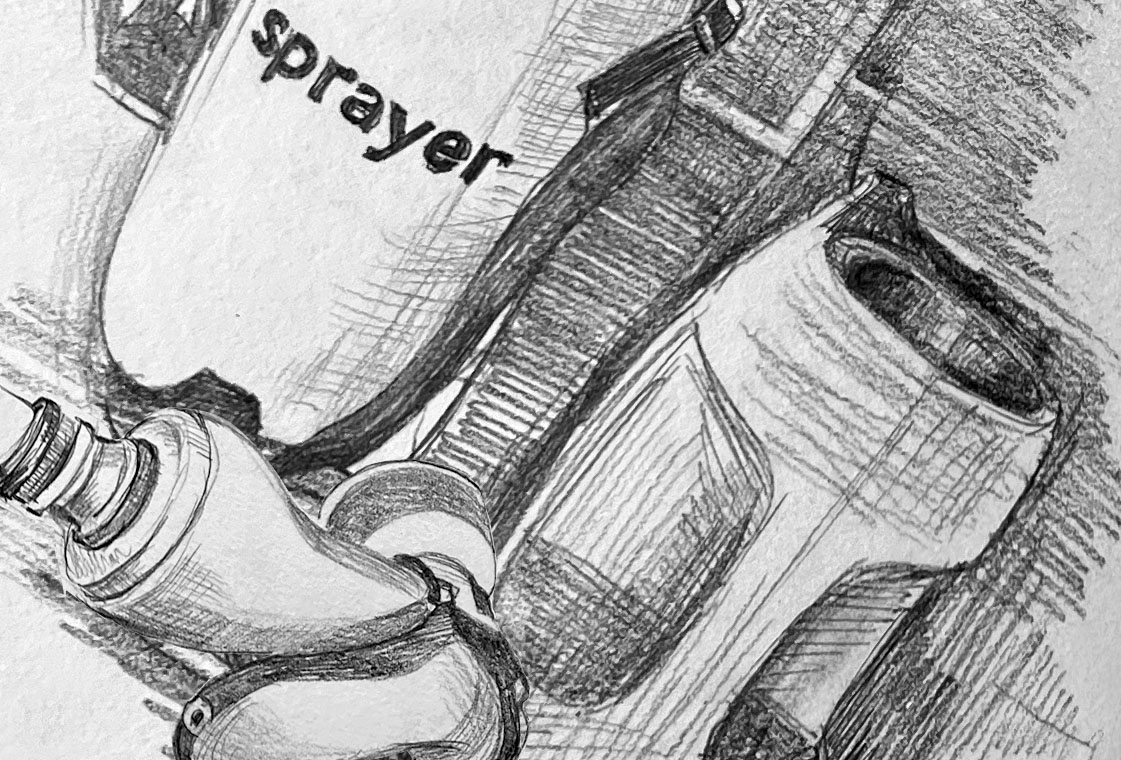
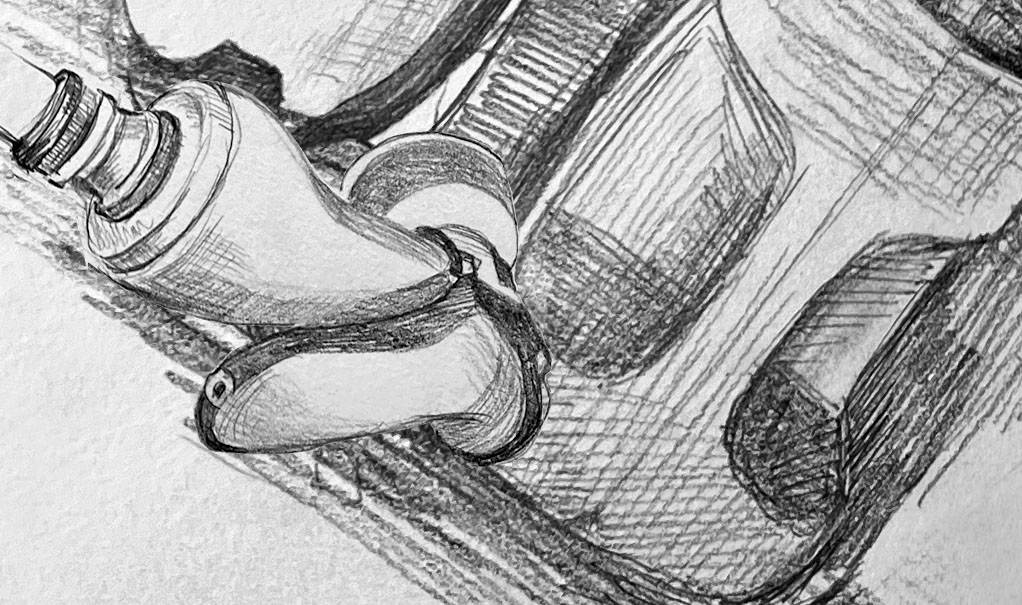
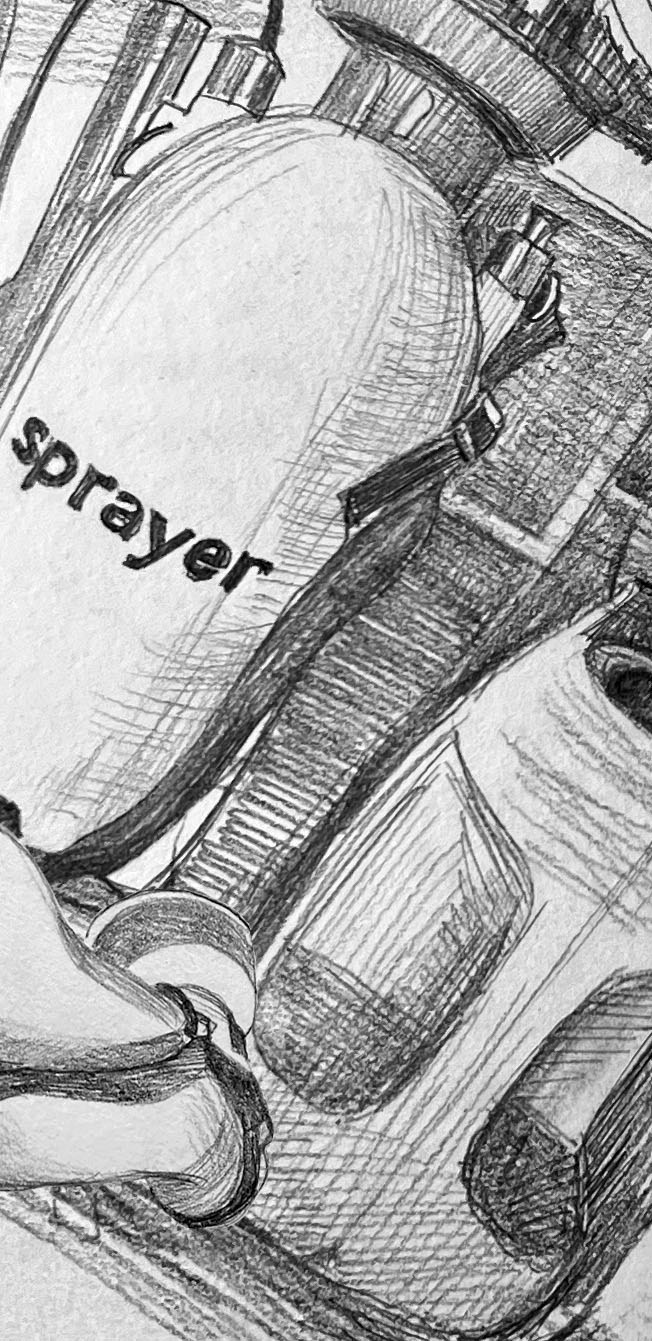
Speaking of Gresley’s Shop, a fascinating subject for sketches would be the distinctive branded bicycle prominently displayed on a pedestal just outside the main entrance. This bicycle, specifically designed for transporting goods, serves as a symbol of the shop’s commitment to convenience and efficiency. Additionally, the shop’s interior showcases an array of shelves filled with an eclectic collection of posters and postcards, featuring captivating illustrations from the 1960s. These displays offer a nostalgic glimpse into the past, evoking the vibrant spirit of the era. Gresley’s Shop truly encapsulates a blend of functionality and artistic flair, making it an enchanting destination for both shoppers and admirers of bygone eras.
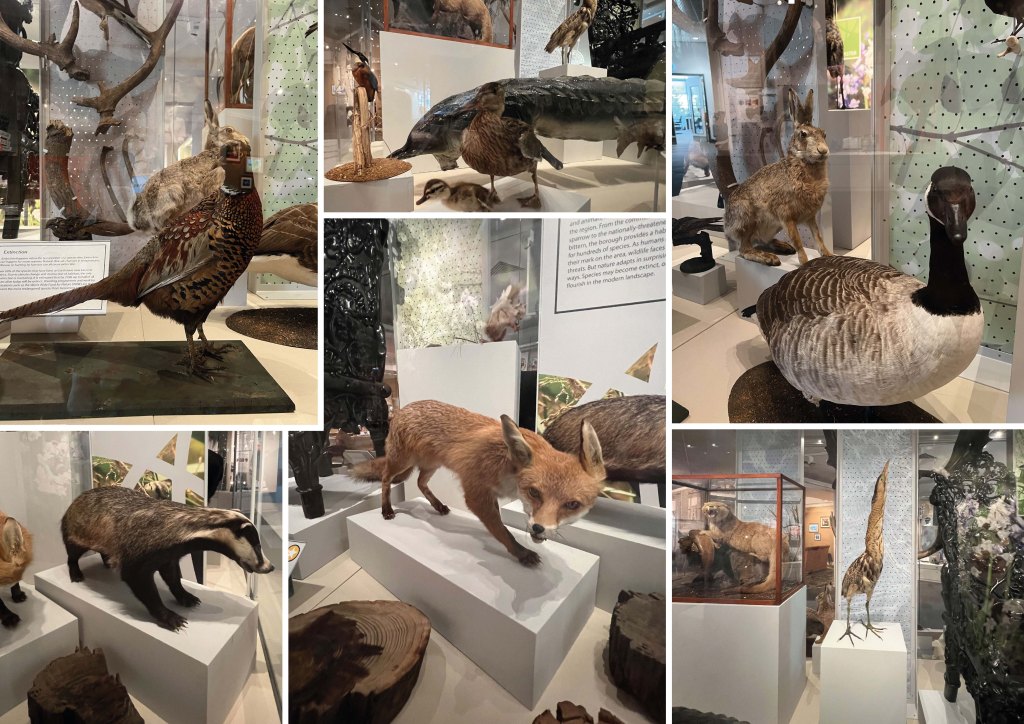
Wild Doncaster
The Doncaster Museum showcases the diverse wildlife that can be found in and around the city. From native birds and mammals to insects, reptiles, and aquatic life, the museum presents a comprehensive overview of the local wildlife. The exhibits not only highlight the beauty and wonder of these creatures but also emphasise the importance of the conservation of the local environment, as well as protecting and preserving these habitats for future generations. The Doncaster Museum serves as an educational and inspiring resource for both locals and tourists, promoting a greater appreciation for the incredible wildlife that thrives in the area.
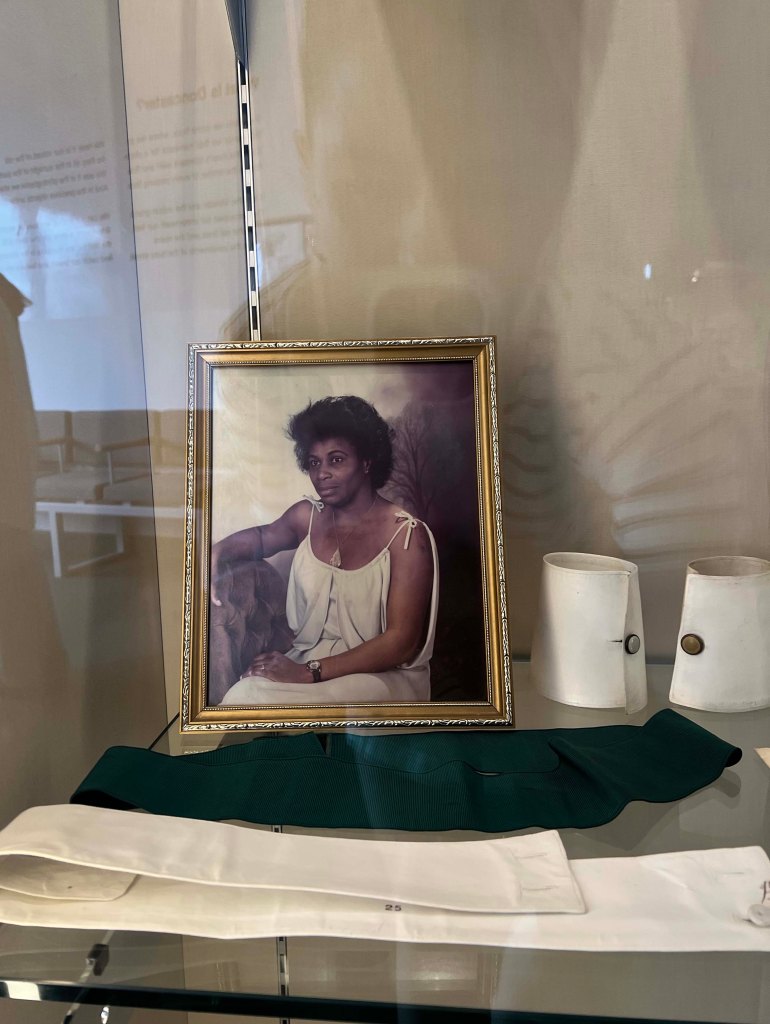
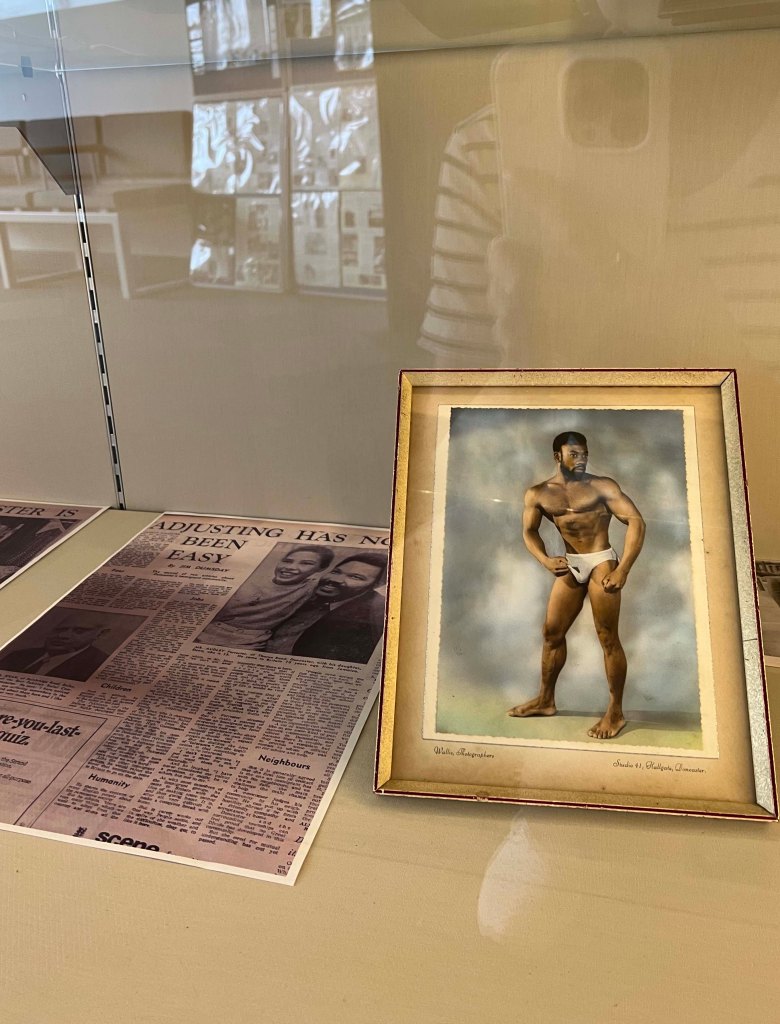
A Celebration of Doncaster Black History Month
The celebration of Doncaster Black History Month is a vibrant and important event that honours the rich heritage and contributions of Black people in the community. Throughout the museum, there are stories and experiences of over 2000 years of black history in Doncaster. The celebration also features vibrant cultural performances, showcasing the diverse talents of Black artists within the community.
For these three sections, I created sketches that could be incorporated into the chosen object for the posters. I was particularly drawn to the idea of highlighting the preservation of the natural environment and featuring animals as the focal point. This theme may captivate teenagers and kids. Regarding Gresley’s shop theme, it could be an ideal choice for the adult audience, but I needed to determine appropriate directions for both teenagers and children. Also, I was thinking of using the visual of African woman that to present the Black History Month poster.
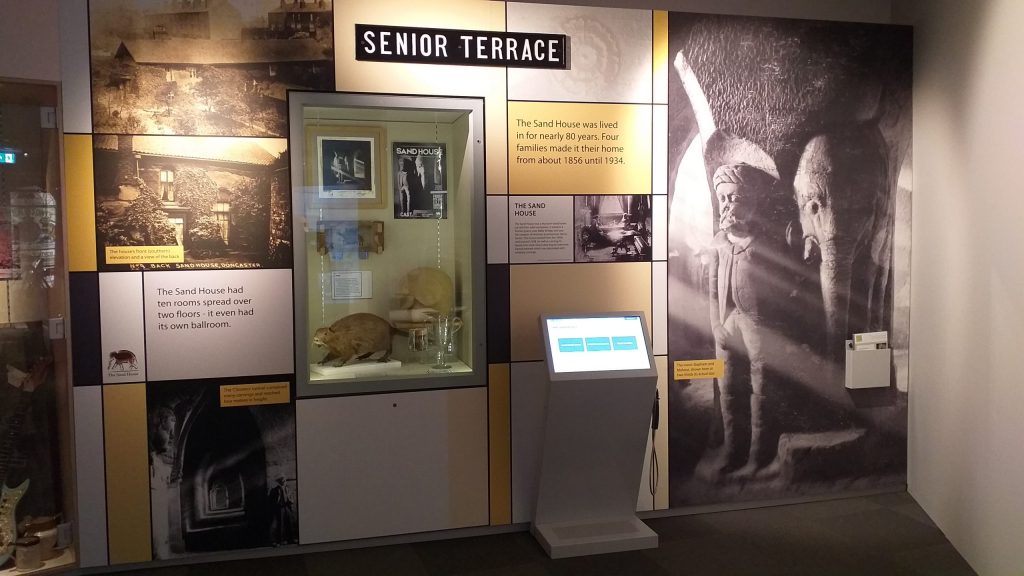
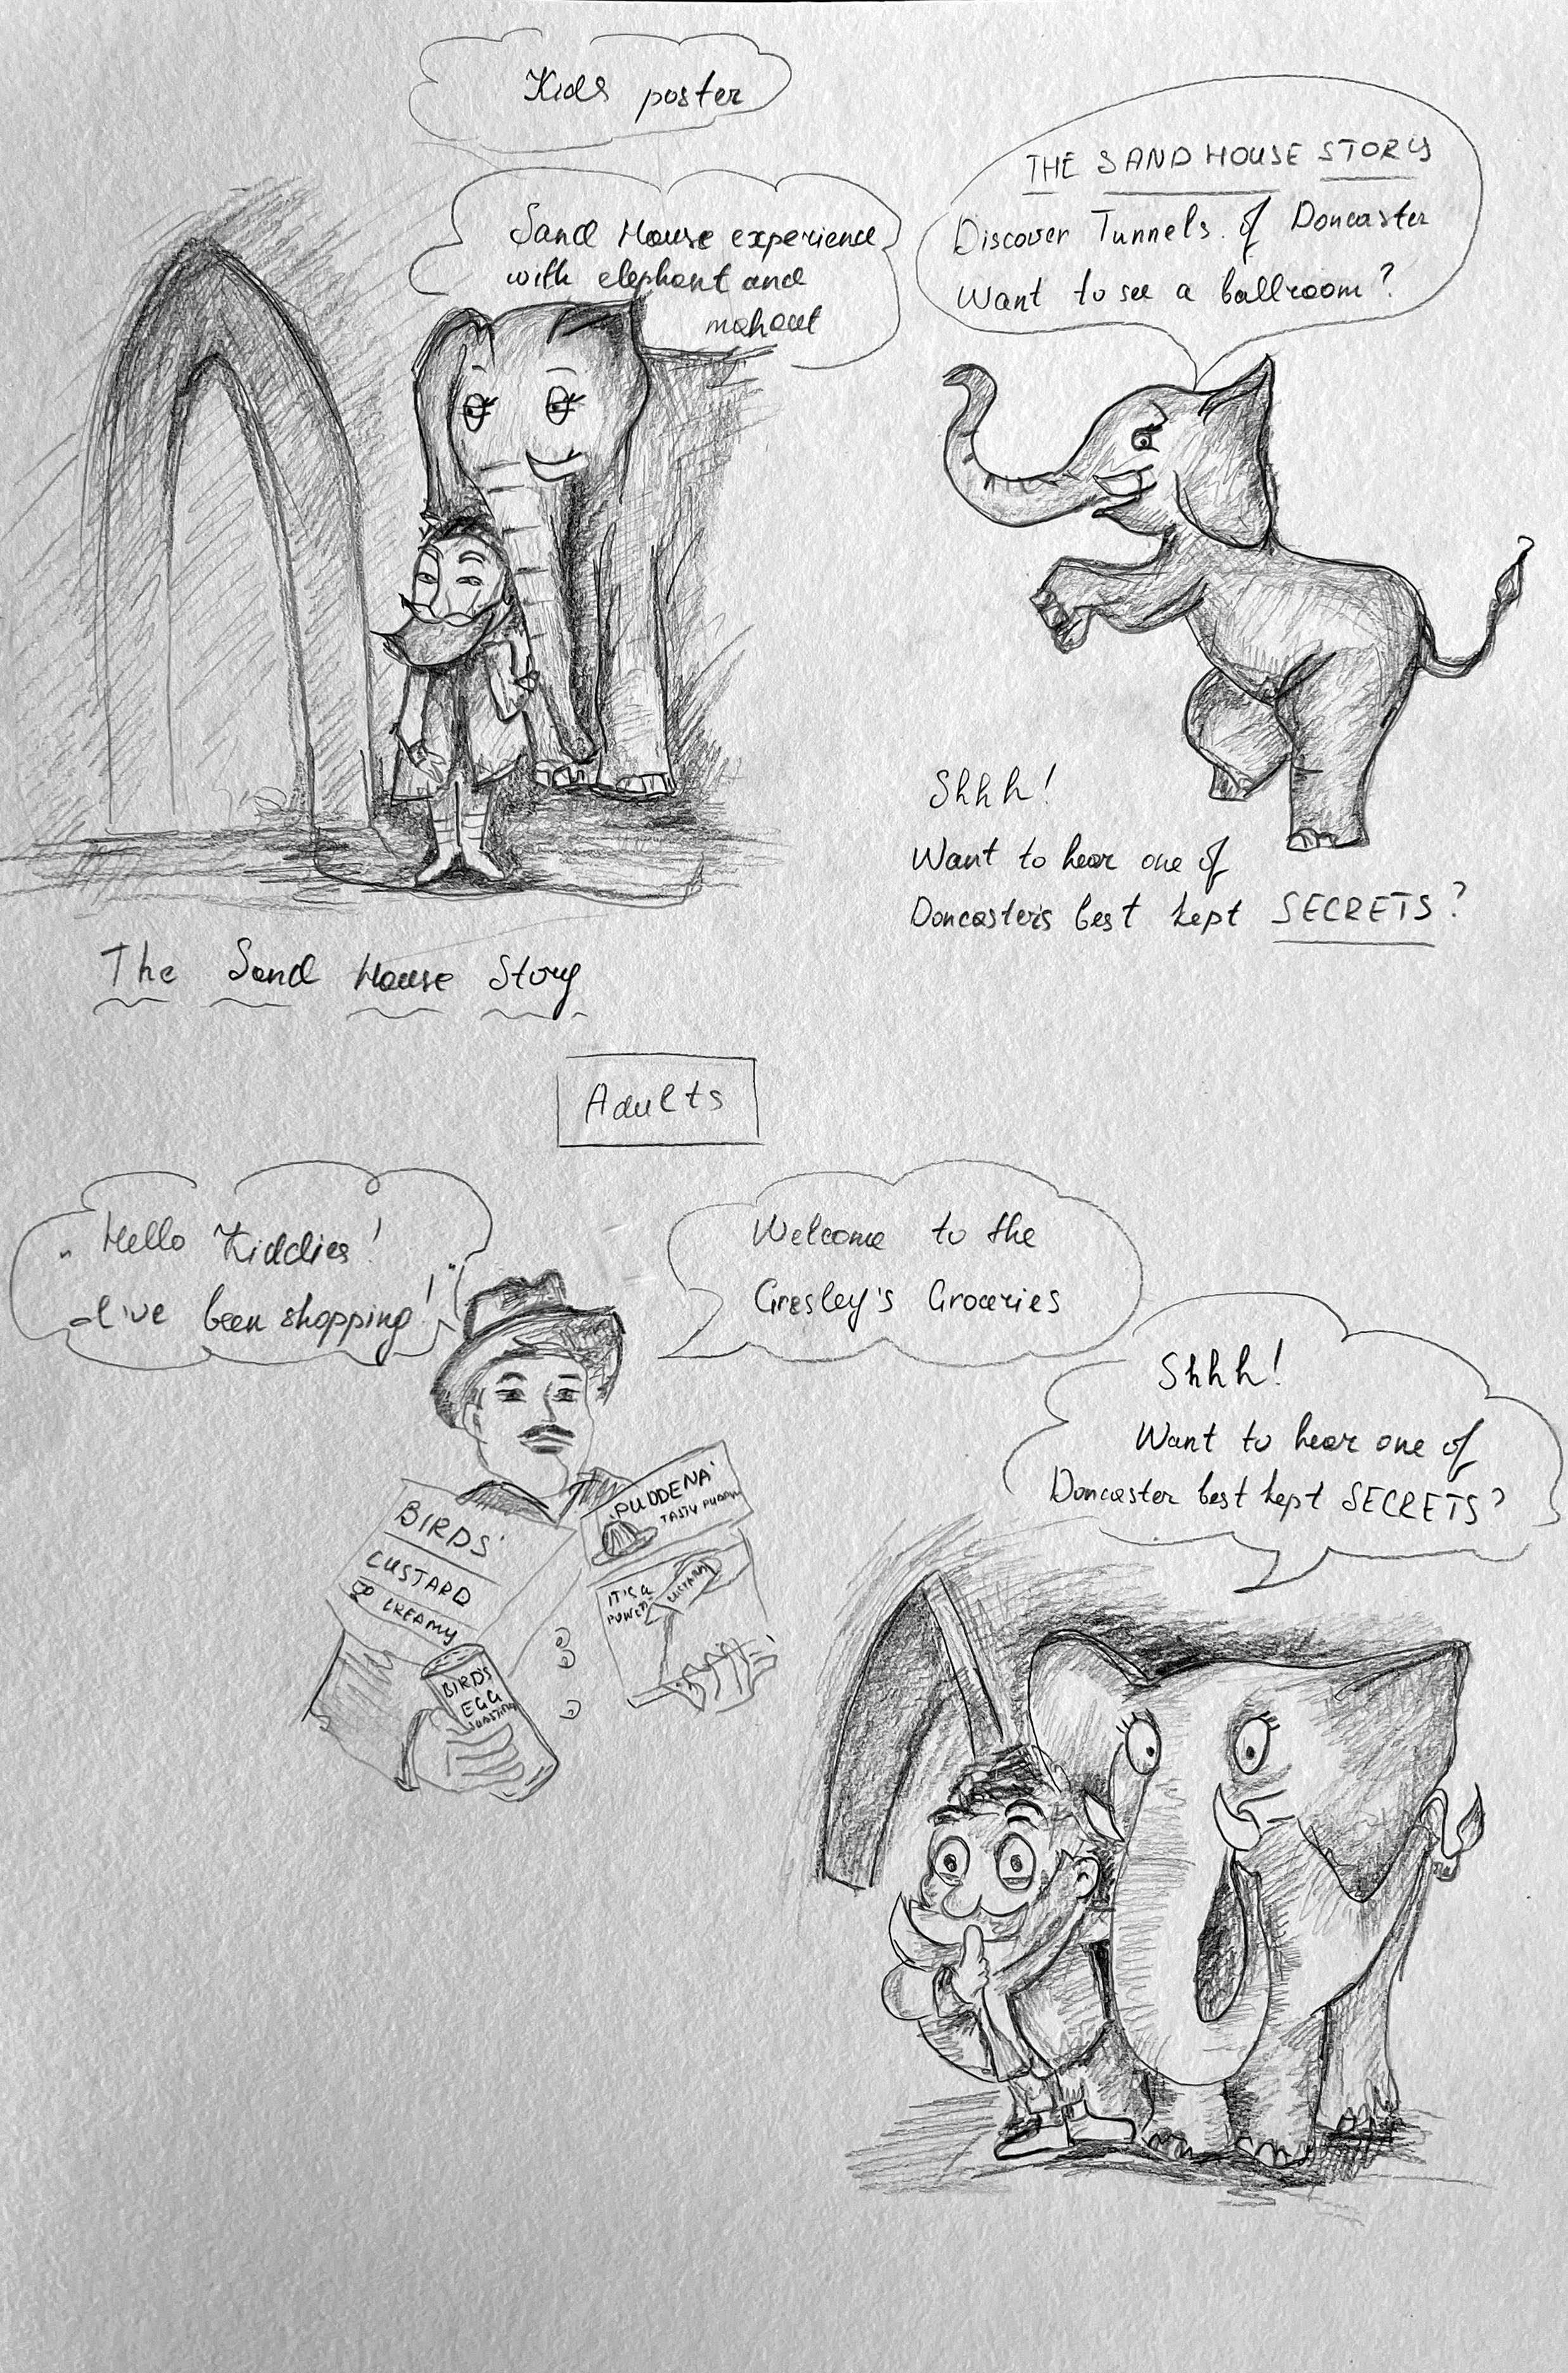
The Sand House
The Sand House story in Doncaster is a fascinating tale that highlights a local figure, Walter Percy Bentley. Located in Doncaster, this structure was crafted from sand, known as the Sand House. Bentley’s passion and talent for sculpting with sand resulted in an extensive underground complex, displaying breathtaking sand artwork and captivating visitors from near and far. Unfortunately, the Sand House was eventually destroyed, leaving behind only photographs and memories of this extraordinary creation. However, the Sand House story continues to inspire and serves as a testament to Bentley’s incredible talent and creativity.
This theme could be one of the subjects to discover for kids. I did a bit of research and found this information about “Elephant in the room”. More information about this movement can be found here: http://www.thesandhouse.org.uk/the-elephant-in-the-room/
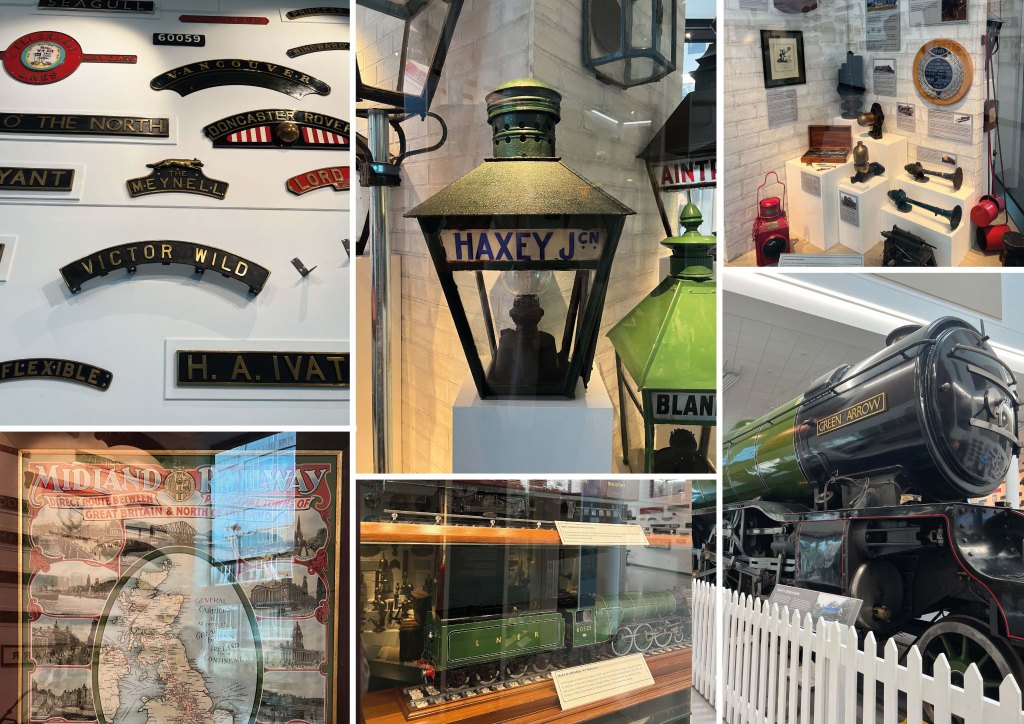
Doncaster Railway Heritage holds a significant place in the history and culture of the town. As a key hub of railway activity, Doncaster played a crucial role in the development and expansion of the railway network during the 19th and 20th centuries. Doncaster is the place where famous locomotives like the Flying Scotsman and Mallard were built and maintained. The Doncaster Railway Heritage celebrates this history through various initiatives, including museums, heritage trails, and preservation projects, offering visitors and locals alike an opportunity to explore and appreciate the town’s deep-rooted railway heritage.
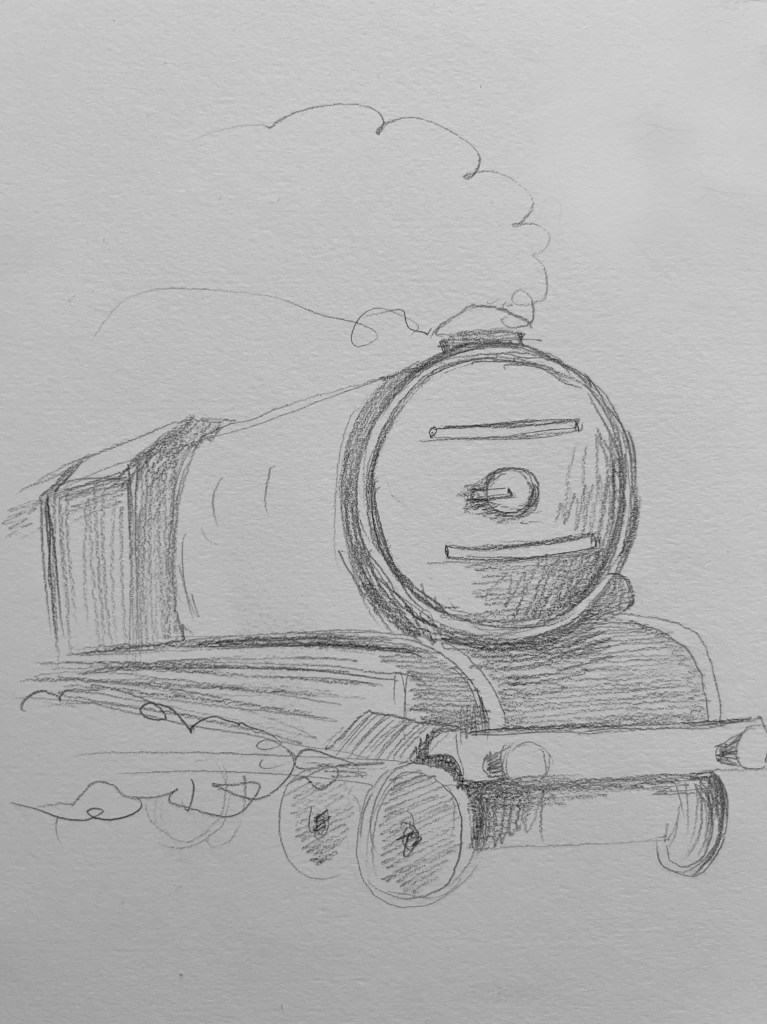
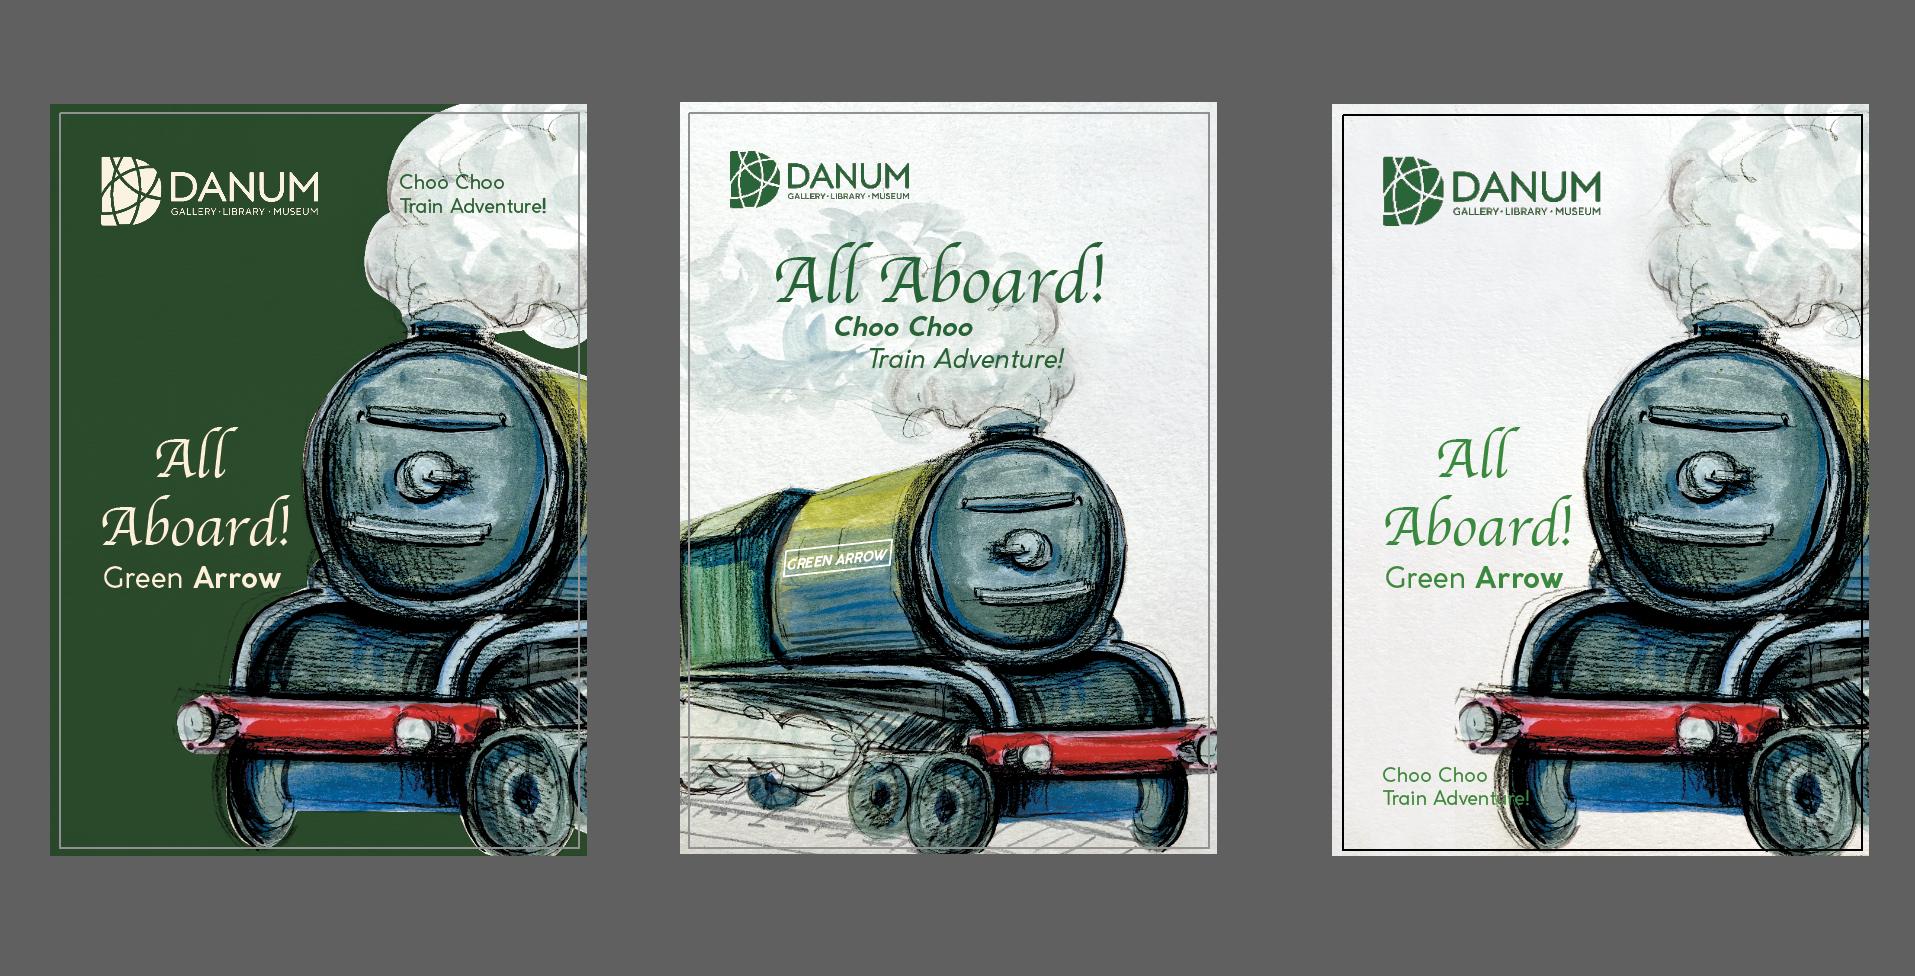
One of the ideas for the kids’ poster was to create an illustration of a locomotive resembling the Green Arrow, accompanied by the slogan “Green Arrow of Doncaster.”
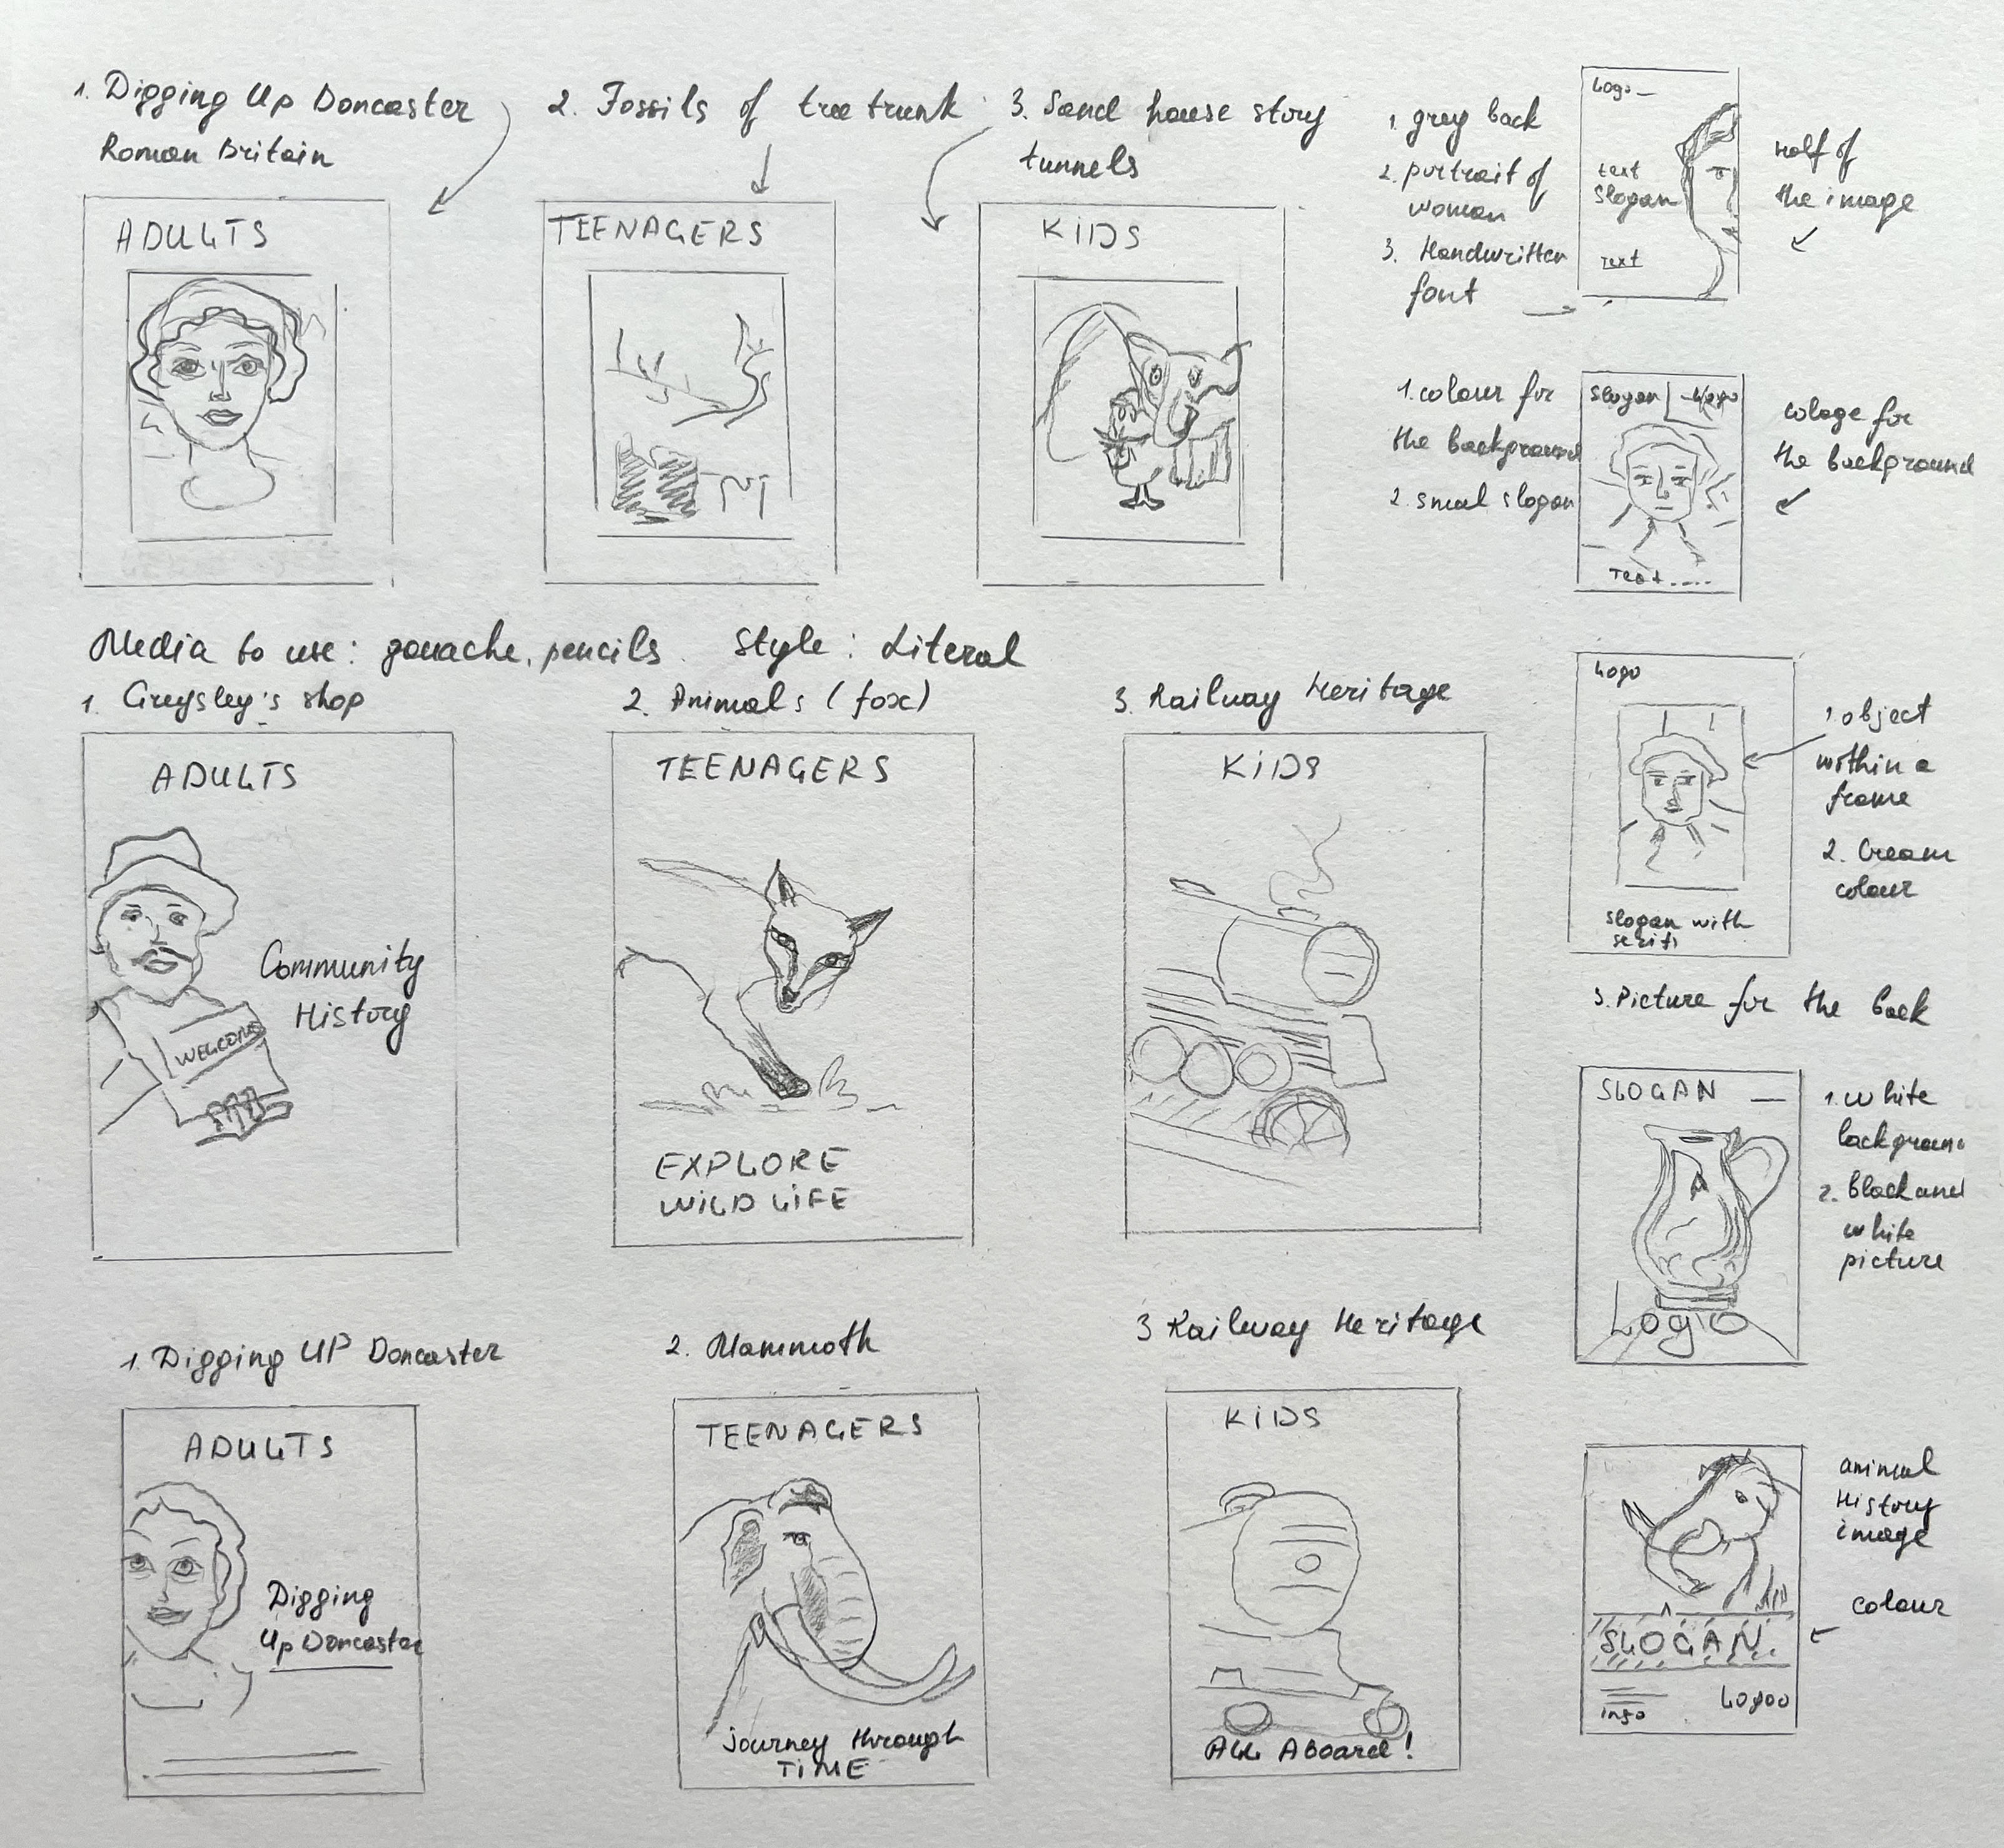
After sketching out several versions of drawings and tags for the posters, I decided to organise them into the mind map. Although the goal was to create three separate posters for different age categories, I wanted to ensure that there was a seamless flow and coherence between all three posters. By doing so, the message and aesthetic would resonate harmoniously throughout, enhancing the overall impact and visual appeal of the final design.
At this stage, I began to develop my ideas for the posters. There were numerous potential objects that I could use for each poster, which initially felt overwhelming. To help visualise the composition, I created sketches of how the objects could be positioned within the poster. One idea that stood out to me was creating a jar filled with objects, like “Hidden Gems,” which would relate to the “Digging Up Doncaster” theme for the adult posters.
Additionally, I sketched out three posters for each target audience, incorporating the Doncaster racecourse theme. Although I hadn’t extensively explored this subject within the museum, apart from Gresley’s shop as a poster card, I wanted to consider all possible options that could be implemented within the brief.
Next, I created sketches to plan the placement of objects on the poster. I had the idea of featuring a jug with a portrait of the Poligton Sarcophagus woman, a face jug, and other objects, creating a collage-like effect. I also sketched different arrangements to determine the positioning of each object, mainly using jugs and vases.
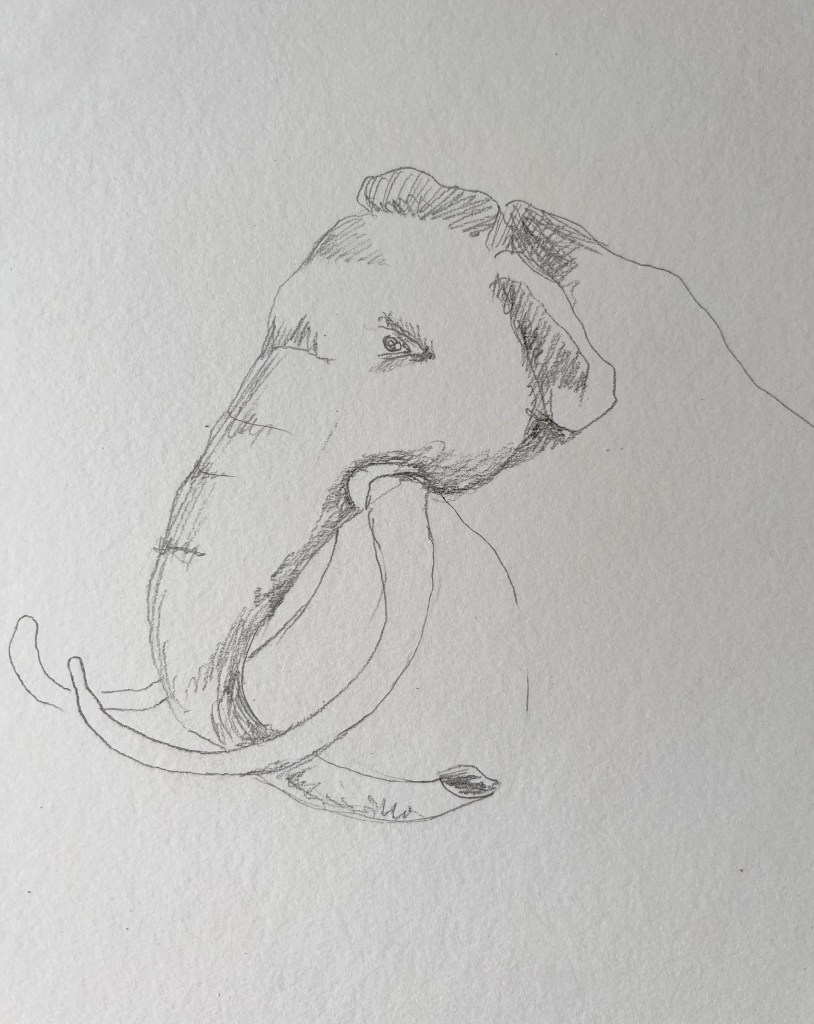
I was inspired by the theme of Sand House Story and created sketches of tunnels, an elephant, and a mahout. My intention was to make it appear as if they were having a conversation and engaging with the reader. This theme would be ideal for a kids’ poster and aligns well with the historical context. However, I also wanted to highlight an important part of Doncaster’s history – its railway heritage, which is prominent in the community. Therefore, I ultimately chose to focus on trains for the kids’ poster.
Conceptualposters
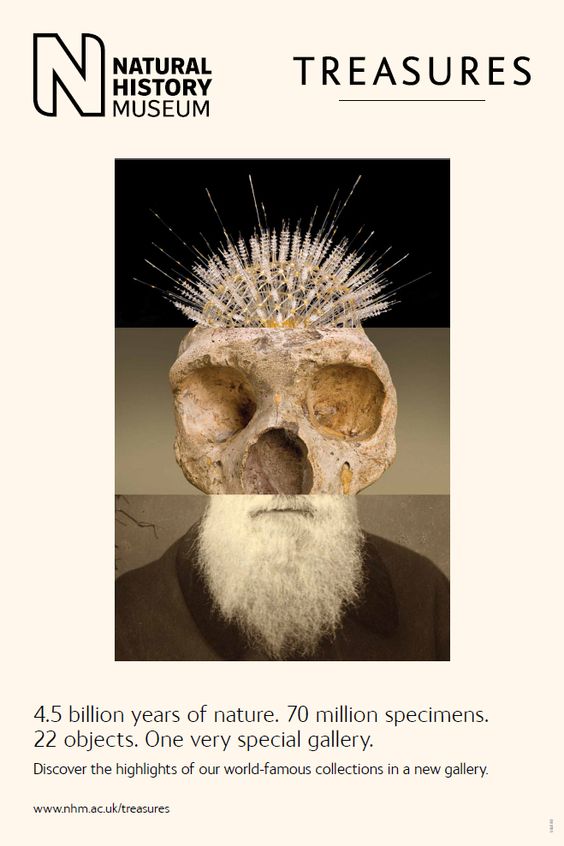
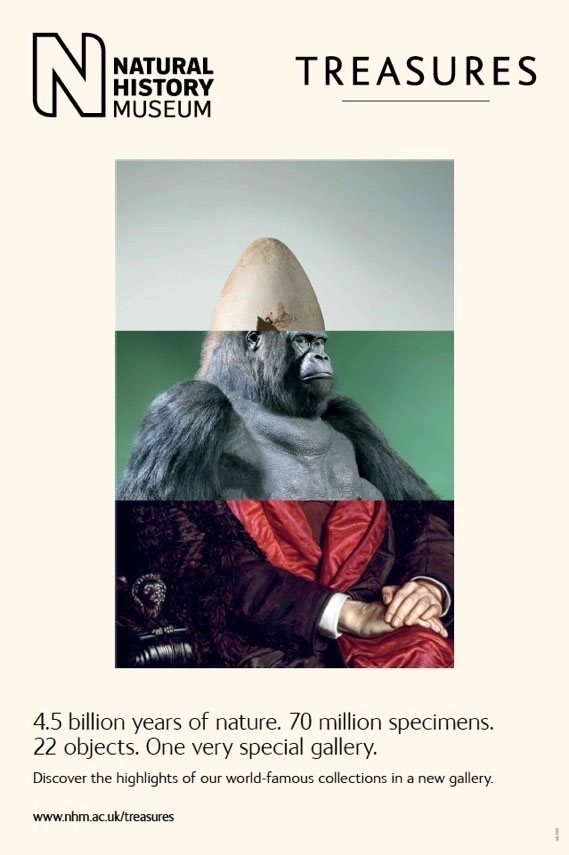
Before designing posters I went online to look for some ideas for inspiration. I was looking for some campaigns that purposefully were done for such topics as museums, history, and nature. Posters below the advertisement for the Natural History Museum are presented in conceptual style. They have a creative approach, where one image consists of several parts, but altogether creates one solid object. The technique is similar to collage, and juxtaposition.
Those visuals include various elements that illustrate the museum’s emphasis on natural history. It helps potential visitors recognise the museum and its distinct visual identity. Each poster may display several illustrations or photographs of key artefacts or specimens found within the museum. This might include imagery of well-preserved fossils, unique geological formations, or extraordinary specimens of flora and fauna. These images serve to demonstrate the museum’s focus on showcasing the natural wonders of the world.
I quite like the colours that were used within those visuals, especially the creamy background, which helps to concentrate on the central part of the visual. They are nature-themed colours such as earthy tones, greens, or blues that could be chosen to evoke a sense of connection to the natural world and instil curiosity in potential visitors.
Overall, the advertisement aims to showcase the Natural History Museum as a captivating and educational destination that celebrates the wonders of natural history. This is something that I should think about for my posters as well.
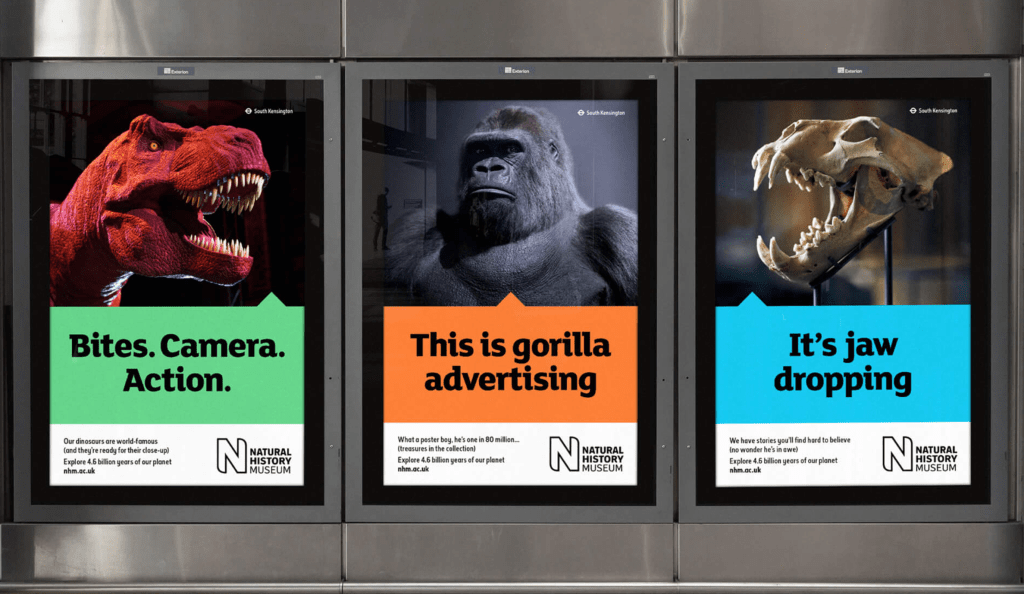
Another example of posters for Natural History Musem has a literal approach, where animals and objects are presented in a real way. The message of the poster is quite loud and confident, with humorous slogans, also, the central part of the poster is highlighted with a bold colour. The colour of the photograph is dark and moody, different to the previous design campaign, but still has a vocal point on one object. These posters are likely designed to attract attention and create curiosity among potential visitors.
Furthermore, I have gathered a collection of posters featuring single objects, including nature presentations and artefacts, in order to explore current trends and explore the keys to creating captivating images. Analysing these posters allows me to identify popular styles and techniques that resonate with audiences.
If I pursued a historical and excavation theme for the adult posters, I felt it would be best to maintain that theme throughout all three posters. This led me to envision the following groups of posters: “Digging Up Doncaster” for adults, “Fossils” for teenagers, and “Sand House Story” for kids. Additionally, I considered “Gresley’s Shop” for adults, “Animals” for teens, and “Trains” for kids. Or, “Digging Up Doncaster” for adults, “Mammoth” for teenagers, and “Railway Heritage” for kids.
I created an additional mind map to finalise the choices for each poster. I was confident with the chosen theme for the general audience and the kids’ poster. However, the teenager poster was a bit tricky because teenagers already have established interests and may not be frequent museum visitors like adults. I thought that the theme of fossils would pique their curiosity and encourage them to visit the museum and explore. However, due to the small size of our Doncaster museum, it might be challenging to see the spectacular artefacts typically found in larger cities. Therefore, for the teenager poster, I decided to focus on the theme of a Mammoth tooth, fossils, and the desire to discover the historical and archaeological aspects of the local area.
I created a series of visuals with different themes to help me organise and better understand my ideas. This process also allowed me to get a glimpse of what I can expect from these poster concepts. Initially, I planned on placing the object in the centre of the poster, creating a framed effect. I also experimented with an off-centre placement, where the object is positioned towards the right side and occupies only half of the space.
For the kids’ poster, I initially planned to focus on the tunnels and The Sand House story. However, my husband, who was born in Doncaster, insisted that I should create a Railway Heritage poster since that is what Doncaster is famous for and something to be proud of. So, I changed the direction and decided to go with a train theme based on his suggestion.
In terms of the background, I am leaning towards using a white or cream colour, but I am also open to the possibility of incorporating darker backgrounds. For the general audience, I have decided to feature the Poligton Sarcophagus woman. For teenagers, I plan on using a mammoth tooth as the focal point. Lastly, for the kids’ poster, I will be highlighting the railway heritage.
The Doncaster Museum is home to an extraordinary artefact — a genuine mammoth tooth. This ancient and enormous tooth serves as a captivating reminder of the prehistoric creatures that once roamed the Earth. The mammoth tooth serves as a tangible connection to a bygone era, igniting curiosity and allowing us to imagine what life was like during the time of these majestic creatures.
After conducting extensive analysis and research, it has become evident that these are the themes I wish to explore in my posters. I added slogans next to each poster, as I thought the message will be a good support for my designs.
Children aged 5–9 (Railway Heritage) Slogan: All aboard!;
Teenagers 13–16 (Mammoth Tooth) Slogan: Journey through time;
General adult audience (Roman Britain) Slogan: Digging up Doncaster.
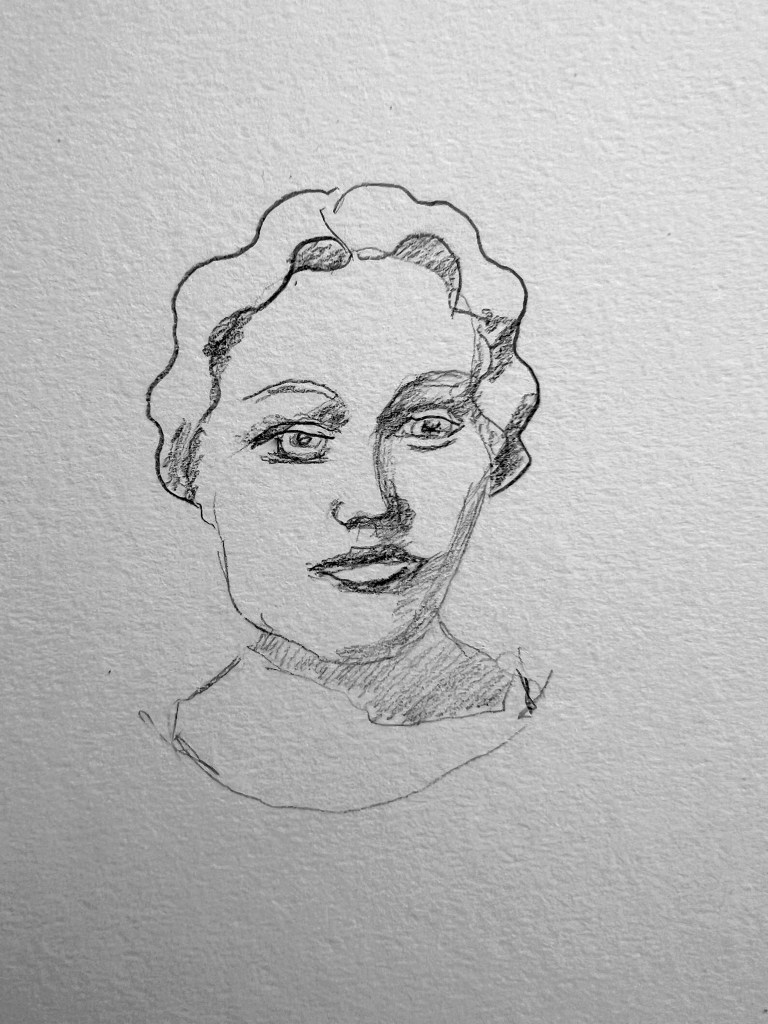
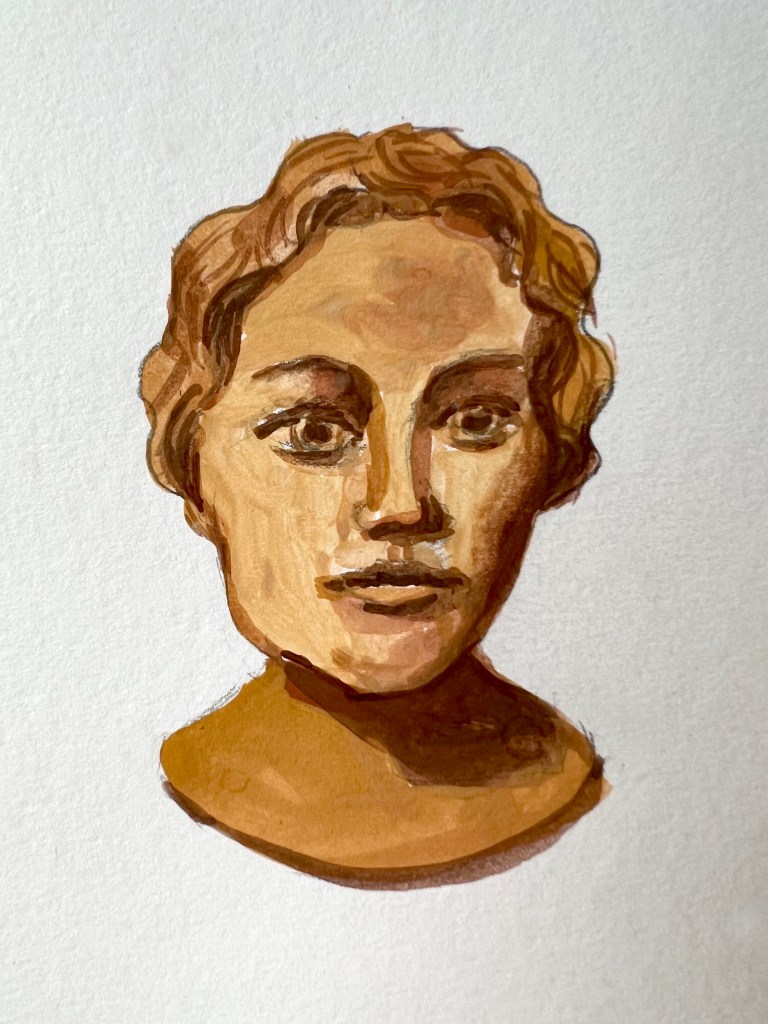
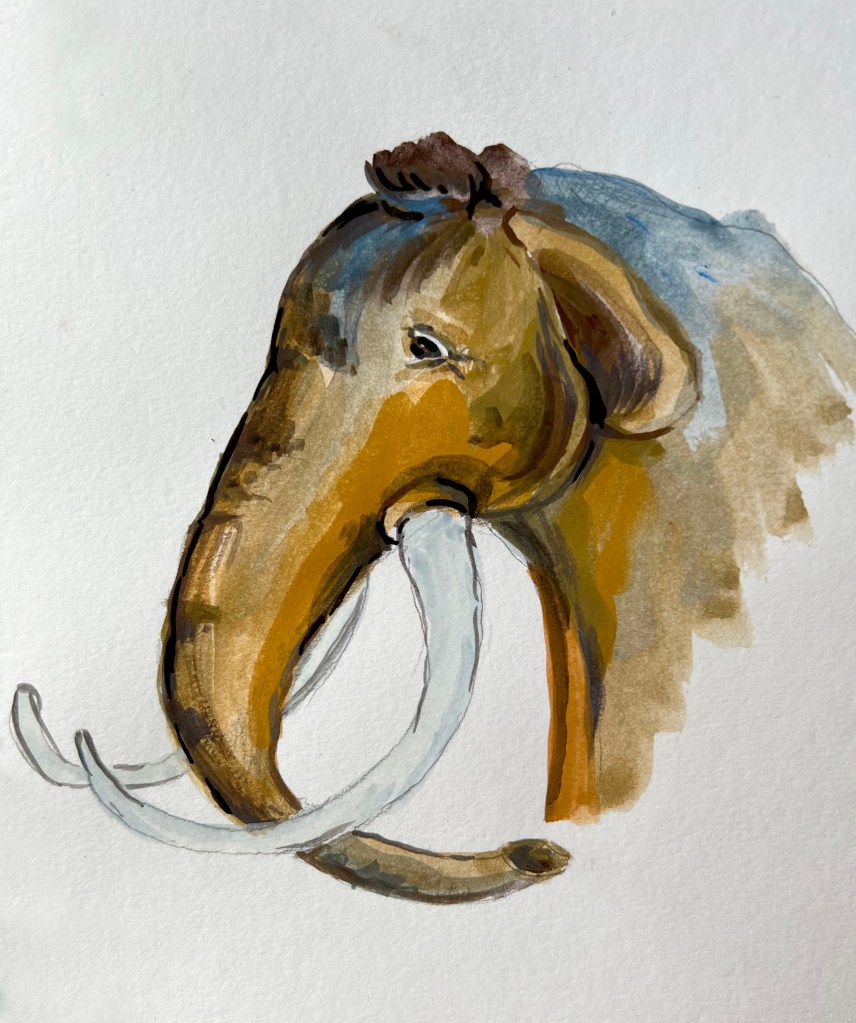
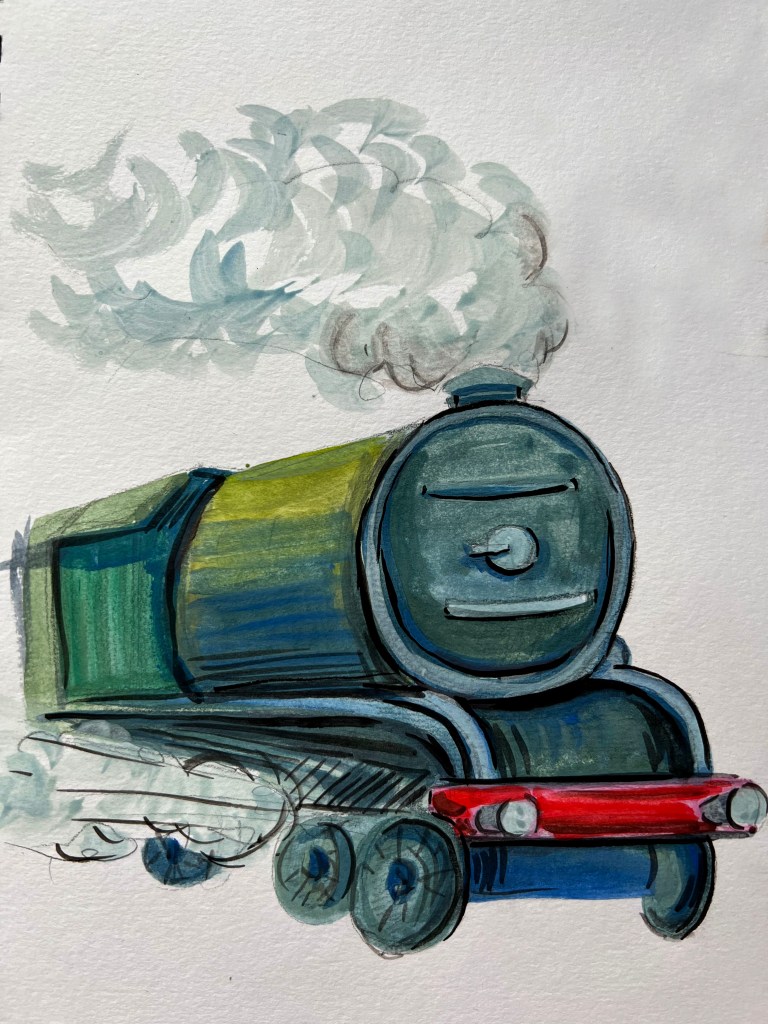
For my drawings, I used gouache to depict a bust of a Pollington Sarcophagus woman, a painting of a mammoth, and a Green Arrow train. Initially, I utilised gouache for my drawings, but later on, I planned to incorporate software to make adjustments and create more effectual illustrations.
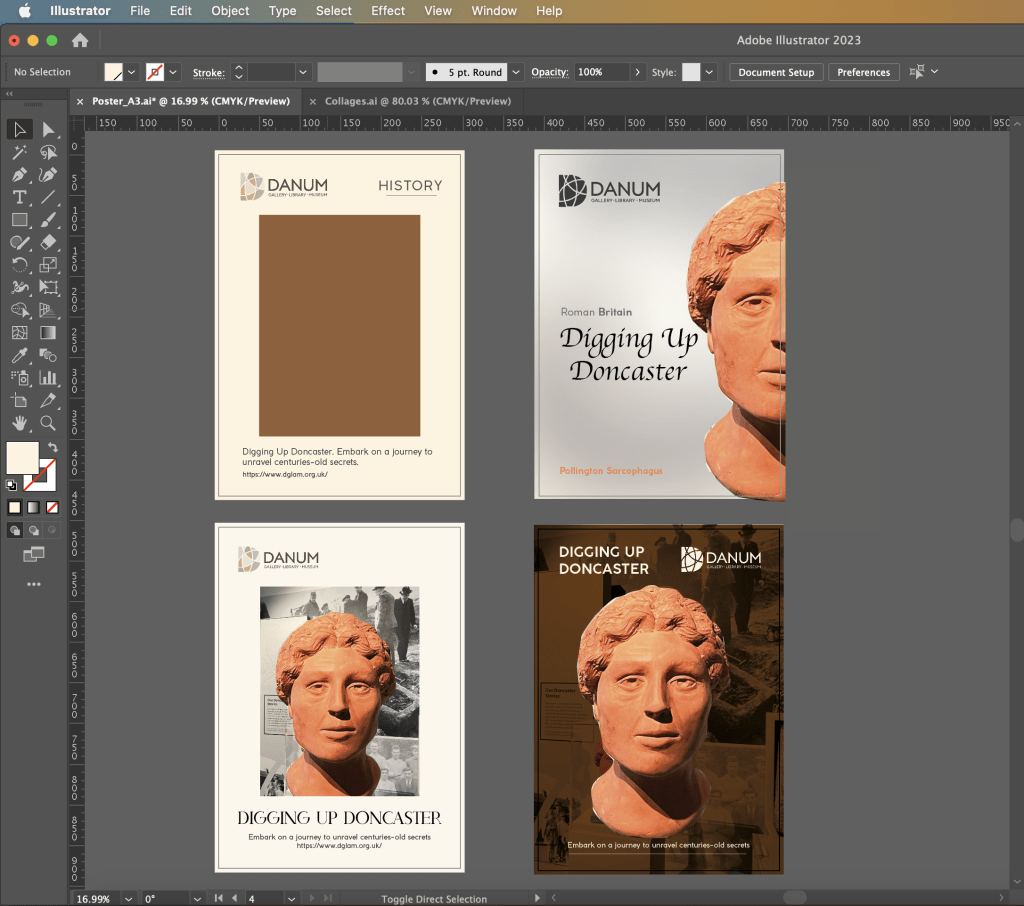
Additionally, I have created various layouts with different options for colour usage and compositions. As the focal point, I incorporated a bust of a Roman Sarcophagus woman and explored different variations of its placement. In these posters, the objective was to experiment with the background colour, typography and the size of the main object.
Initially, a design was chosen with a centrally positioned portrait and a rectangular background formed by photographs which looked like collage (bottom left image). The cream colour surrounding it created a frame-like effect. The cream colour surrounding created a frame-like effect. The choice of a serif font added a decorative touch. However, I had certain doubts regarding this composition. The presence of numerous distracting elements made the design resemble a magazine or book cover, deviating from the intended objective, although I was not sure about the font choice. As a result, a decision was made to shift towards an enlarged placement of the main object (upper right image). I had some concerns about the grey background, which was lacking vibrancy. So, I was planning to brighten it up. At the same time, I chose to create one solid colour for the logo and typography, which was in charcoal colour, and the font for the main slogan in the central left part seemed like worked harmoniously with the composition.
The next step involved creating a high-quality illustration. In my case, the portrait of a woman by gouache paints was just a textured representation of the future character. The sketches were cute, but they lacked the “wow” factor. I wanted to amaze my viewers, not only the adult audience but also young children and teenagers.
Using Photoshop, I cropped out the woman’s bust and applied a Neural Filter to enhance the image. Next, I lay my gouache illustration on top, followed by a pencil sketch. And voila, the illustration came to life and acquired a stunning look. As it was a portrait, I aimed to recreate accuracy, which I achieved by utilising the original photograph that I took in the museum. The textures created by the gouache and pencil sketch added a unique dimension to the bust. This is exactly what I needed to create a standout key object for my design.
At that point, it was essential to get the composition right because I was going to rely on it for two other posters. I created four samples, based on previous research, but this time using updated illustration. I thought that contrasting dark green colours for the background will make an impact on the composition, but it definitely looked too much and didn’t quite work.
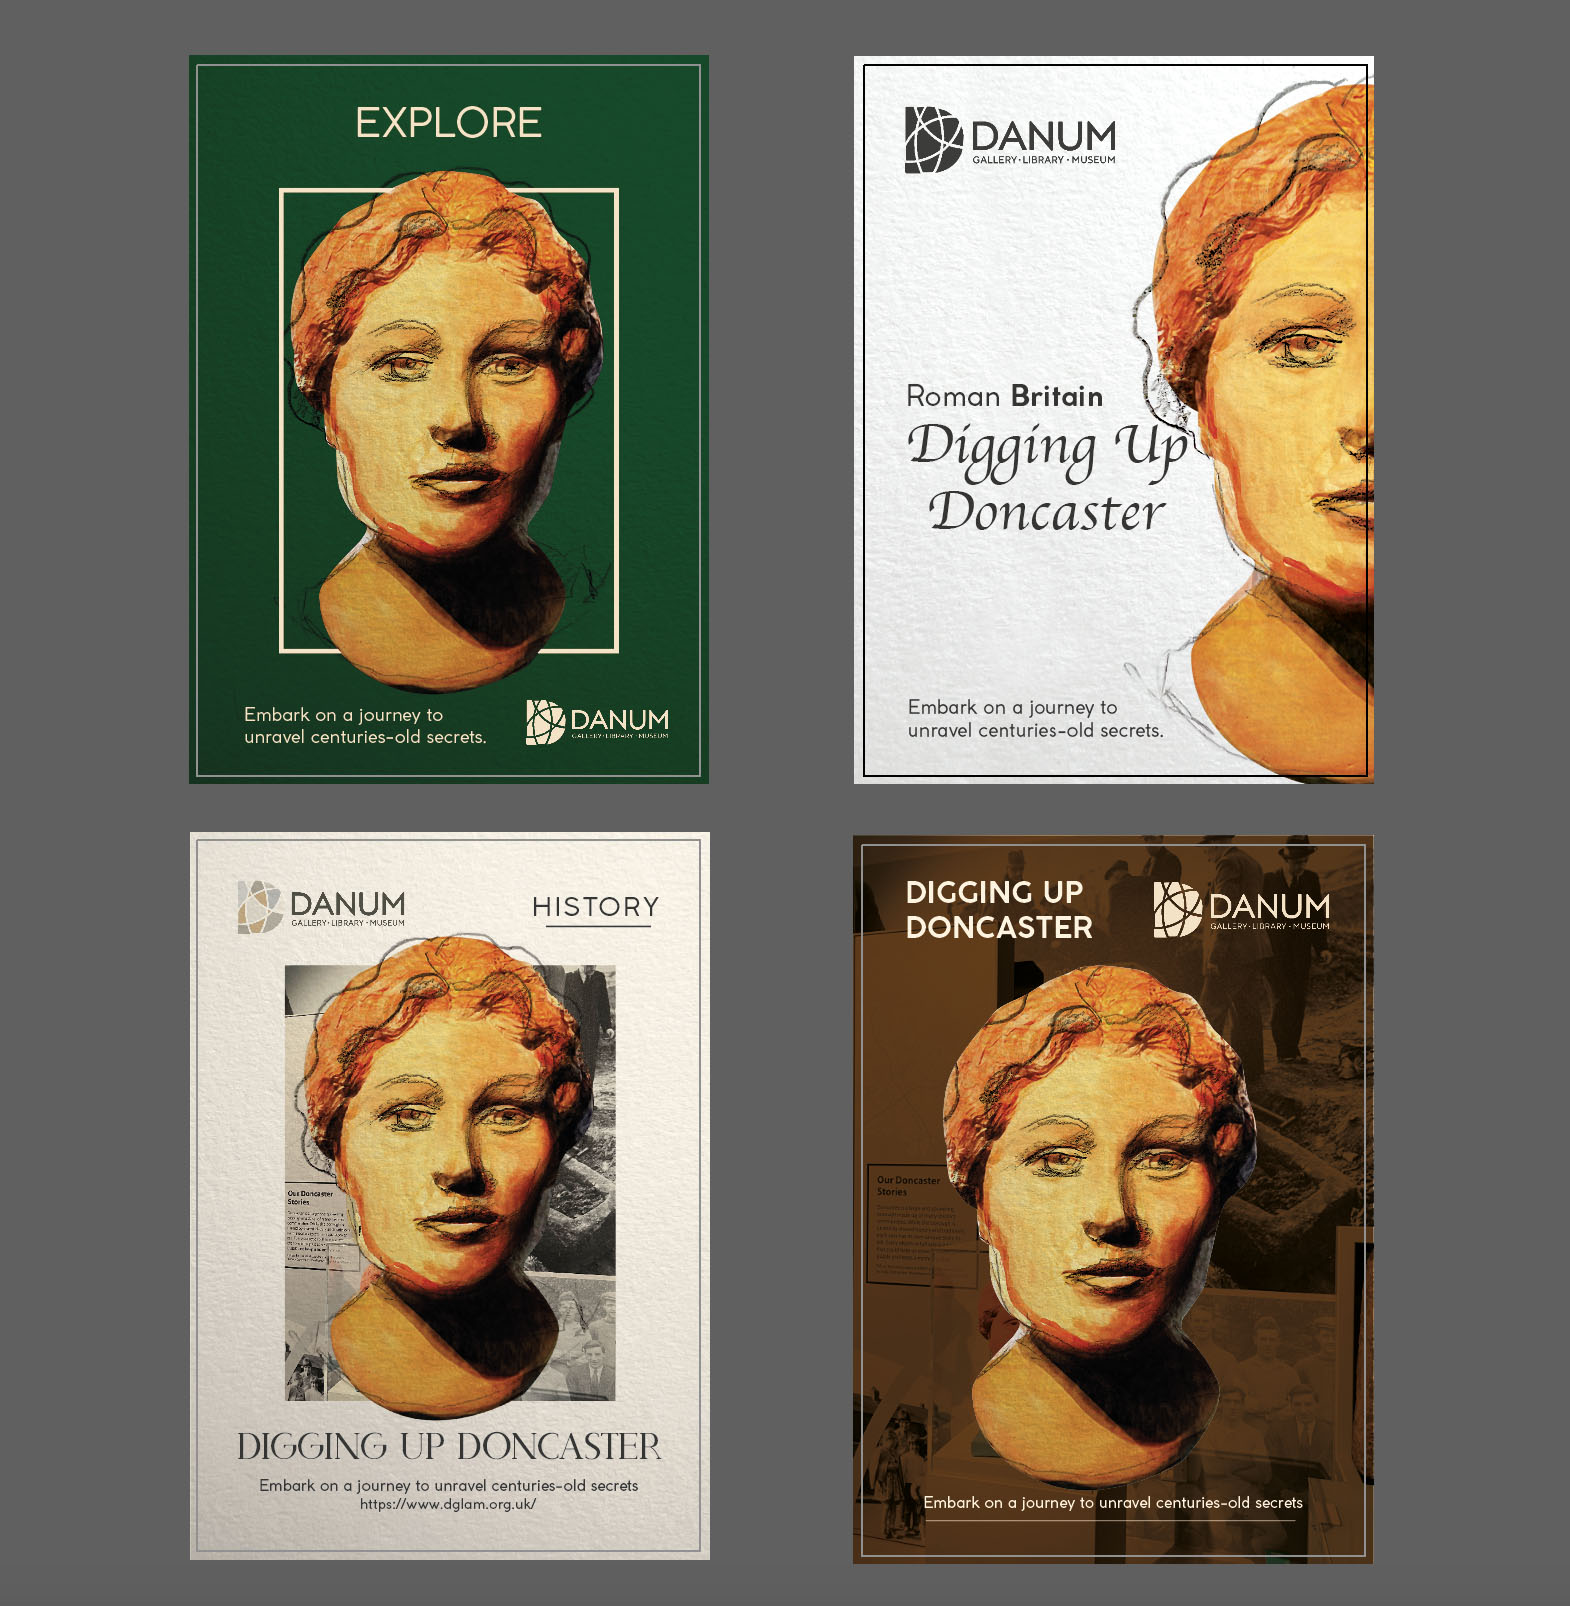
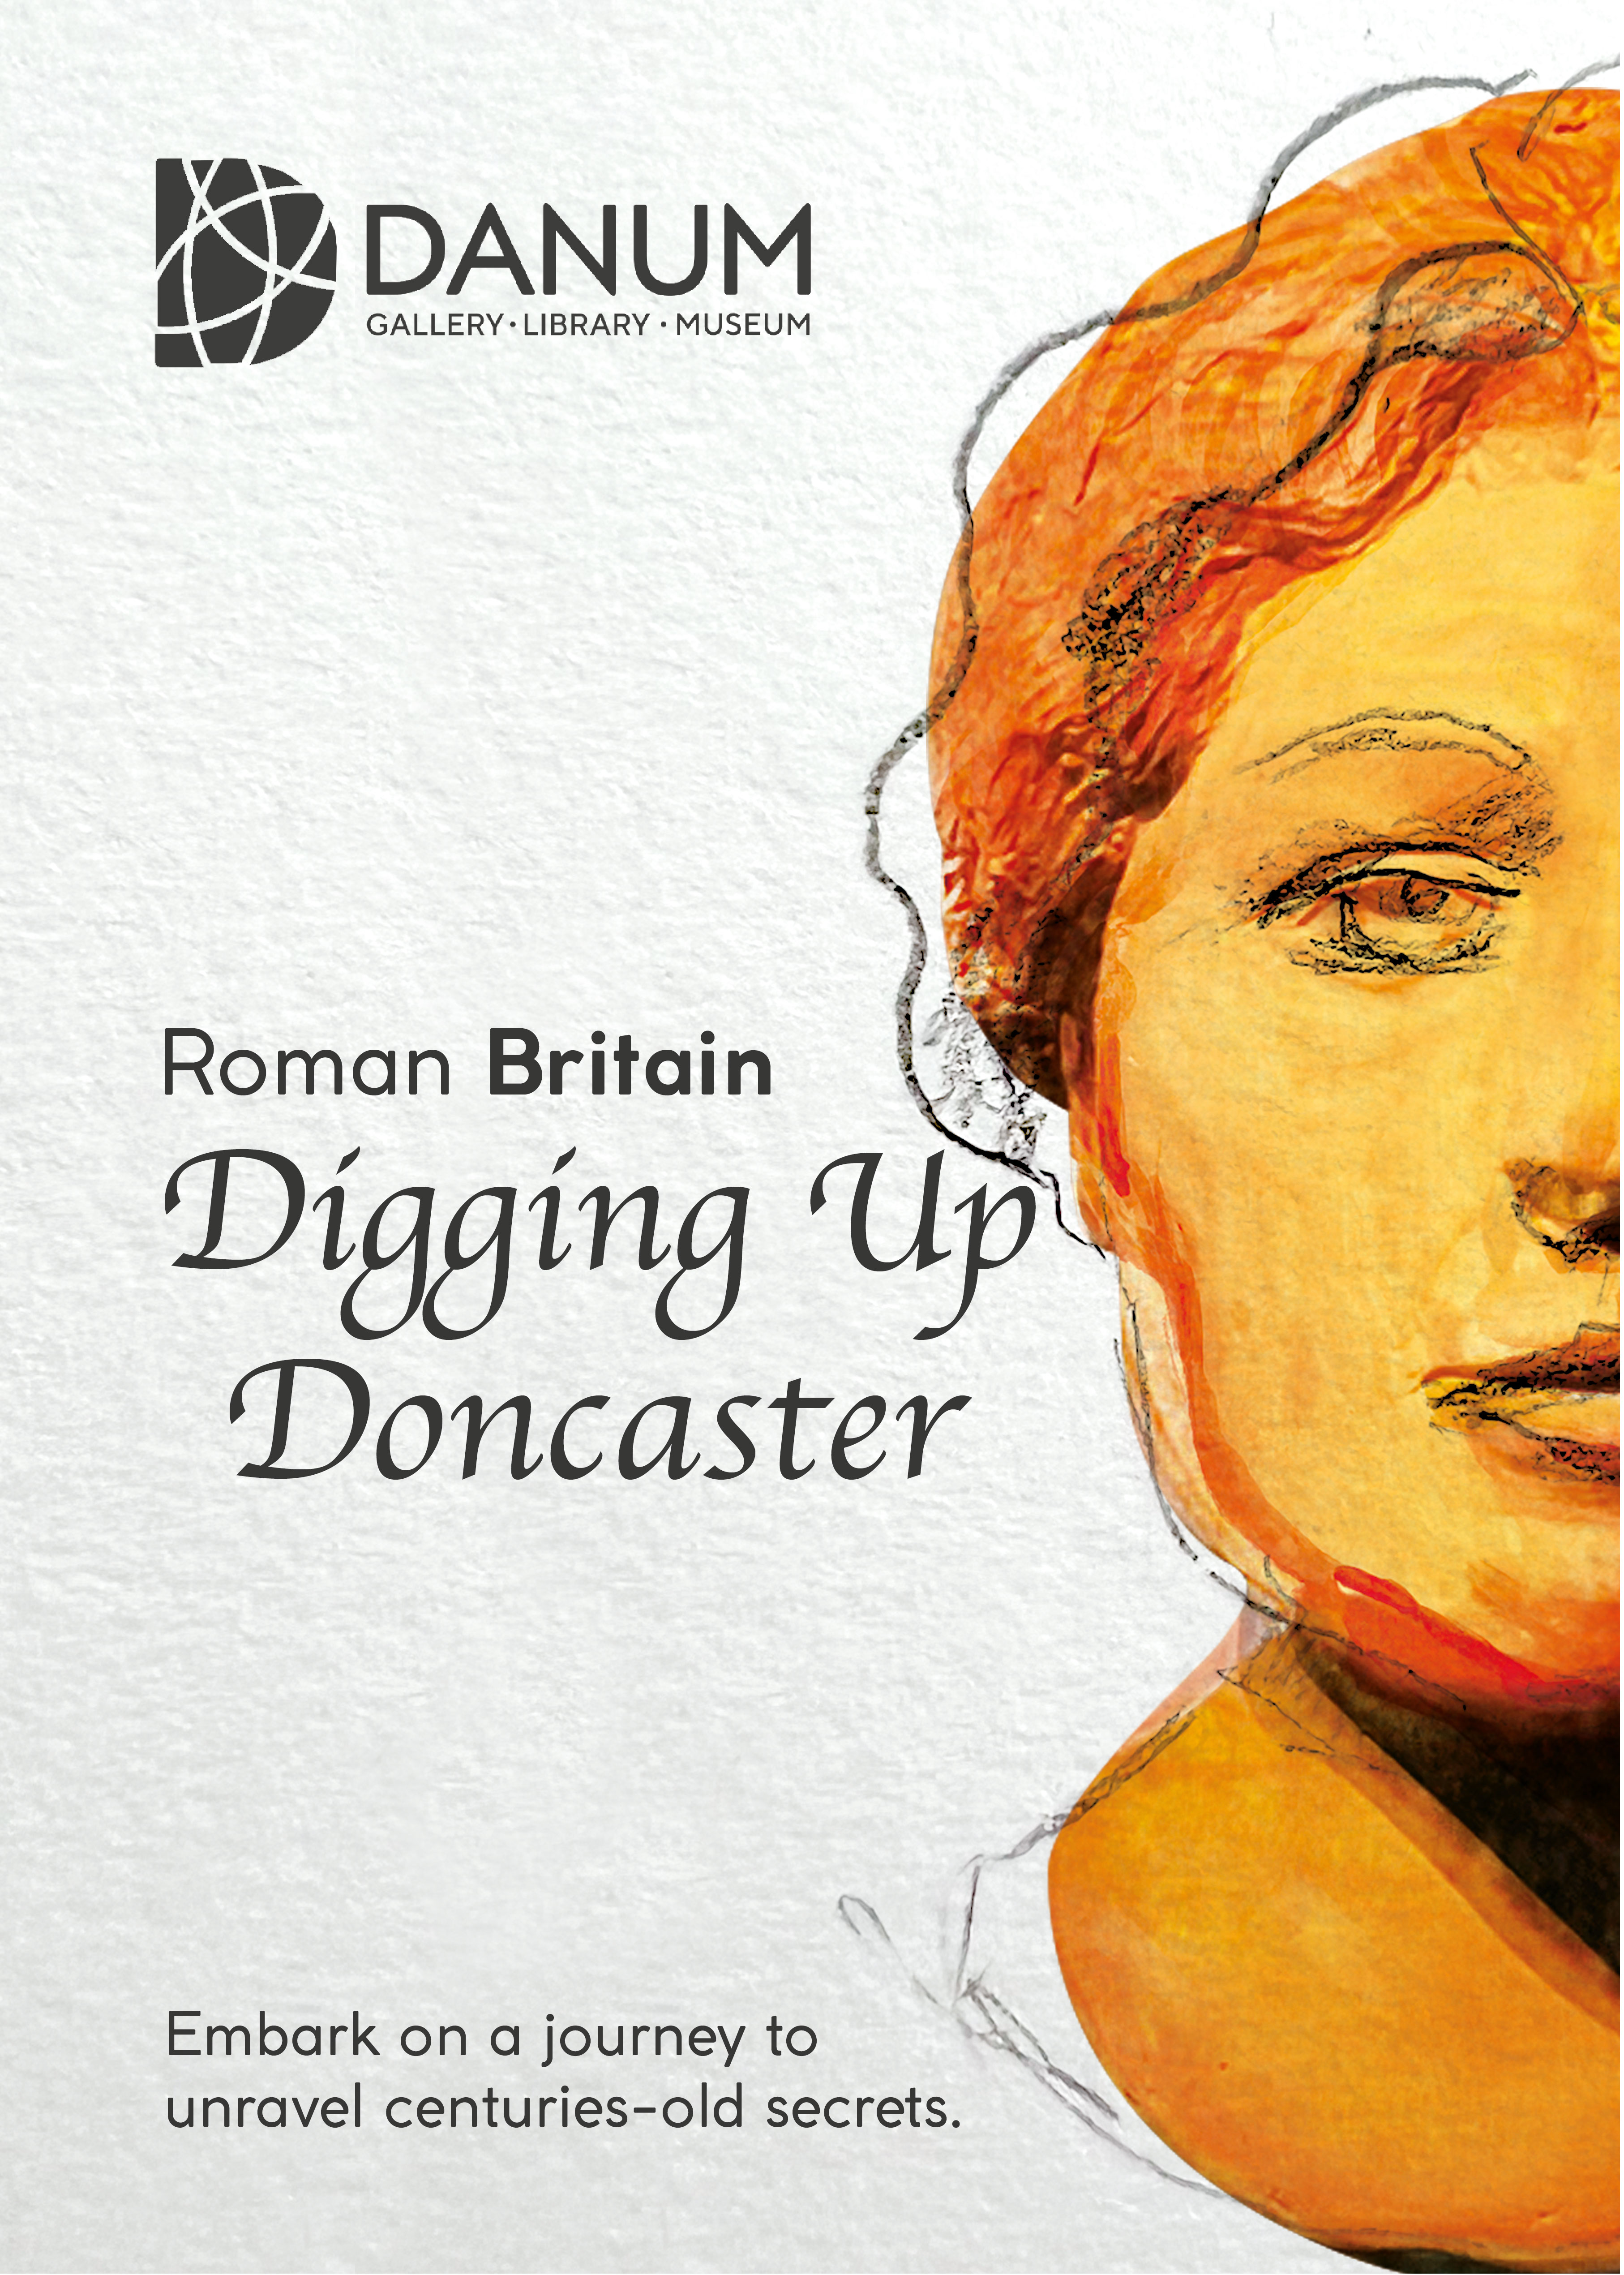
I was hesitating between two options: one with a photo as the background and a cream frame, and an enlarged photo positioned to the right. Ultimately, I decided to choose the more prominent design that I mentioned earlier. This design featured a large portrait of the woman’s half-face with a clear white space on the left, creating a well-balanced poster. It is simple and easy to read, which makes it the perfect choice for a museum poster where clarity is crucial. For the background, I used the paper texture, with a slight grey hint. Additionally, I wanted to incorporate captivating titles into each poster to make them part of the overall design. For the main slogan, I selected the Apple Chancery font, with a brief description in a charcoal grey san-serif font at the bottom.
The final design for the general audience turned out quite well. The scrupulous and thorough analysis certainly played a role in ensuring its success. The illustration of the poster comes across as confident and self-sufficient, capturing the essence of the Roman presence in Doncaster.
The poster effectively balances text, imagery, and negative space in its composition, creating a visually appealing layout that draws the viewer’s attention. The use of earthy tones on the portrait effectively conveys a sense of history and antiquity, adding to the overall theme and ambience of the design.
Overall, it seems that the efforts put into the design, including the analysis and selection of elements, have resulted in a successful museum poster that effectively communicates the exhibition’s message to a general audience.
Following the successful design experience for the general audience, I moved on to the next layout, creating a train poster for kids. However, I faced a challenge in fitting the train into the composition correctly, as it was a different shape illustration compared to the bust of the woman. While I initially planned to position the train in the right corner, enlarging it to half the length of the A3 format, this would have resulted in most of the carriage parts being hidden, which was not ideal. Additionally, adding colour to the background didn’t allow the train to stand out, and the white outline didn’t work either.
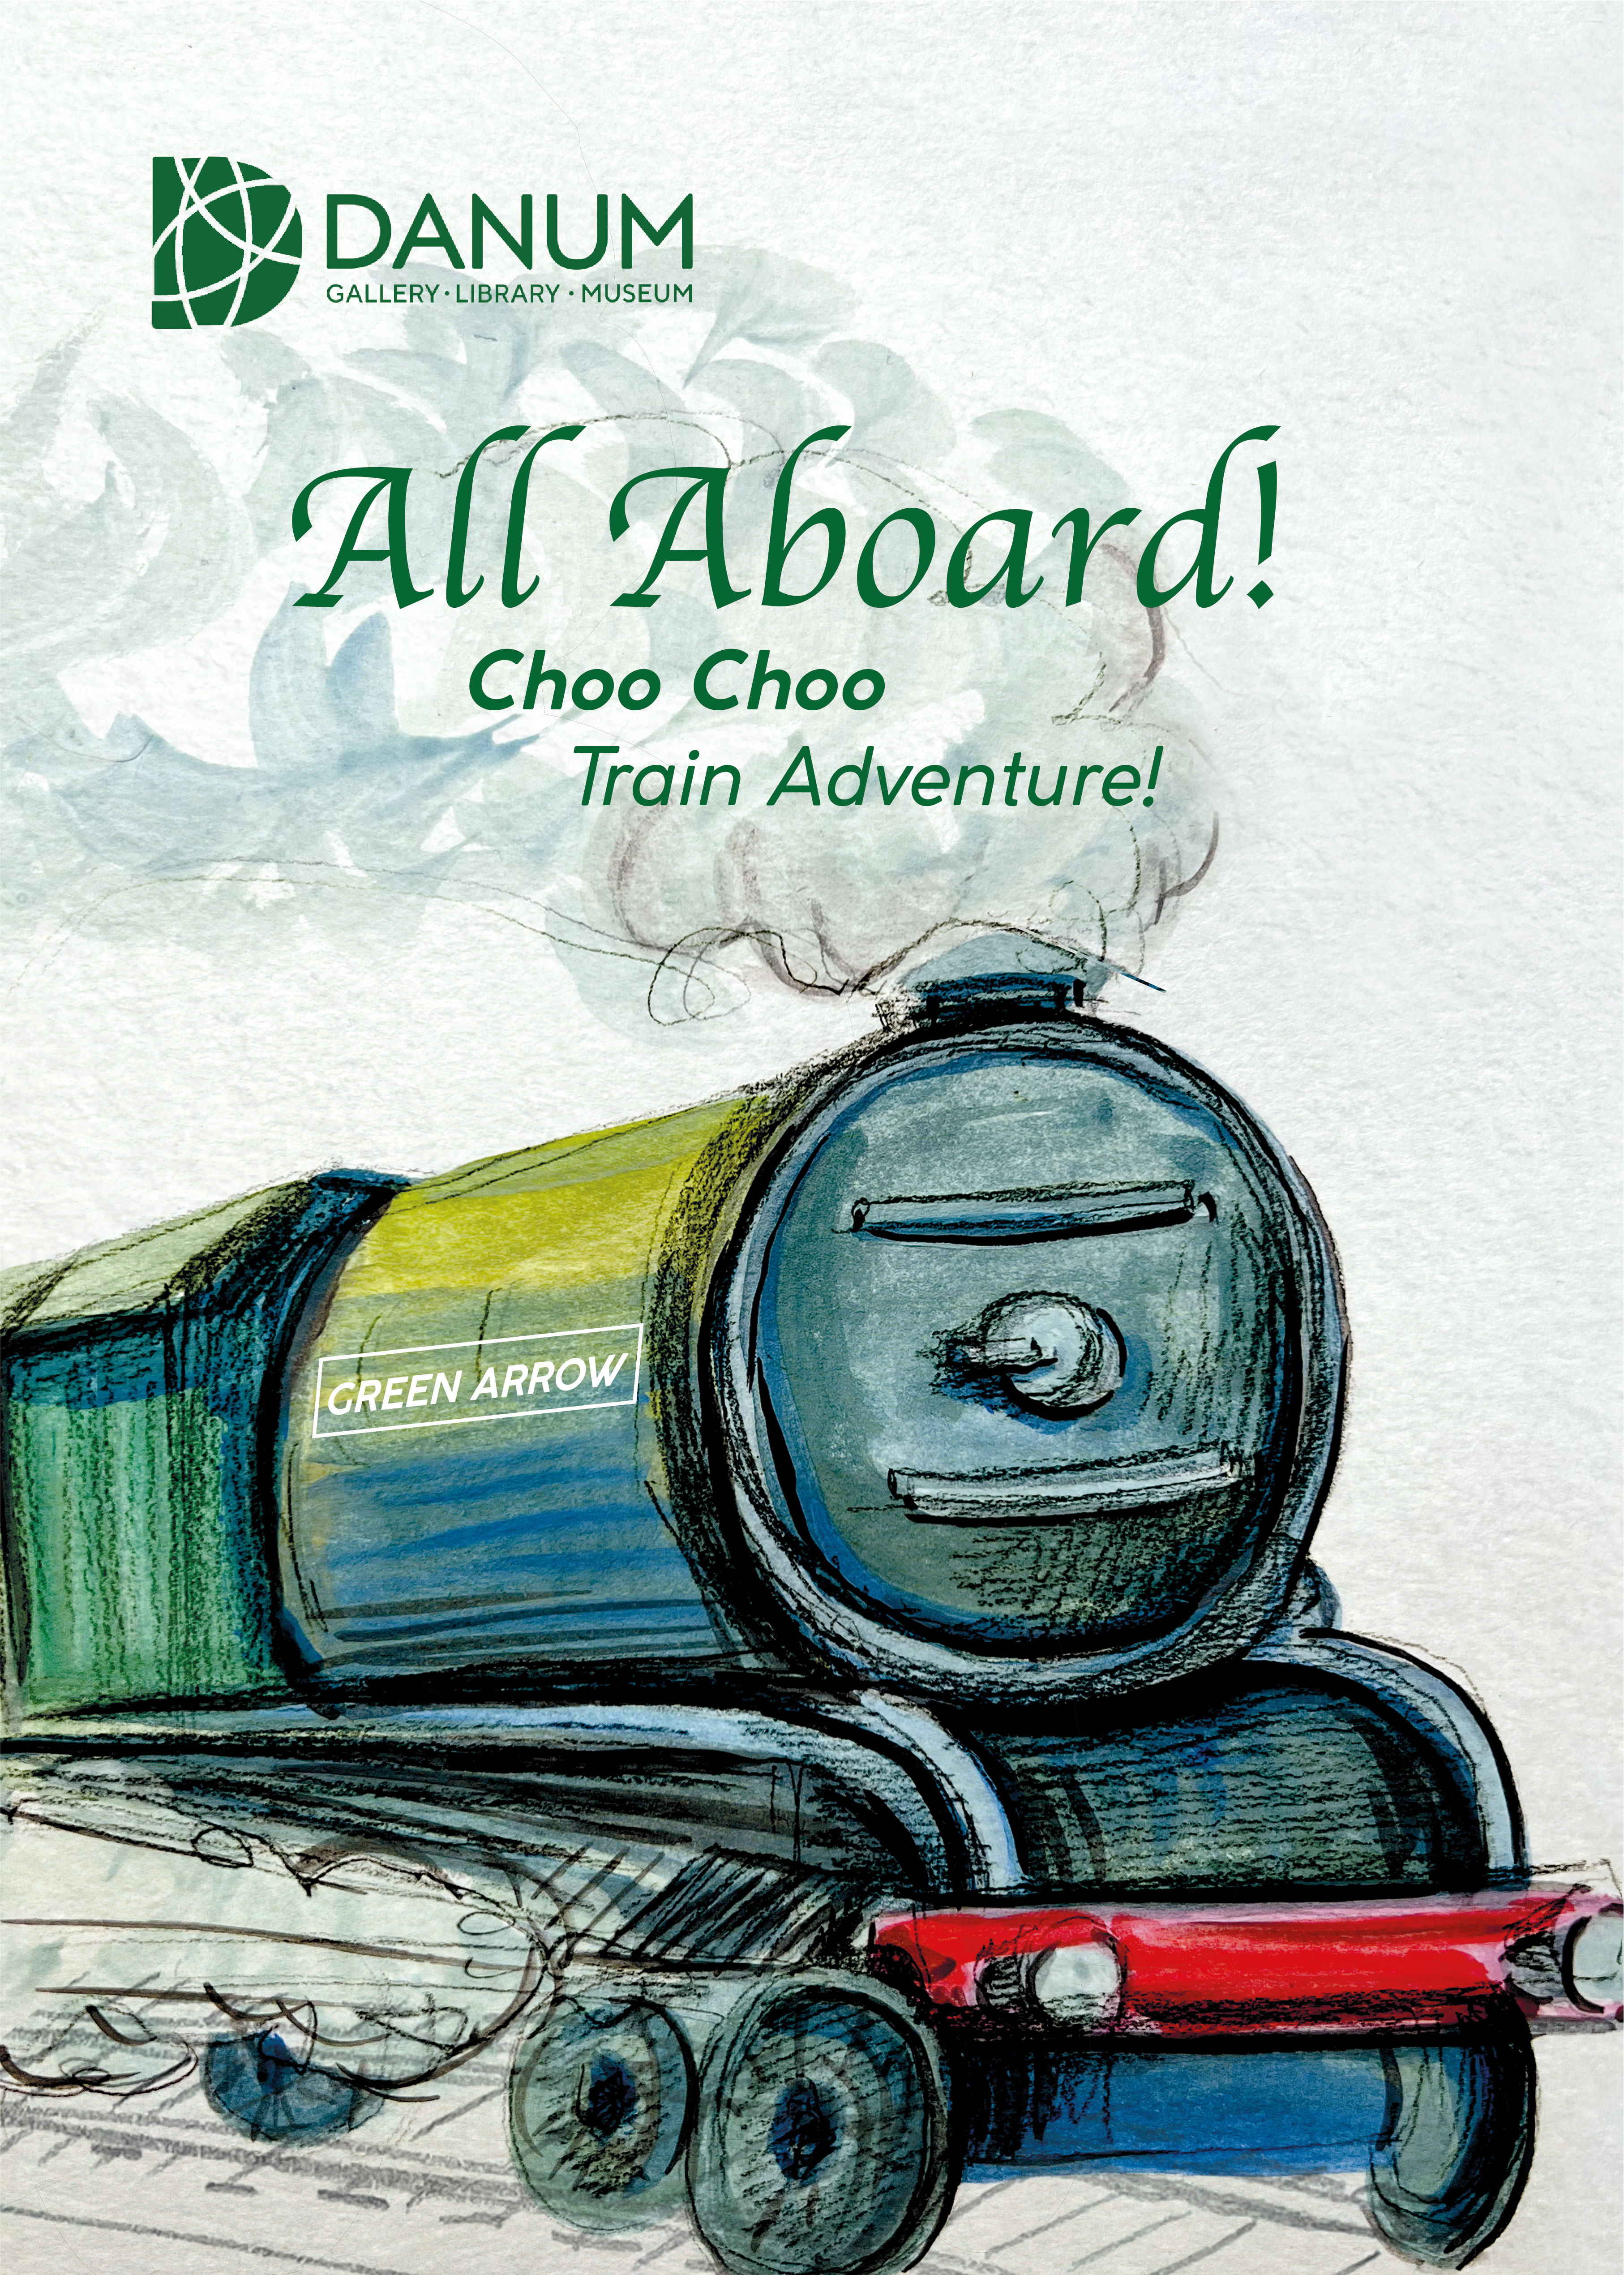
Fortunately, I found a solution by positioning the Green Arrow in the bottom part of the sheet and using the steam as a background for the text. This placement allowed the train to pop out effectively, and the slogan gained more meaning as it emerged from the train’s steam. Also, highlighting the name of the train, Green arrow, I chose a dark rich green colour for the text and logo.
The final poster for the kid’s audience is presented below. I implemented a cartoony and simplistic style, using bold outlines to make it more visually engaging and child-friendly. The colour of the train is bright and vibrant, with the use of green and red, which brings a sense of excitement, playfulness, and whimsy. I hope that the idea to help children relate to the image and spark their imagination was achieved. I kept the background clear, as that was the idea of the poster, using a singular object, steam at the top and railways at the bottom of the page creating a more stable composition for the train, which helps it to look more dynamic as well.
In summary, the poster for kids for the railway heritage combines several graphic design and illustration elements to achieve a captivating and child-friendly result. Through its composition, colour scheme, illustration style, and imaginative details, this poster aims to engage young viewers, spark their curiosity, and encourage them to visit the museum.
The last poster I developed was meant to engage with teenagers audience. I was determined to use the fossils excavation theme, that Doncaster exhibit in the museum, but unfortunately, we don’t have big great dinosaurs bones, which from my perspective would be the most effective for teenagers, but we had a mammoth tooth which would lead to the pre-historic creatures. I was thinking to use the tree trunk for the poster, which is over 310 million years old, that sounds impressive, but I would struggle to use that piece of the black rectangle for the poster. I could paint a tree, but it wouldn’t catch the required attention. The landscape is best for that kind of theme, but that deceives the objective to highlight one object. Therefore I chose to recreate a mammoth portrait. I made the painting in dark brown tones, adding some textures and strokes in Photoshop. Also, I placed the painting in a similar position as the general audience poster. To make the poster brighter, I used orange colours for the logo and text around, and it helped me to brighten up the dark brown mammoth picture.
By choosing that direction for the teenager’s poster I aimed to highlight a mysterious, introspective, or thought-provoking atmosphere, that would encourage the audience to visit. I hope the final design conveys a sense of adventure, exploration, or fascination with the past.
Overall, I am quite satisfied with the outcomes of all three posters. I find them to be bright, eye-catching, with cohesive themes, and likely to be effective for all three target audiences. The decision to use different coloured text and logos for each poster was particularly useful as it created a consistent theme across them, with similar illustration styles and text, albeit with slight variations in positioning and colour.
The fourth part of the course is devoted to the definition of ‘Style’. Style is an integral part of every illustrator, by which the artist can create their own unique and inimitable style. The majority of practising professional illustrators, along with many graduating student illustrators will have a ‘Style’ associated with their work. Also, the style allows the artist to be recognisable in the creative market.
What is meant by style? It is the distinctive visual language that identifies one’s ‘mark’ or personal iconography. It should also define one’s placement within a visual, illustration genre. Like music, literature and fine art. Some will represent an adherence to a contemporary trend or fashion and others will be more traditional.
Exercise
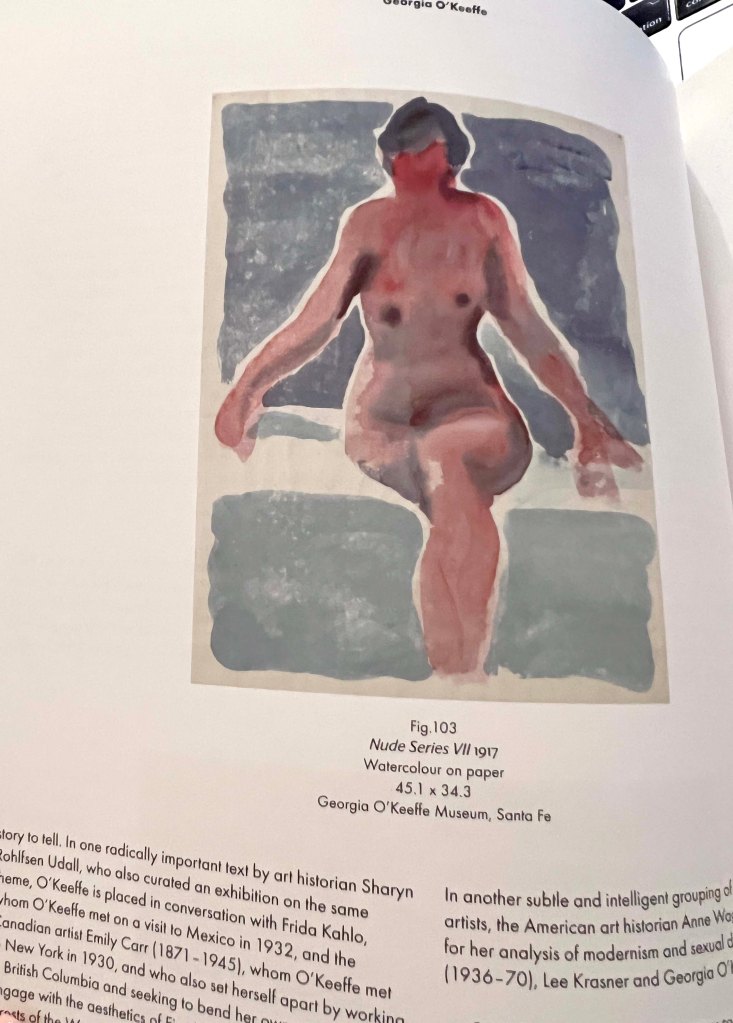
In this exercise, I was asked to find a range of illustrators who use a particular medium, and then catalogue them according to similarities in the way that they use tools and materials. I had a choice between traditional materials, such as paints and pencils, or chose digital direction such as collage or photography. I think, I’m going to analyse illustrators who use watercolour in their art, as that is something I know and love. Watercolour is a versatile and captivating medium that relies on transparent pigments mixed with water to create stunning artworks. It is such a versatile paint, that can bring traditional and at the same time modern vibes into the painting. I personally always been intrigued by the precision and artistry that watercolour requires. Unlike opaque mediums like acrylic or oil, watercolour is known for its transparency. When mixed with water, the pigments become translucent, allowing for layering and creating luminous effects. As I have known before, watercolour doesn’t forgive mistakes, once you used the colour, you can’t hide it, or change it on the piece of paper. Also, it is crucial to keep colours clear, making sure they aren’t muddy or turning into vague shades. One of the greatest artists I discovered during this course who uses watercolour was Georgia O’Keefe. I actually followed her path for creating some of the designs in the third part of the exercise ‘Abstract Illustration’. This time I would like to look into such artists as Emma Larson, and her beautiful watercolour paintings. Emma has evolved her practice to include expressive and organic watercolours, alongside paintings created with oil and acrylic.
Ever since my art classes, I remember that watercolour loves water and quality watercolour paper, which varies in price and can also be handmade. Thanks to the balance of water, it is possible to achieve different shades using the same colour. Watercolour paintings are characterised by lightness and purity, they can also be filled with depth and convey nature in all its glory.
From my observation, watercolour is most often used for depicting naturalistic landscapes, and portraits, also for children’s books and abstract paintings when it comes to spots and splashes. Such an example for children’s books is Kathleen Hale, who uses watercolour and pencil to depict her characters. In general, I have accumulated a small database of styles and ideas about watercolour painting techniques, and now it remains to collect everything on the Pinterest board. I also made a short trip to the local Doncaster Library where I saved watercolour examples from the book ‘Paint Yourself Positive’ created by British watercolour artist Jean Haines that are naturally airy, light, realistic, and imaginative at the same time.
Watercolours
According to the Alan Male book despite hundreds of styles of illustration, there are just two forms of imagery. All variations of visual language will be placed within one of these. Literalillustrations tend to represent pictorial truths. The second form of illustration can be described as conceptual. The images may contain elements of reality, but as a whole take a different form of being. Examples may include diagrams, composites, surrealism, extreme distortion or abstraction.
Looking at a large number of watercolour illustrations I collected for my Pinterest board, I catalogued the illustrators according to similarities in the way that they use tools and materials. It helped me to identify noteworthy authors, what connects them, and also to comment on the difference between styles.
I created the following subgroups:
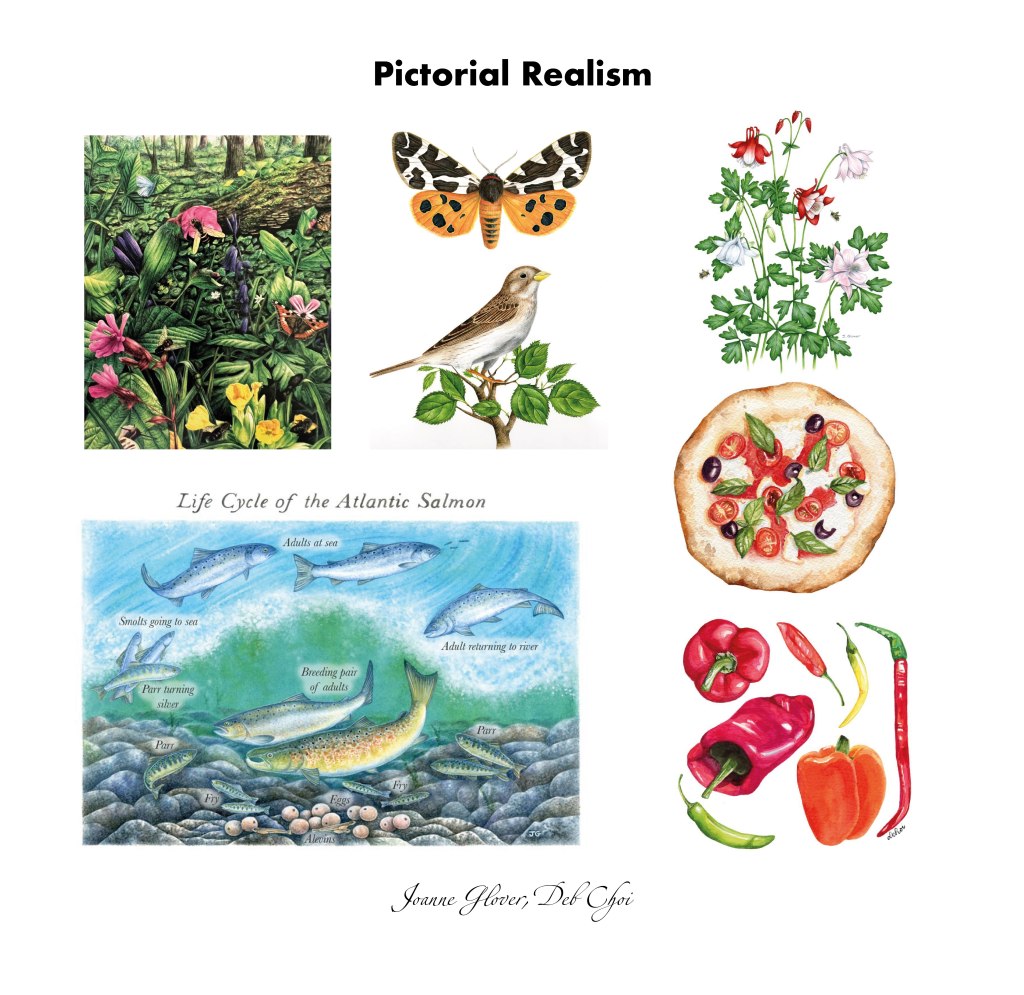
Pictorial Realism (literal illustrations);
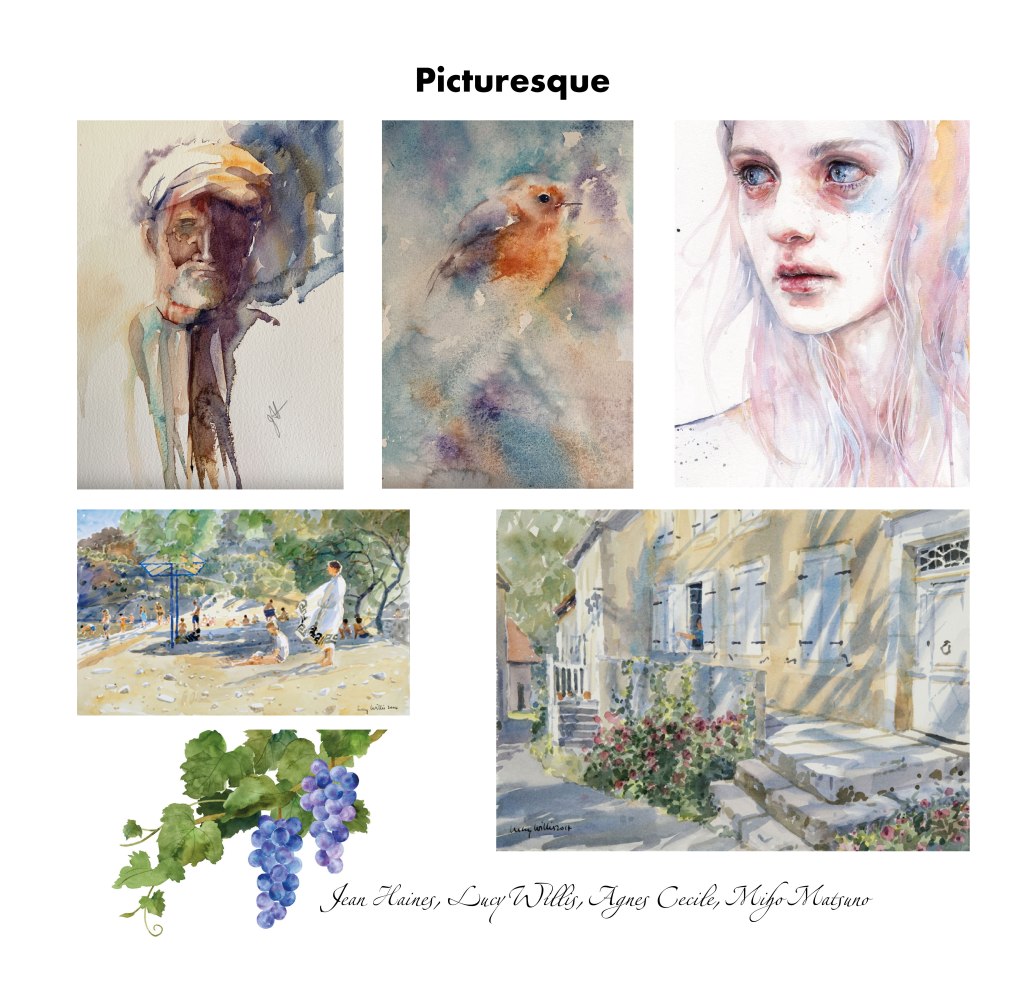
Picturesque (literal illustrations);
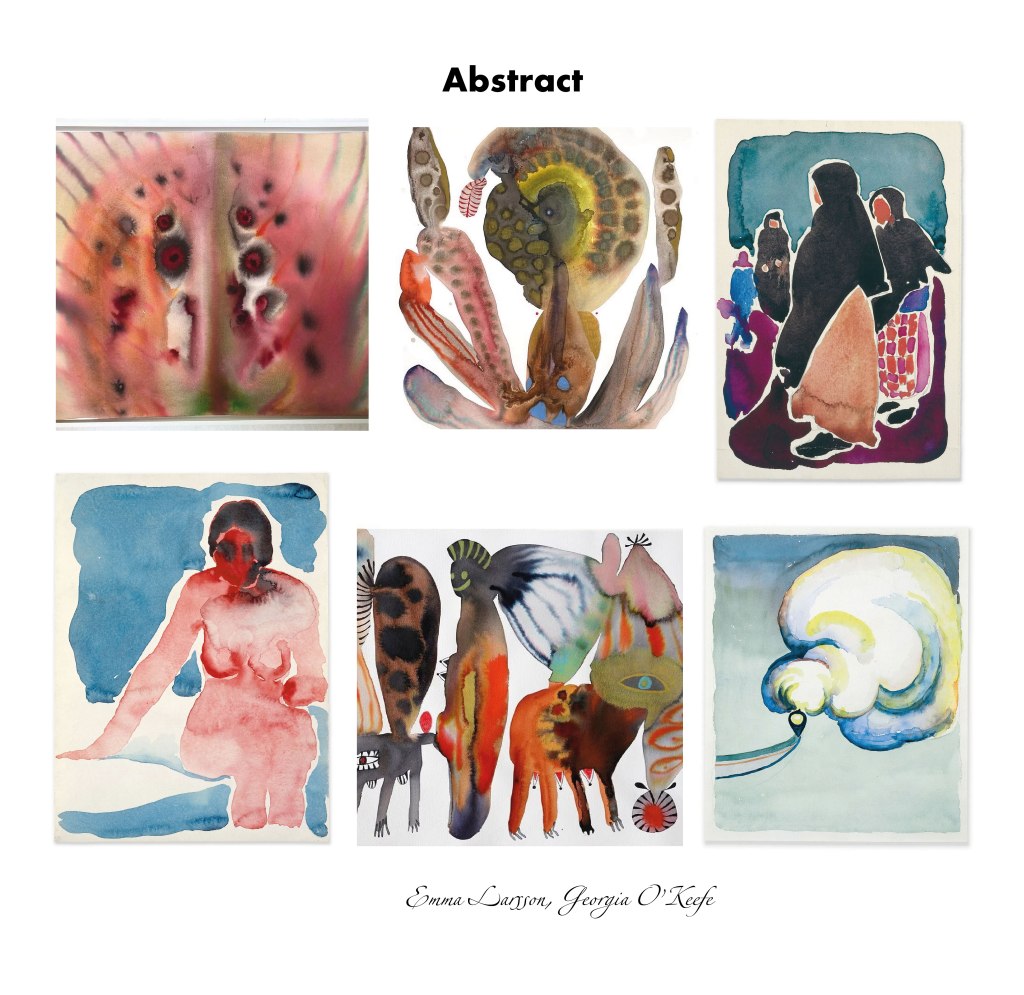
Abstract (conceptual illustrations);
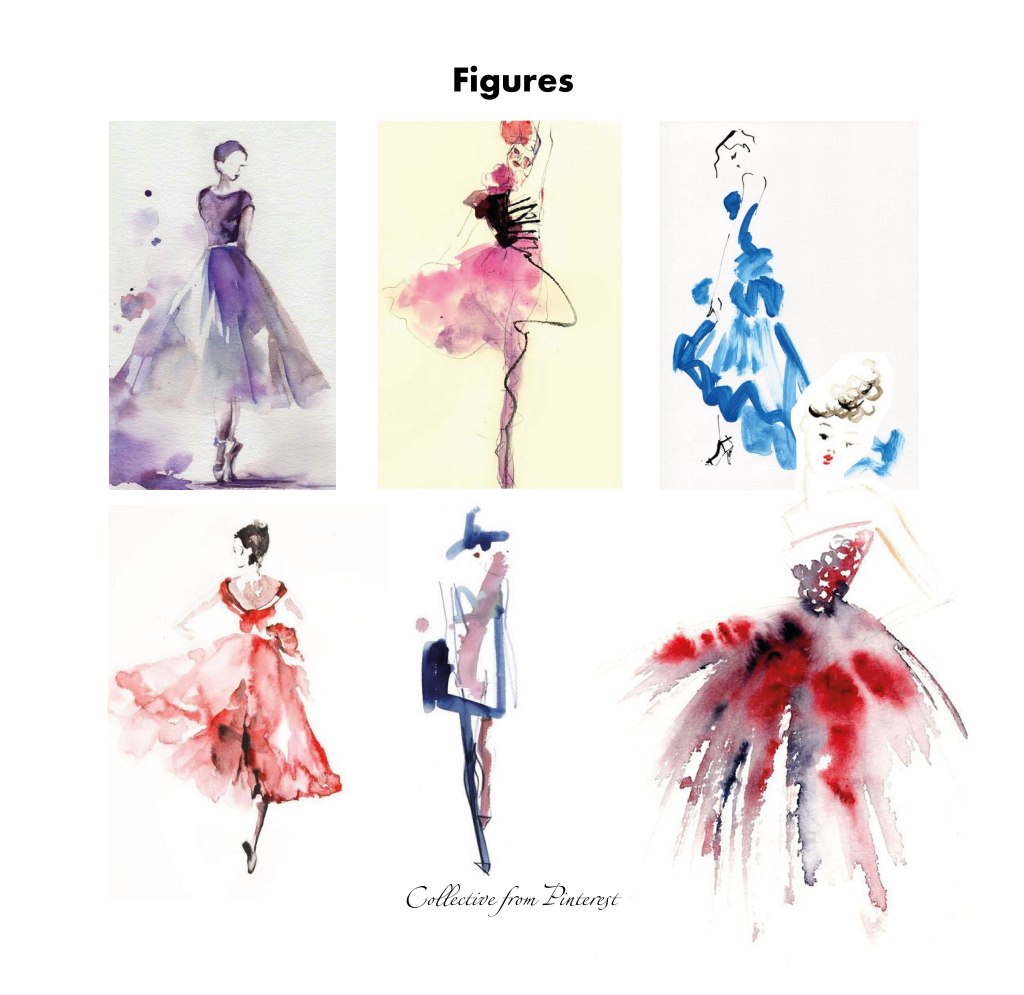
Figures (conceptual illustrations);;
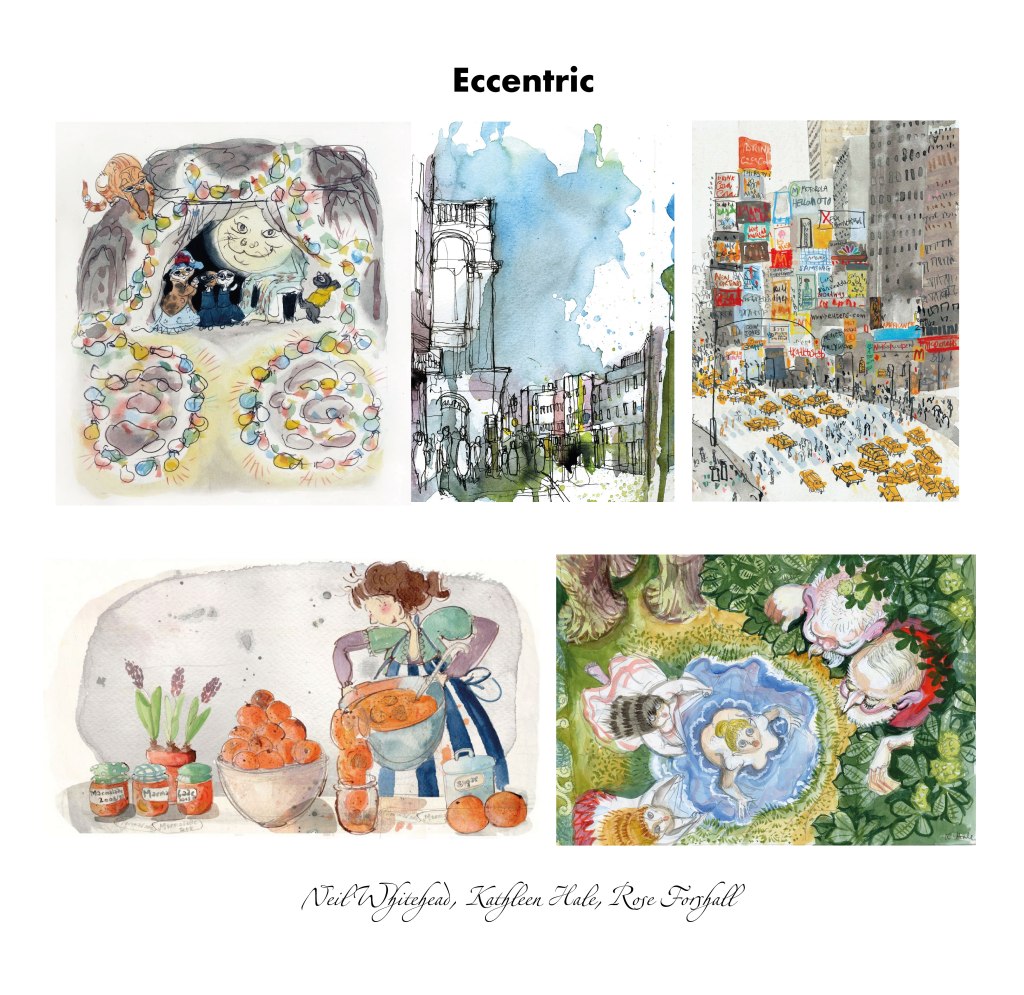
Eccentric.
Nowadays we can find a profusion of pictorial illustrations scattered through various published mediums. Great quantities of drawings are used today in pamphlets, magazines, books, comics, billboards, posters, calendars, and on packaging such as book jackets. One of the purposes of pictorial truth illustrations is to stimulate interest. It is used in all forms of narrative fiction, the pictorial qualities ideal to create dramatic effect particularly when used in sequences, such as in graphic novels and comic strips. Stylistically, the visual language of literal representation can vary greatly.
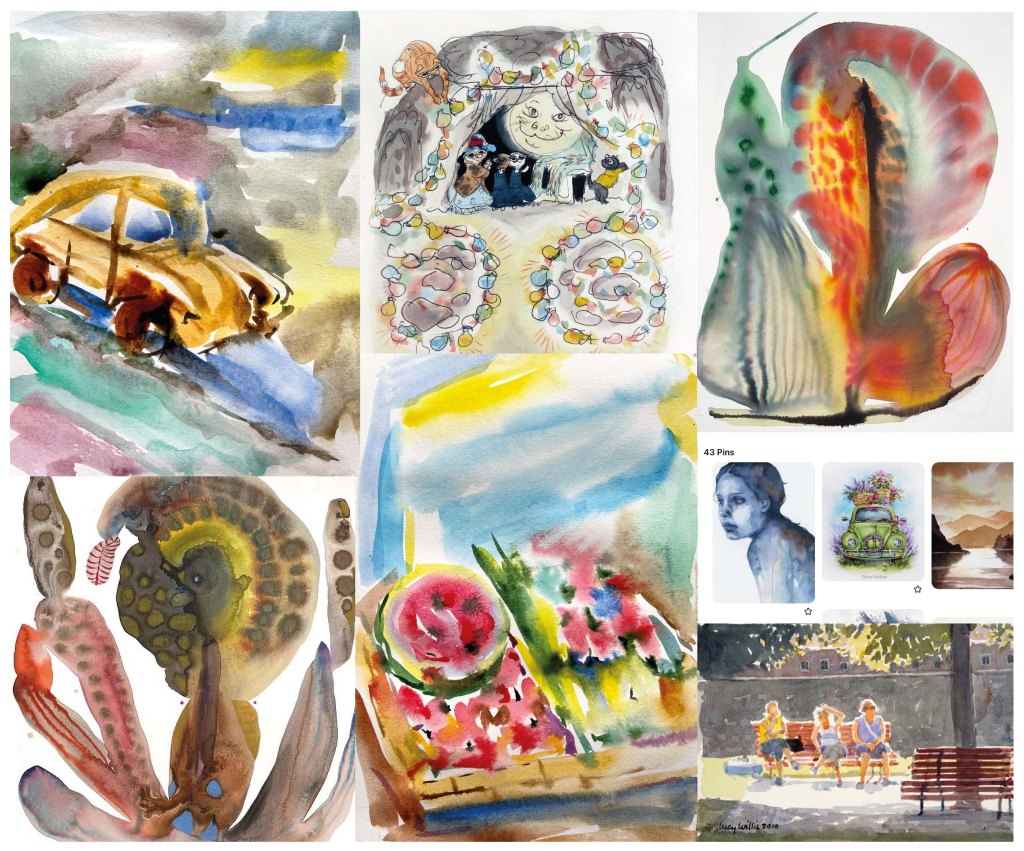
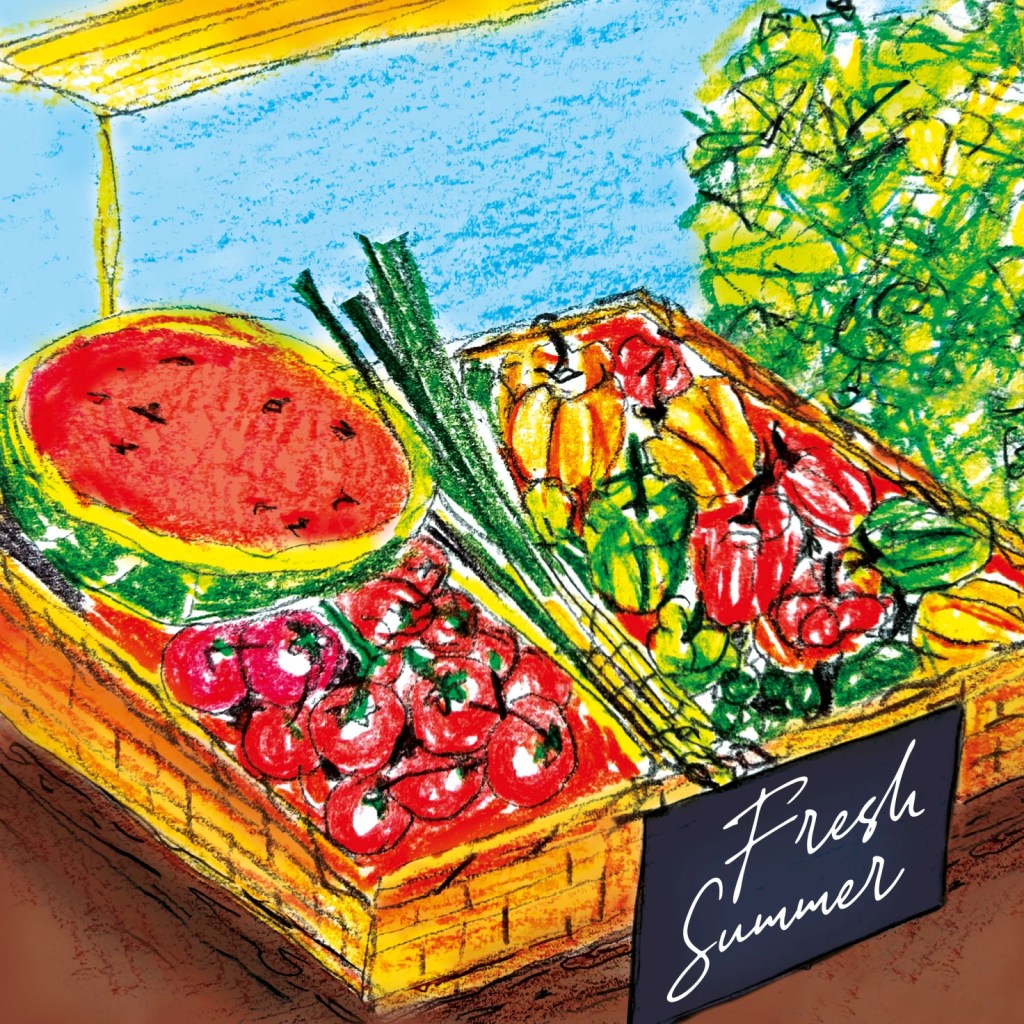
I collected works of such artists as Joanne Glover, natural history illustrator, who uses her scenic images to portray nature. She paints a wide range of natural subject matter including plants, animals, birds, insects, fruit and vegetables, maps and landscapes. Also, I included in this board artist Deb Choi, who creates realistic food illustrations. She uses colour in a fresh way, also her works stand out because she elevates the ordinary and the everyday into something unexpected, fresh, and beautiful. Both artists communicate to the reader through realistic images, rather than metaphors or symbols.
Another representative of literal illustrations, which manifests itself in picturesque portraits, correct proportions, inspired by nature and natural tones. Objects and portraits drawn in this style are recognisable, but at the same time, colours are characterised by lightness and airiness.
Looking at these images, one can assume that academic drawings and natural shades characterised those paintings. Lucy Willi‘s pictures are reminiscent of a photograph, only done in delicate watercolours. In this selection, the portraits by Jean Haines and Agnes Cecile have the mystery in the way they are presented, colours are different to the realistic colour scheme. Still, in the case of proportions and construction, they are believable and picturesque. I would say that the top three images are slightly distorted to be called realistic, and mainly that happens because of the colour scheme and slight mystery that is present in those images, compared to the pictorial truth art.
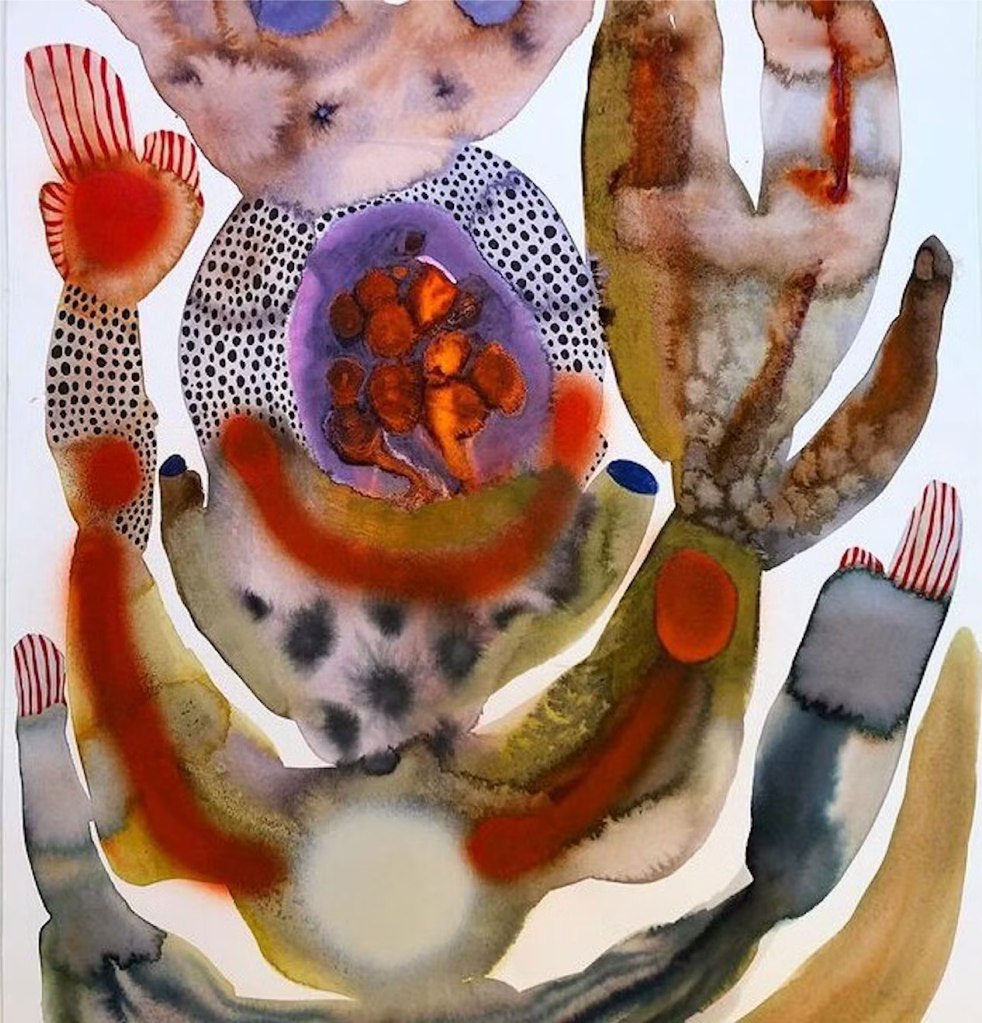
In this collection, I have added abstract images that are conceptual in nature and allow the reader to turn on the imagination and present their own interpretation of the images. You can also track how the author’s opinion coincides with the perception of the reader or the general audience. Emma Larsson is a Stockholm-based artist and illustrator. Her work strikes the balance between colourful dreamscape and in-articulable melancholy. Emma’s practice has evolved to include expressive and organic watercolours, alongside paintings created with oil and acrylic. She describes her work as an ongoing exploration without rules and conventions, continually generating new forms, patterns, and themes.
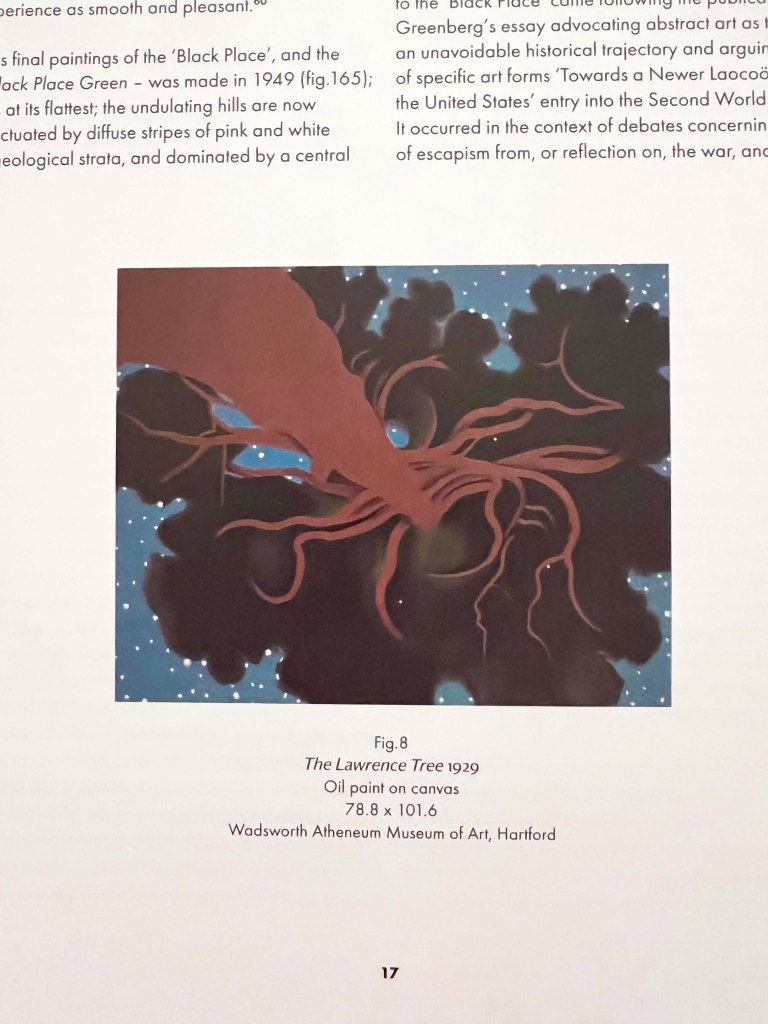
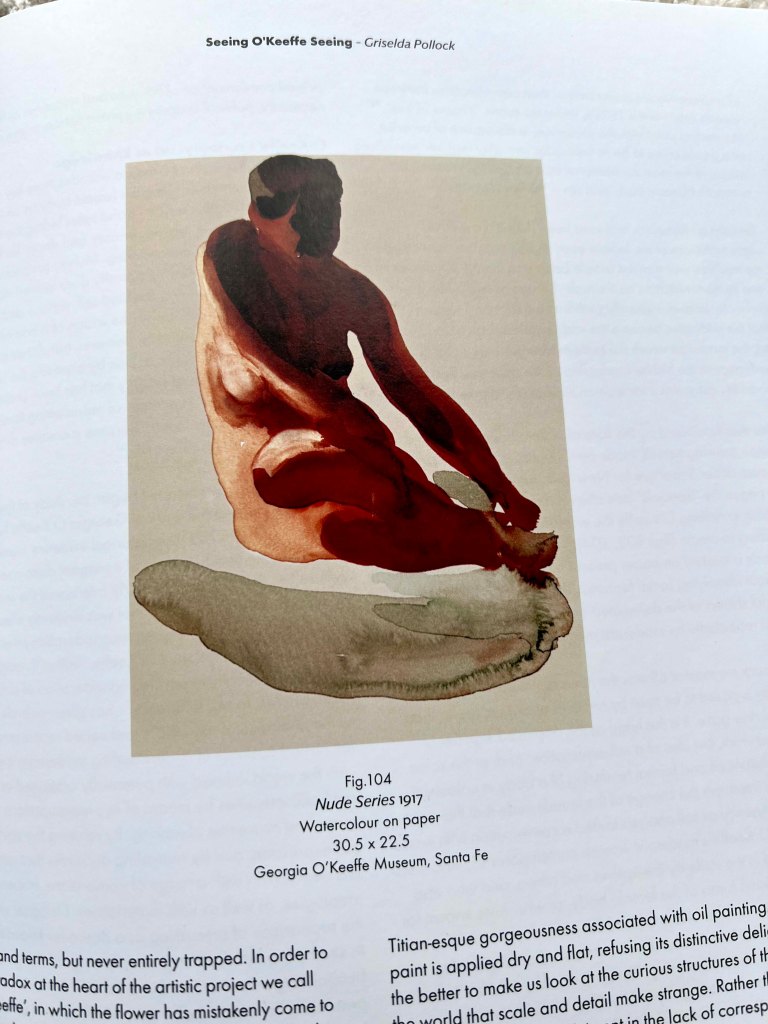
Also, I included the works of Georgia O’Keeffe that I analysed earlier in previous exercises. The abstract works she created throughout her career have remained overlooked by critics and the public in favour of her representational subjects. O’Keeffe sought to transcribe her ineffable thoughts and emotions. Her artistic style is characterised by both pictorial truth and abstract images. Georgia sends the viewer into a fictional world of sophisticated imagination, a kind of melancholy and peace. Her pictures are calm and light. Both artists communicate with the reader through the use of metaphors or symbols.
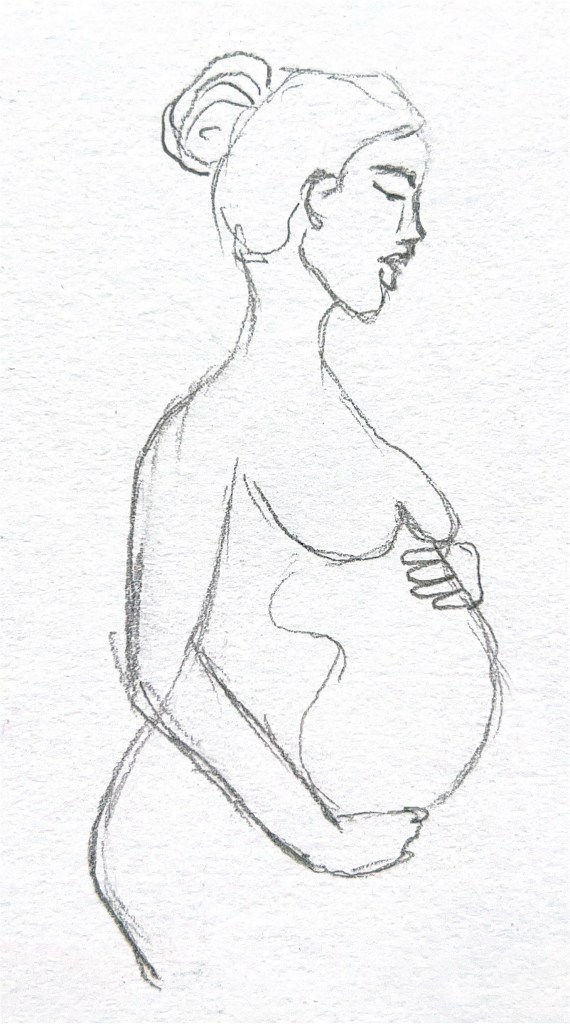
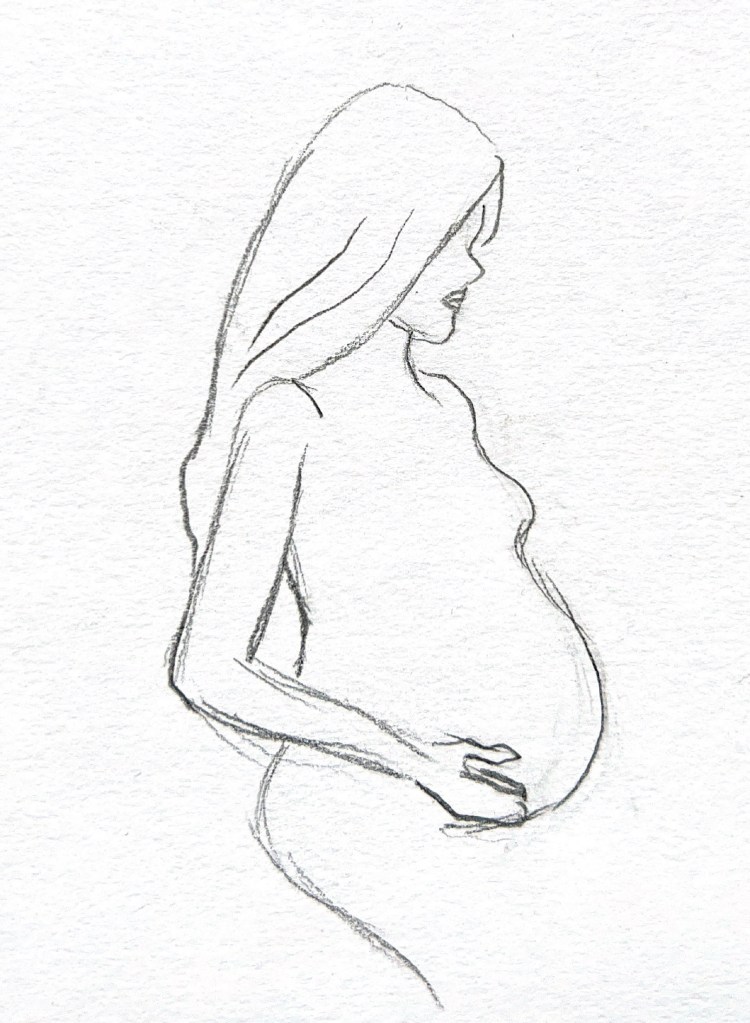
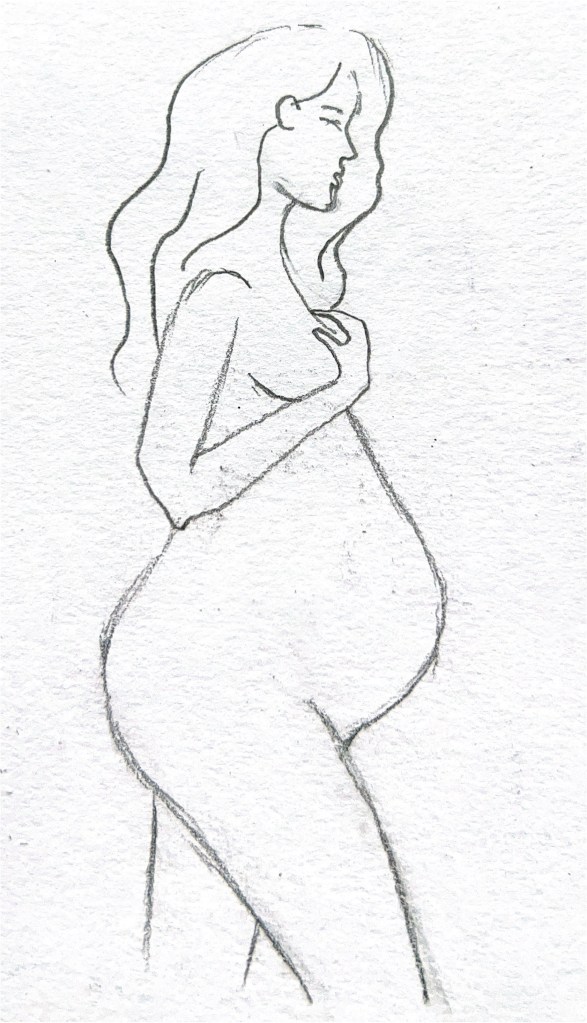
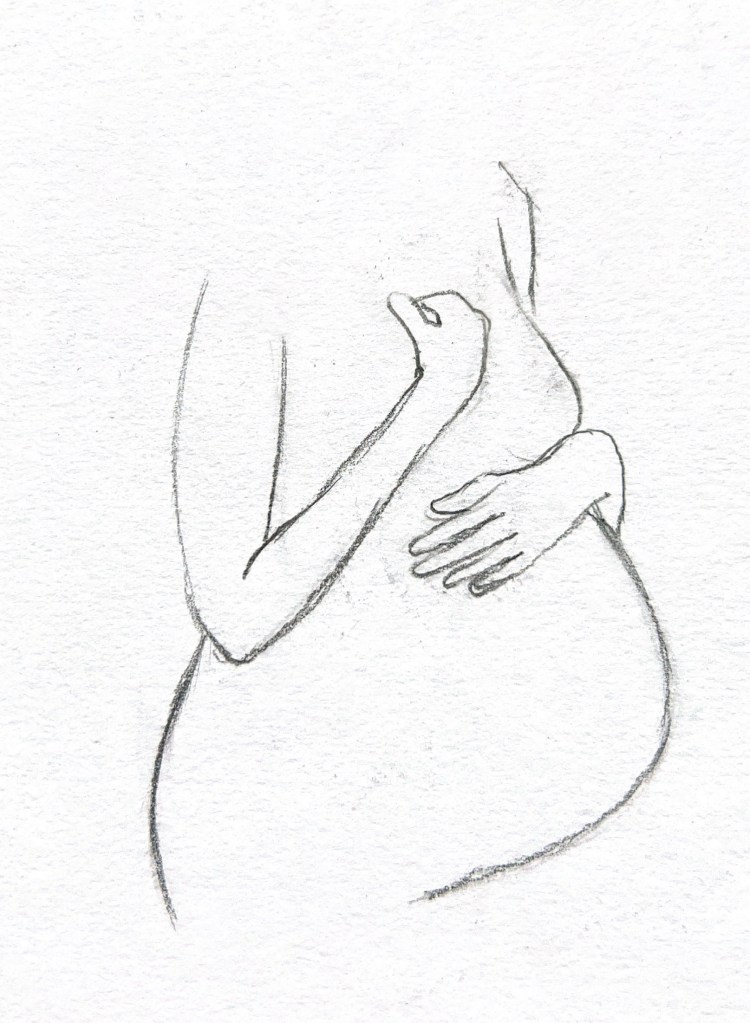
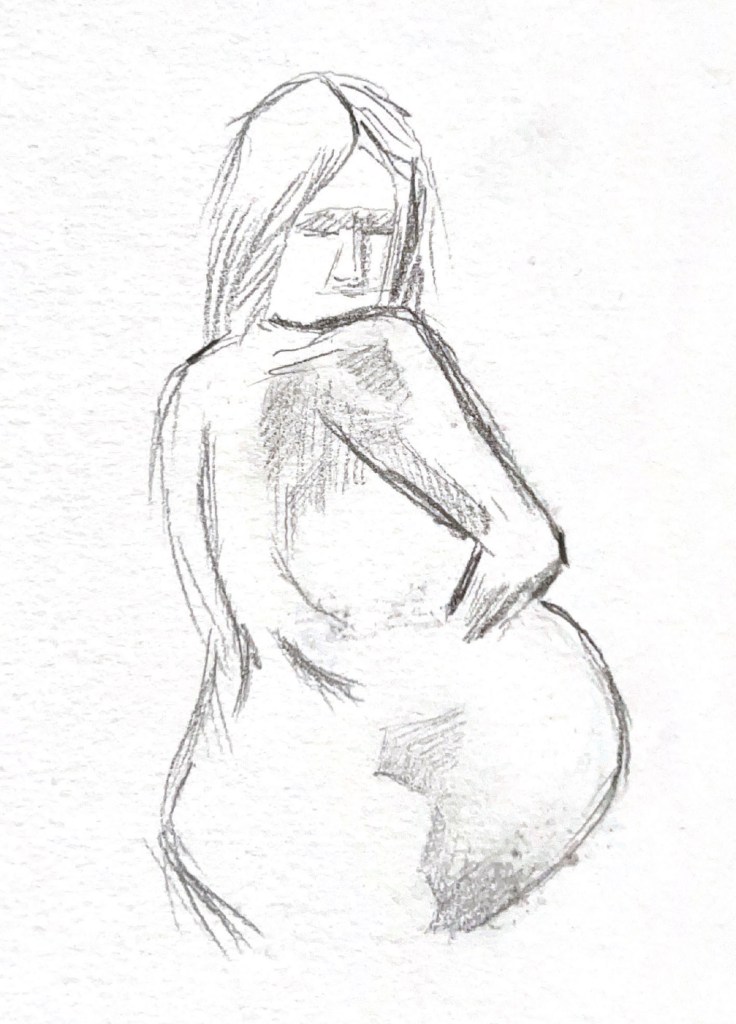
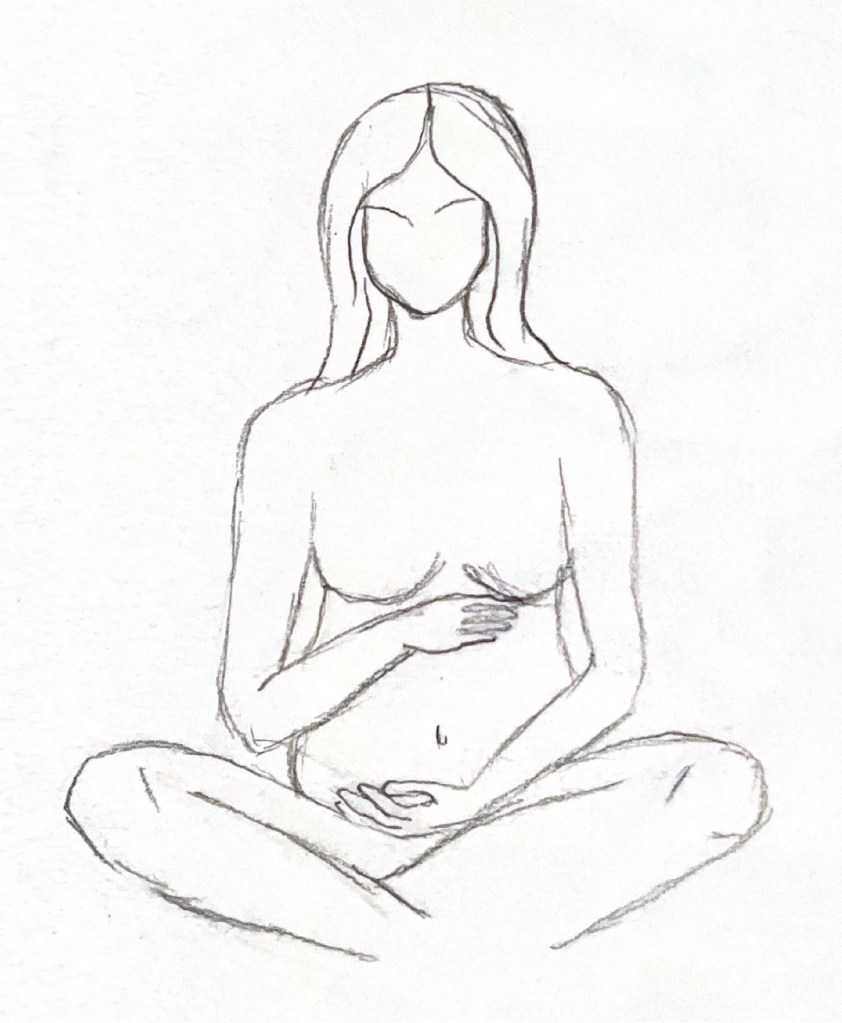
I have also added to the collection exquisite watercolours of miniature models, made with just a few strokes. They are watercoloured images are captivating graceful illustrations created by a couple of brushstrokes. Those figures embrace elegance and poise, with the silhouette emanating confidence and allure. These types of illustrations are more conceptual and are most often used as a demonstration of glamour and style, also for fashion industry shows. The choice of watercolour as the medium enhances the softness and fluidity of the image. Colour solutions are also characterised by simplicity and understandable combinations, they carry the meaning of conveying an idea or concept through symbols, or quick sketches, more than a picturesque character.
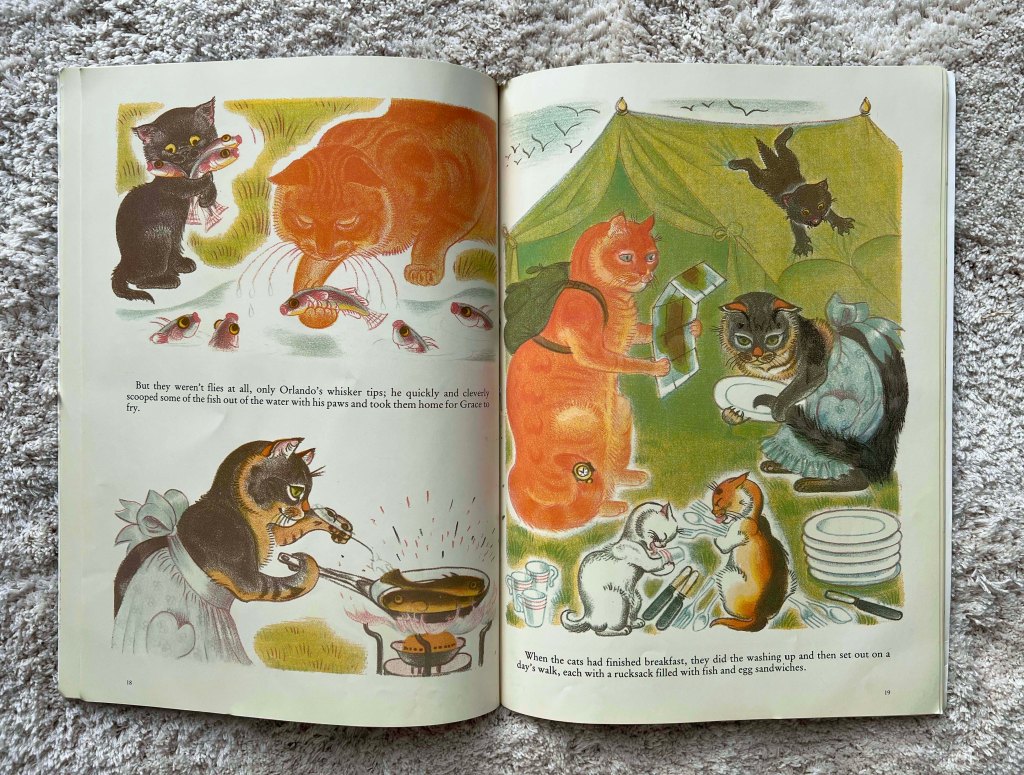
The latest selection of eccentric illustrations that are most often found in children’s books or gift cards. This style is characterised by quick sketches, emotional characters, or the transfer of a bustling city through a lot of swirls and strokes. Whimsical watercolour style refers to a particular approach to watercolour painting that emphasises spontaneity, imagination, and a playful sense of wonder. It often involves the use of vibrant and unexpected colours, loose brushstrokes, and imaginative subject matter. This style embraces the freedom of expression, allowing the artist to create dreamlike or fantastical compositions. The most prominent representative of this style is the author of the Orlando the Marmelade Cat character by Kathleen Hale. Overall, a whimsical watercolour style embodies a sense of charm, imagination, and a playful spirit. It allows artists to break free from rigid representational techniques and embrace the fluidity and spontaneity of watercolours, resulting in captivating artworks that transport viewers to a world of whimsy and delight.
The first artist I’m going to analyse and try to recreate is Emma Larsson – a contemporary artist known for her unique and vibrant watercolour paintings. Her painting style often incorporates bold and expressive brushstrokes, creating a sense of energy and movement within her artwork.
How is the image composed?
This art has been composed manually, by using watercolours. The style of this art is abstract, the artist presents to the reader unusual shapes and figures that are not supposed to be direct. You can learn and examine the image for hours, and something new will be available to discover.
How are colour, tone, and texture used to evoke a mood or convey an idea?
The colour palette of this art is catching us with surprise and unpredictable solutions, there are monochrome shades present, with a mixture of bright red splashes and added texture on the purple colour. The shape of the figure is smooth and round, it doesn’t have sharp corners or angles, which helps to have the feel of the floating image, that can be read from the top to the bottom by moving the eye-site from left to right. The mood of the image is melancholic, like a psychological test, when every individual will see their own interpretation of the image. I can see nature that rose hands into the sky. I’m fascinated by this image.
Has the illustrator distorted the content within the imagery and how does this work for the purpose the image fulfils?
Definitely, this art was meant to be distorted, that’s the primary purpose of it. Emma Larsson uses distortion as the primary tool of communication, also, her art is filled with metaphors and second meanings. Larson’s artistic approach often focuses on capturing the essence of nature, incorporating elements of realism while infusing her own interpretation and creativity. She has her own recognisable and unique style, that is worth analysing and examining. Through her mastery of watercolour techniques, Emma Larson transforms simple subject matter into a captivating piece of art. That makes her art surreal, eye-catching and curious.
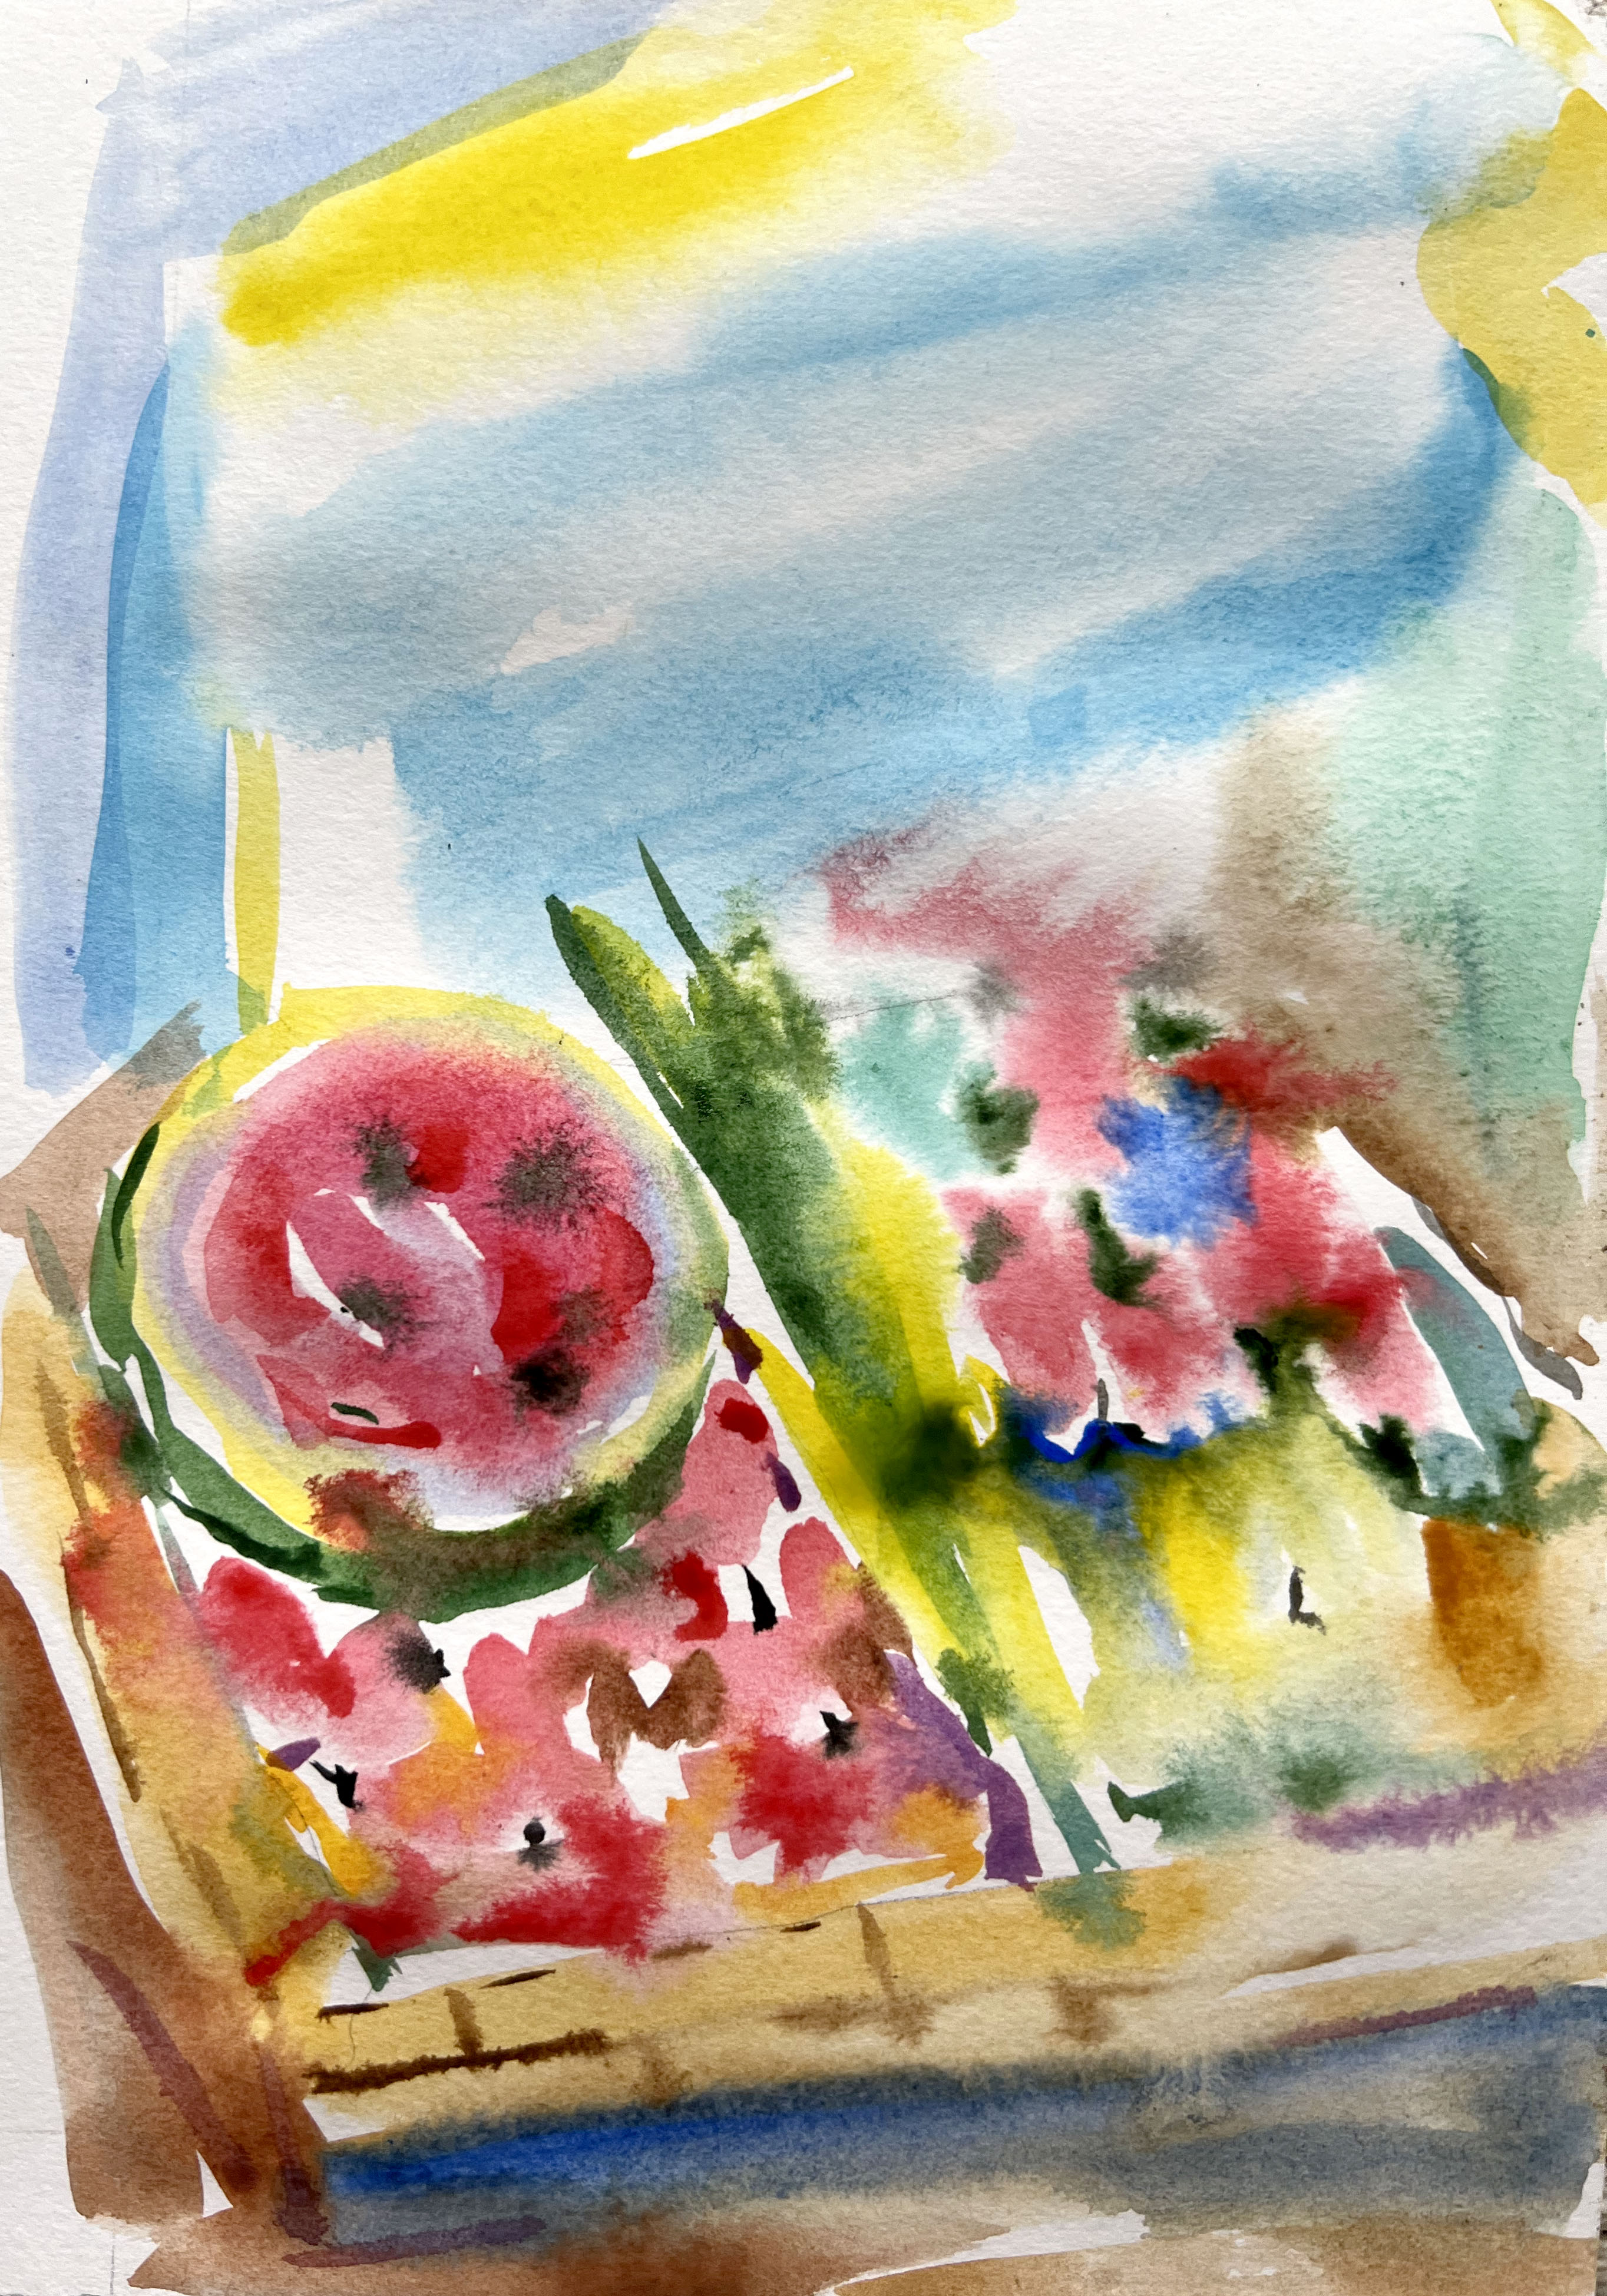
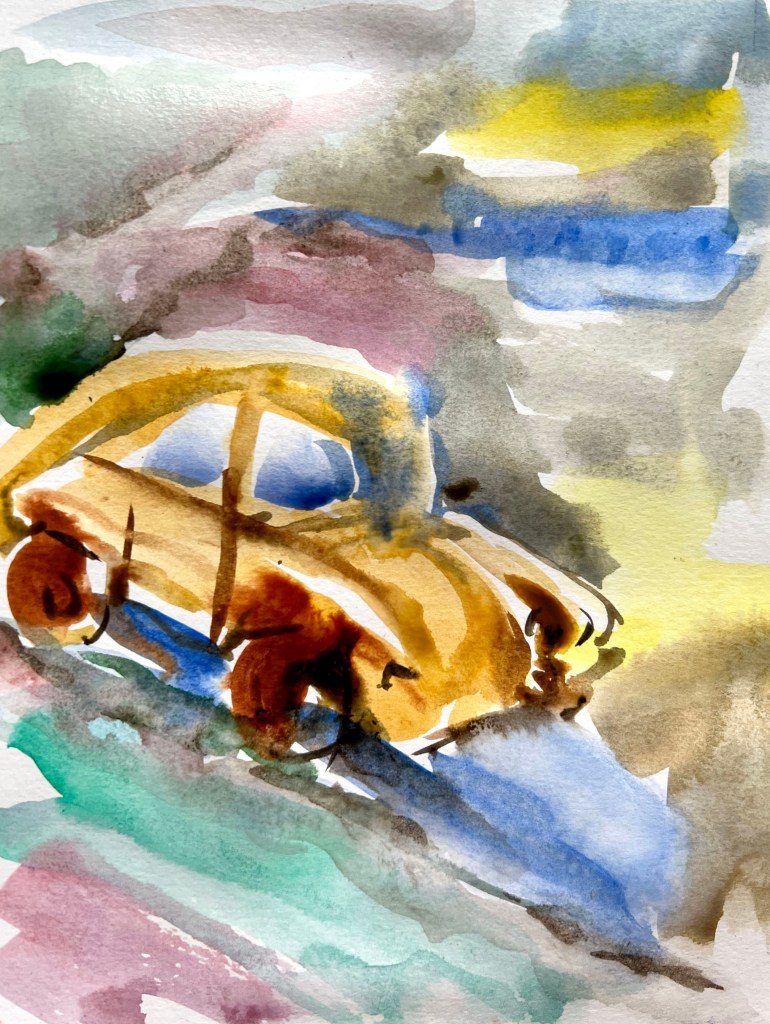
To replicate the style of Emma Larson I’ve chosen my earlier assignment for the ‘Point of sale display’. Here I tried the wet-on-wet technique which involves painting on a wet surface, producing soft, diffused edges and blending colours seamlessly. I wanted to create that abstract way of using watercolours, mainly splatters and stains, with lots of water and paint spreading from one colour into another. I like the experiment I received in the result, it is still recognisable that I tried to design some natural objects, but the style of illustration suggests a more imaginative way of painting. My artwork doesn’t look as abstract as Emma Larson’s illustrations, but it is still a good replication of the style. The outcome of the design is airy and light, and it helped me to visualise something I’ve done before in a new way, and compare both arts designs by using different techniques.
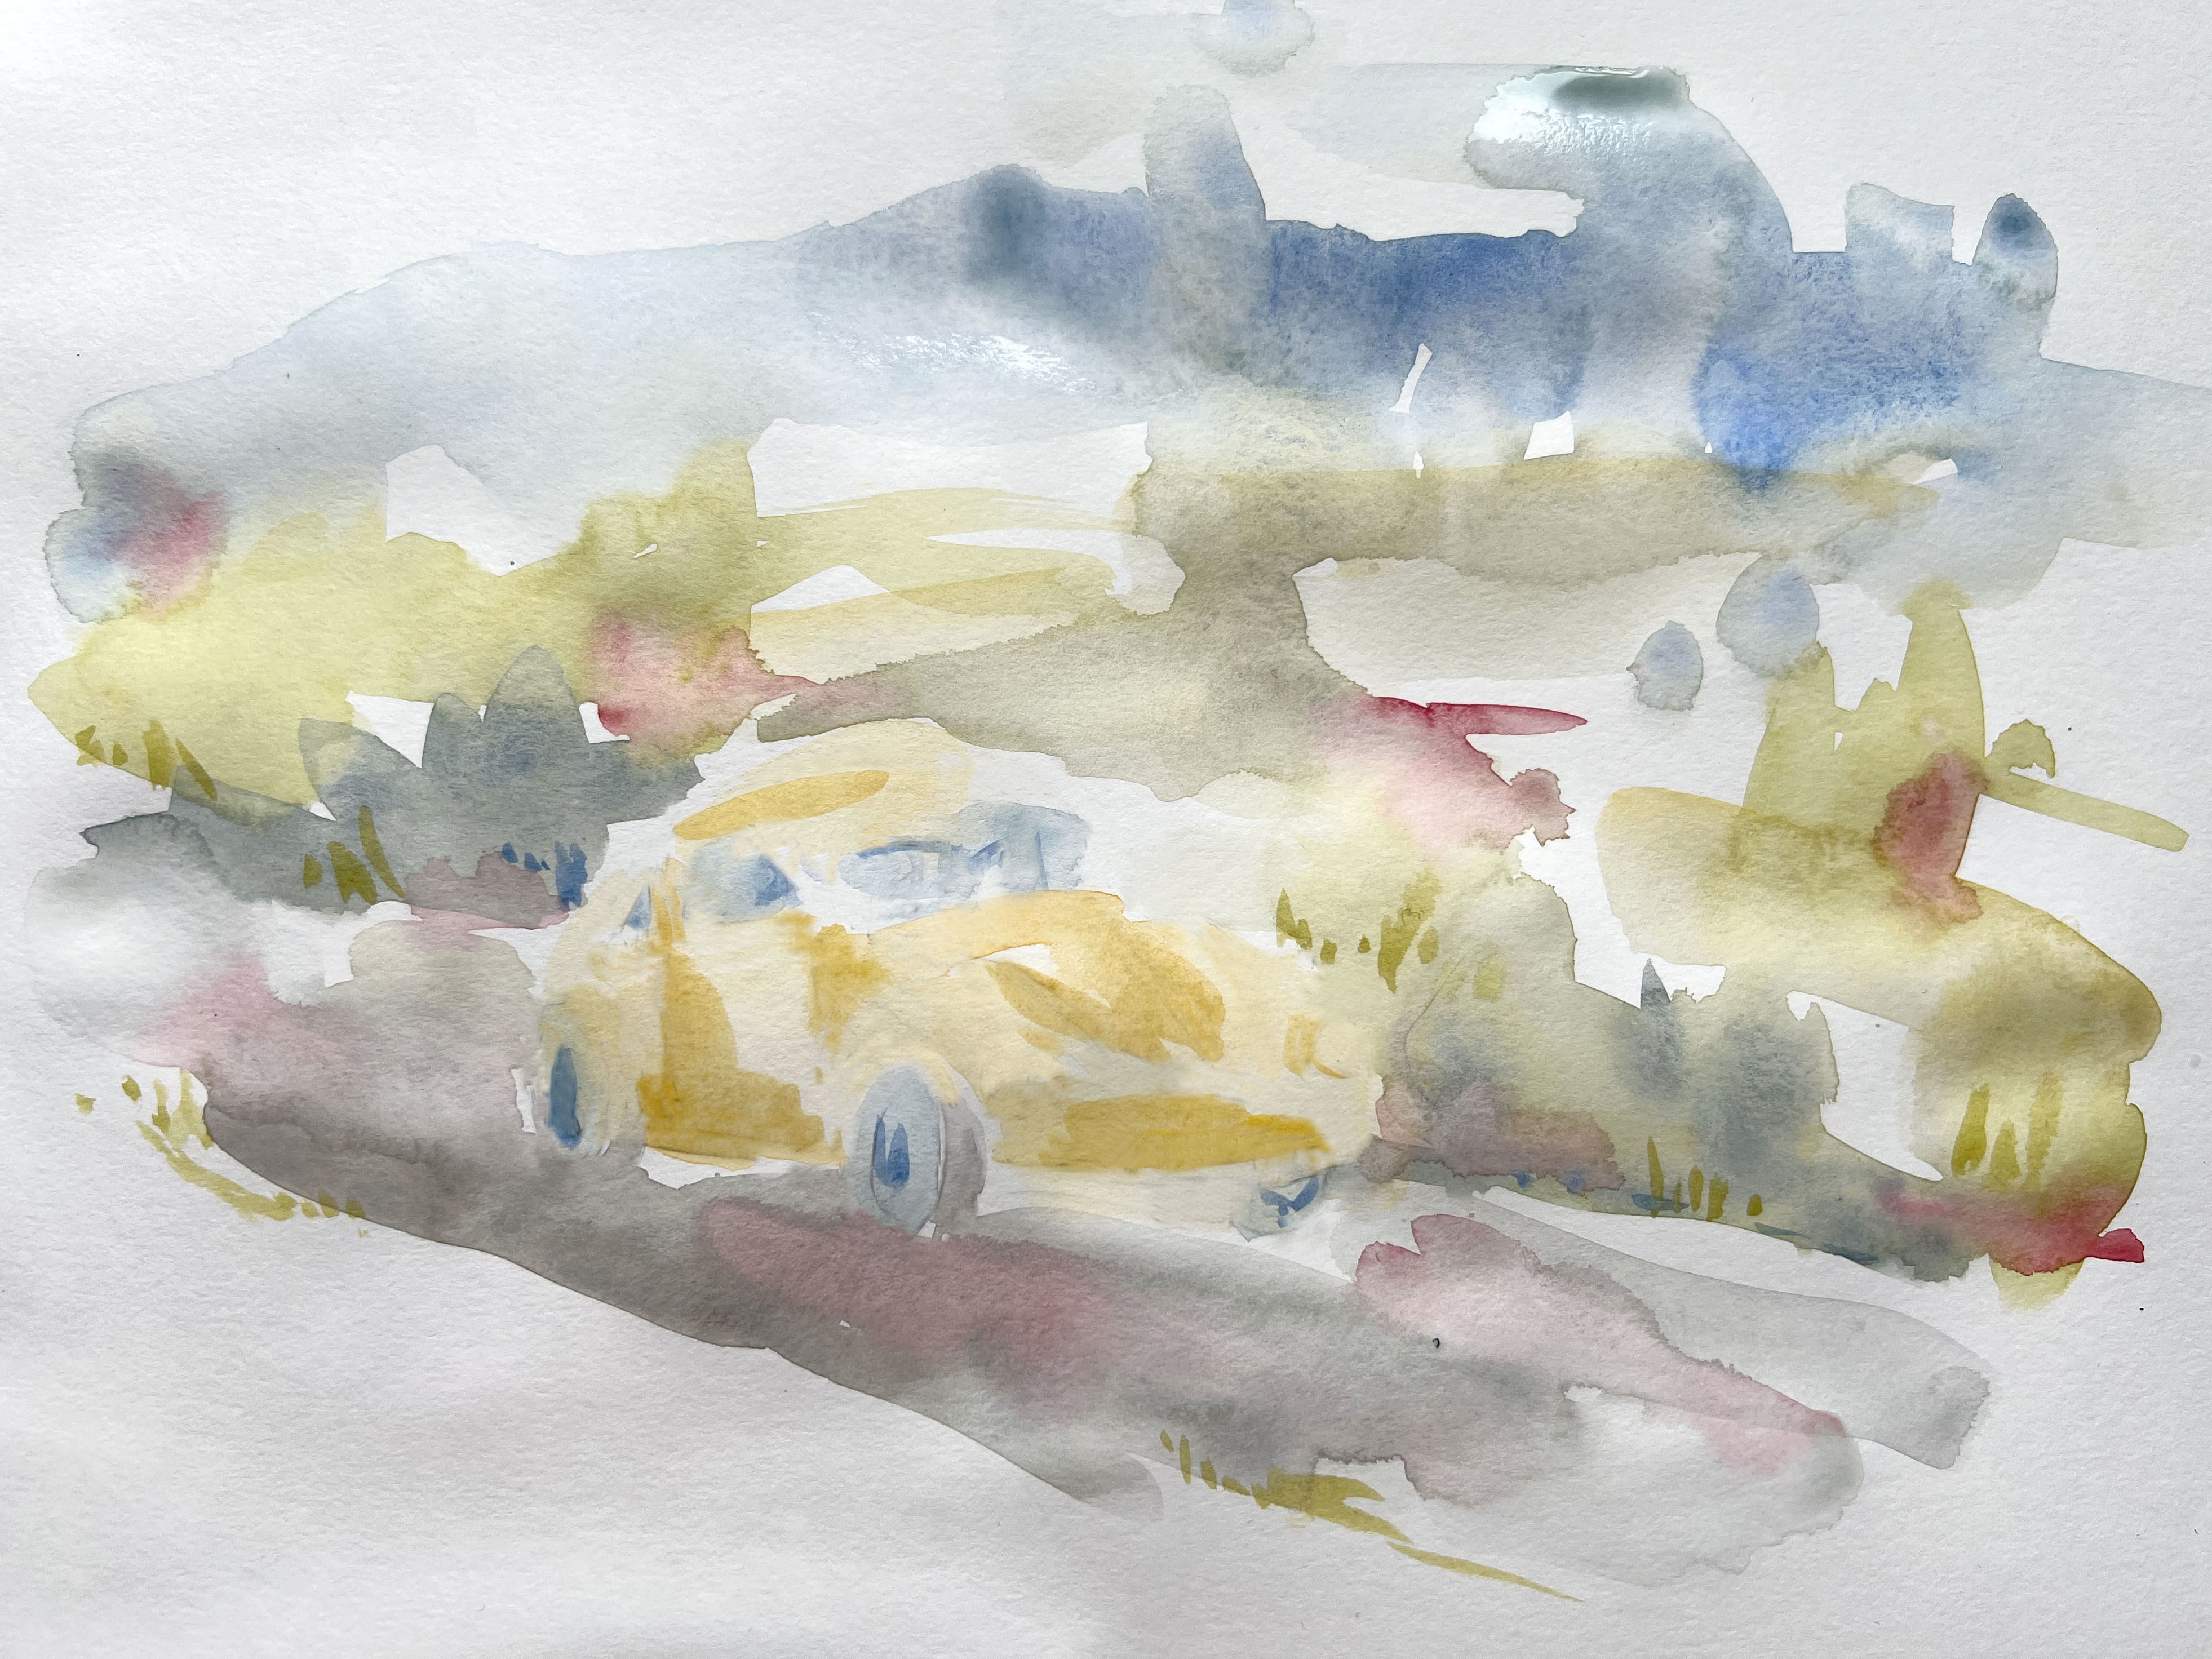
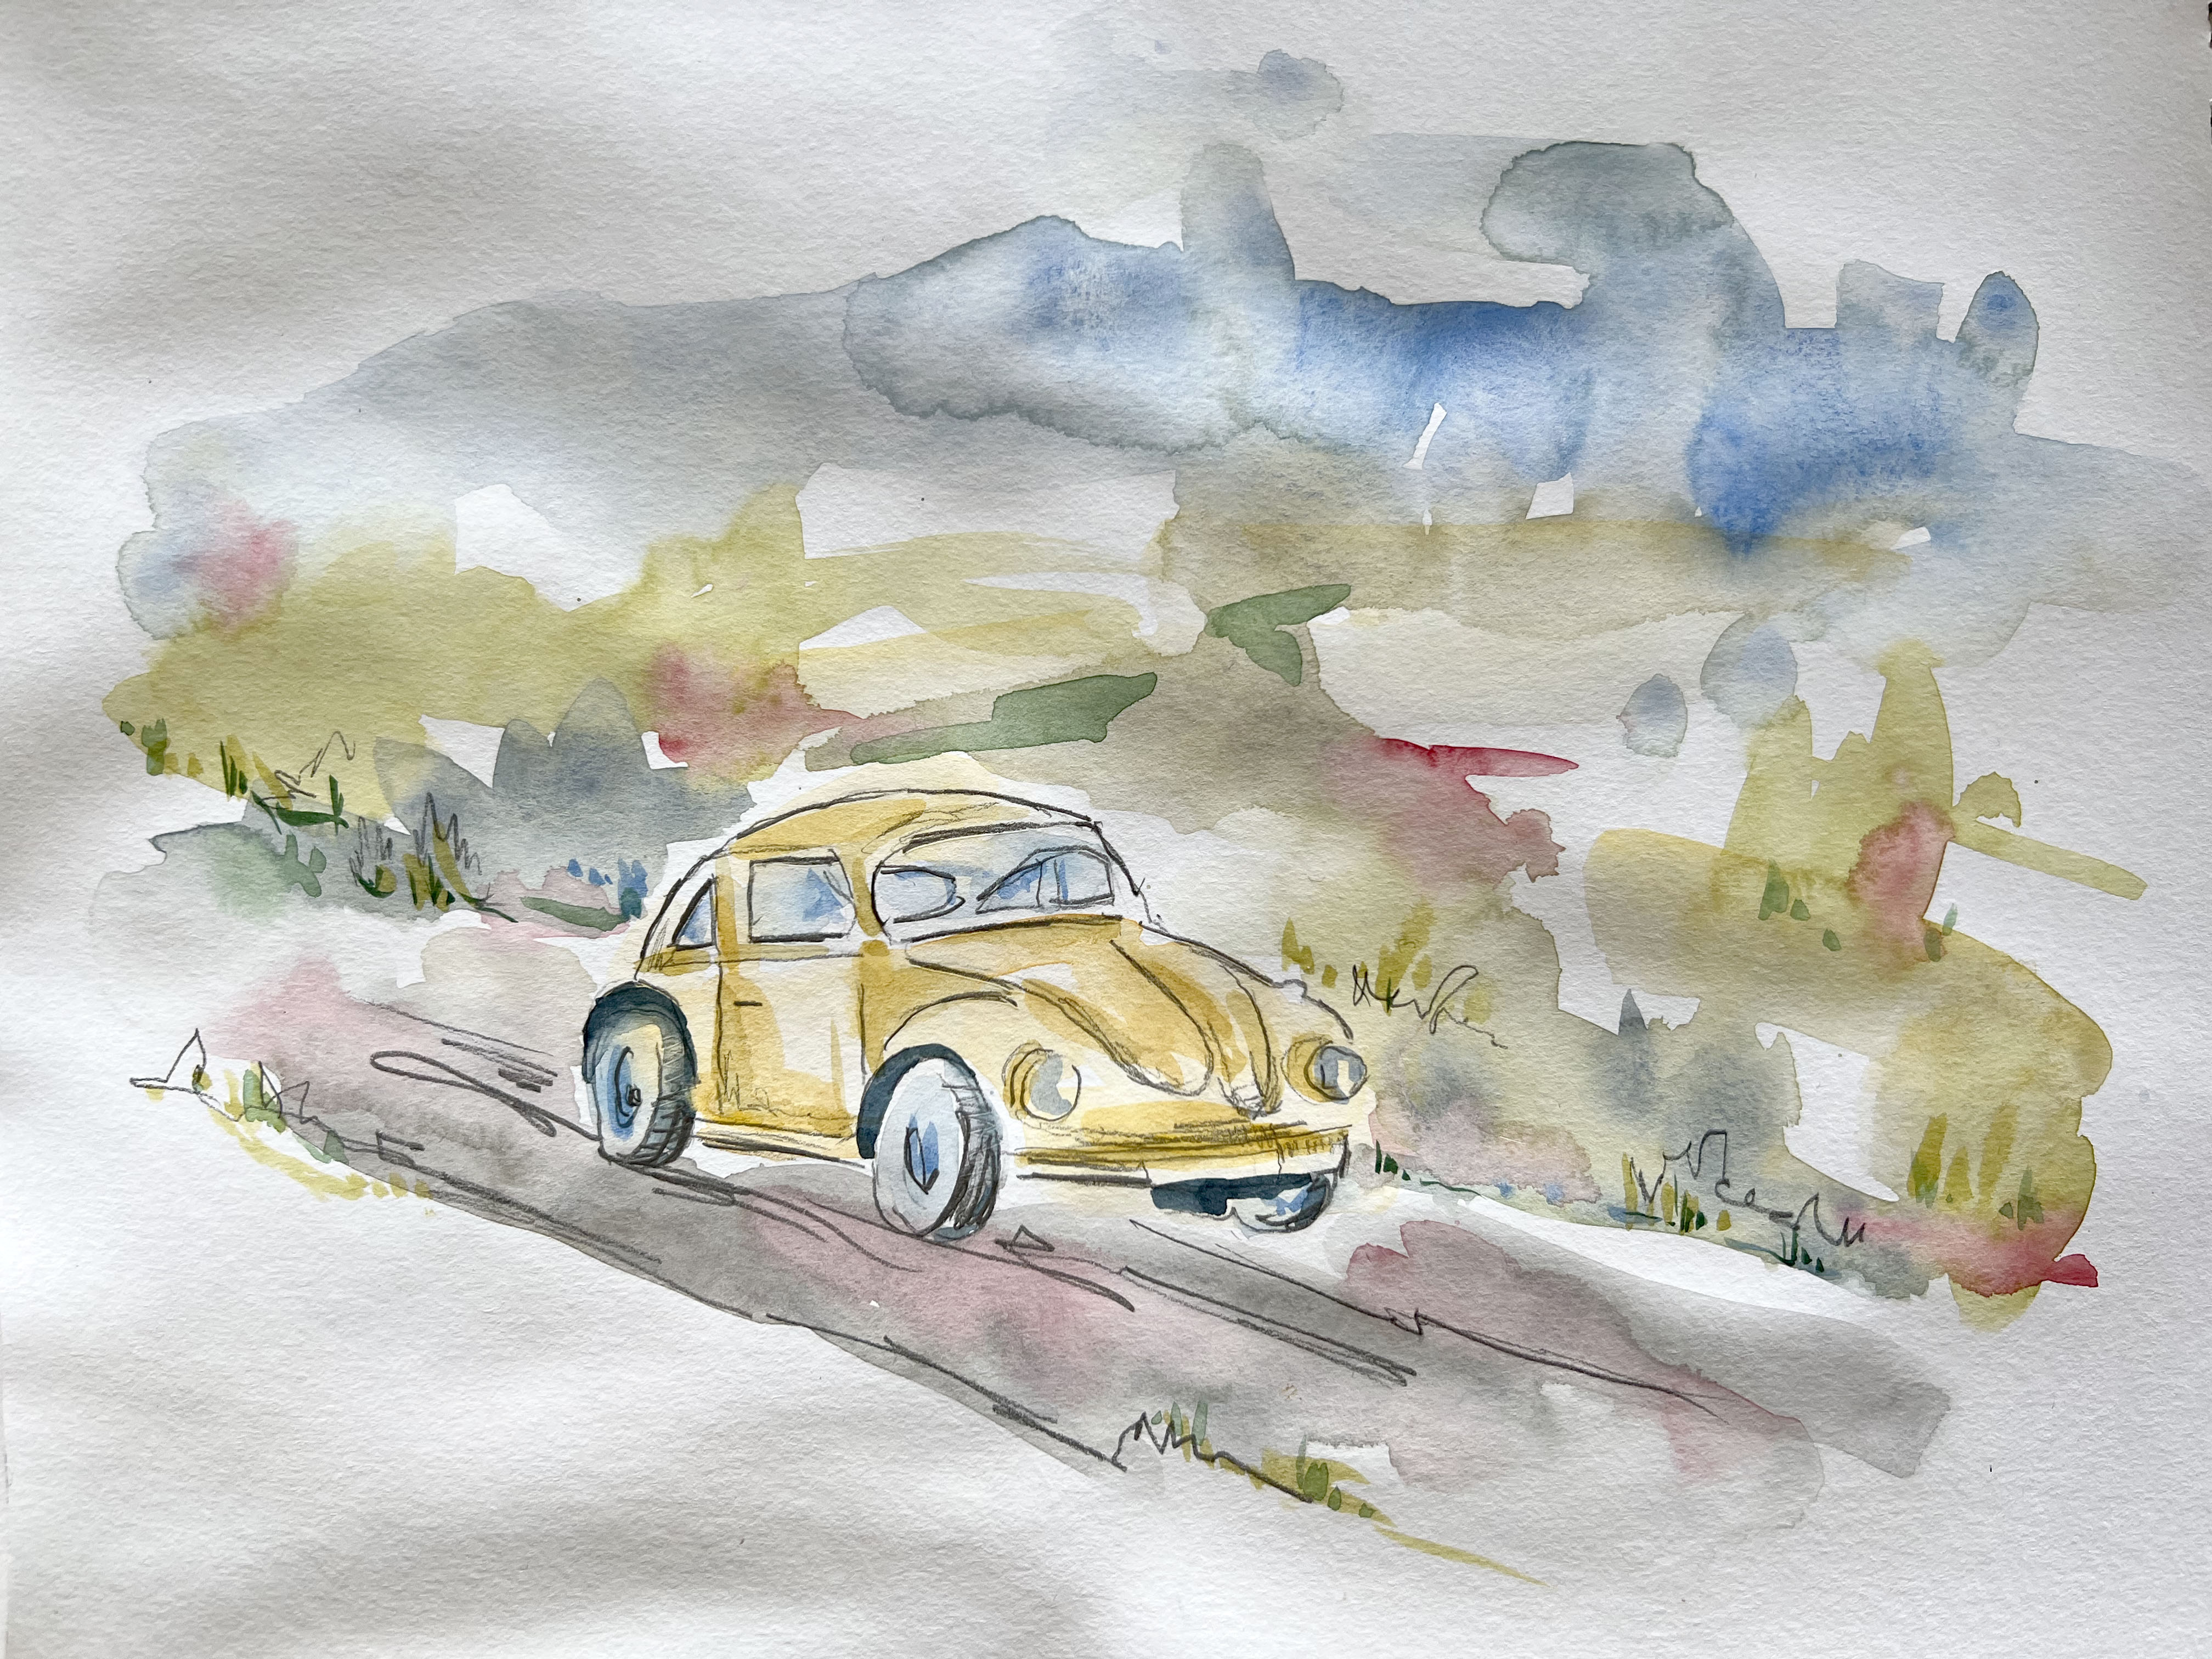
In addition, I created another image in the style of Emma Larson the image ‘Getting There’ from Part 3.
For this image, I tried to create another vibrant illustration using abstract vision. I tried to work quickly with this painting and capture the fluidity and movement of both the car and the surrounding environment. Like Emma Larson I used the wet-on-wet technique, where moist layers of paint are applied onto wet paper, allowing the colours to blend and bleed into one another.
Overall, the watercolour technique used in this painting creates a dreamy and impressionistic portrayal of the car on the road, emphasising the delicate interplay of colour, light, and movement.
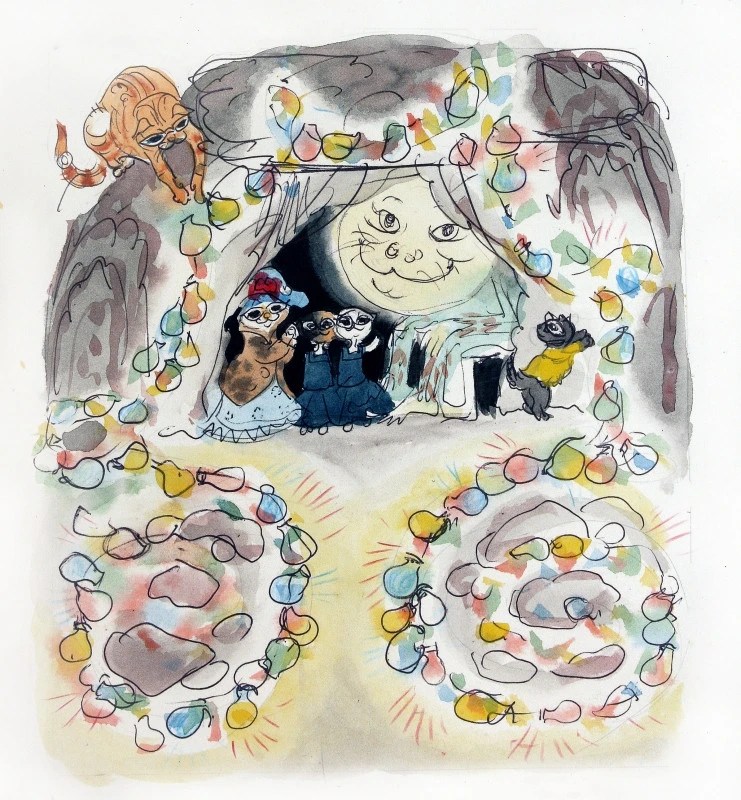
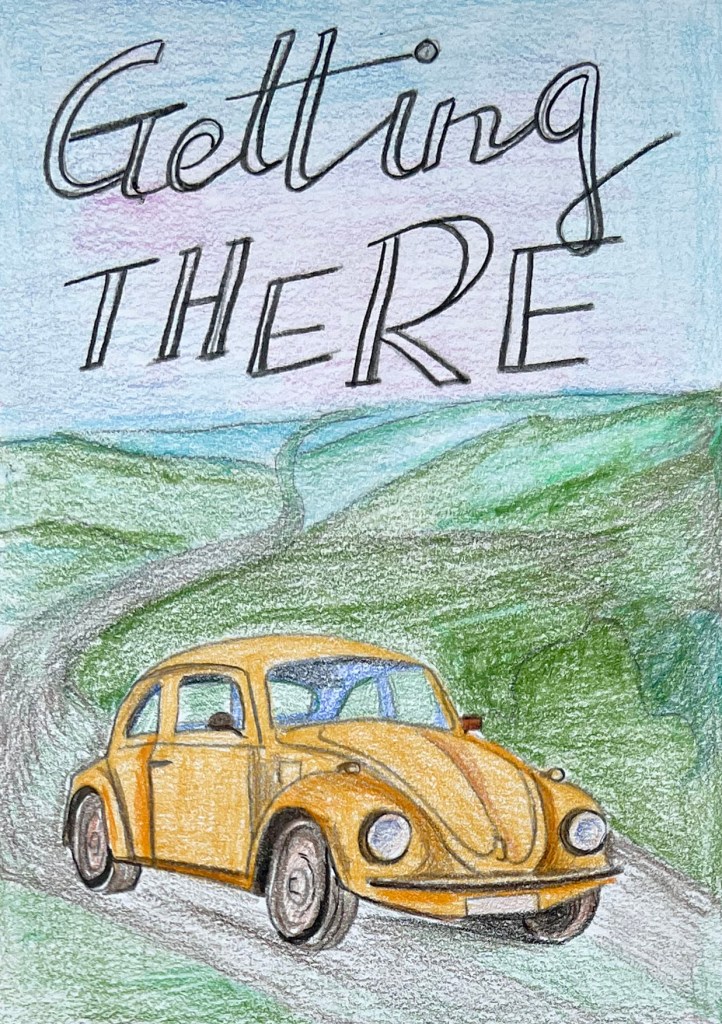
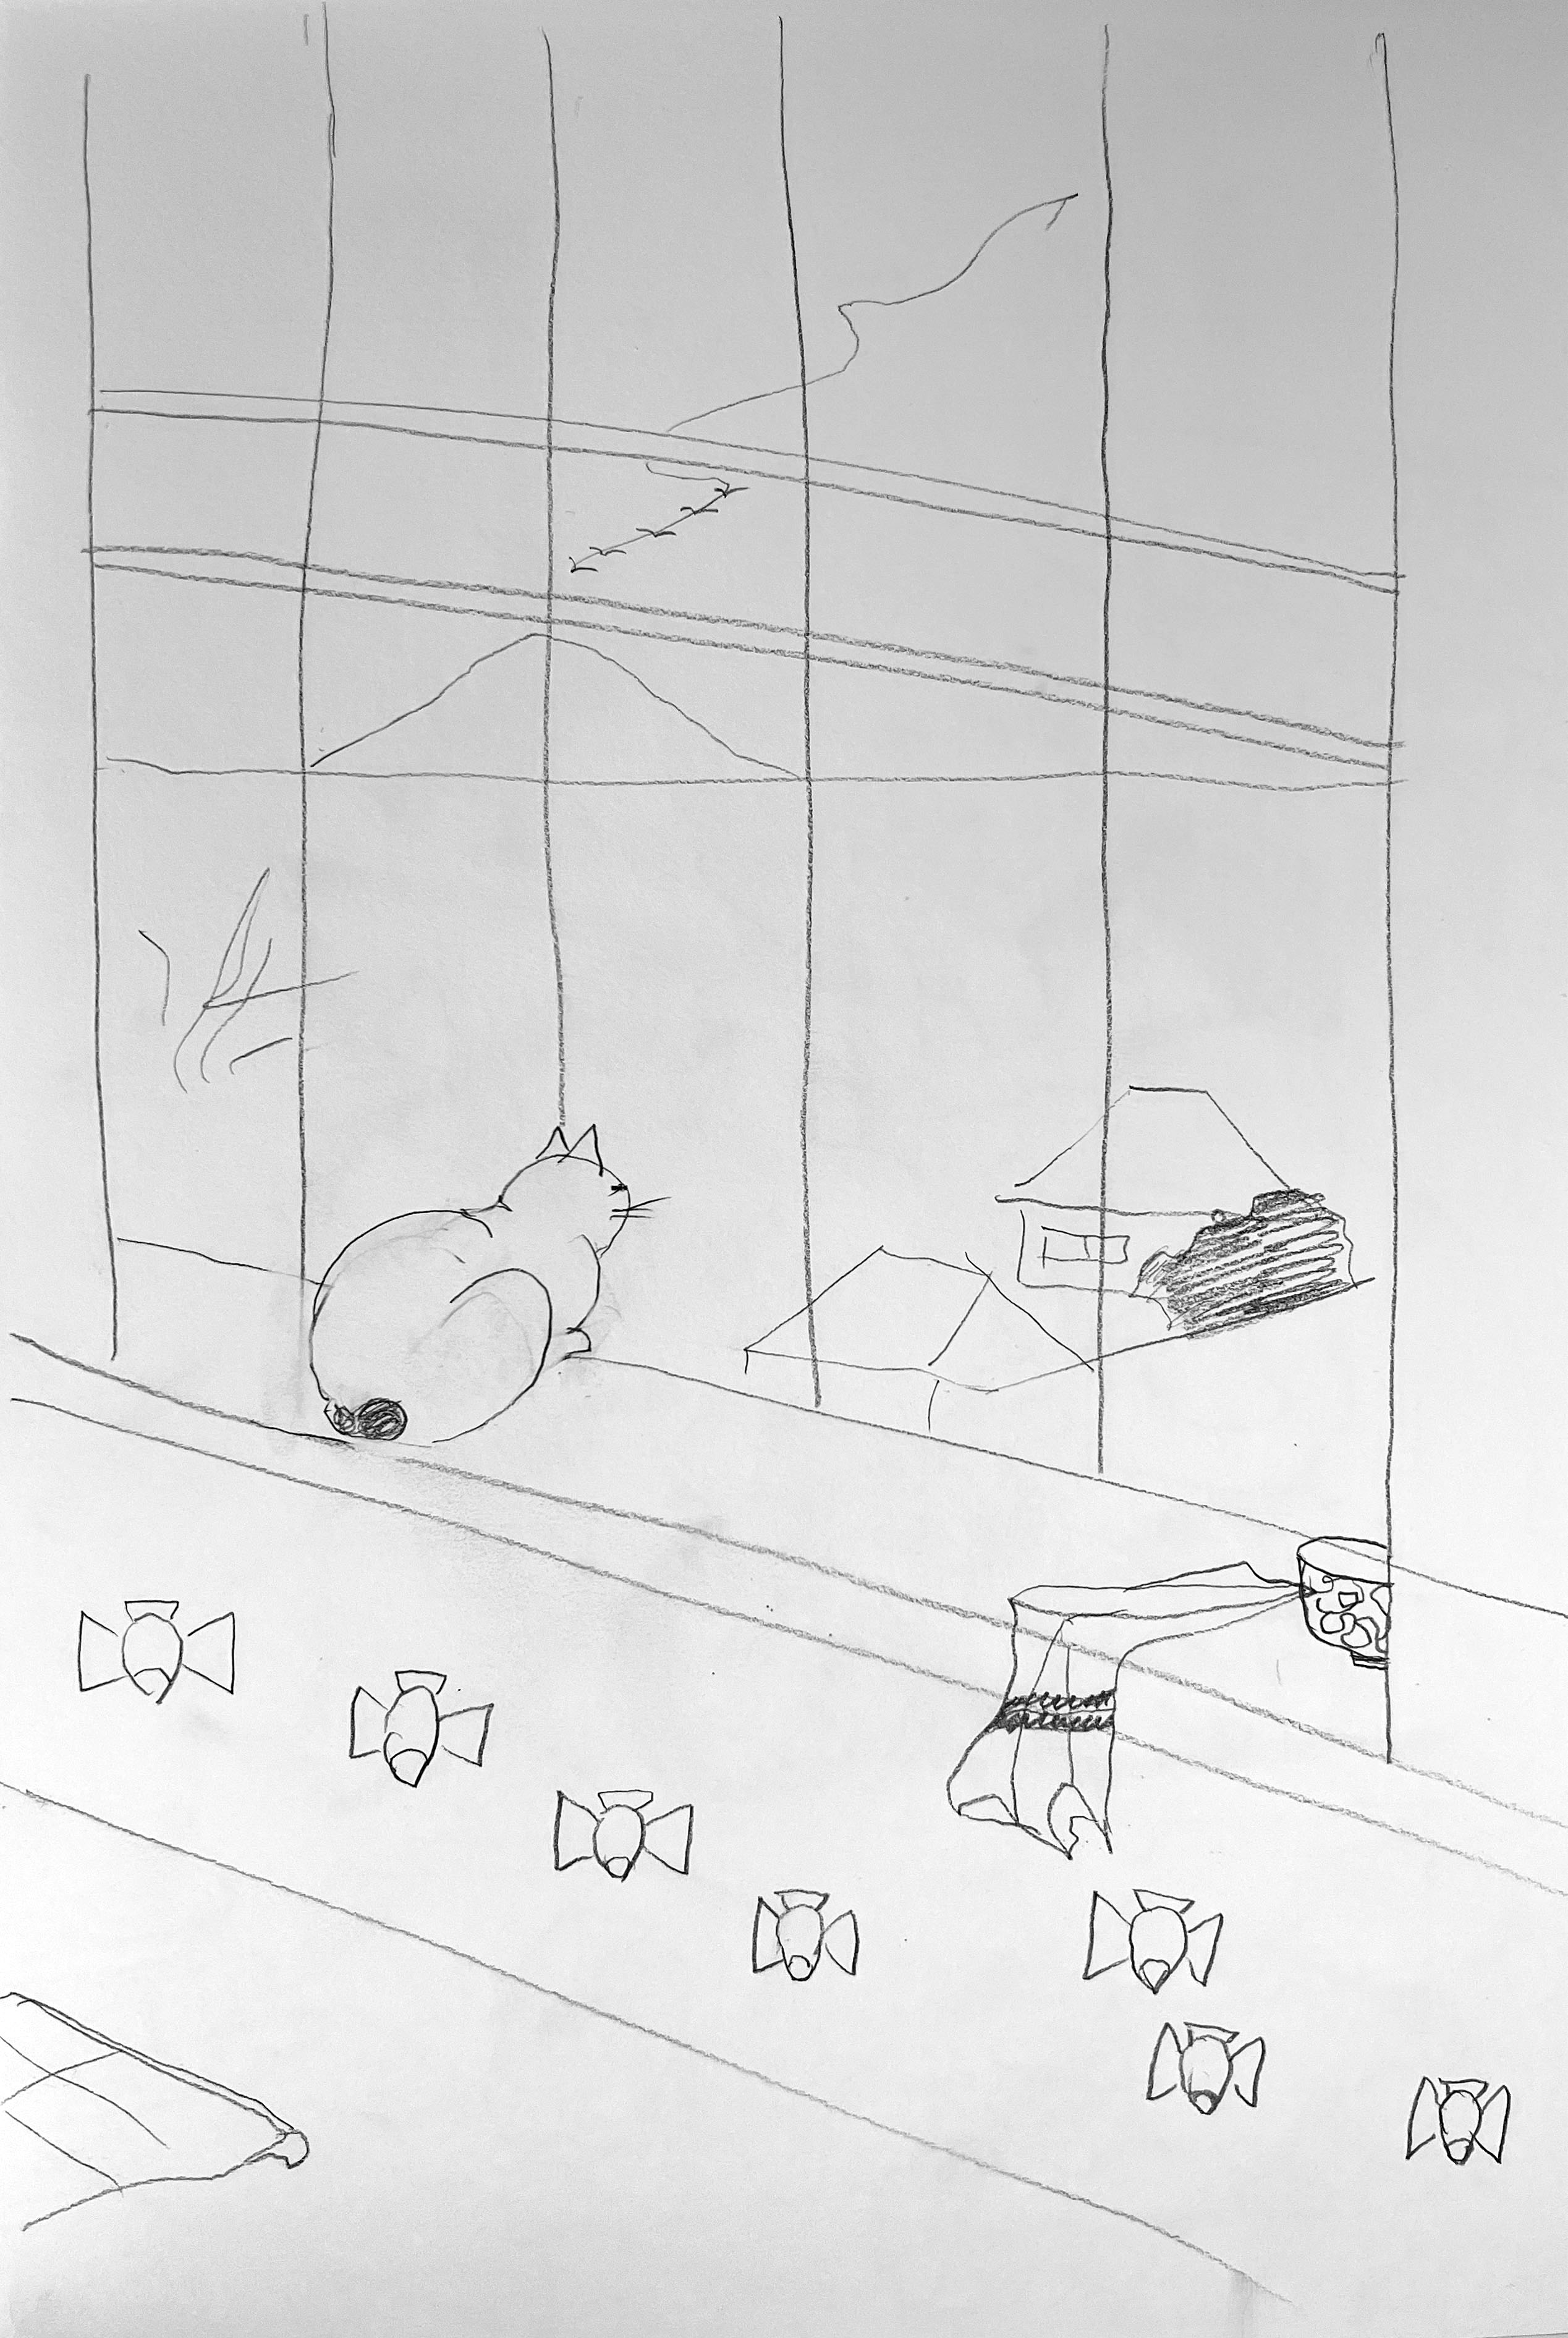
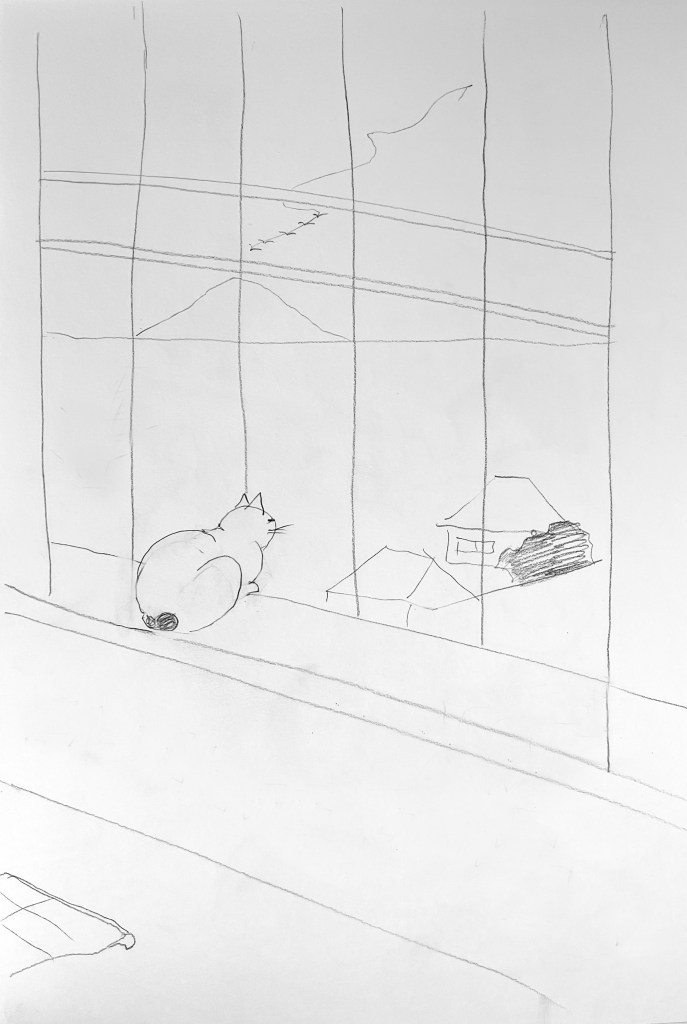
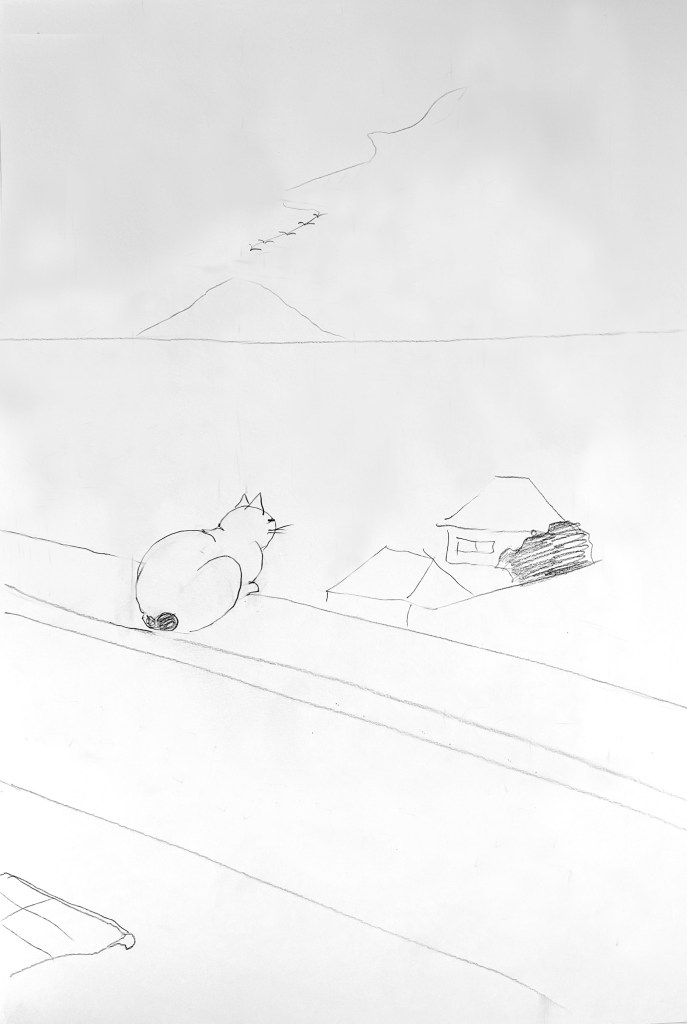
Because the exercise required repeating the experiment using a different piece of art as inspiration, I chose Kathleen Hale ‘The Bulbs Glowed with the Colours of Roses, Bluebells, Daffodils and Green Leaves‘ made in watercolour and pencil or black pen sketches on the top. Kathleen Hale was an English artist and writer known for her distinct and charming watercolour illustrations. Her painting style was characterised by soft colours, delicate brushwork, and attention to detail. For the image to adjust I selected the poster ‘Getting There’ from Part 3 made with watercoloured pencils.
This art has been composed manually, by using watercolours and pencils. The style of this art is eccentric and whimsical. The art that I’ve chosen to analyse is made by using gentle shades of watercolour with some quick sketches of the black pen. The image has warmth, and kindness in it, perfect for kids’ illustration, also the mood of the art is playful and holds some classical features of using watercolour techniques.
How are colour, tone, and texture used to evoke a mood or convey an idea?
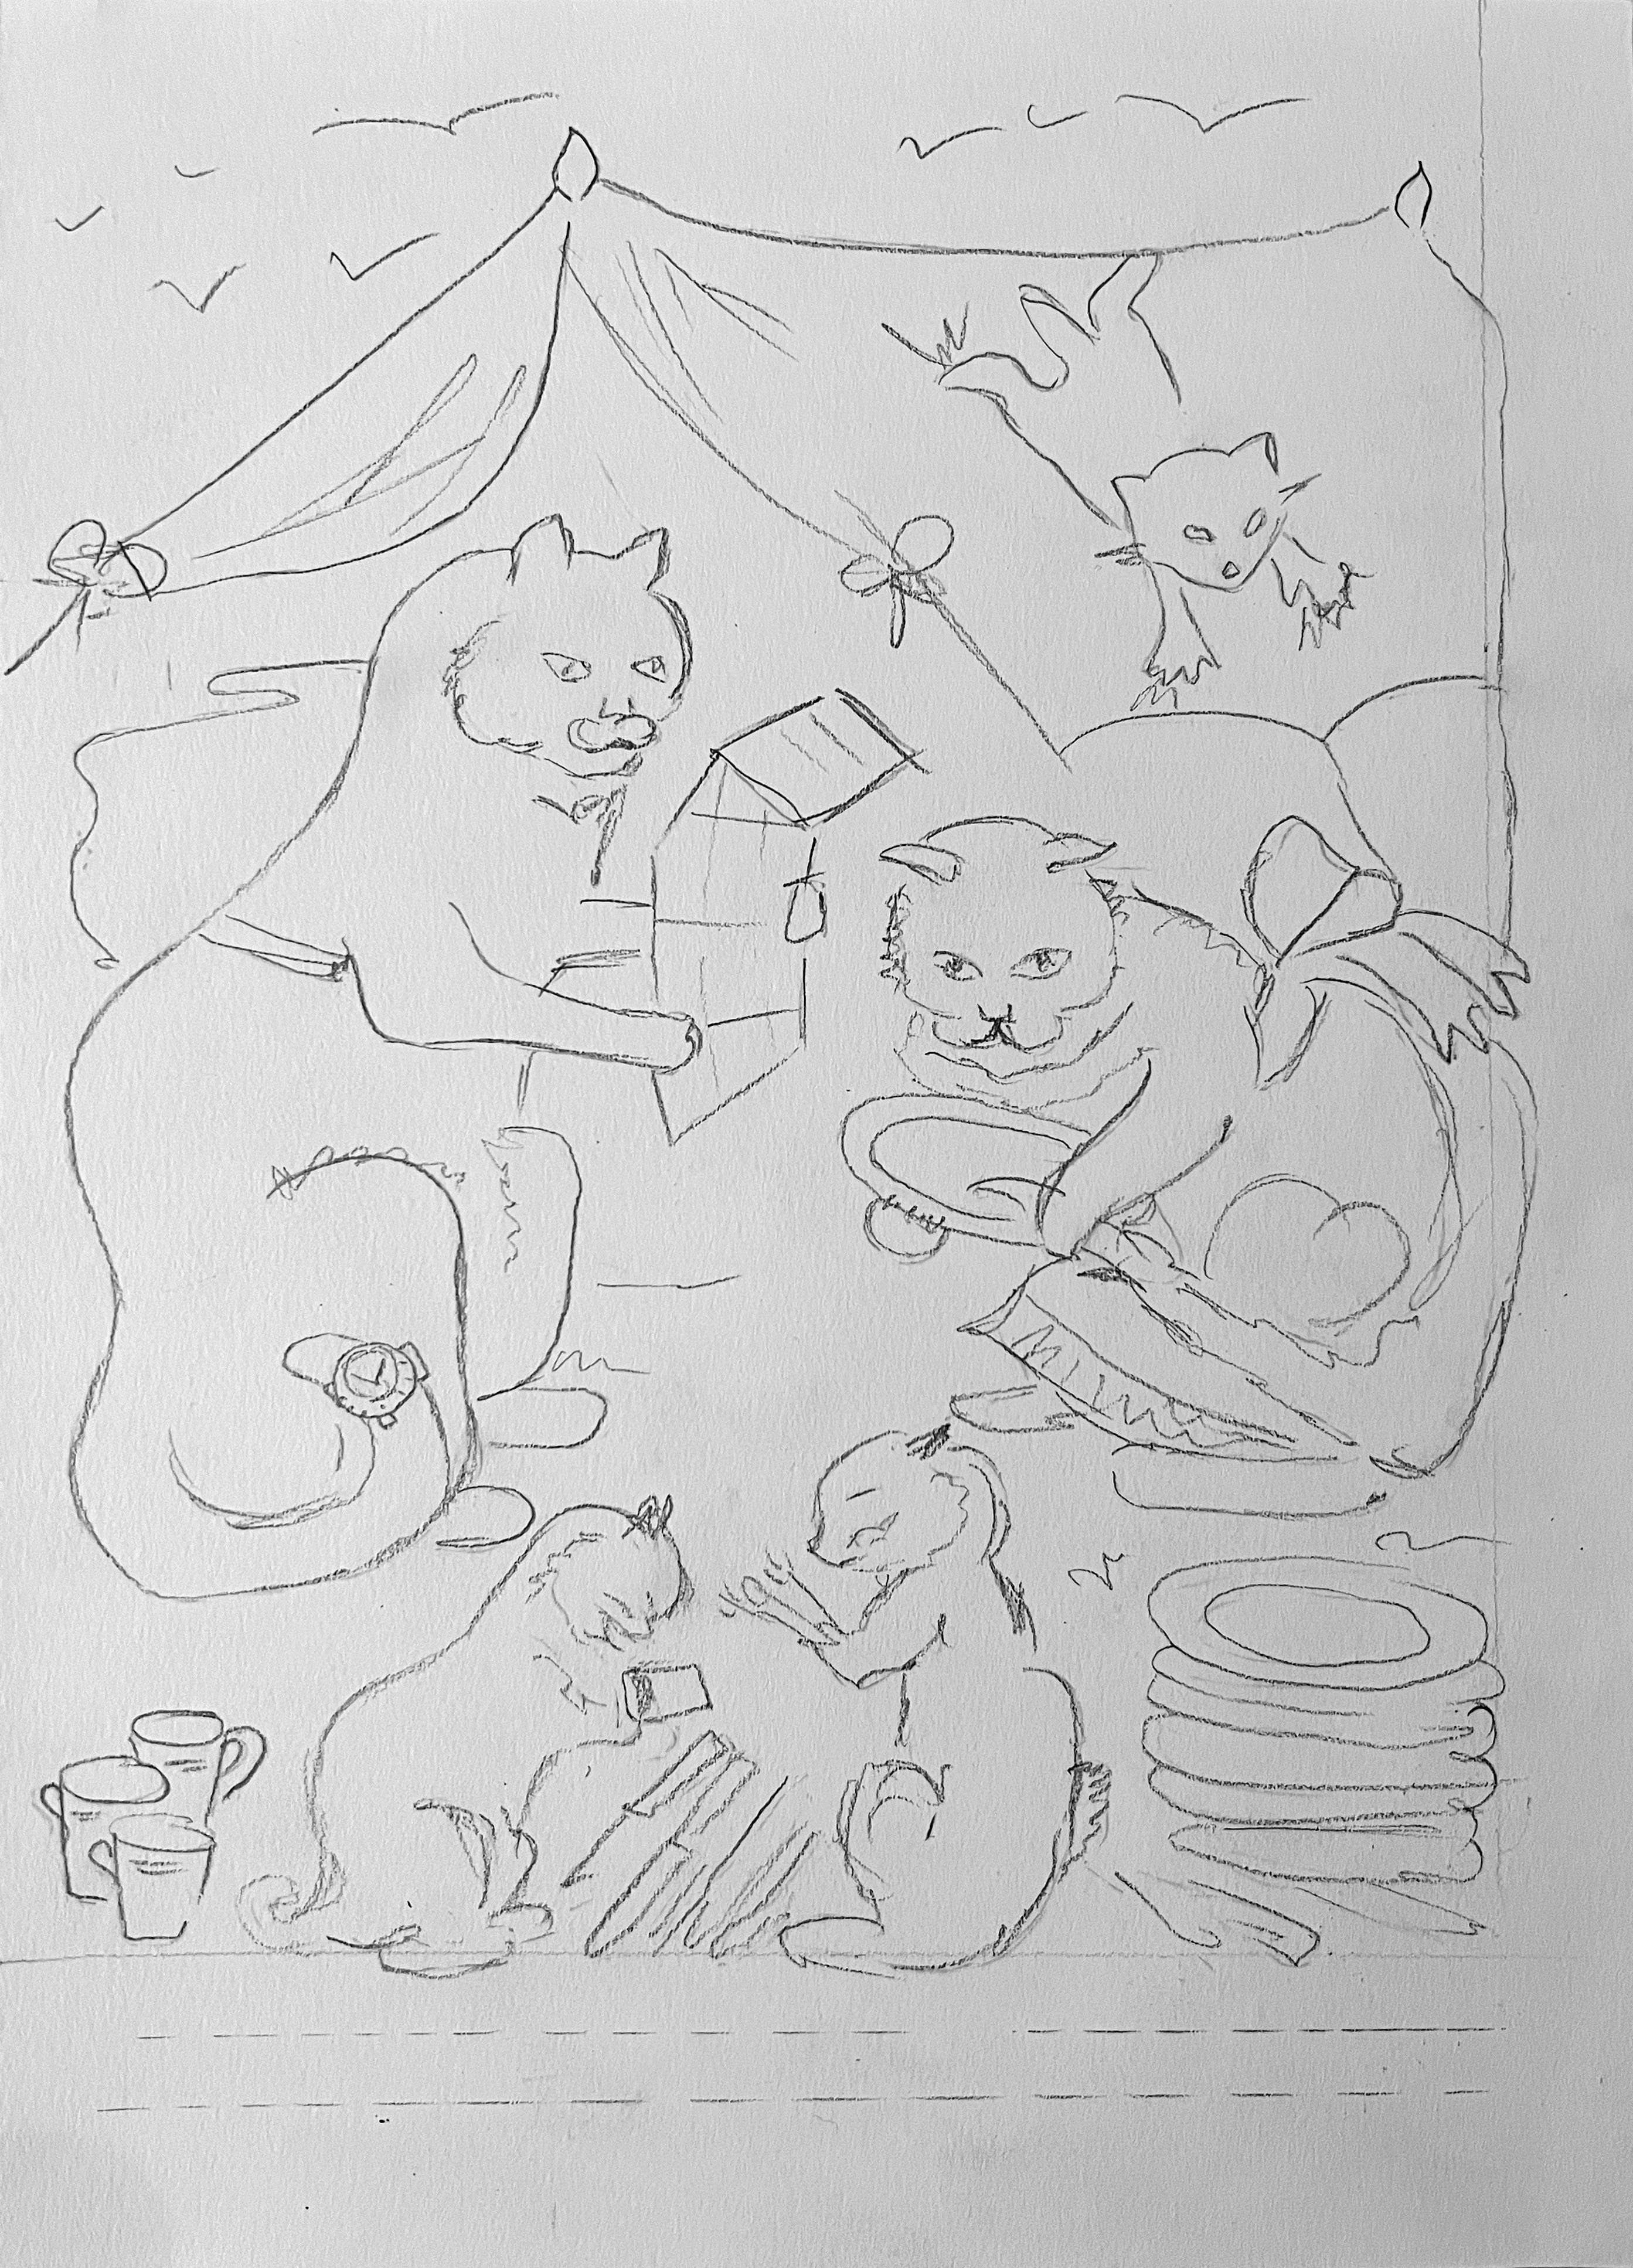
The tones of this painting are transparent and smooth, and the colour palette is natural and consists of classical colours we will see in traditional watercoloured books, like gentle yellow, blue and grey tones. Hale had a fondness for portraying animals in her illustrations, and a cat would fit well within her repertoire. The cat would likely be depicted with delicate brush strokes, showcasing its fur texture and playful expression. In contrast, artists use dark shades to create deepness in the art. The cave might have natural-looking textures and shading to create depth and evoke a mysterious atmosphere. The mood of the painting is joyful and frisky.
Has the illustrator distorted the content within the imagery and how does this work for the purpose the image fulfils?
I would say that the main purpose of those illustrations is to bring an imaginative world, that is easy to understand for the younger auditory, like kids’ cartoons, or children’s books. Overall, Kathleen Hale’s painting style would bring a combination of elegance, imagination, and attention to detail to the watercolour drawing of a cat in a cave with Christmas lights. Through her expert watercolour techniques, she would bring this enchanting scene to life, captivating viewers with its beauty and charm.
To begin with, I sketched this painting in watercolour, without using a pencil. I marked the sky, the landscape around Volkswagen Beetle. For the colour palette I used similar shades as from the source of inspiration. Later I added a pencil sketch. I tried to create a contrast between the highlight and the shadow using navy blue and soft yellows. A watercolour painting in Kathleen Hale’s style is a vibrant and lively recreation compared to the original ‘Getting There’ illustration. I think those soft brushes of watercolour bring a sense of nostalgia, and quick sketching on the top creates whimsy, and perhaps a touch of unique flair.
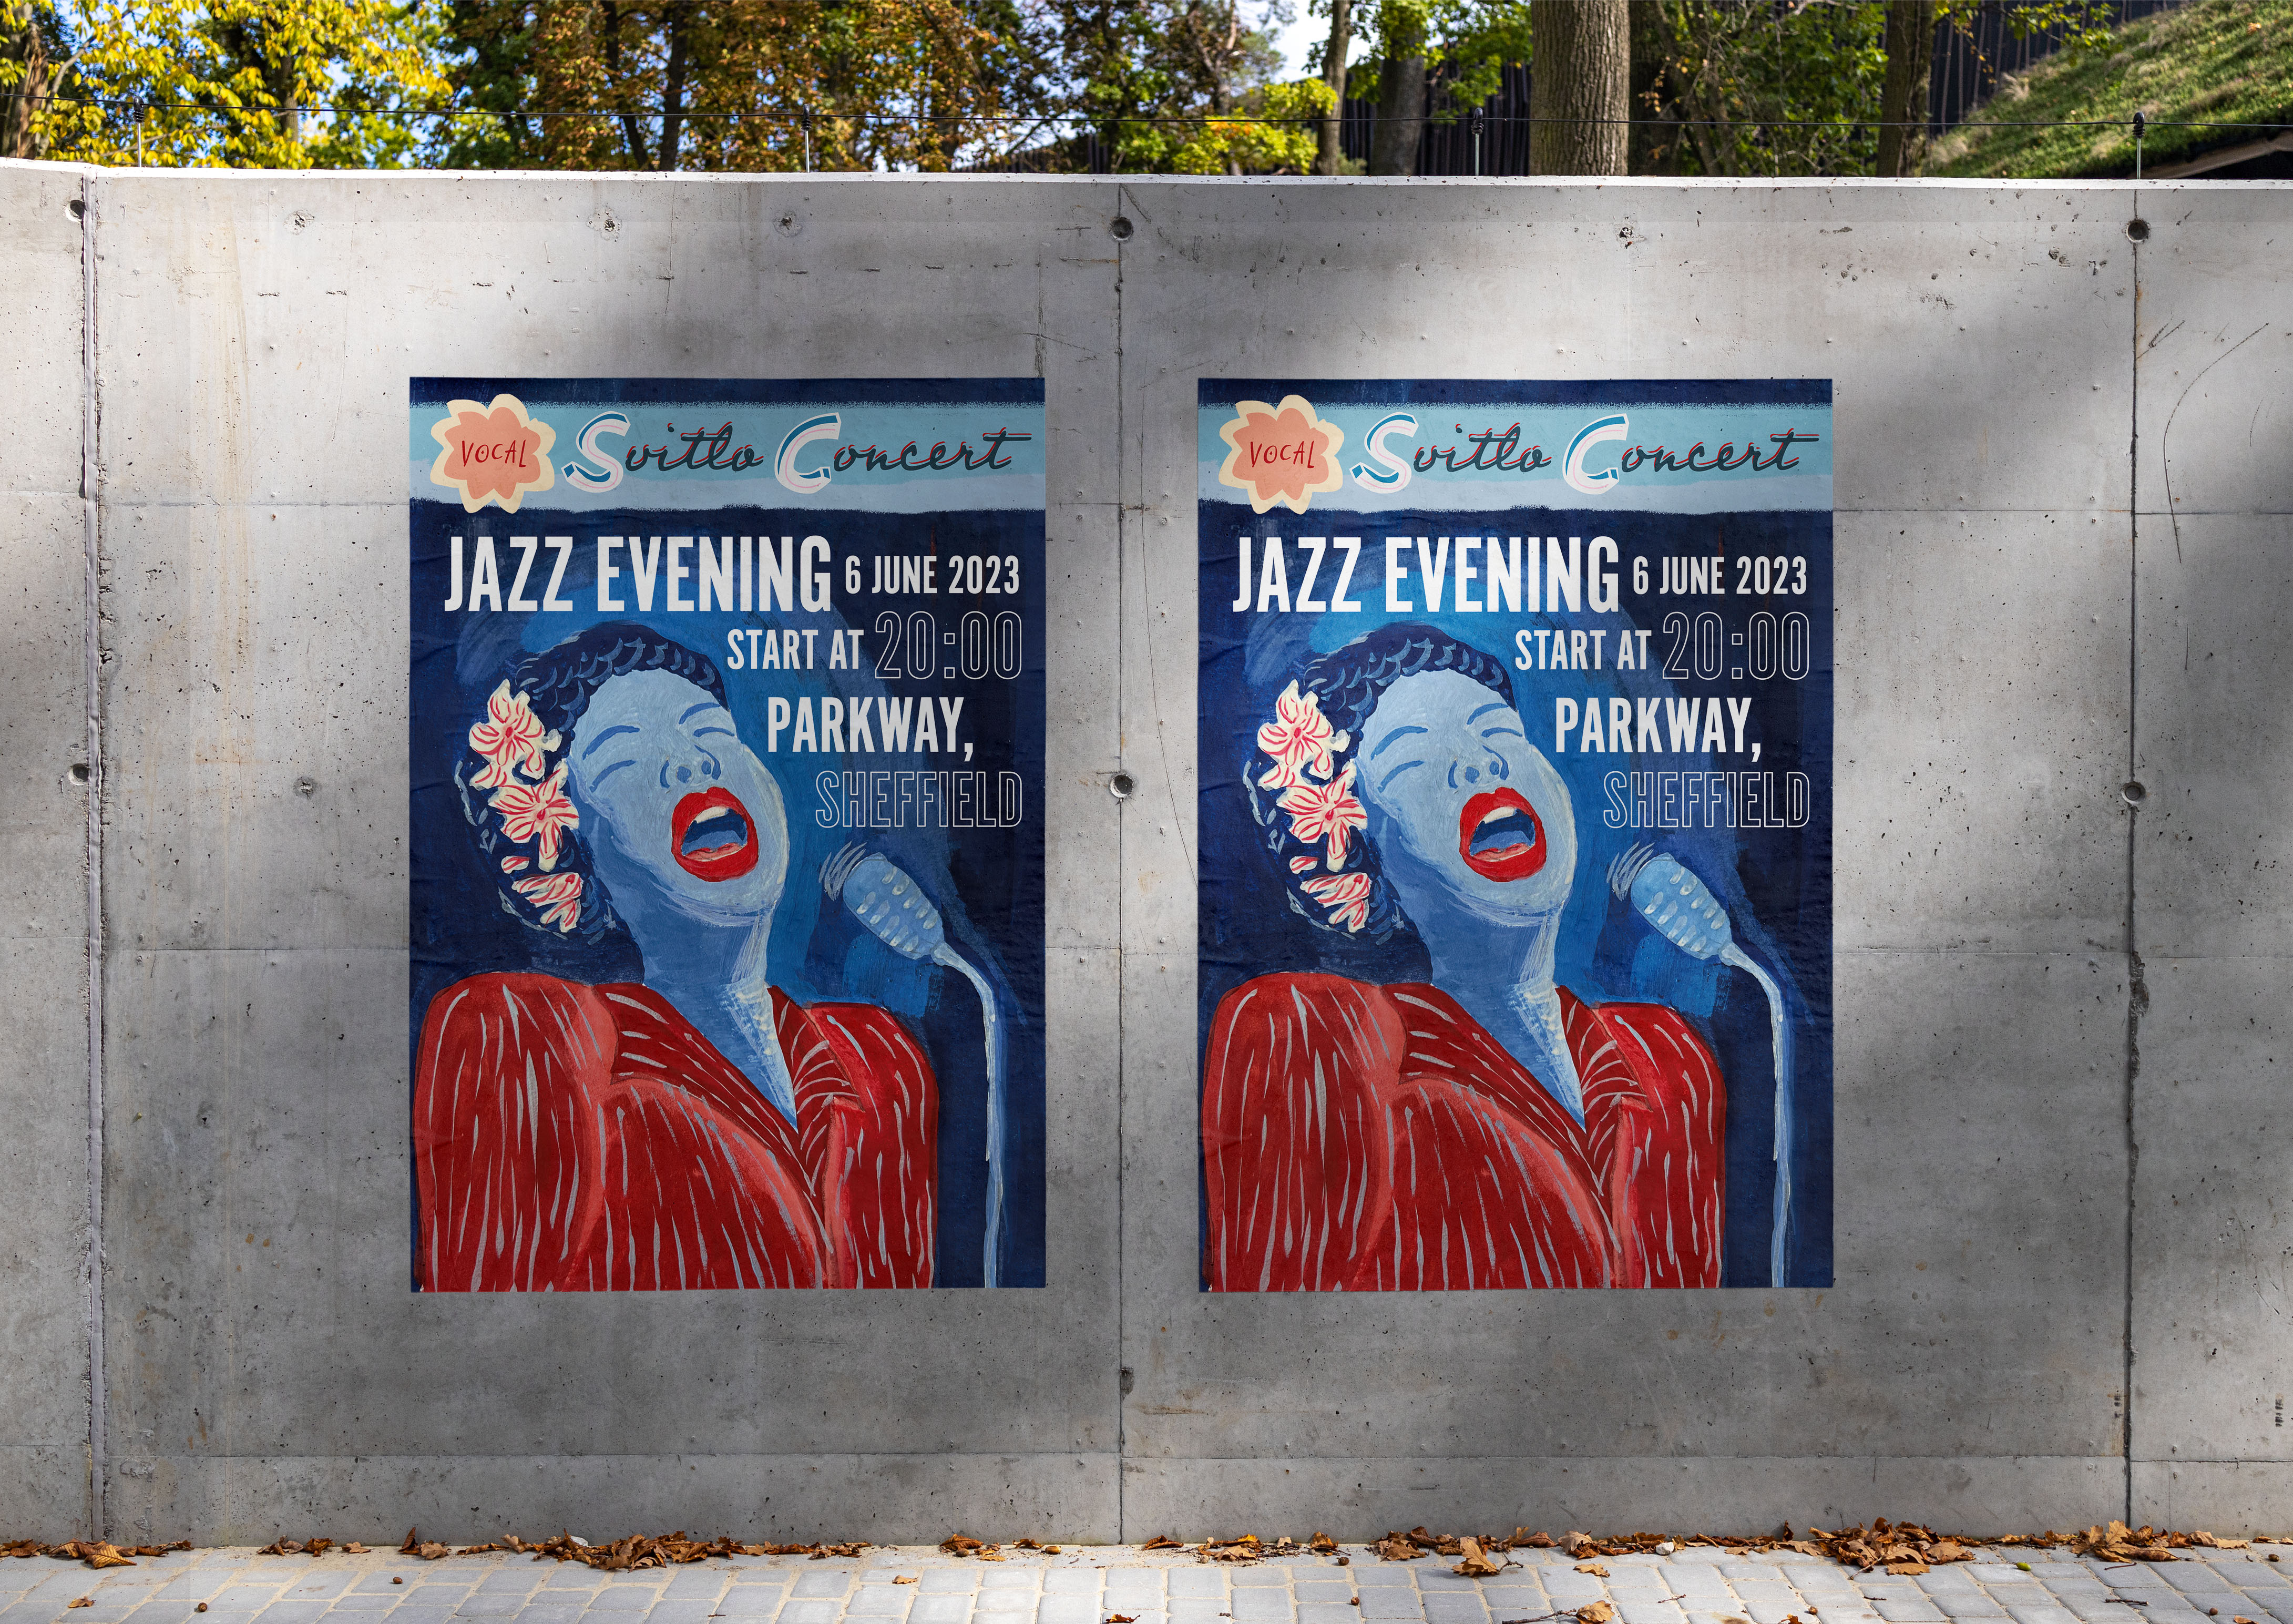
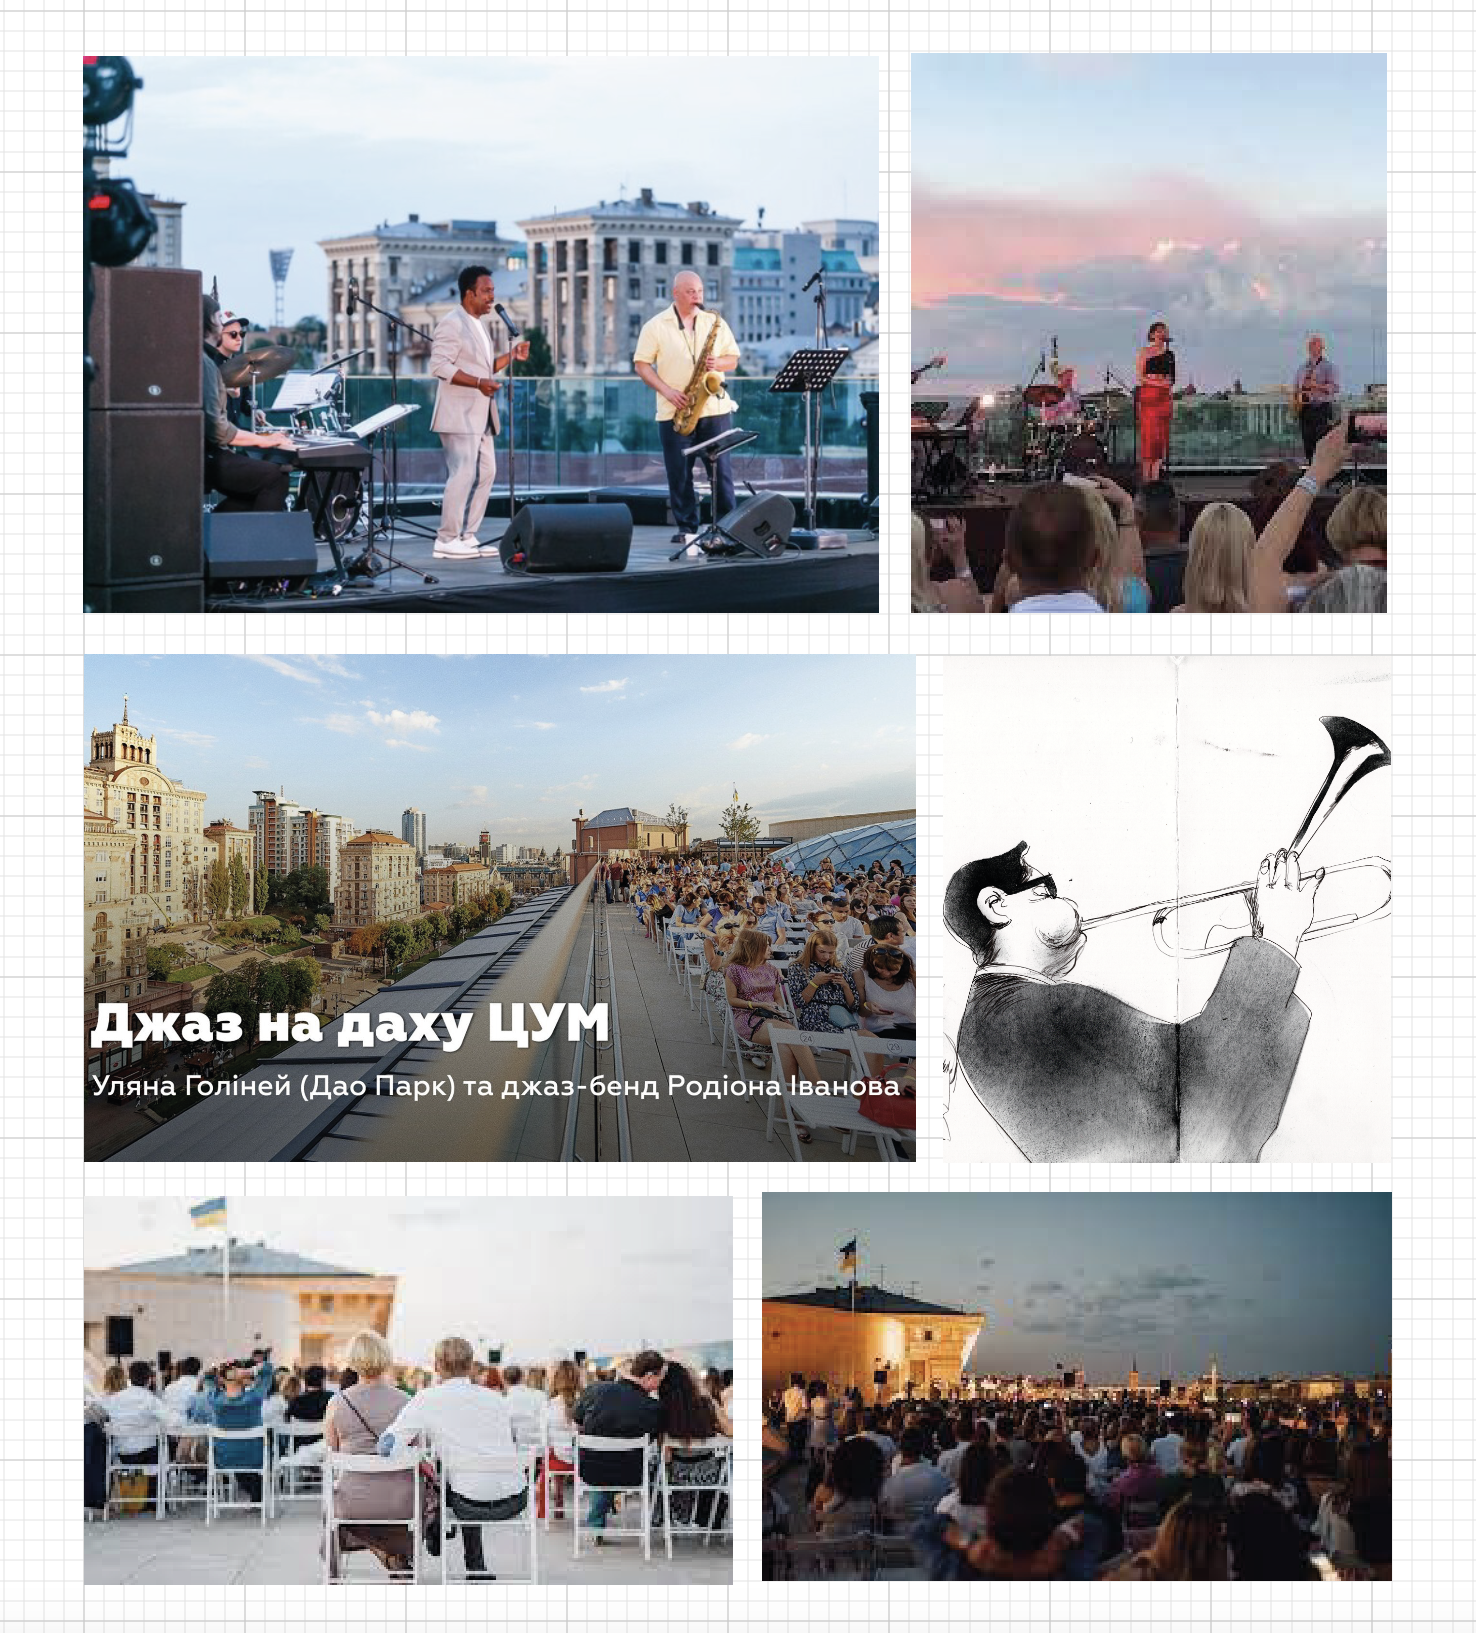
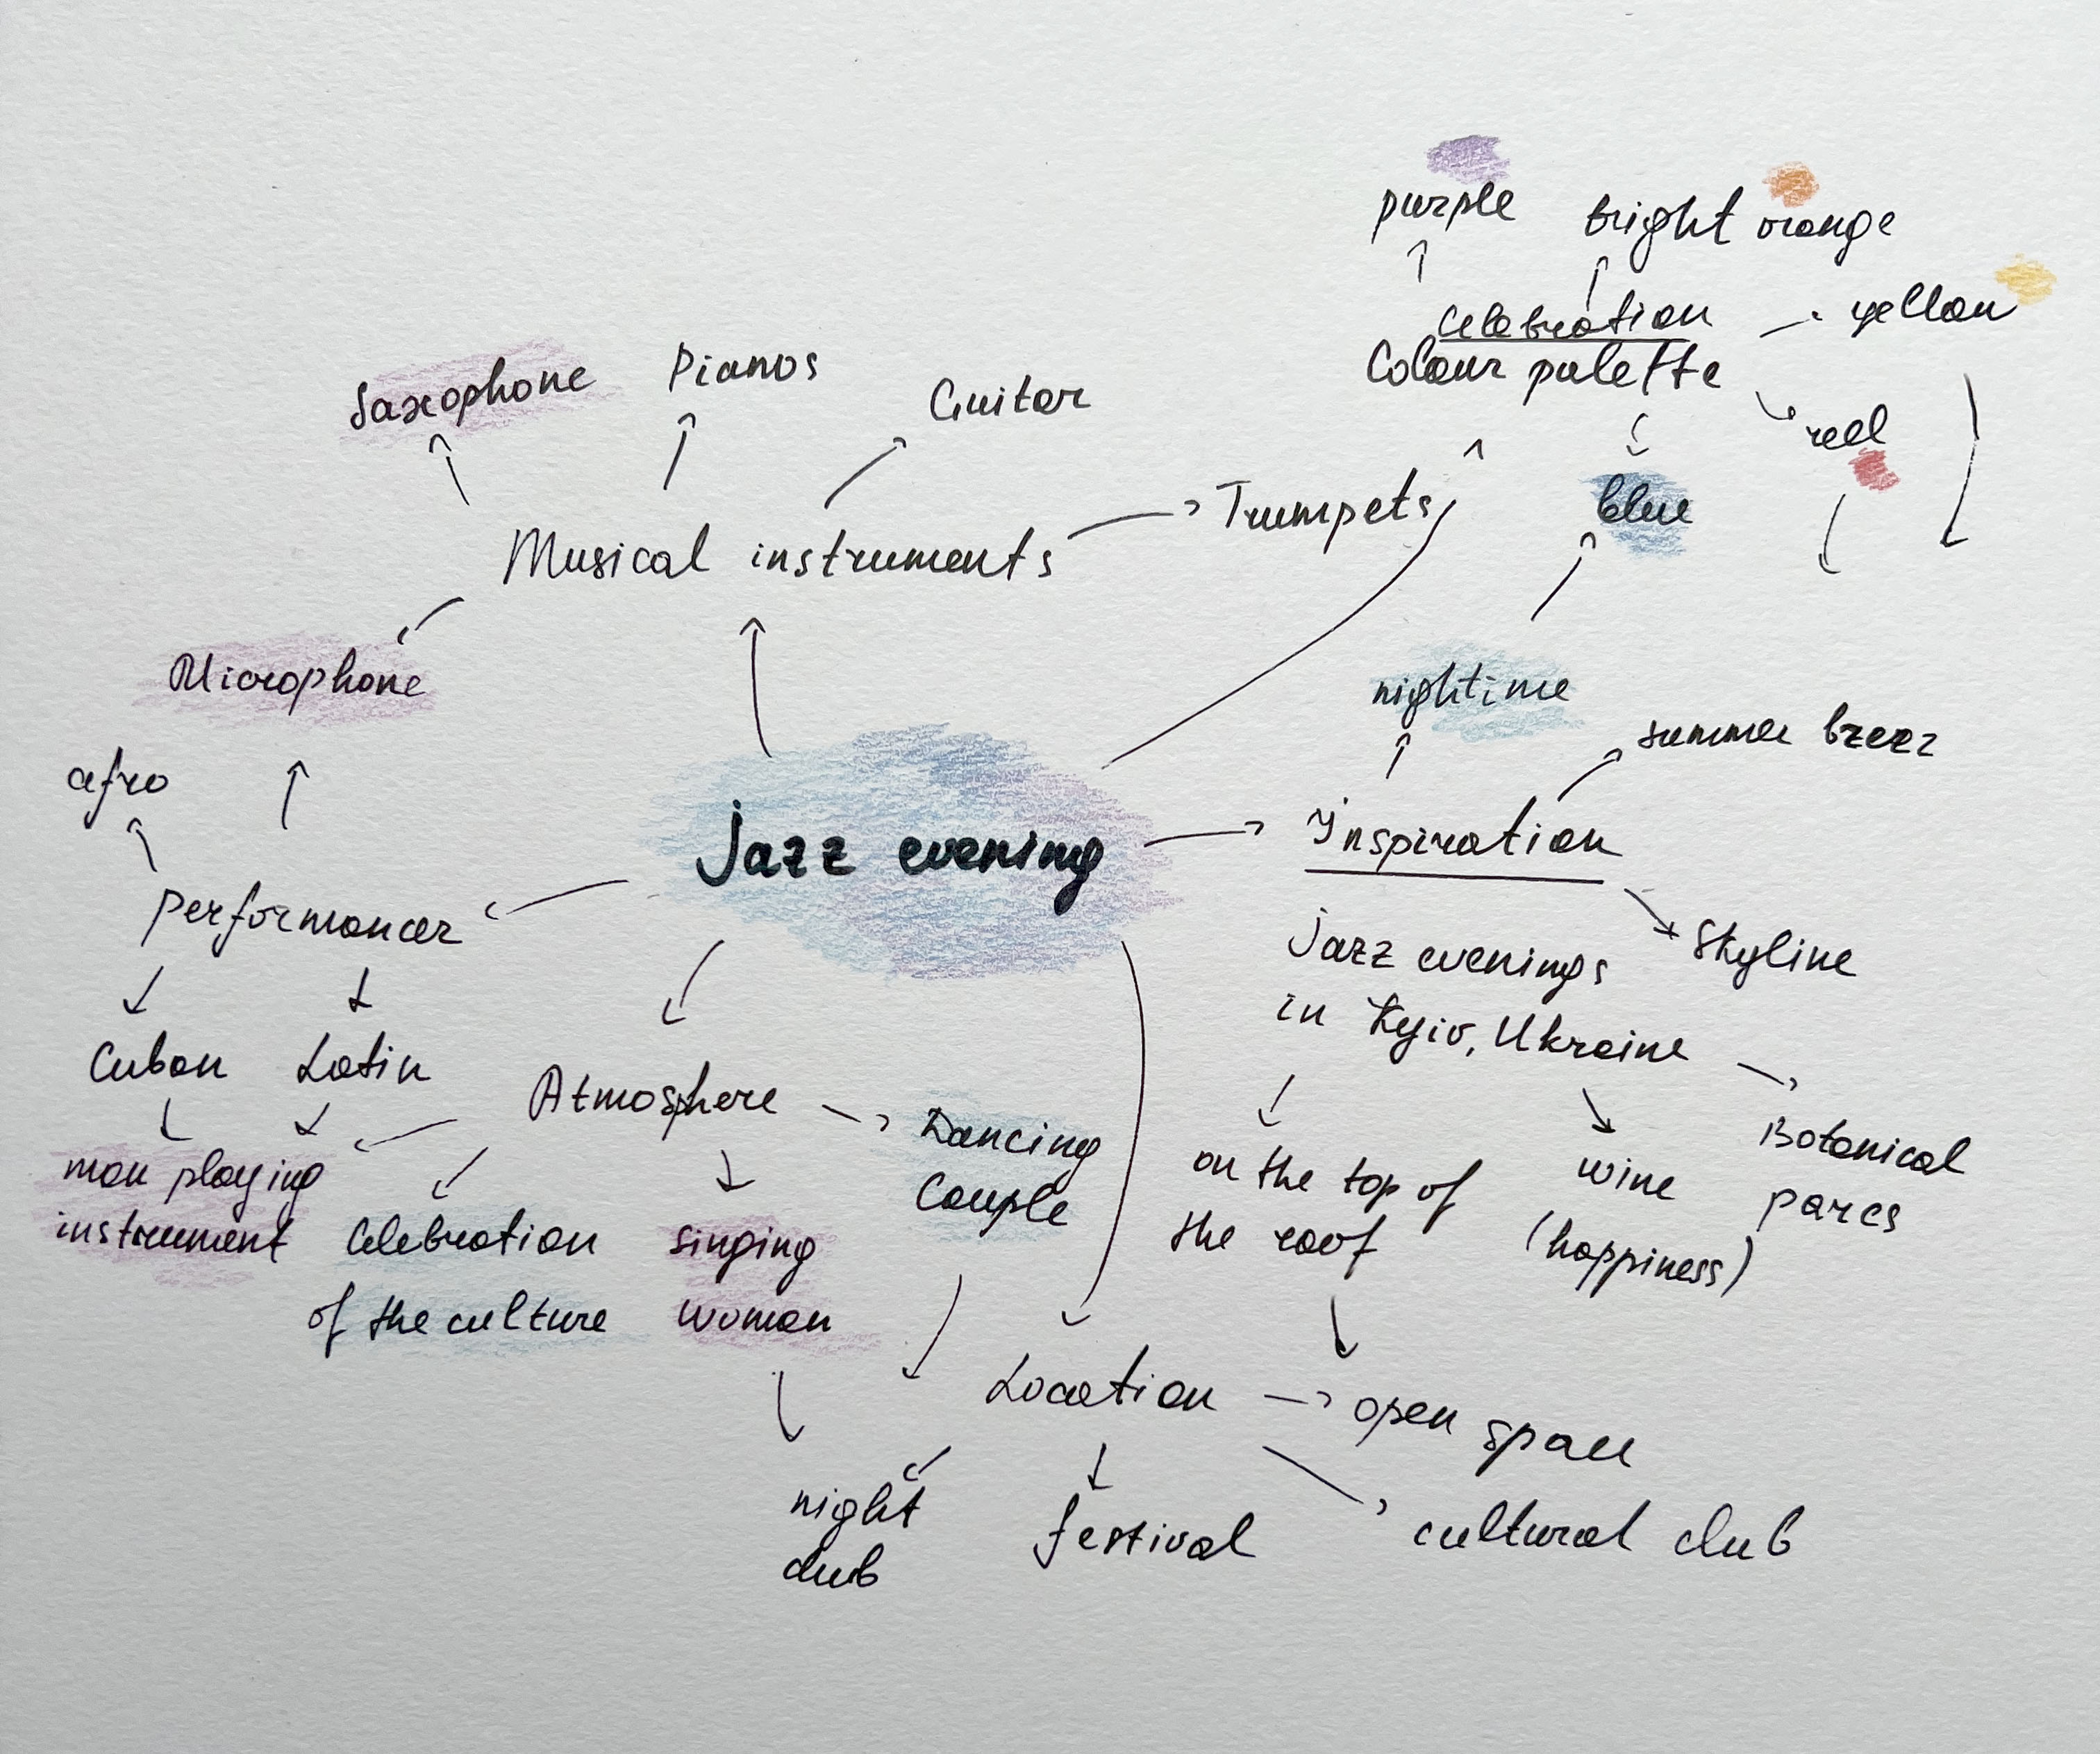
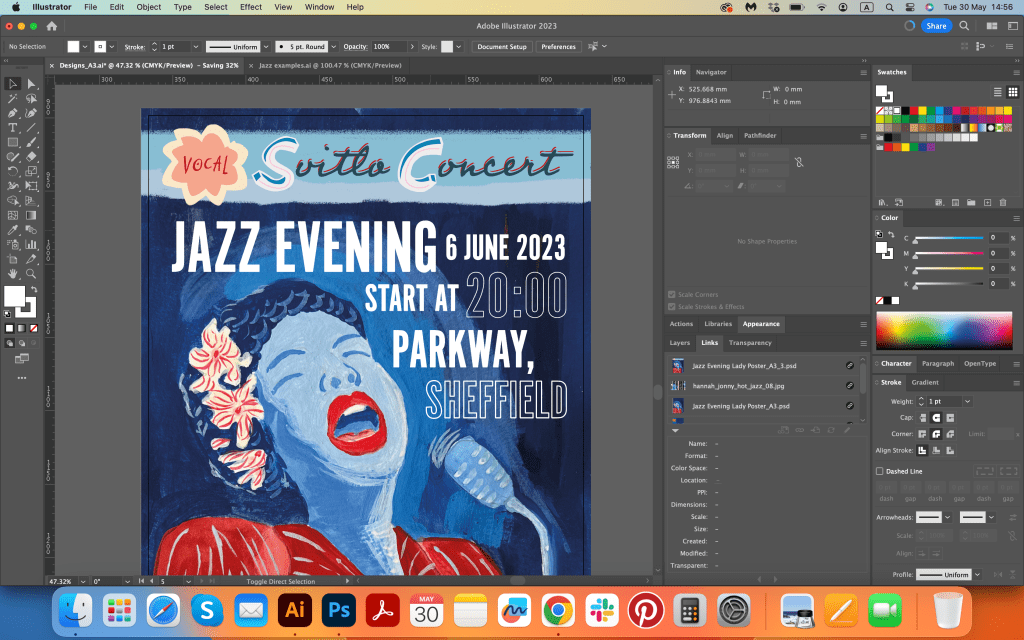
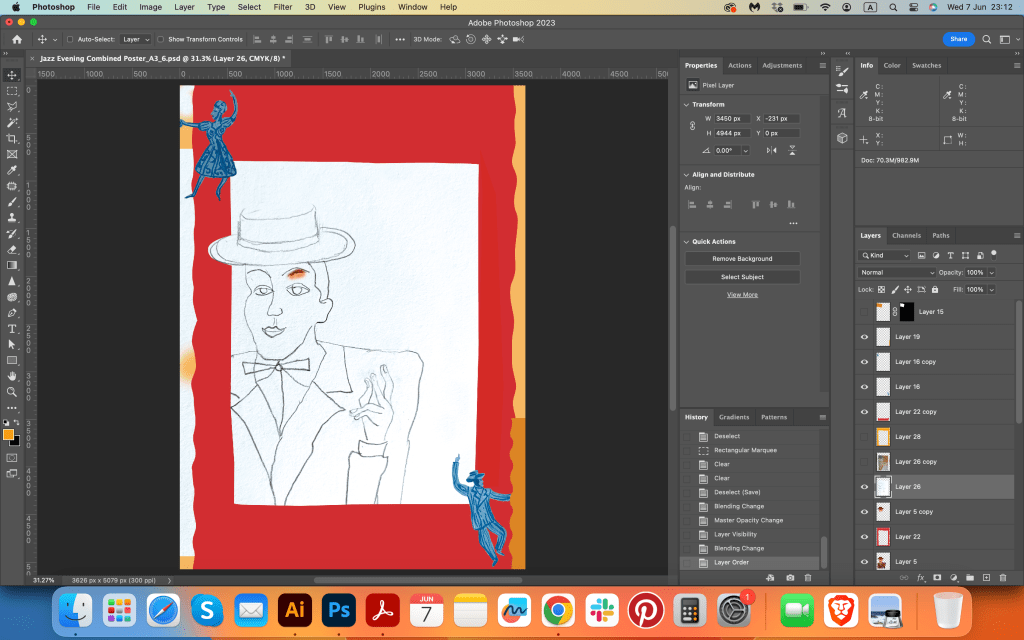
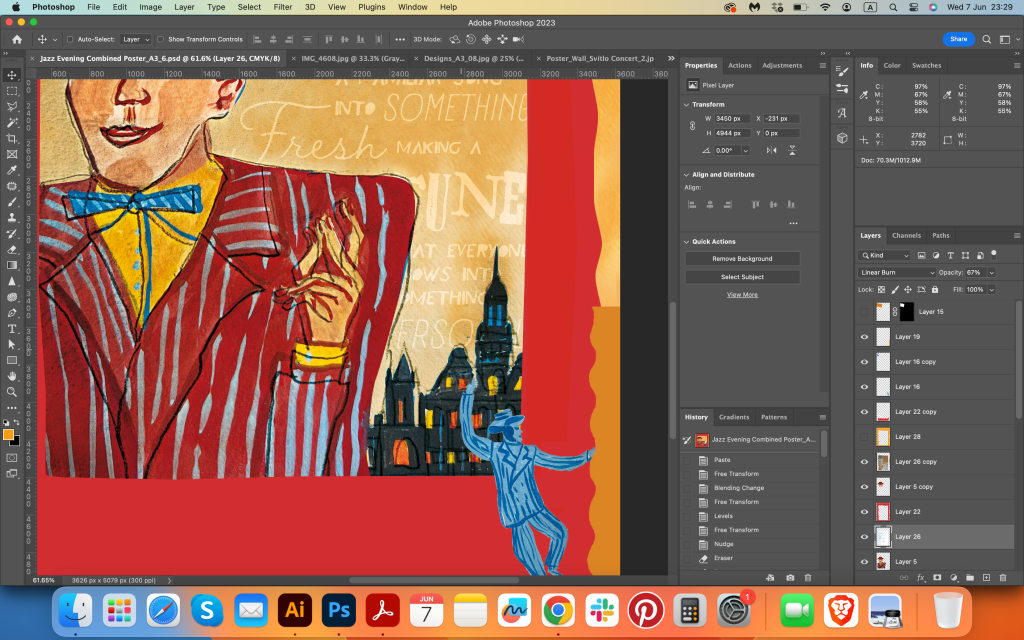
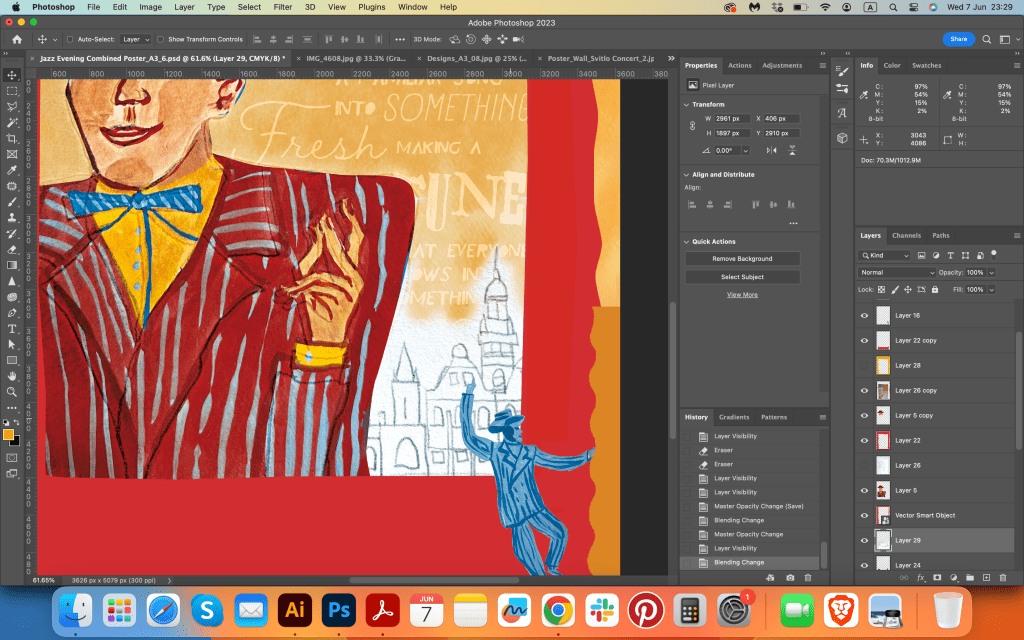
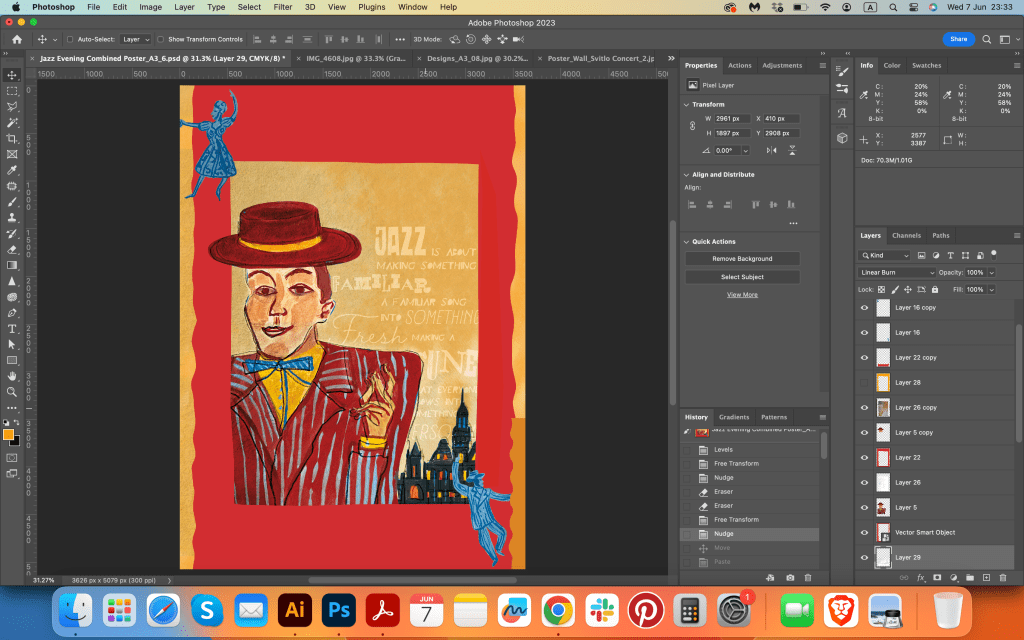
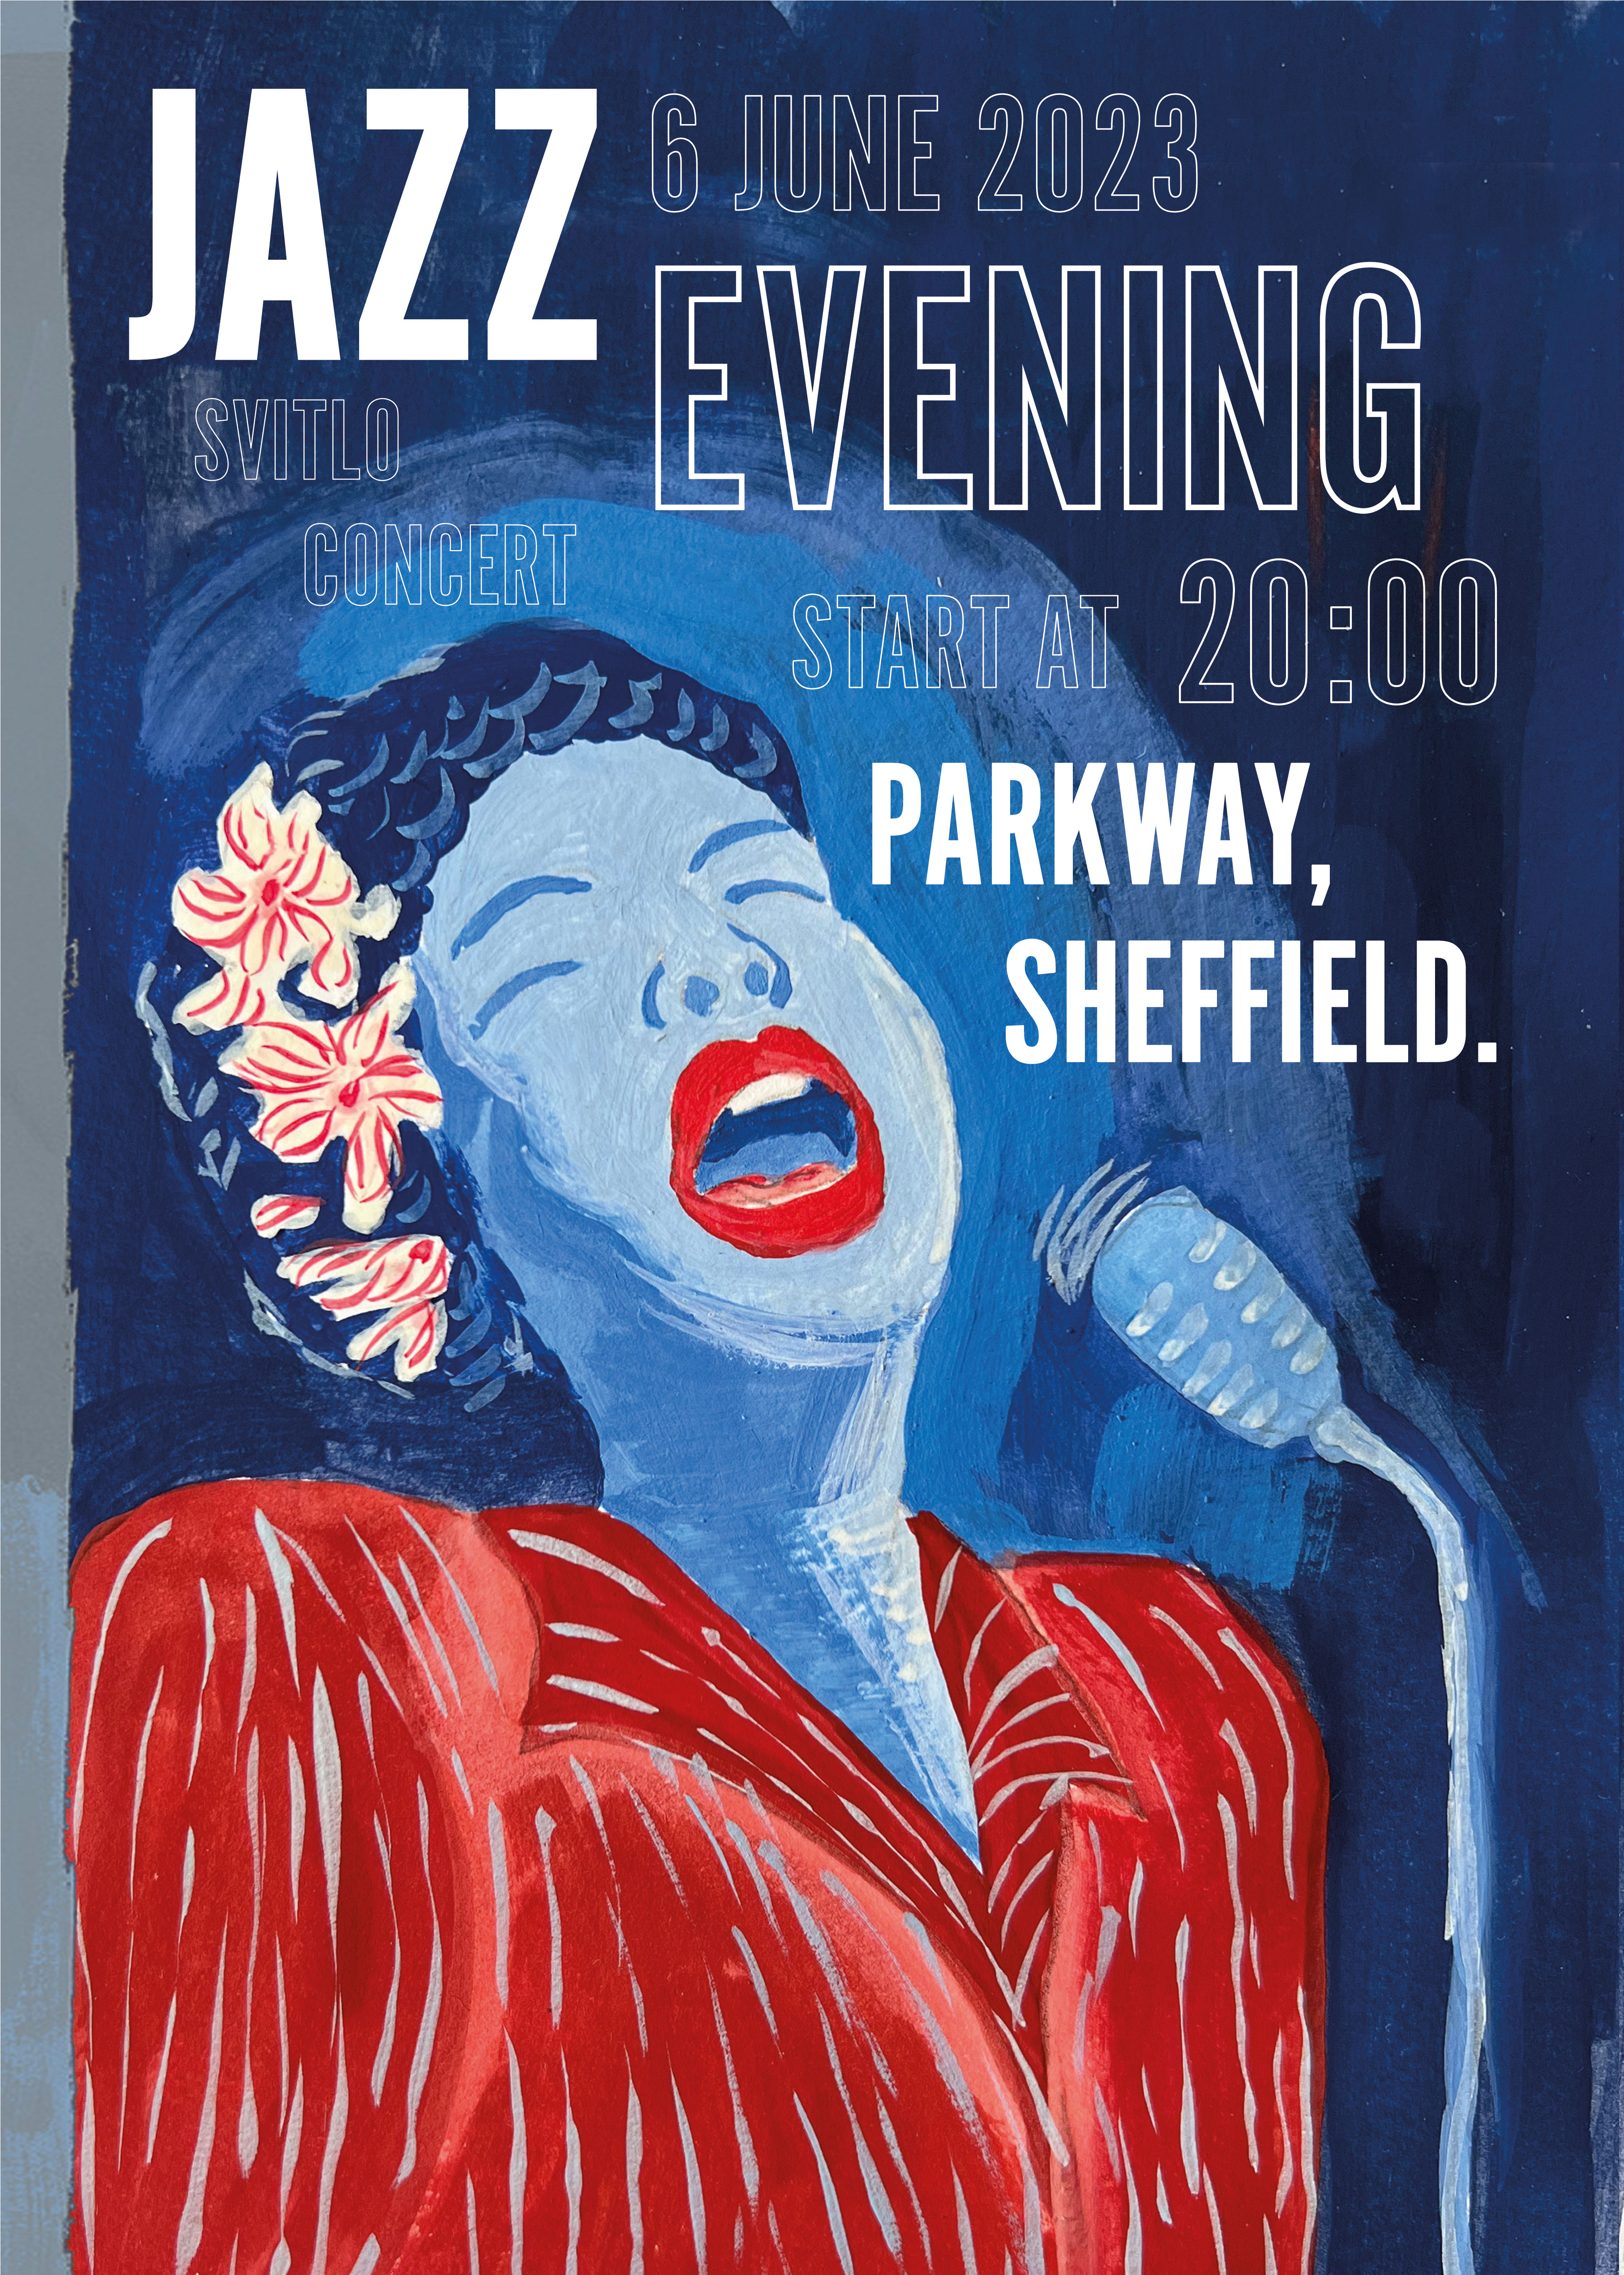
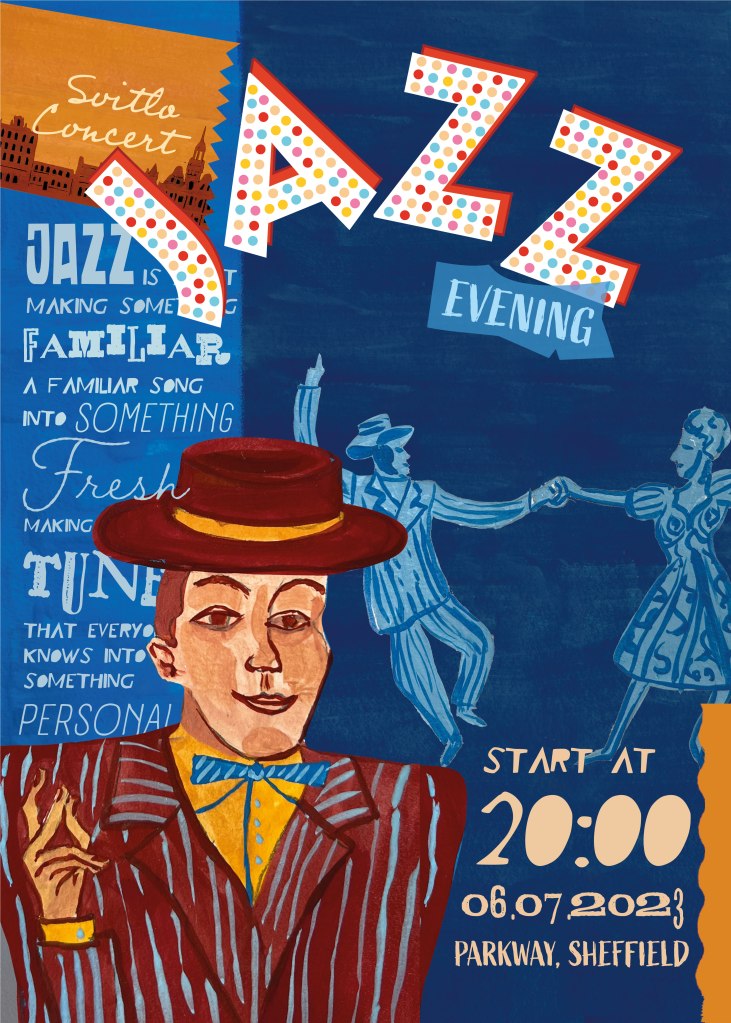
After reading the brief a couple of times, I decided my chosen theme poster will be Jazz Evening. I had a similar exercise earlier in the Graphic Design Core Concepts unit, where I designed a rock band poster, using Occam’s razor principle, and a poster with minimalistic colours for the local singing competition. I found poster design as the most approachable part of graphic design, as it requires only a few significant components, sticking visuals and the right font for the text reading. This time I would like to have a new approach and challenge myself with some new style illustrations. Also, I’m keen on the jazz theme, as it reminded me of jazz evenings we had in Kyiv, Ukraine, on the top of the roof of the central part of the city, where people gathered together after work for a couple of hours relaxing and pleasant atmosphere with a glass of wine.
Mood board of the jazz concert on the roof in Kyiv, Ukraine
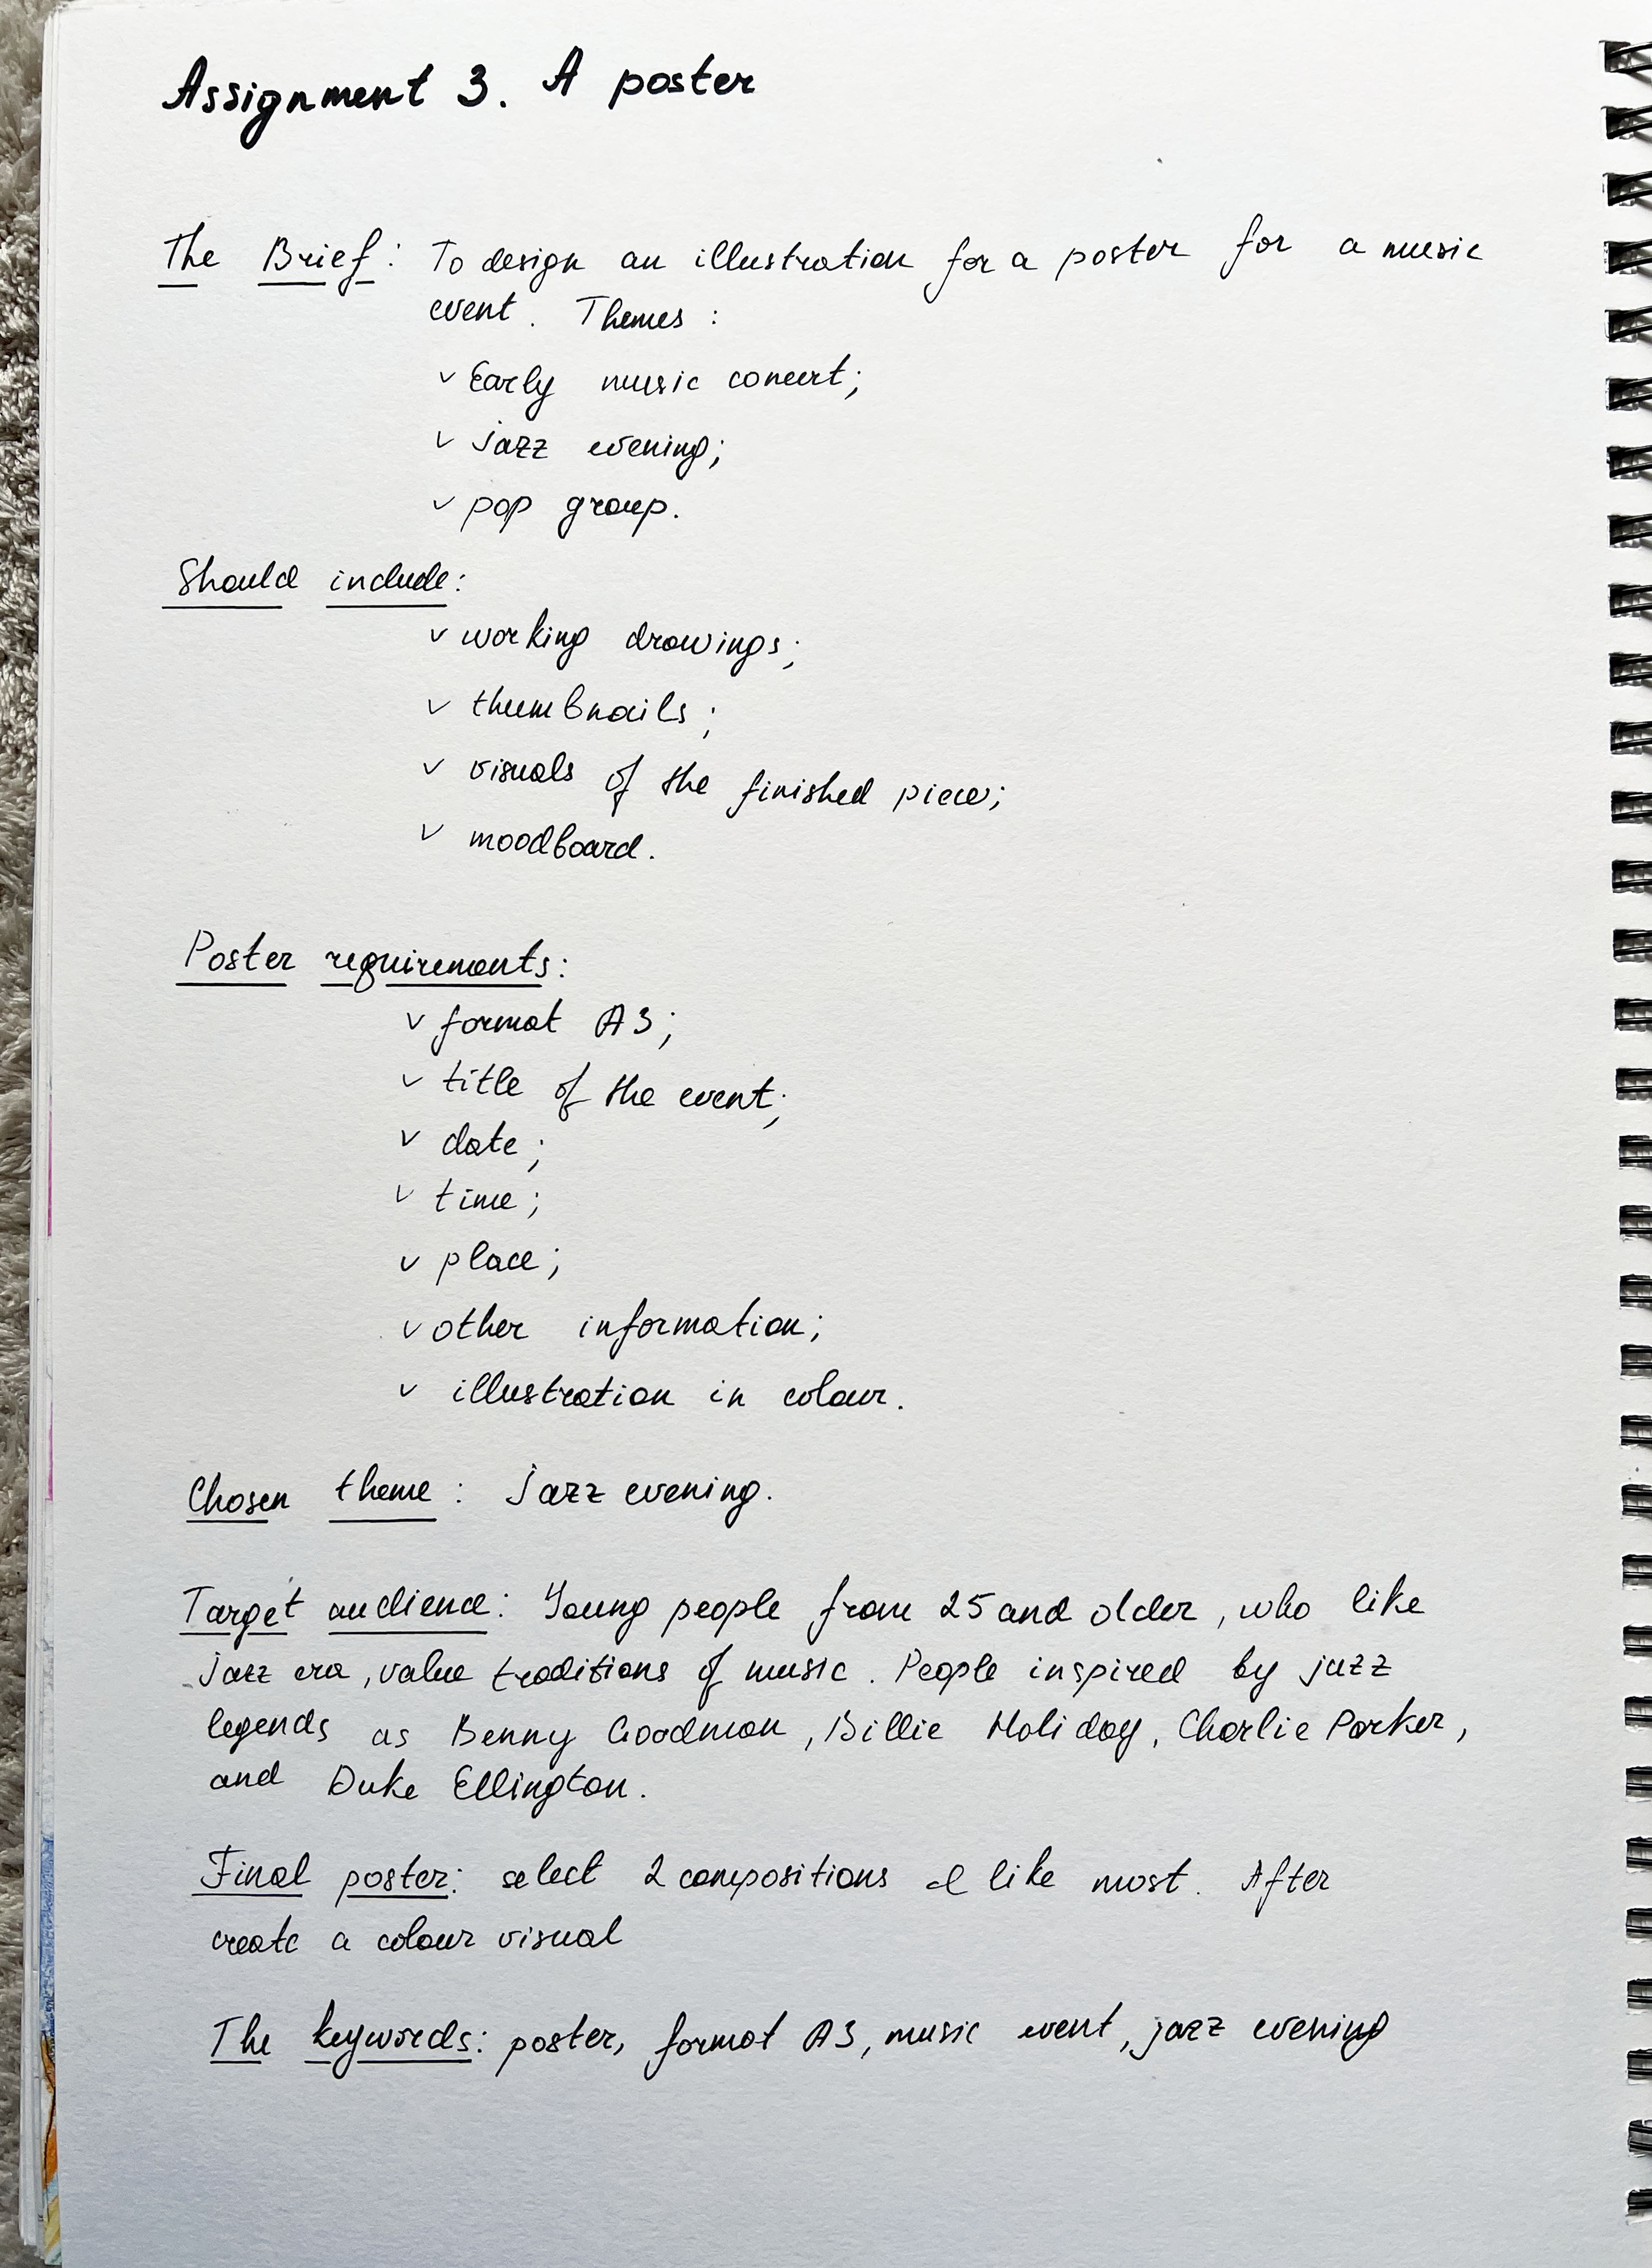
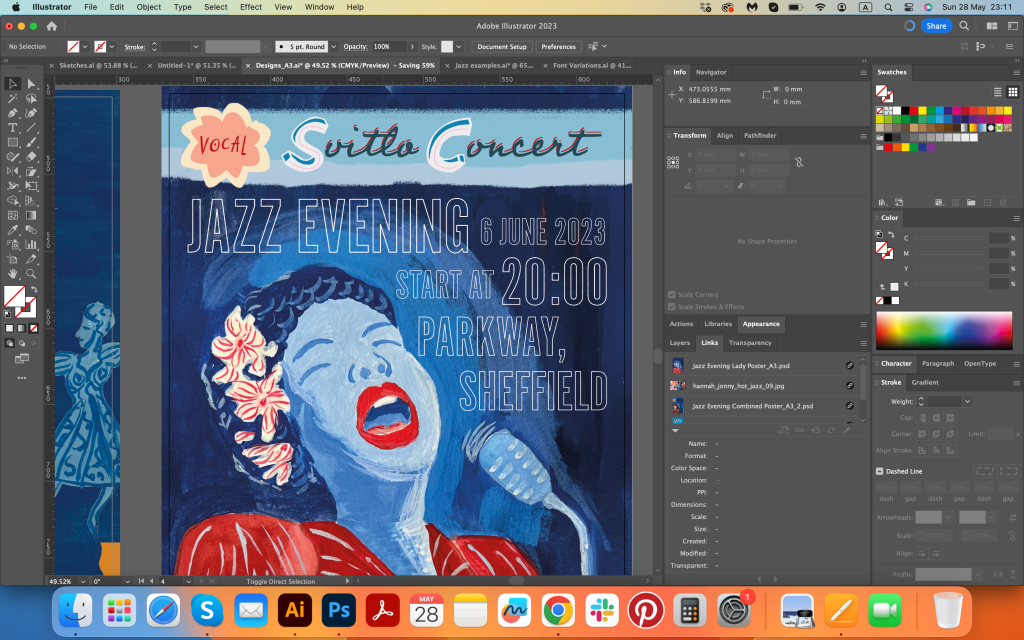
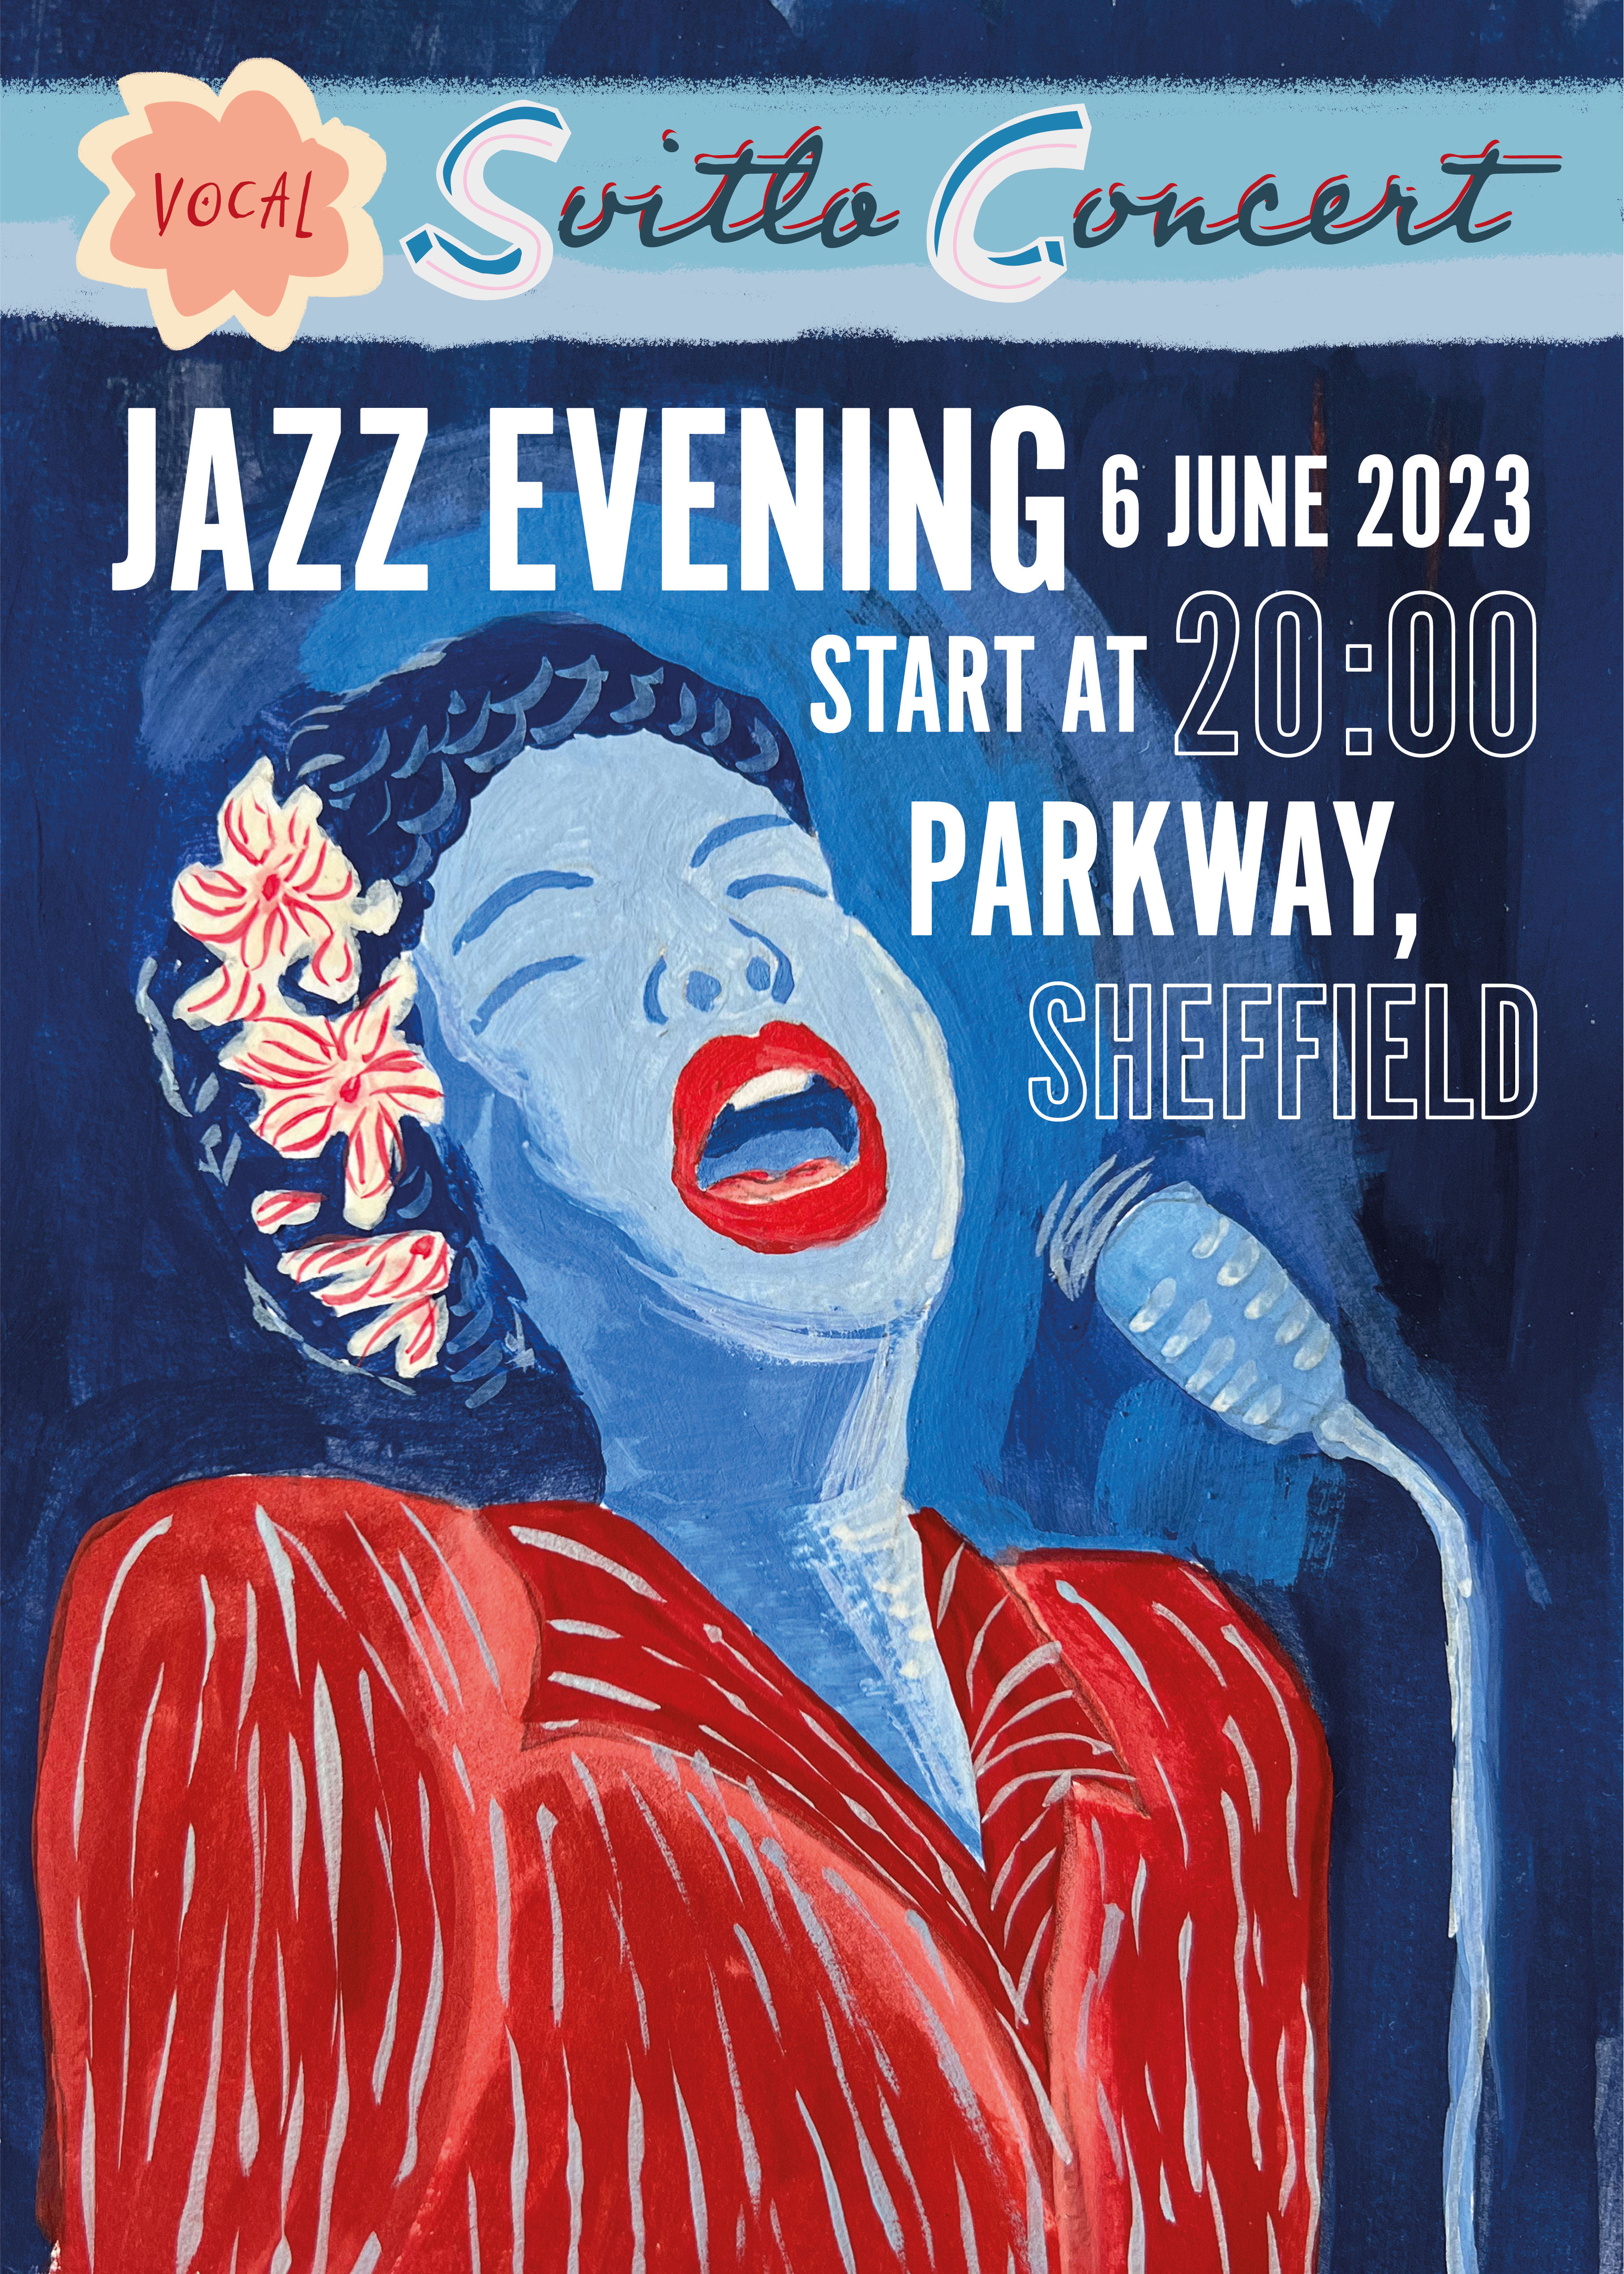
I wrote the brief in my own words, describing specific details of the assignment. The brief is to design an illustration for a poster for a jazz evening music event. The poster should be format A3 and include:
title of the event
date
time
place
other information I think appropriate.
As the music style I’ve chosen is quite mature, I think the target audience is people 25+ who are interested in jazz music.
I also created a mind map exploring potential options and inspirations, locations and musical instruments I could include in my illustration.
Moodboard
Next, I created a Pinterest moodboard for inspiration. Mainly it was a mixture of retro jazz photography, posters and illustrations for jazz events that I found eye-catching and could apply to my designs. This collection consists of bold illustrations related to performances, and musical instruments, also, there is a big play on the hand-made typography and retro photographs from jazz bands.
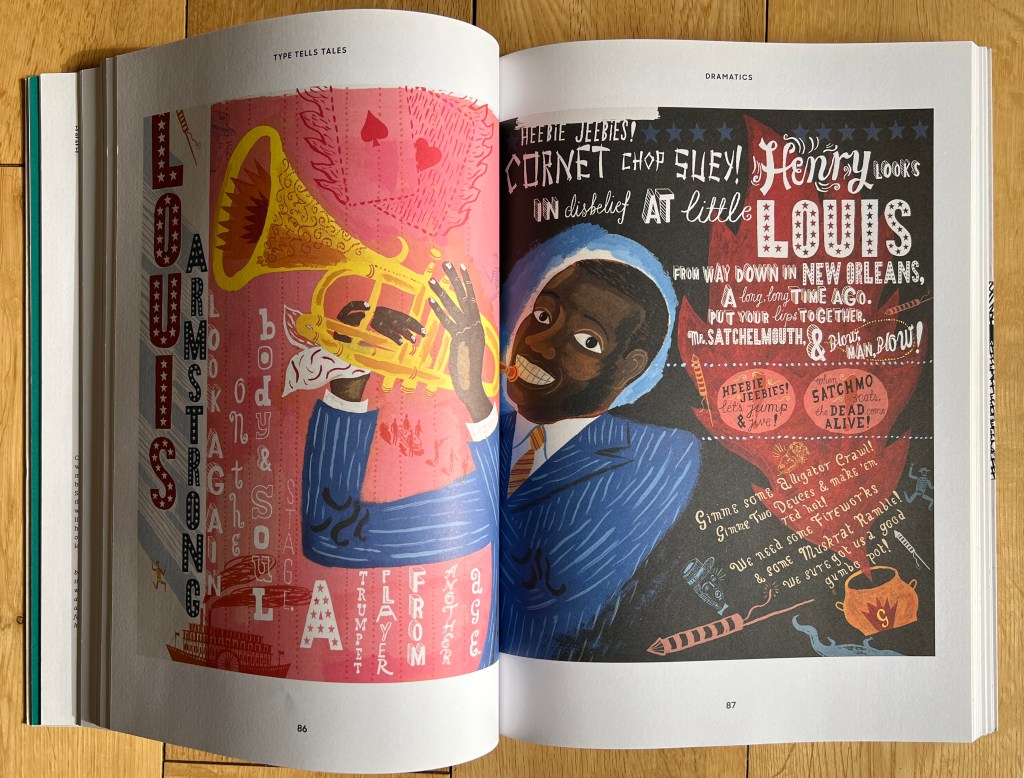
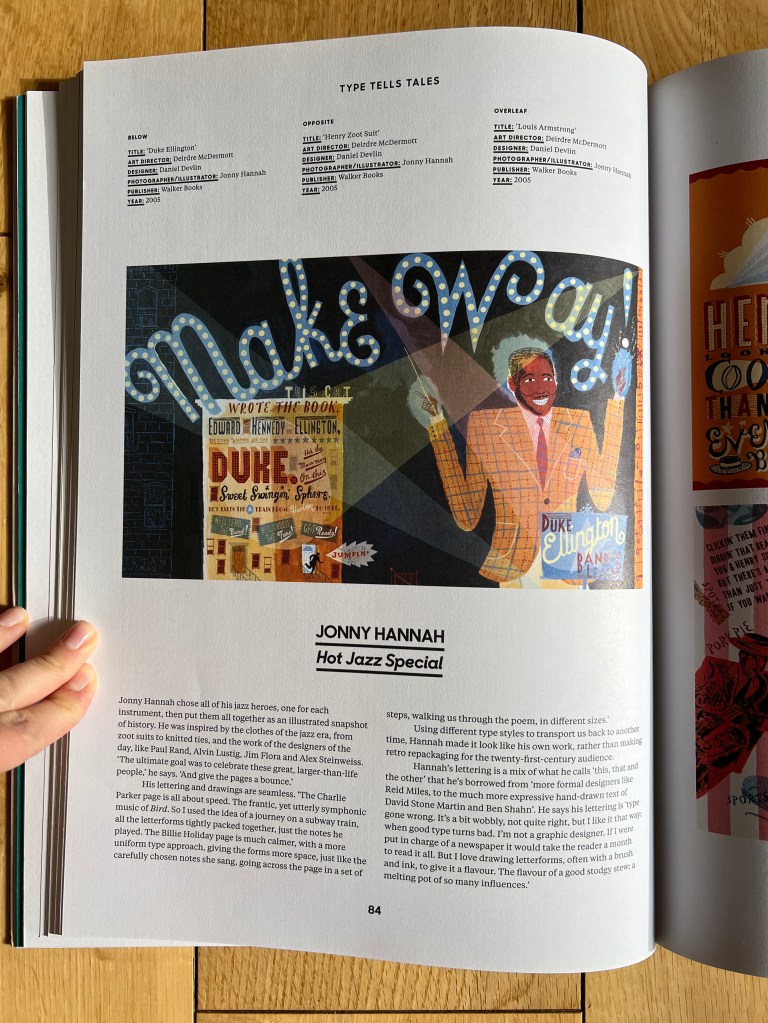
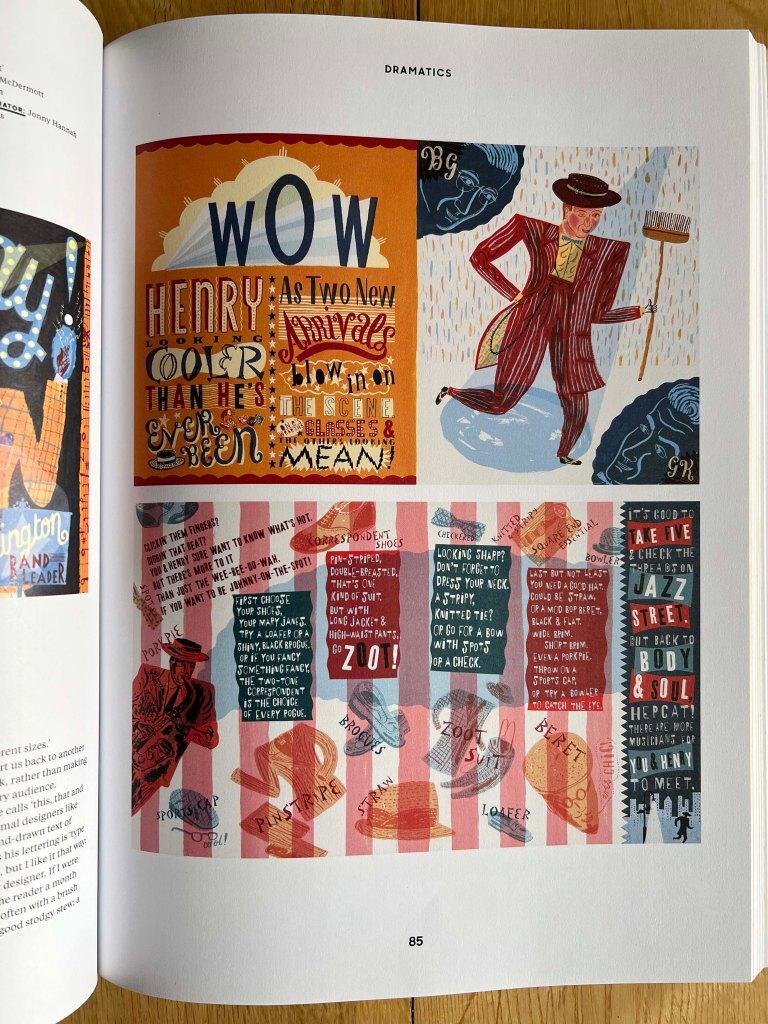
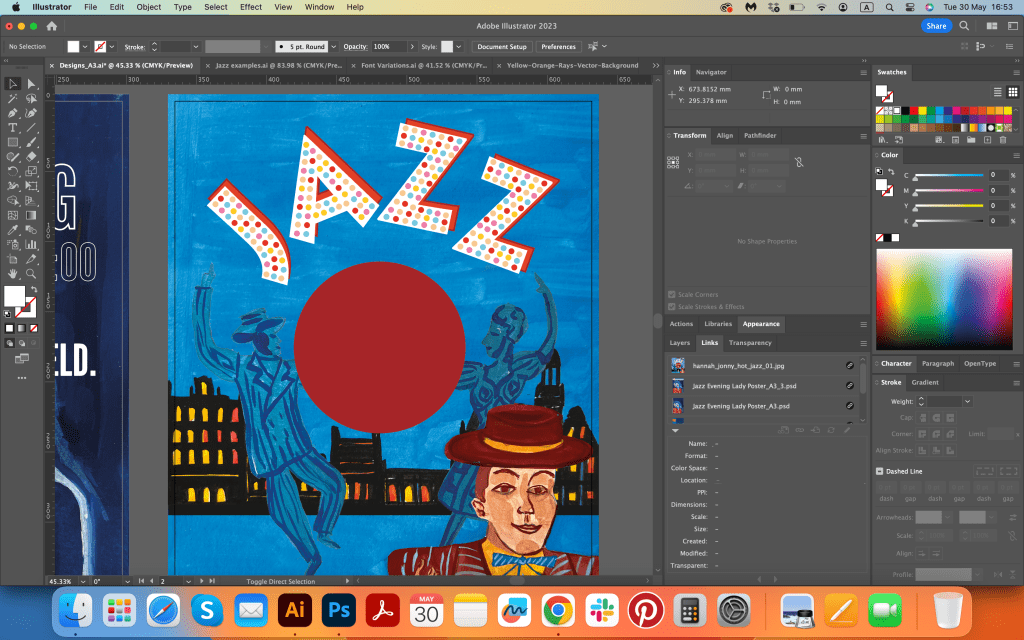
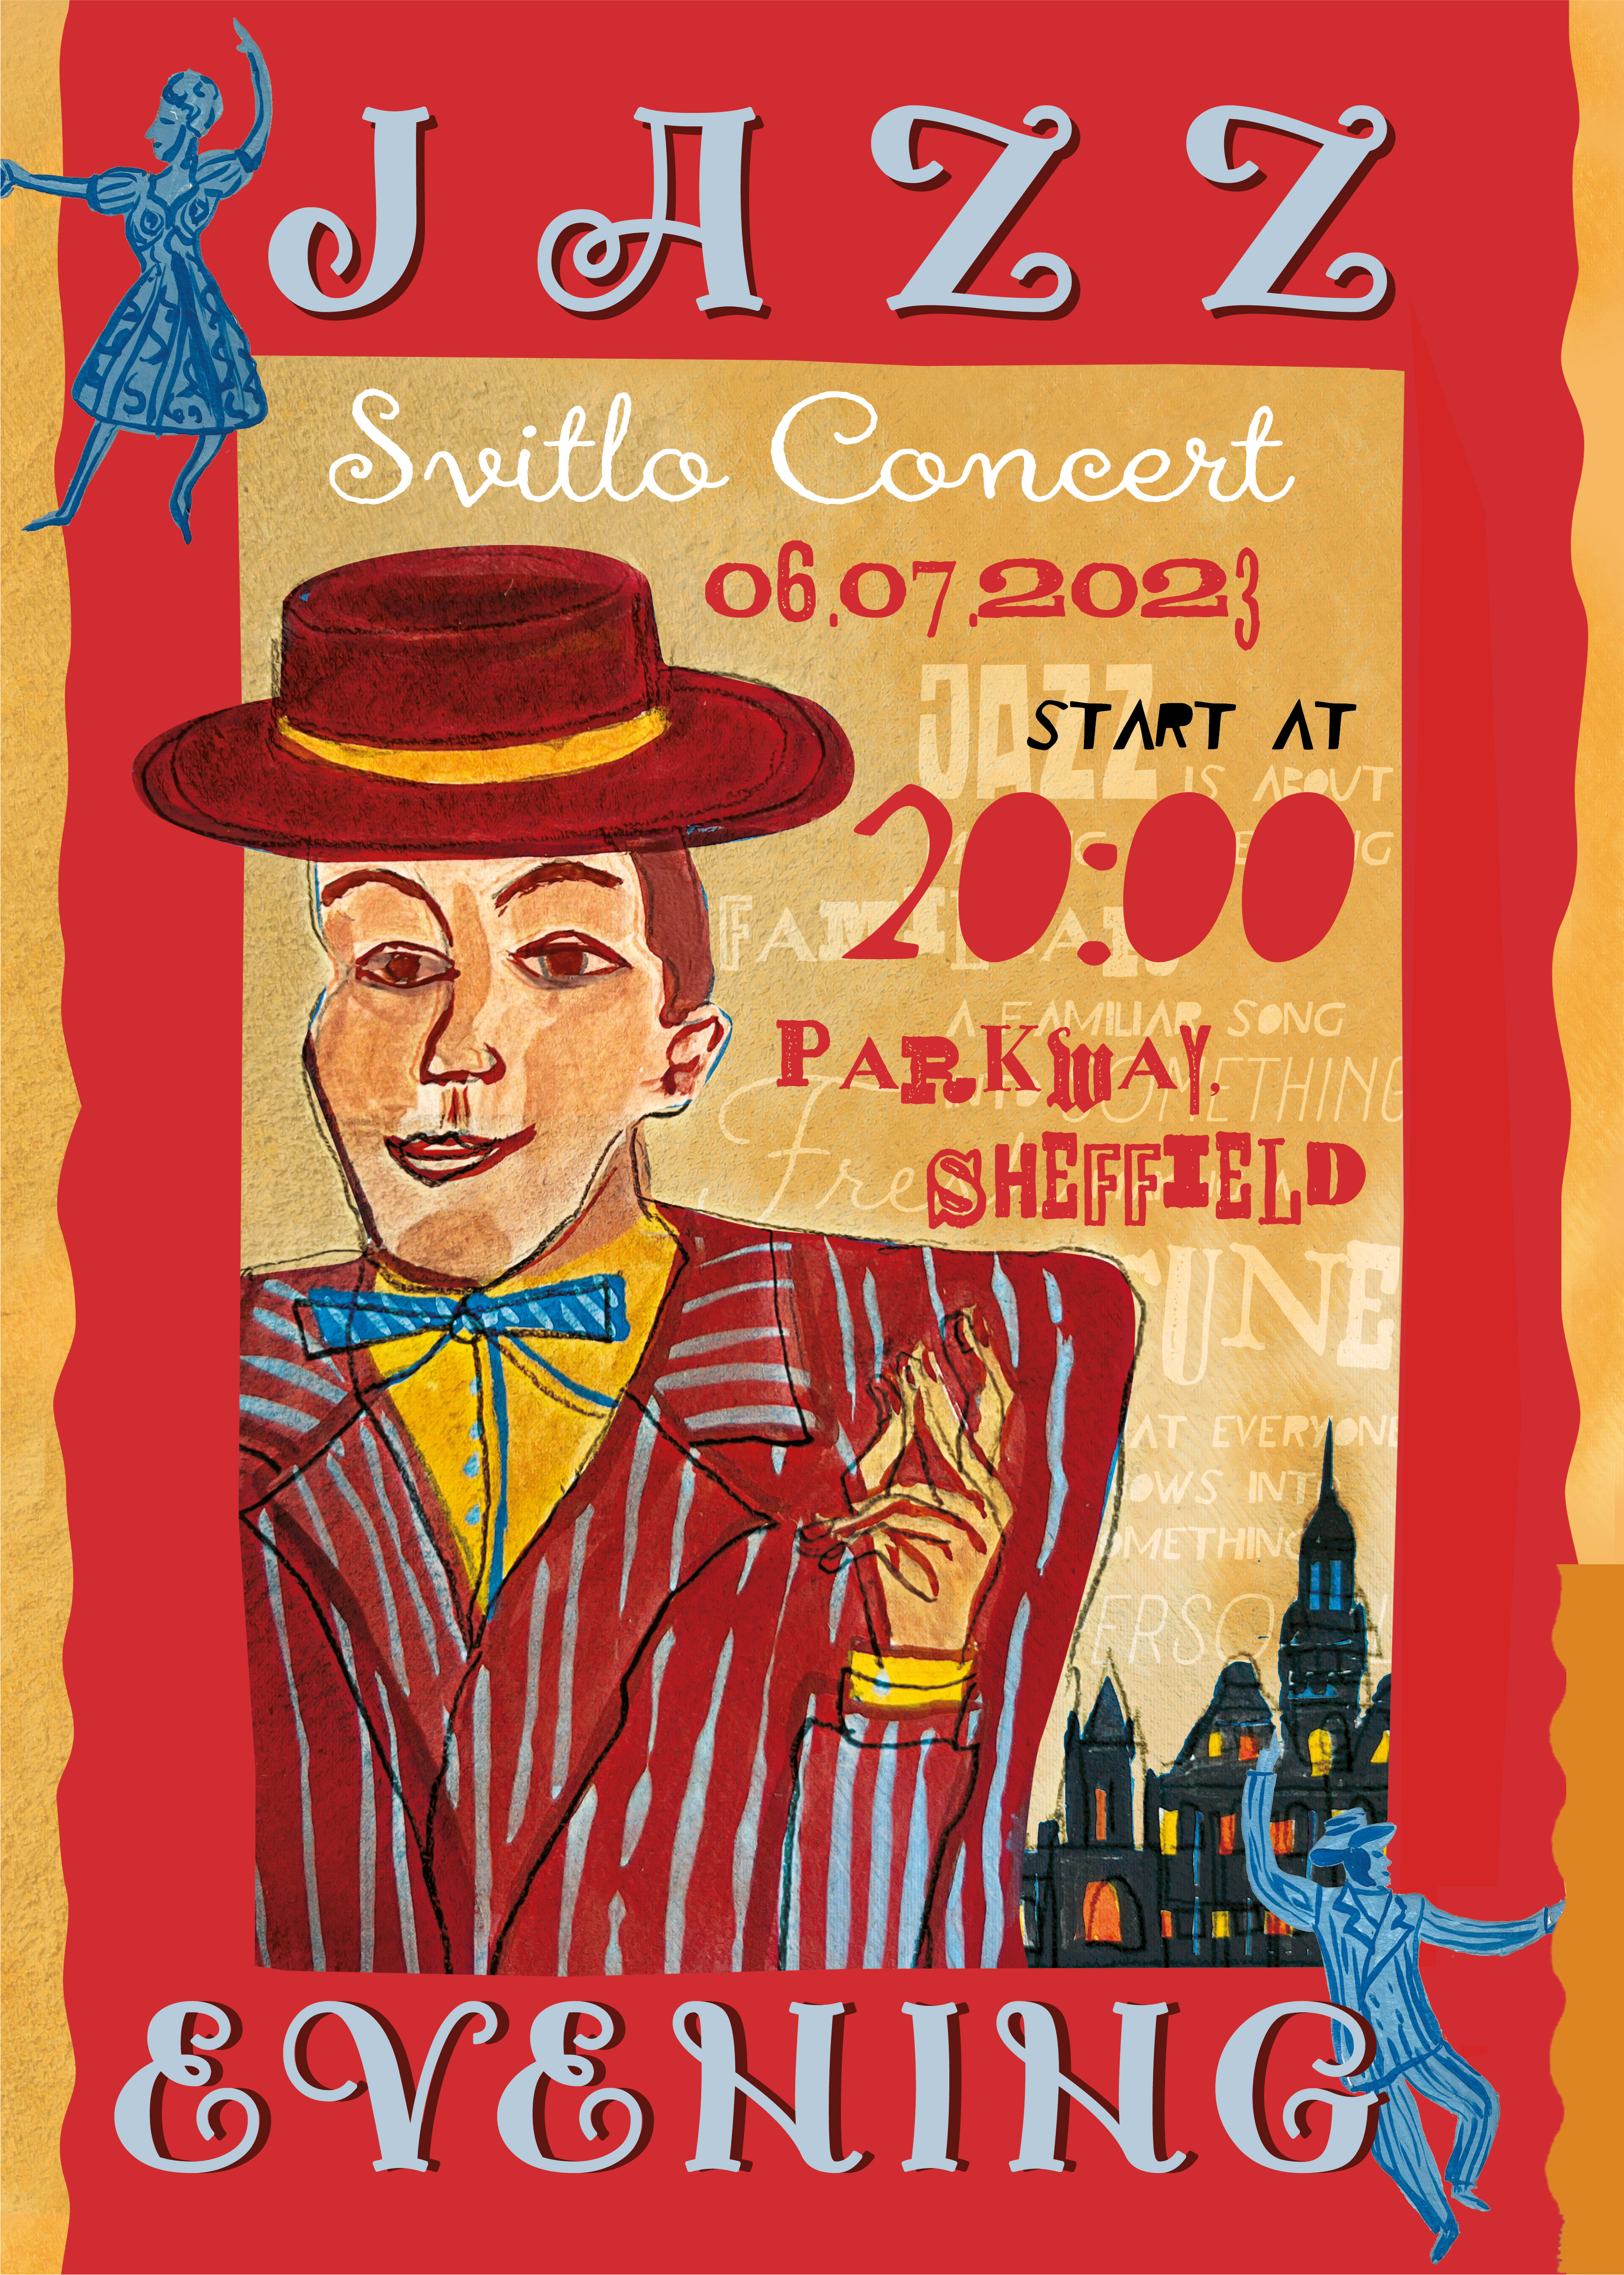
Jonny Hannah
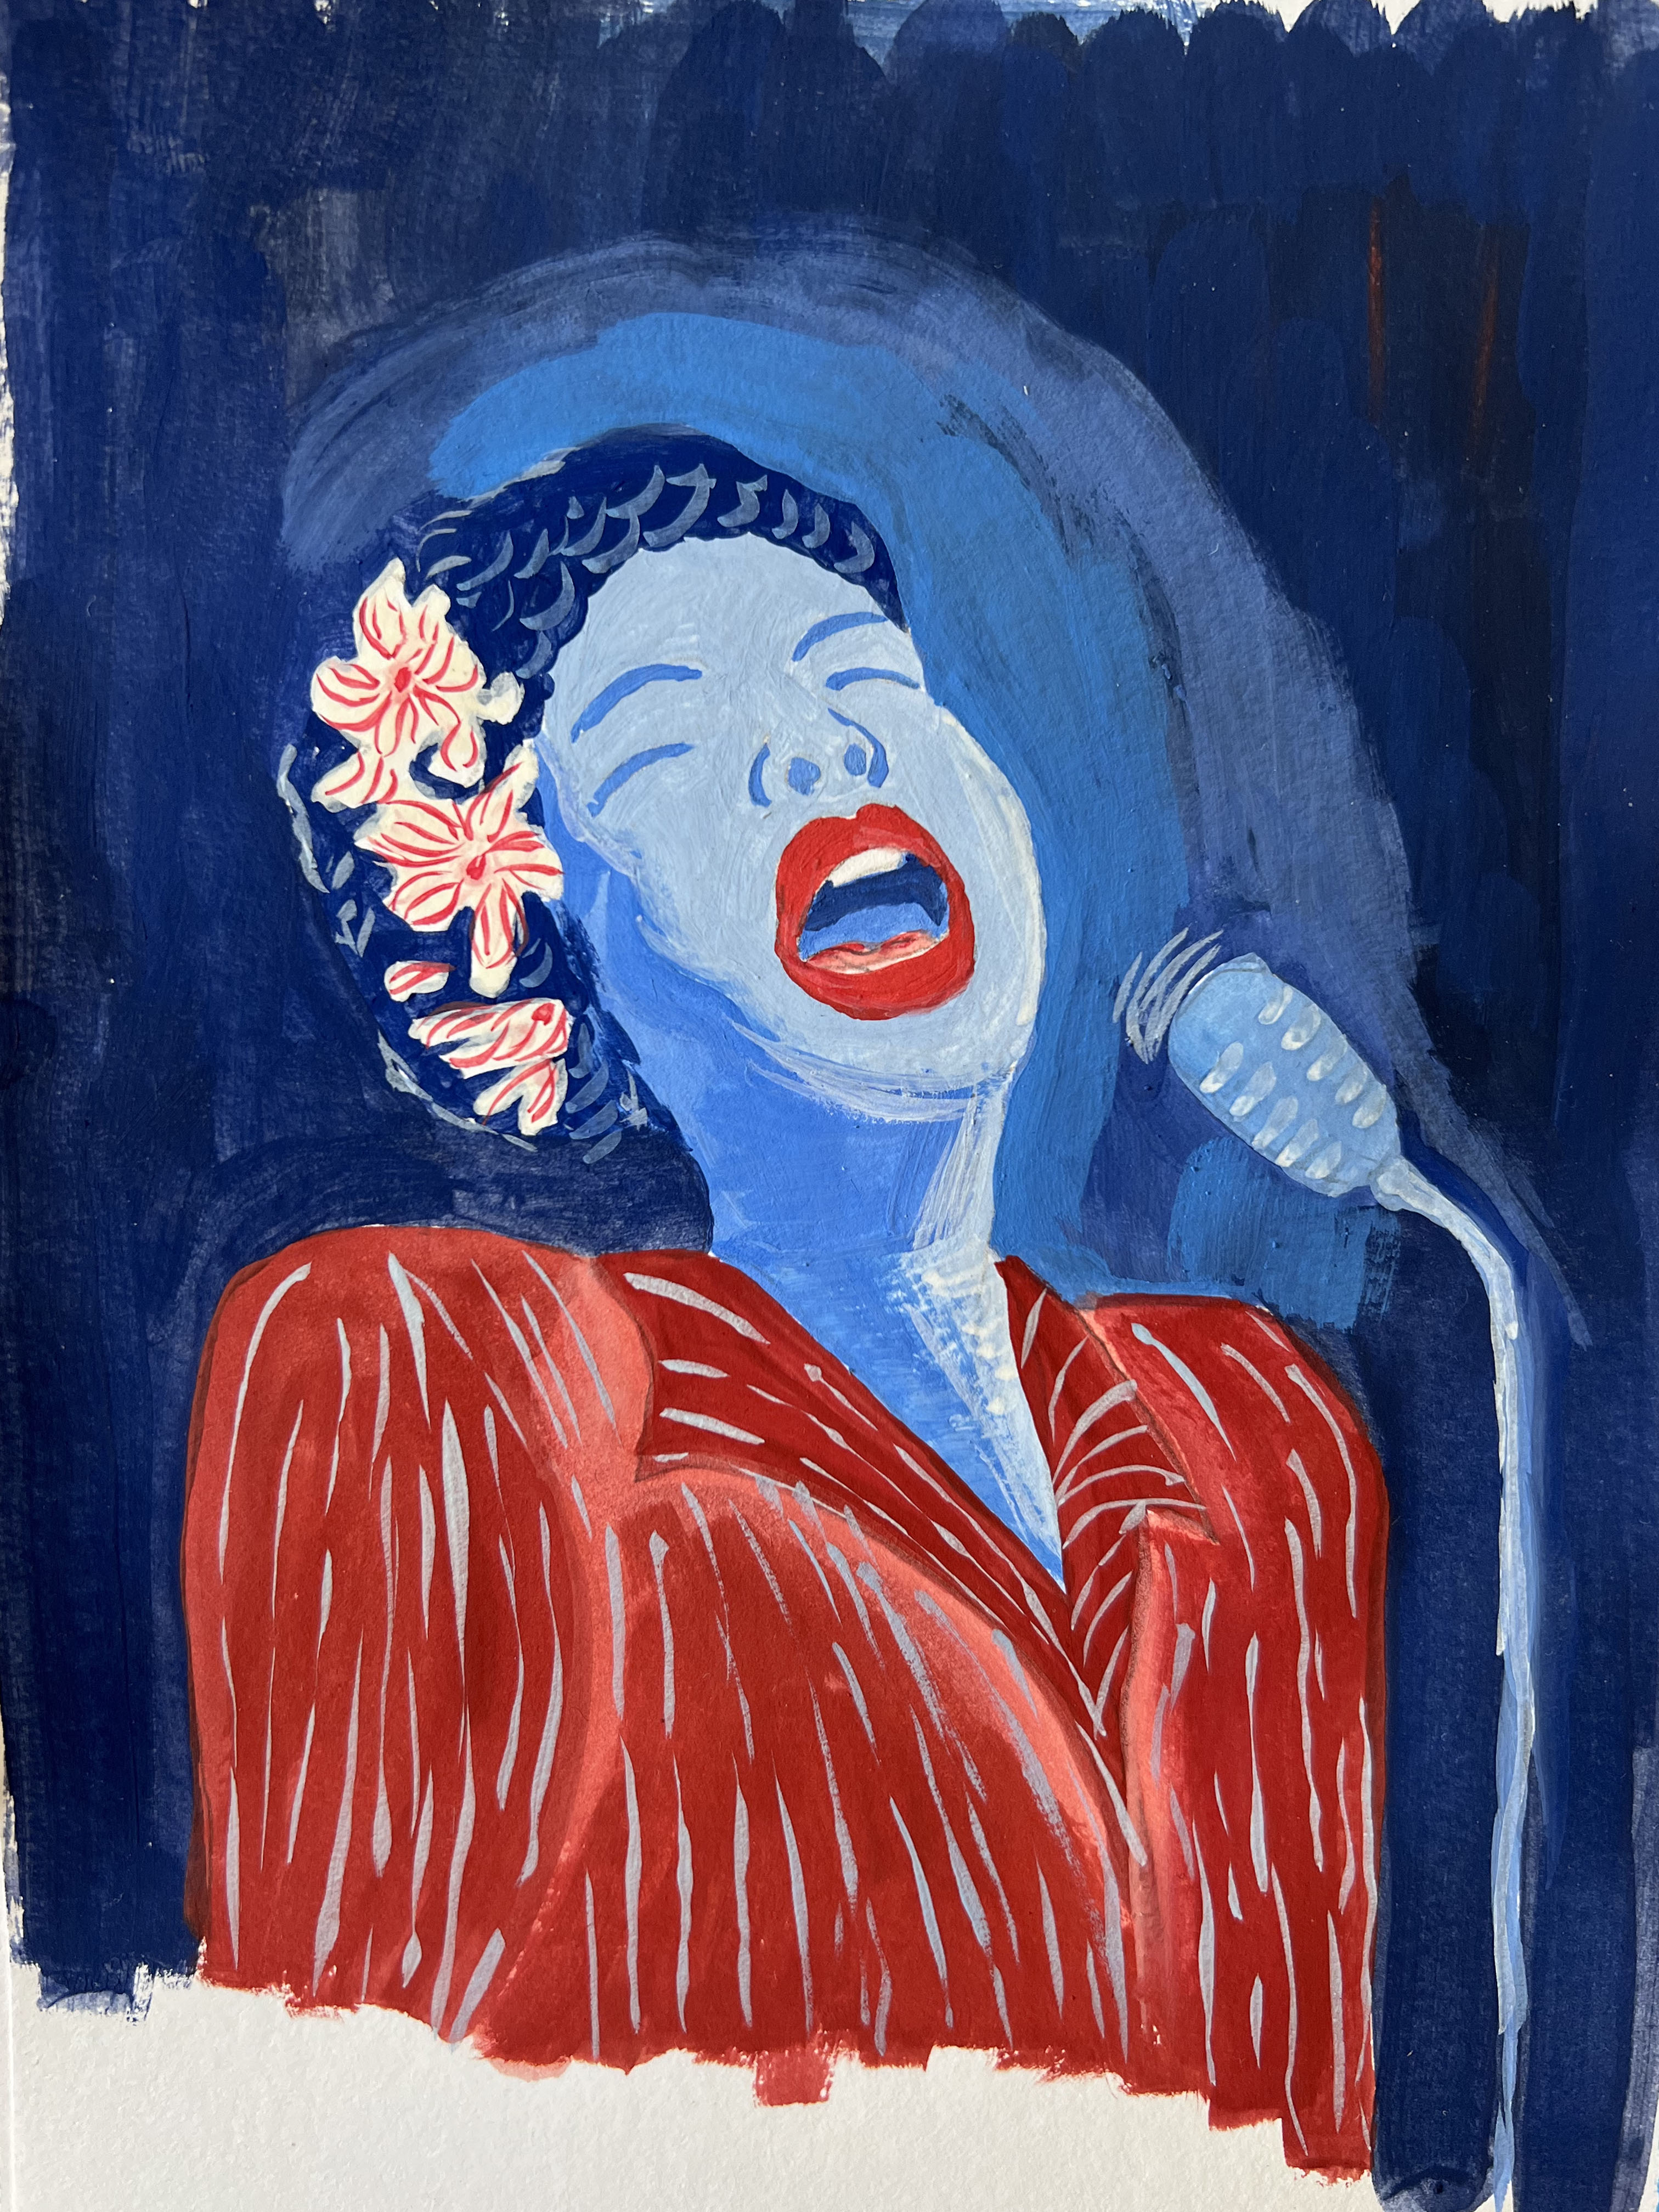
When I was thinking about the design of the jazz poster, one artist that came into my mind from the book ‘Type Tells Tales‘ – Jonny Hannah. He designed remarkable illustrations for the children’s book that evolved around the jazz era. They are vibrant, colourful, and filled with handwritten typography, so that is a perfect example of merging unique illustrations and distinctive writings. These images are emotional, filled with energy and dynamic, which all contribute to the main source of my inspiration.
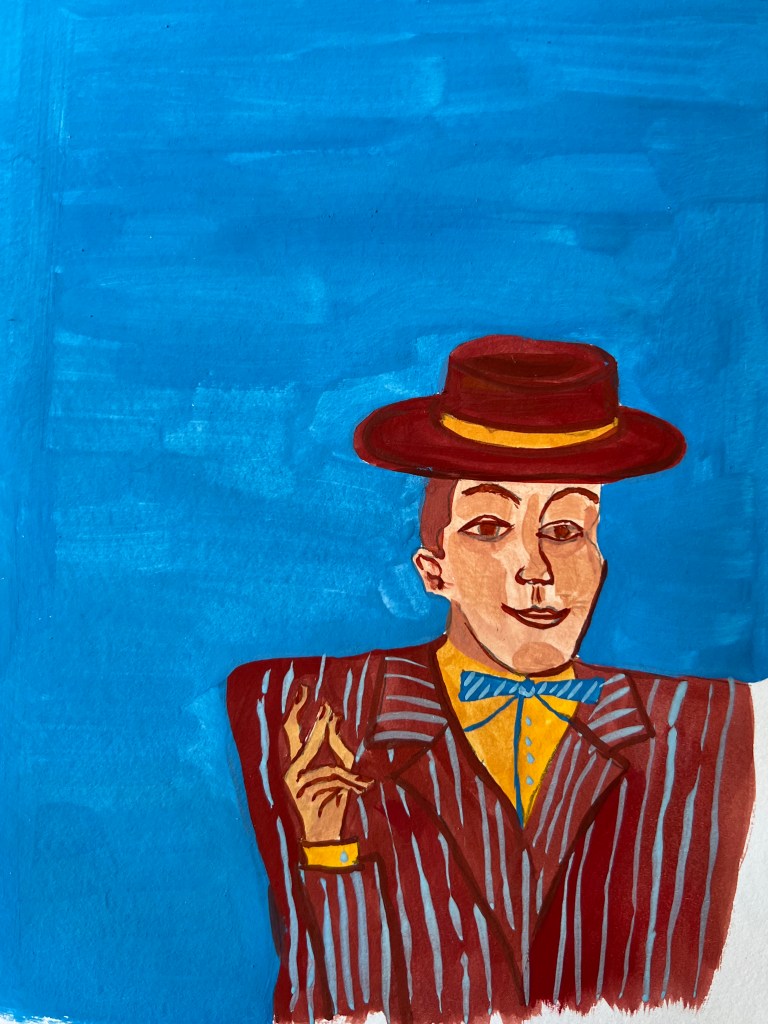
Brief story shortly, Jonny Hannah wrote and illustrated a children’s book Hot Jazz Special, published by Walker Books and the Candlewick Press. The narrative is written in rhyming couplets and centres around the young protagonist Henryat the Body & Soul Cafe where he encounters the performances of jazz legends such as Benny Goodman, Billie Holiday, Charlie Parker and Duke Ellington. Jonny chose all of his jazz heroes, one for each instrument, then put them all together as an illustrated snapshot of history. He was inspired by the clothes of the jazz era, from zoot suits to knitted ties. I loved how artists joined illustrations together with various fonts. That font variation and colourful images made posters stand out, which is the principle I could use for the poster design.
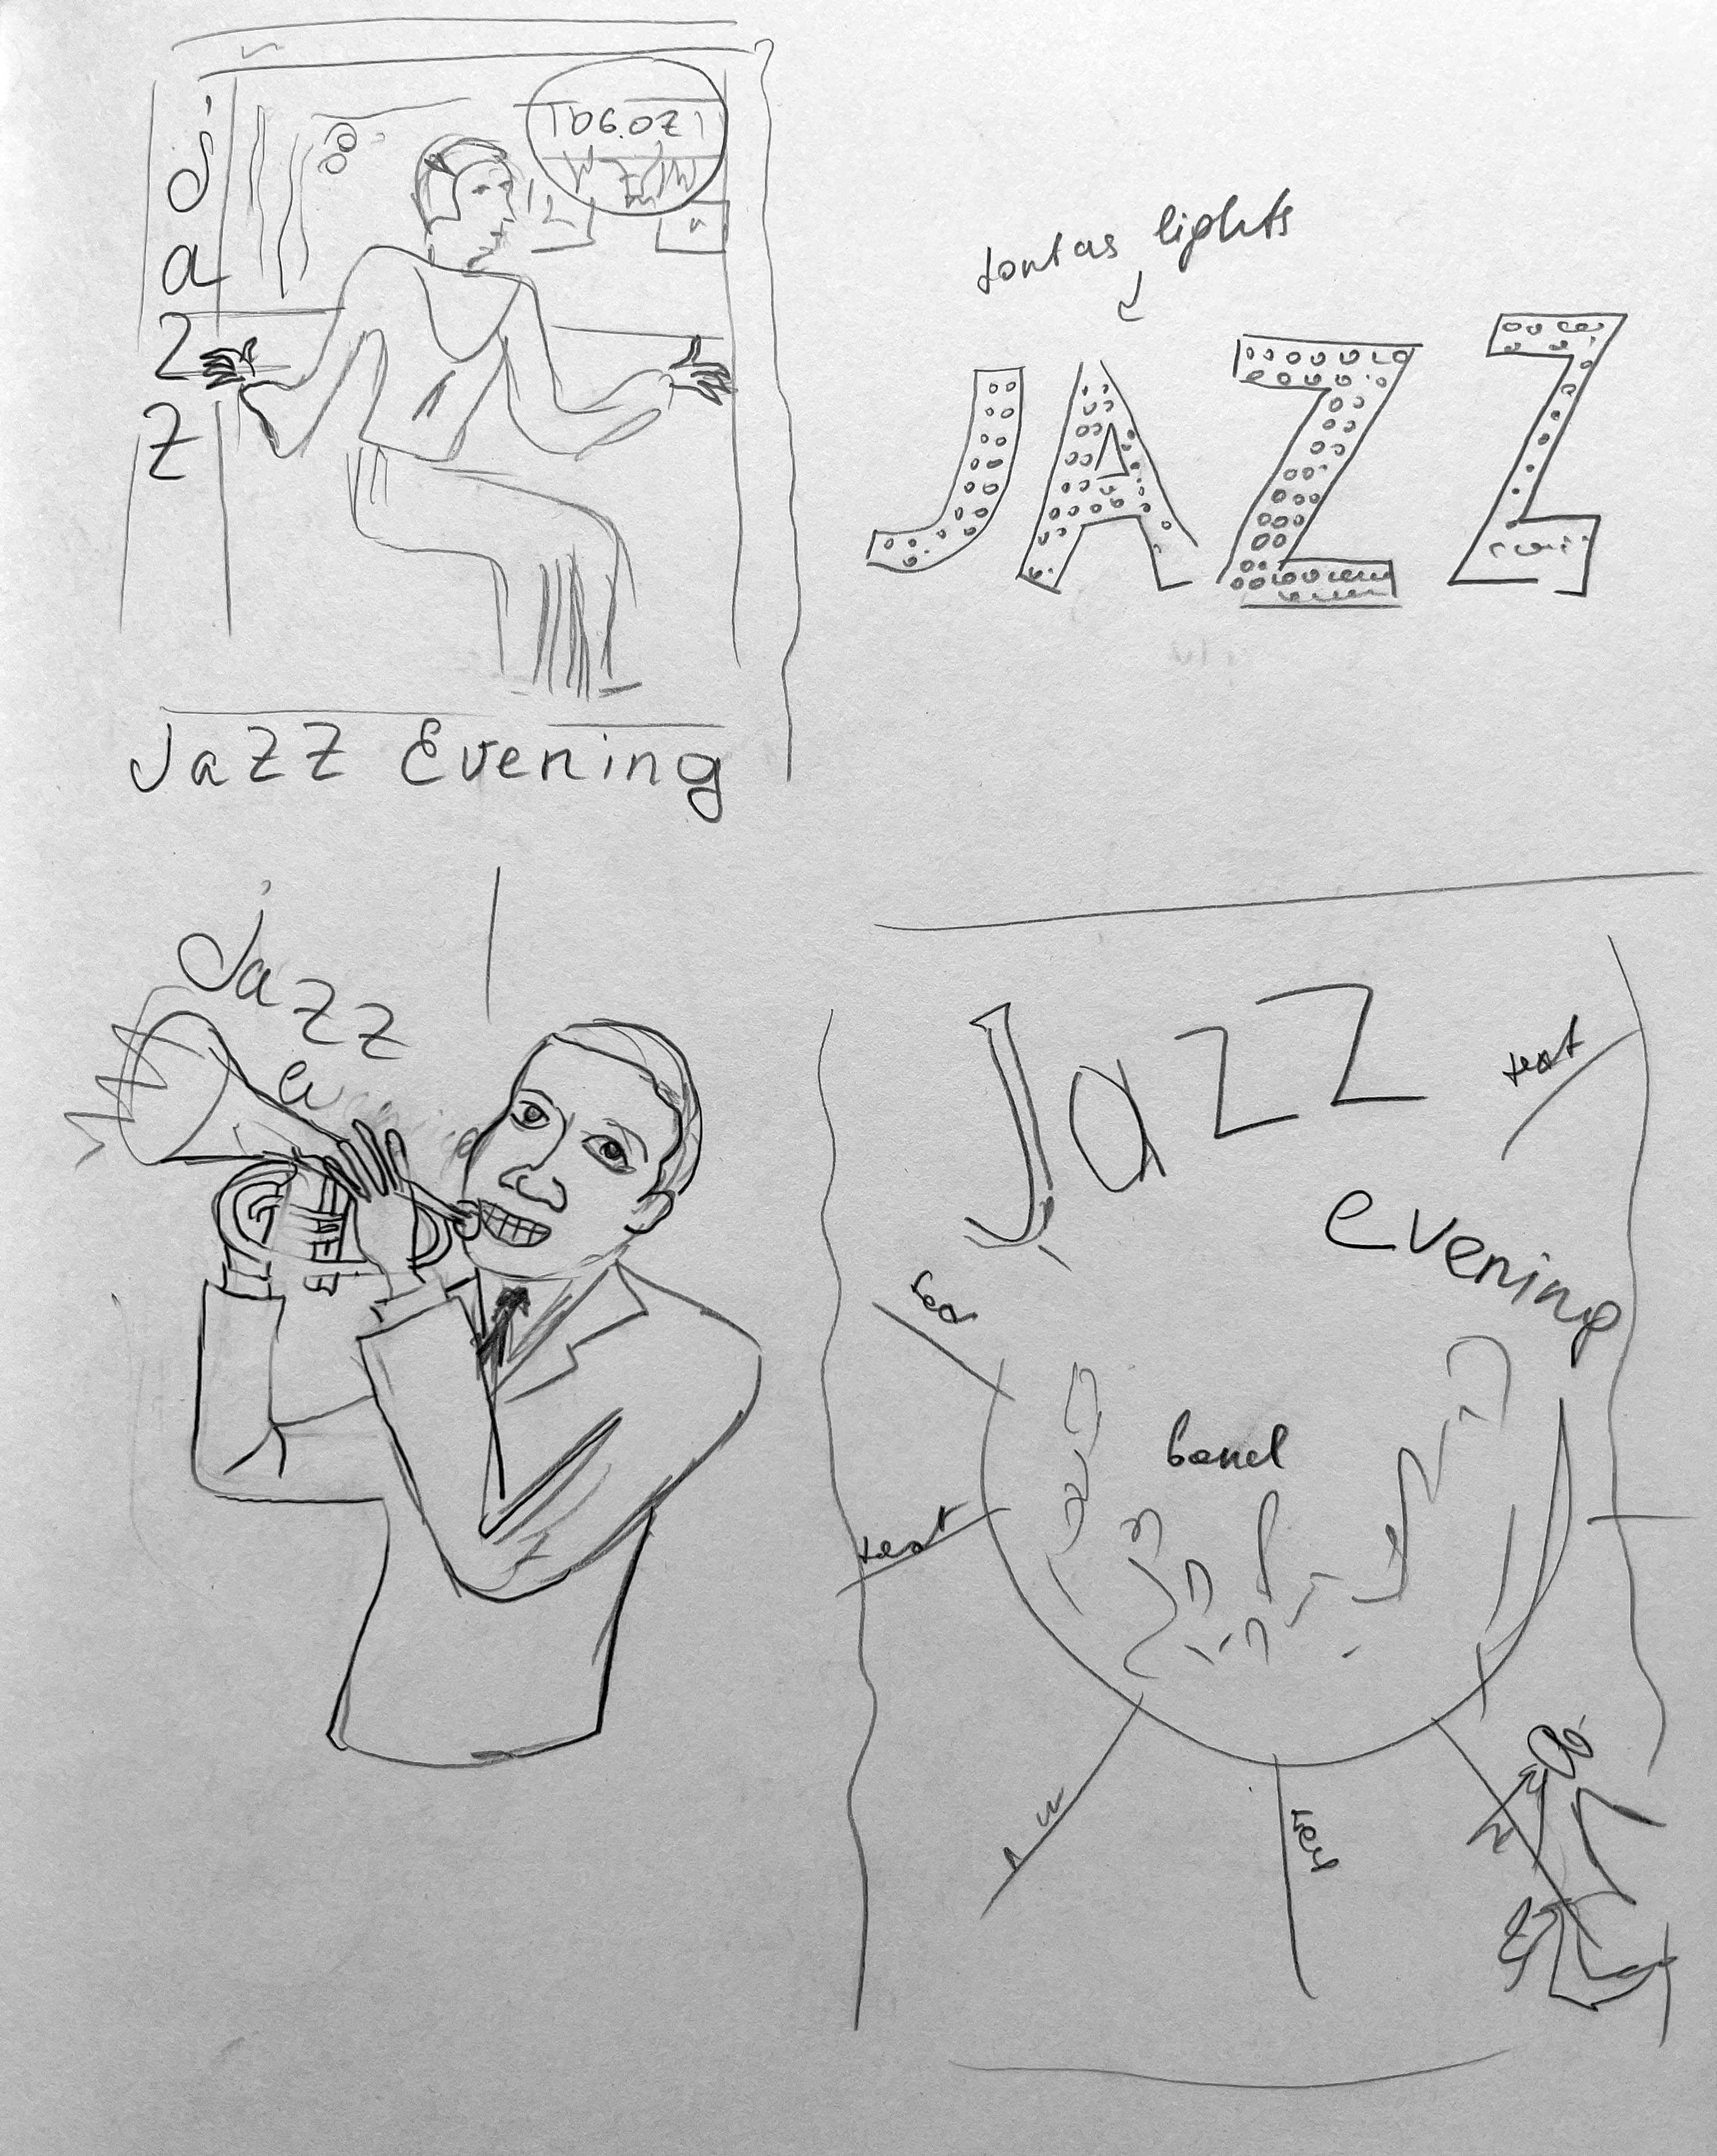
Sketches
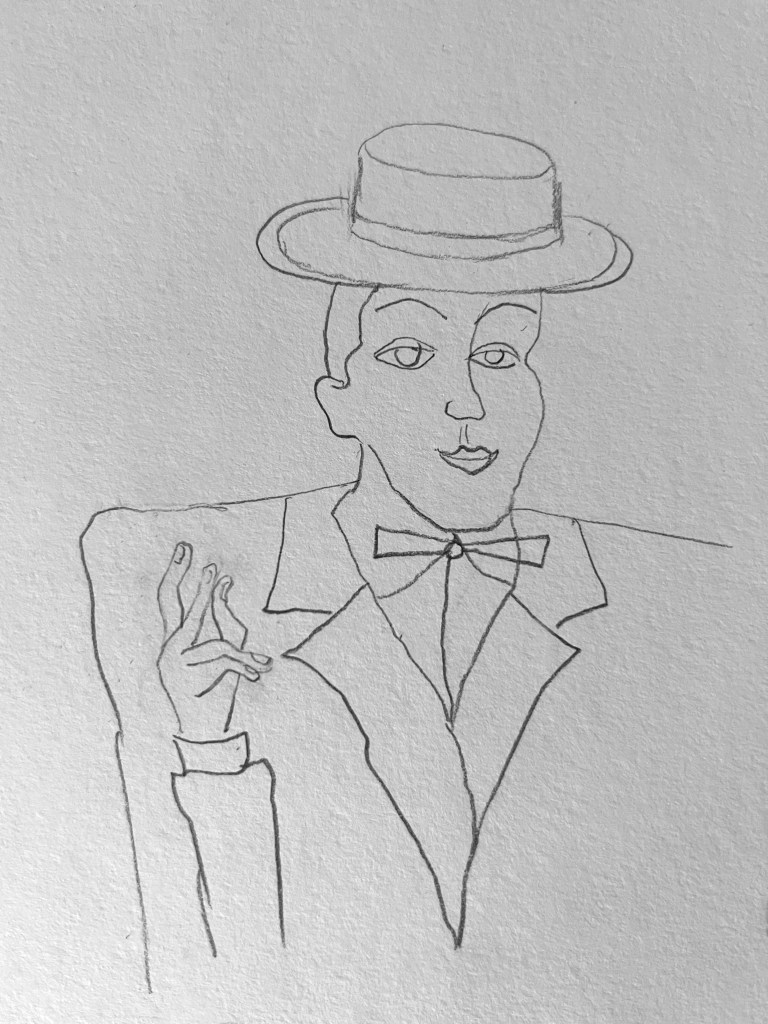
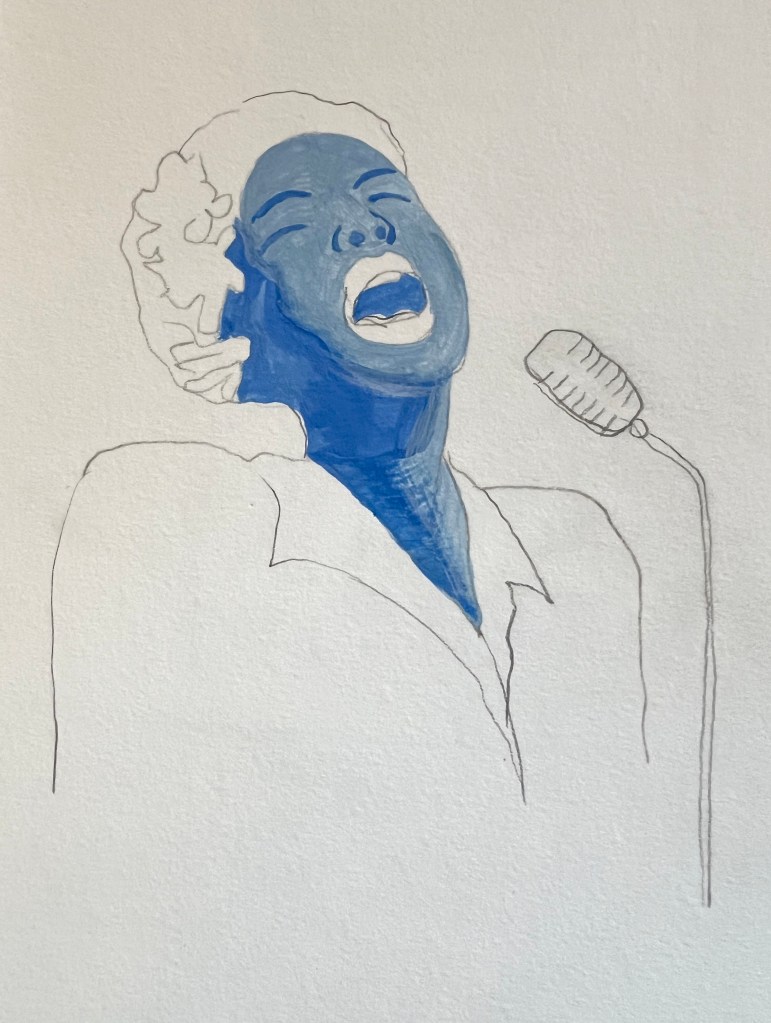
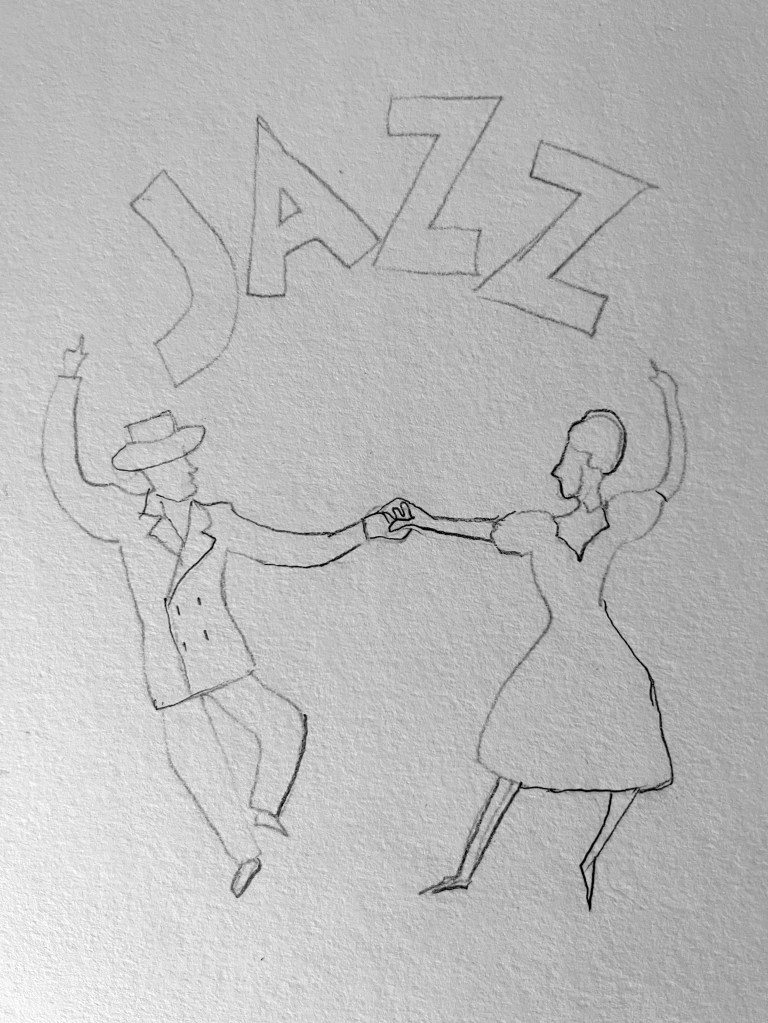
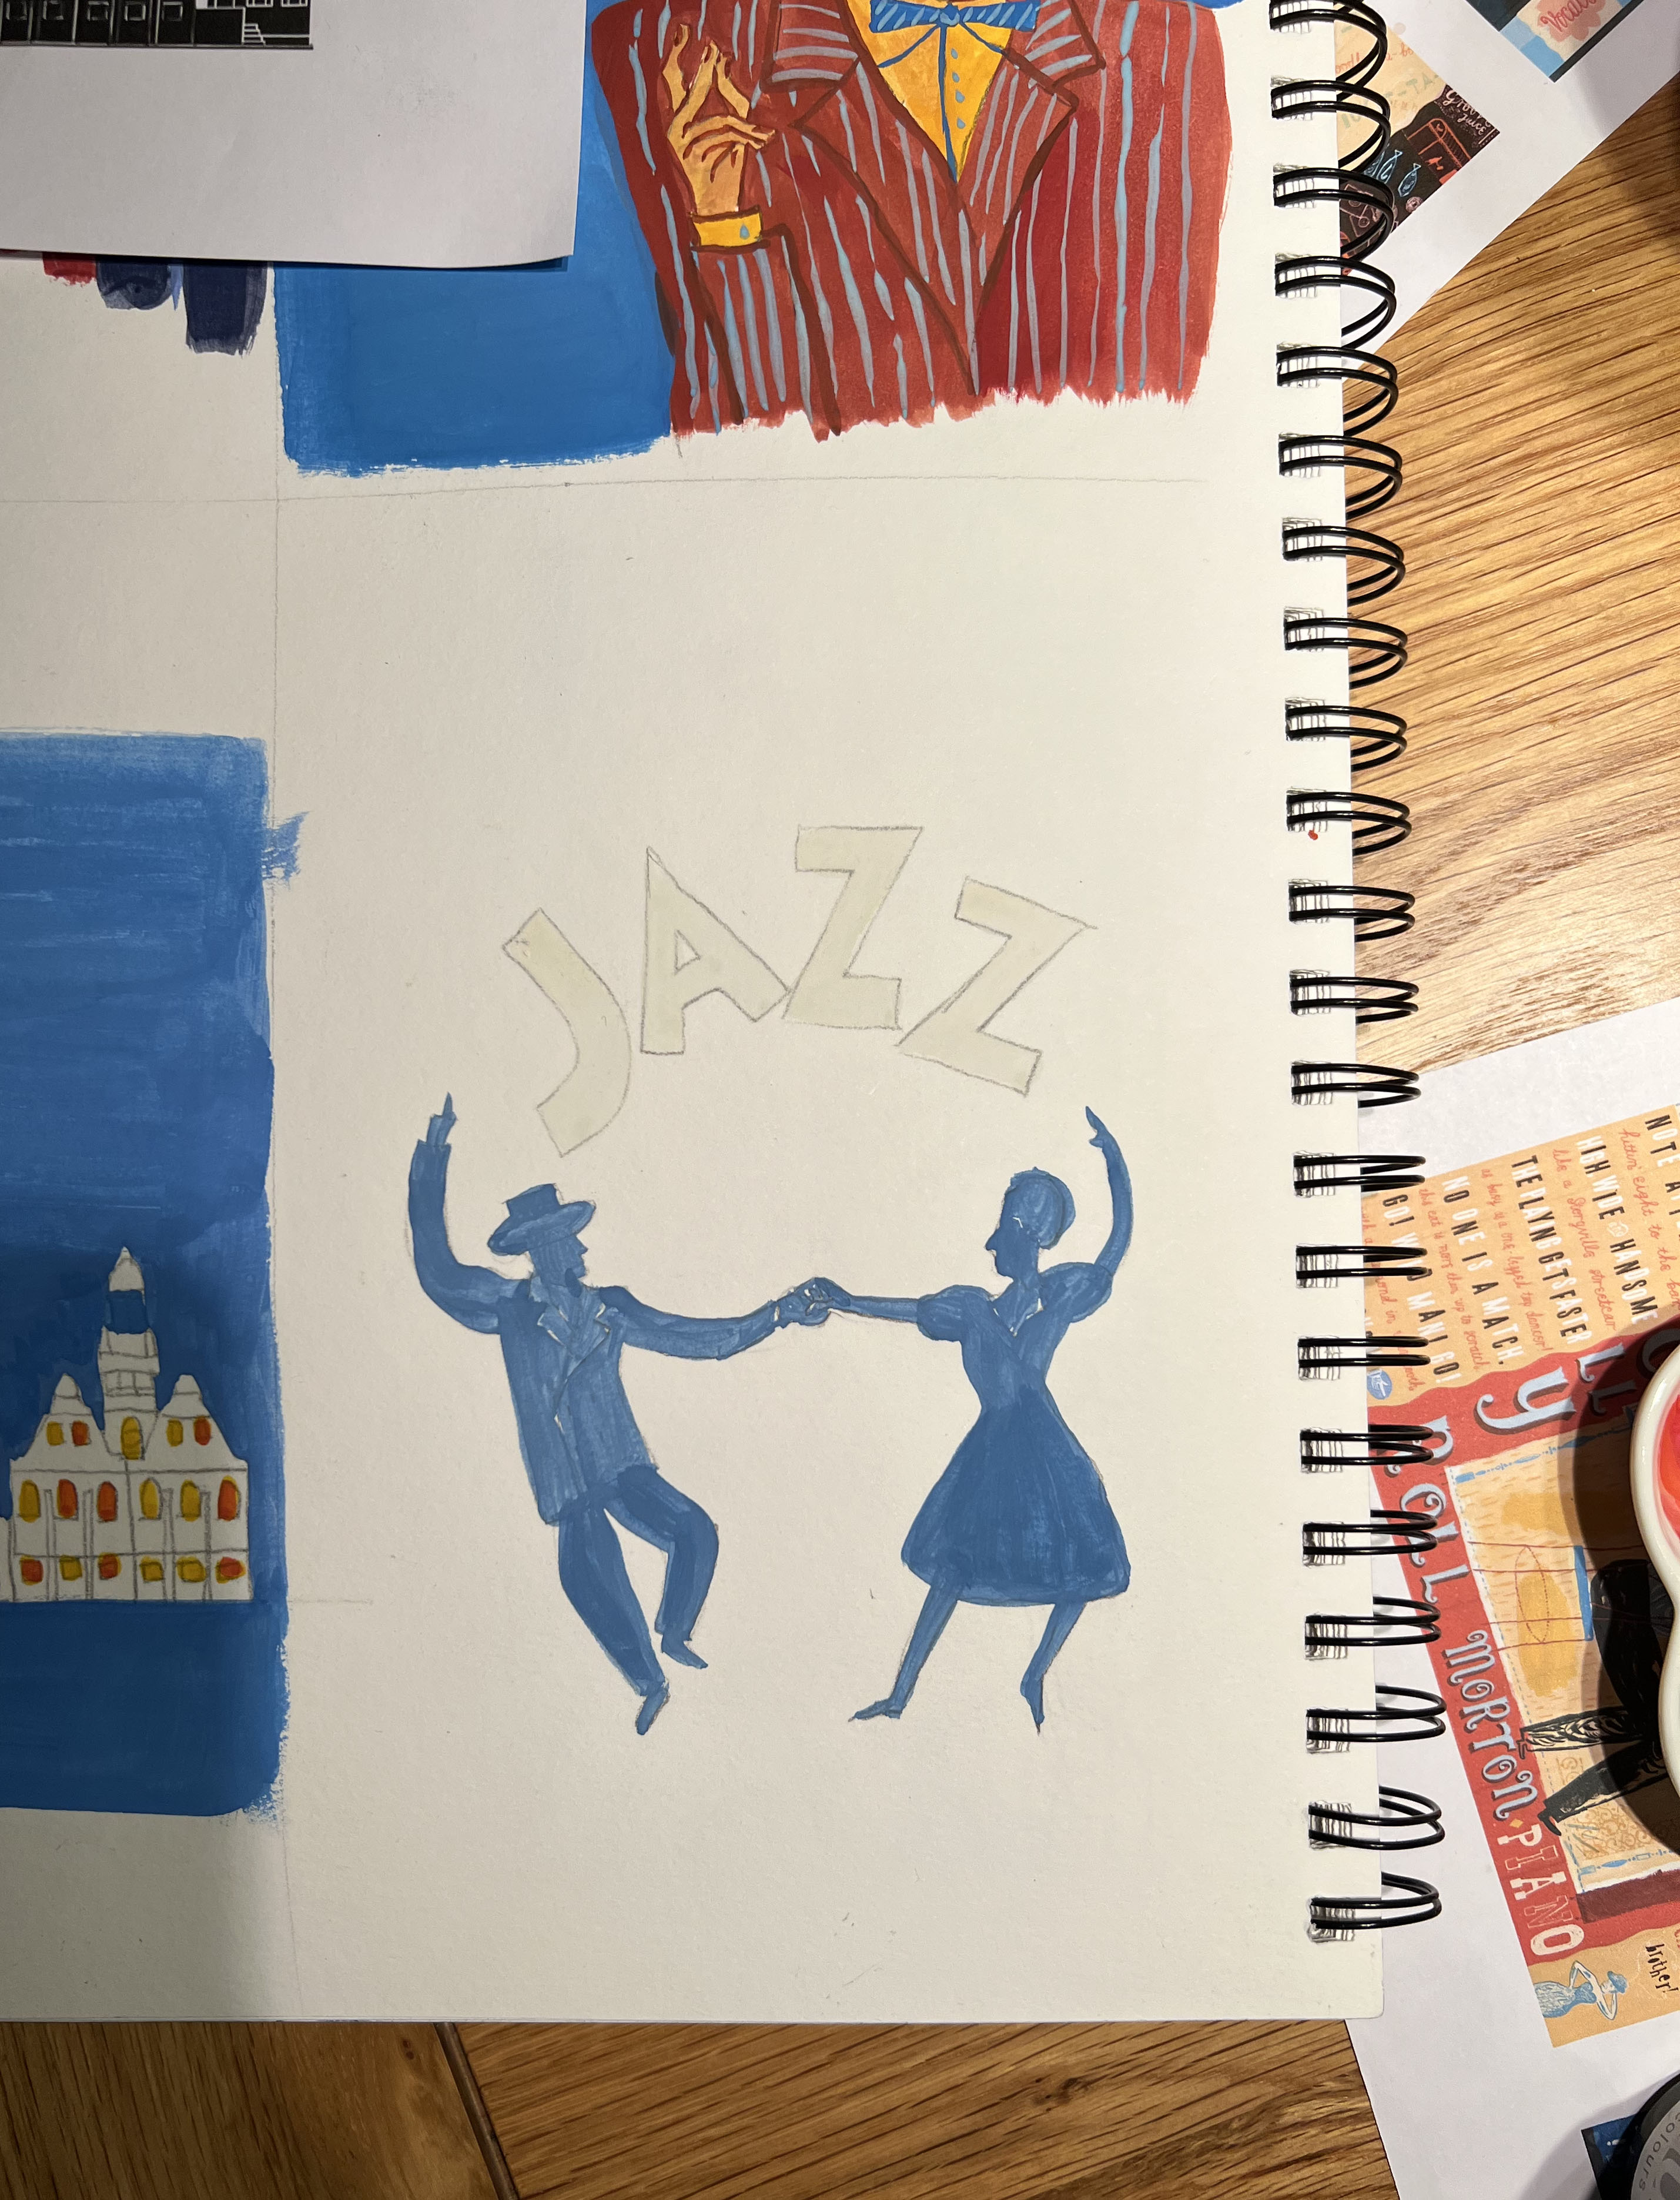
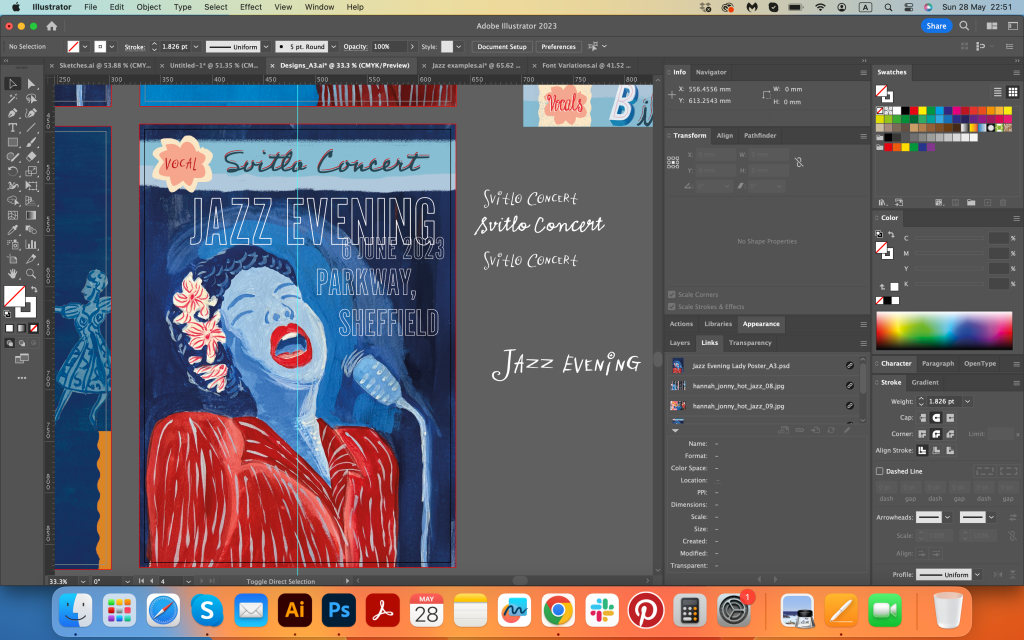
I made a quick sketch for the future posters, whilst I still remembered all ideas. My main thoughts were to make an illustration of the musician, playing such instruments as piano, trumpet, double bass, or guitar. As an alternative, I was going to use also singing artist, or dancing couple. I was planning to make the composition dynamic, so the poster would be practically all singing and dancing to the audience. Also, I thought would be great to create my own designed font, or at least go for the unique one. Sketches are below.
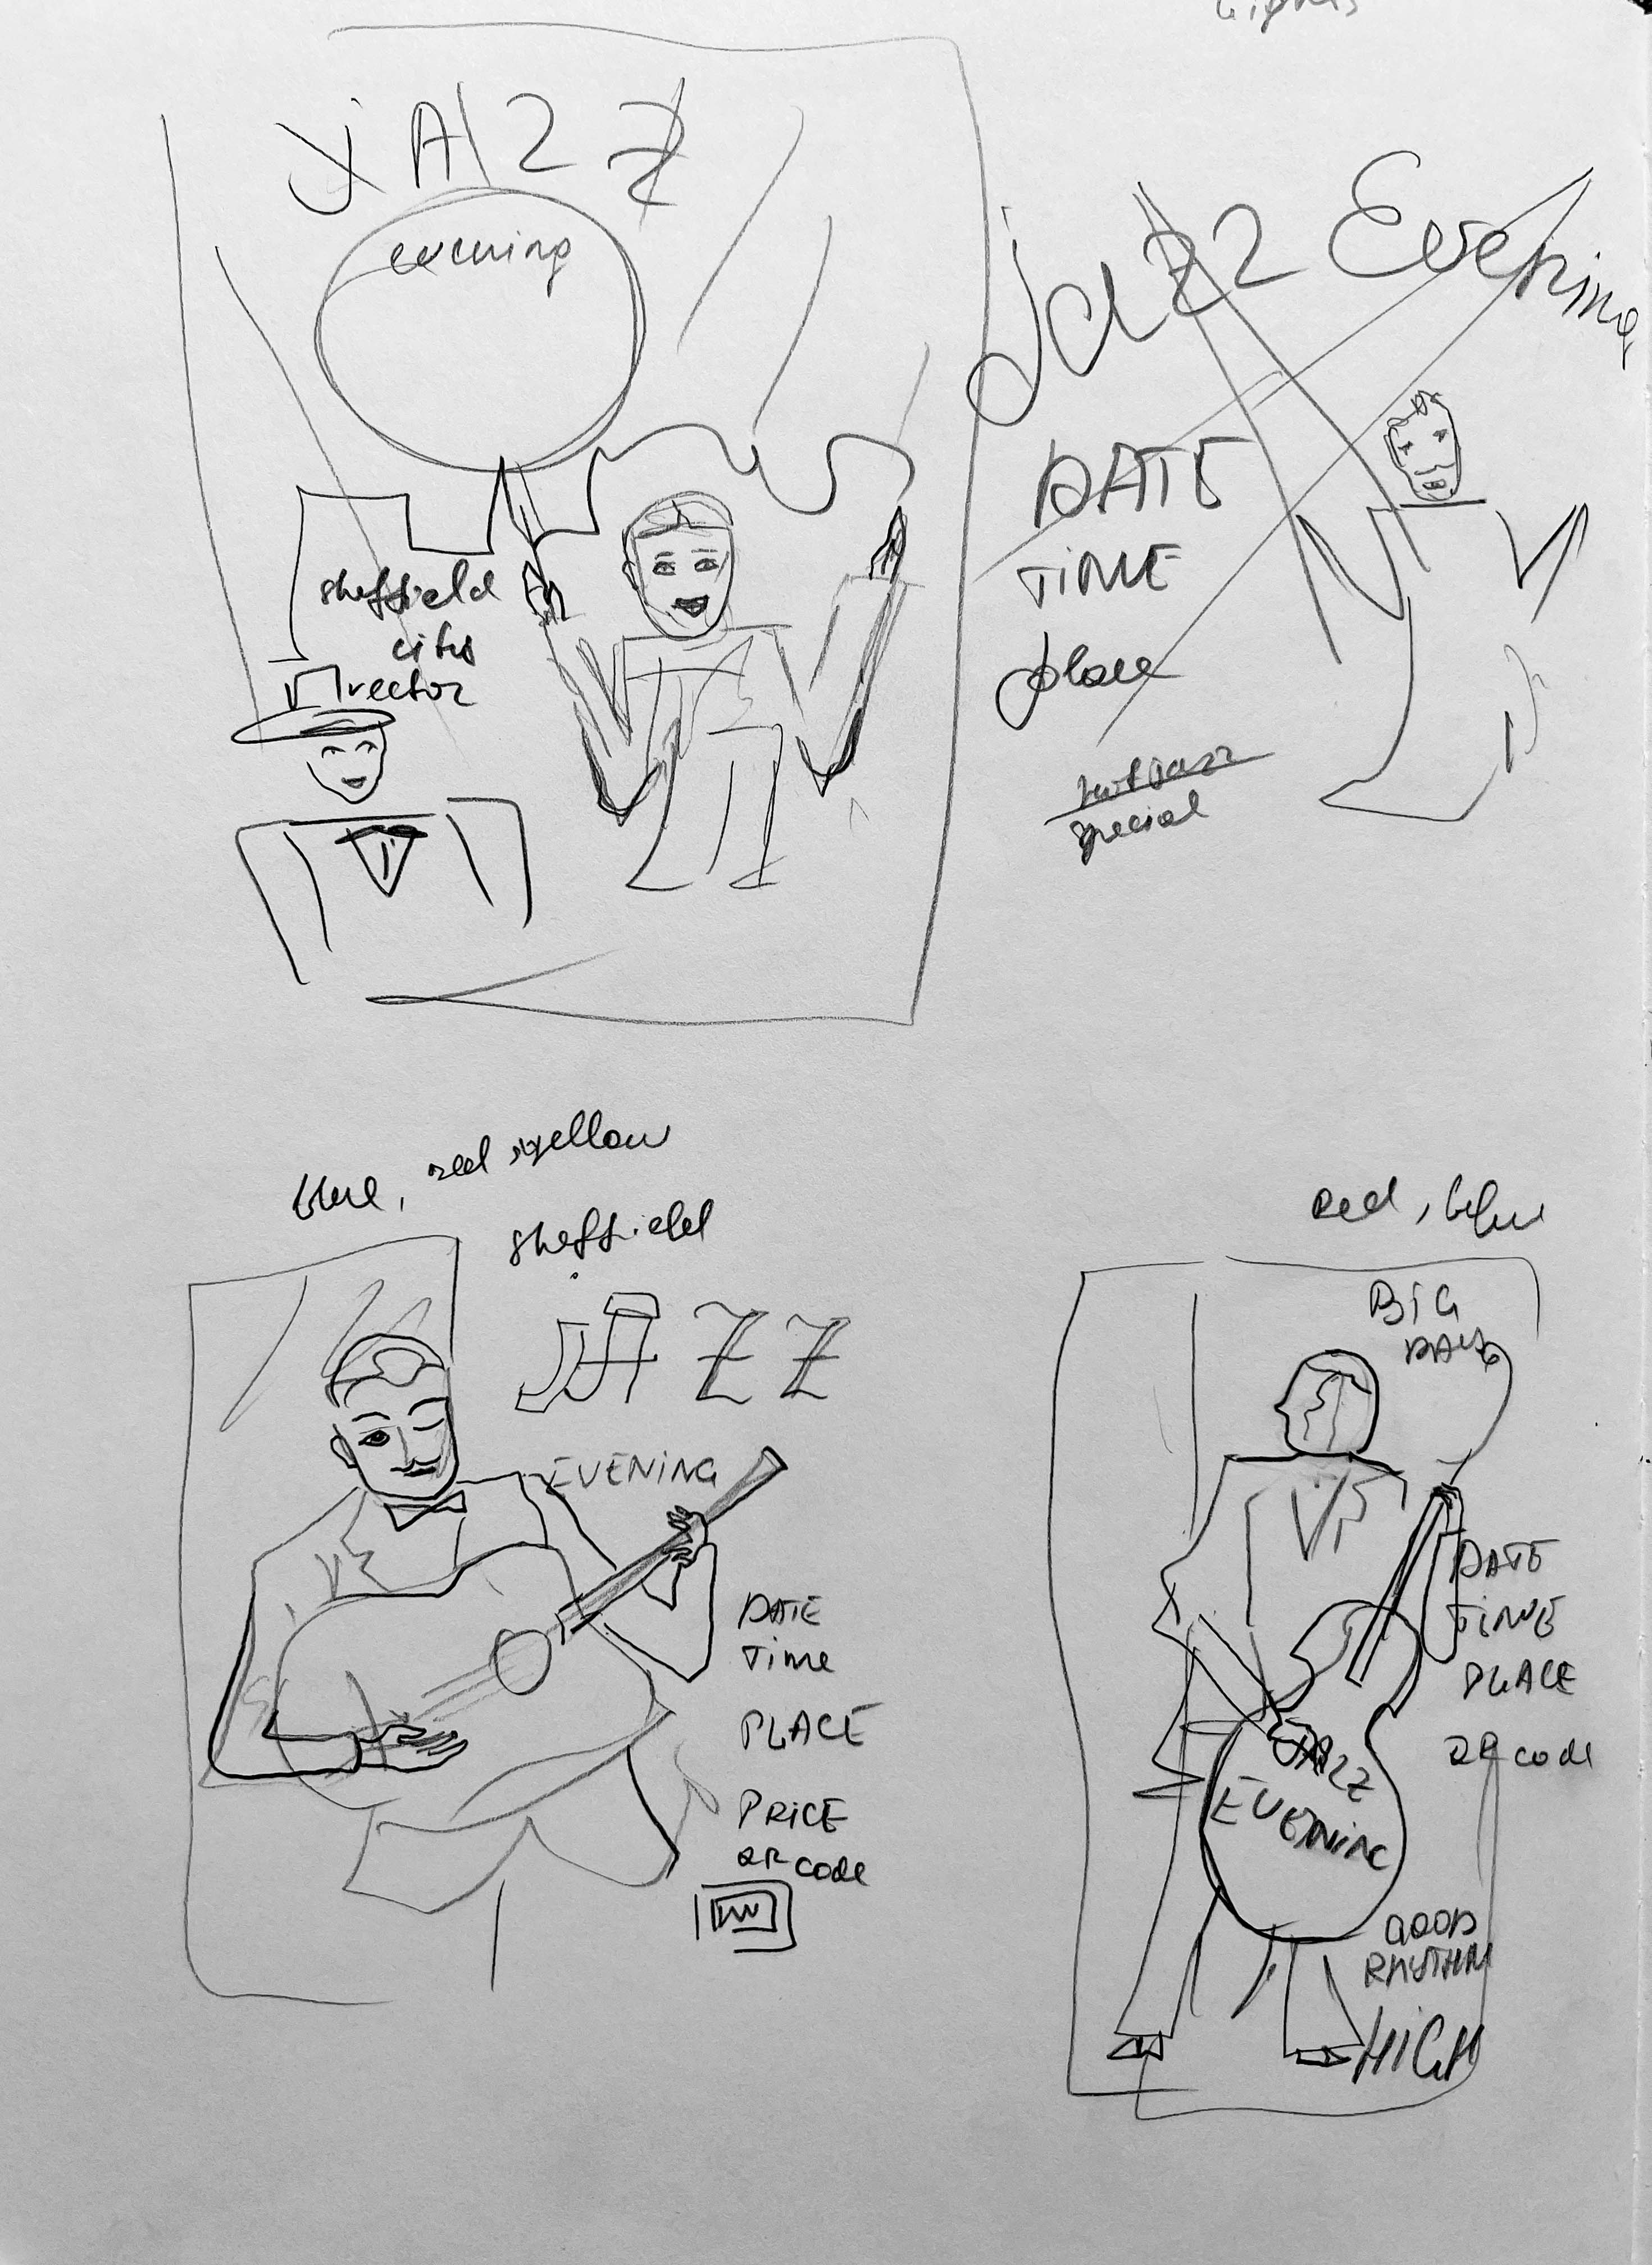
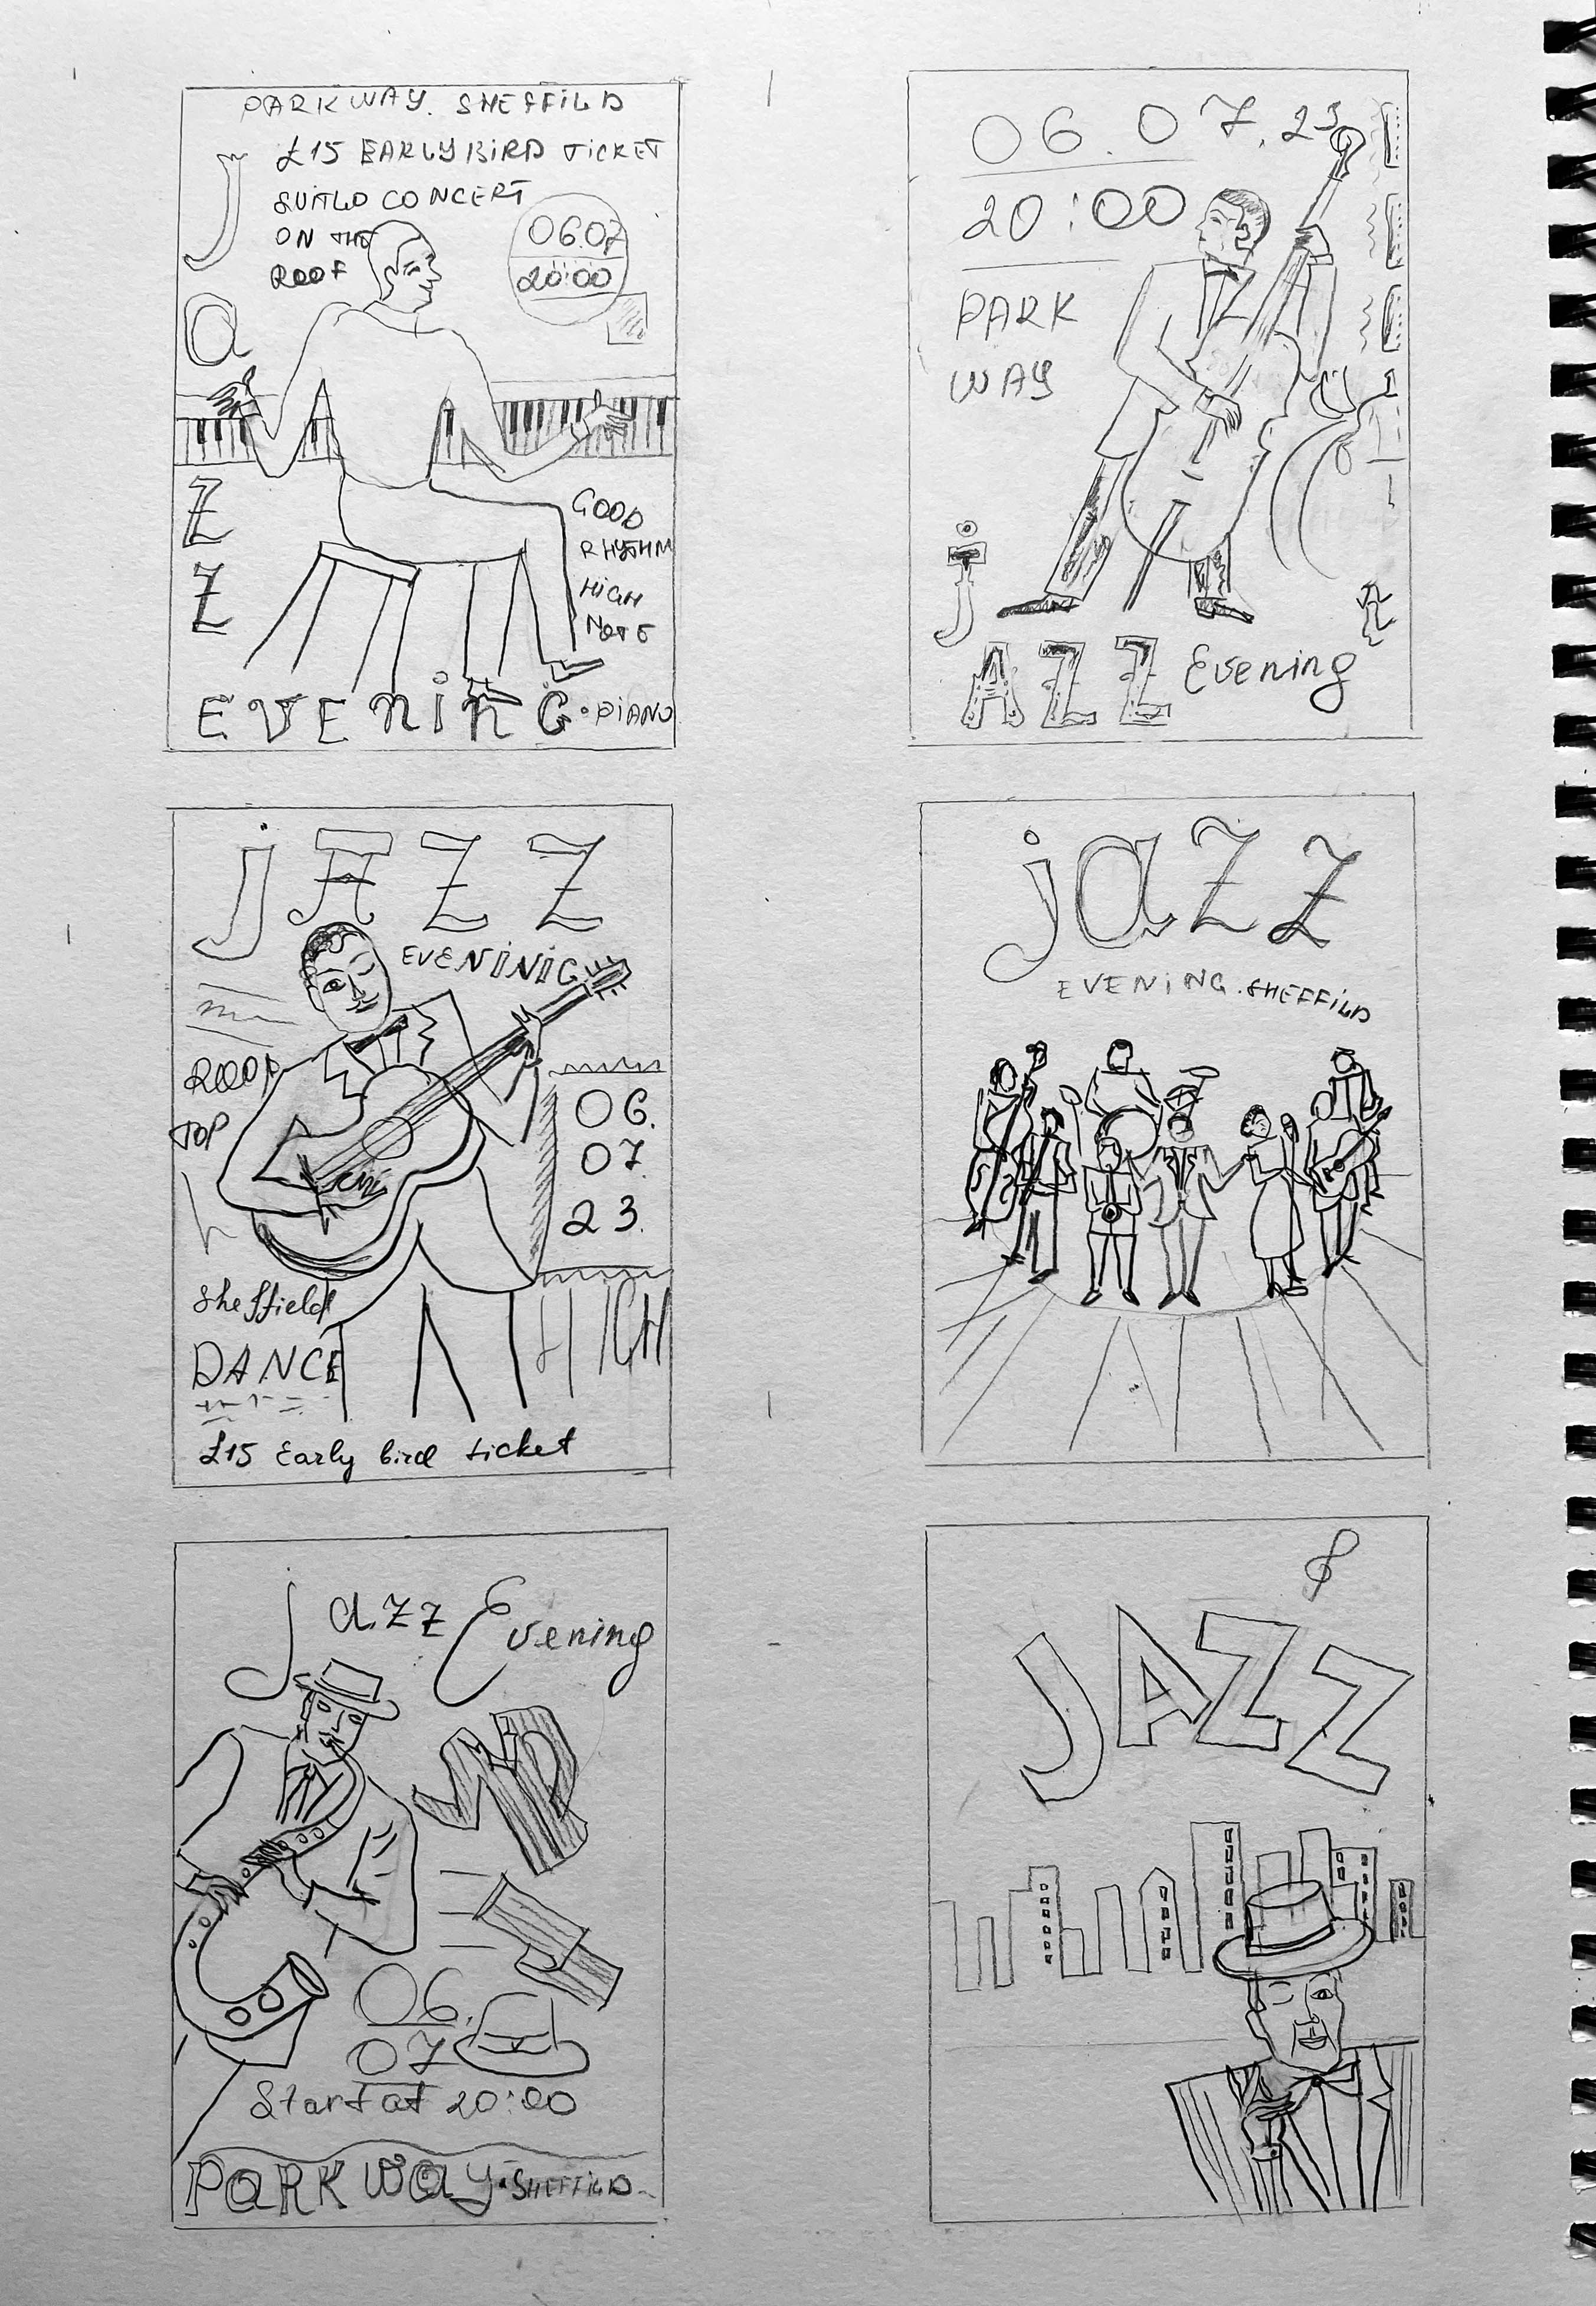
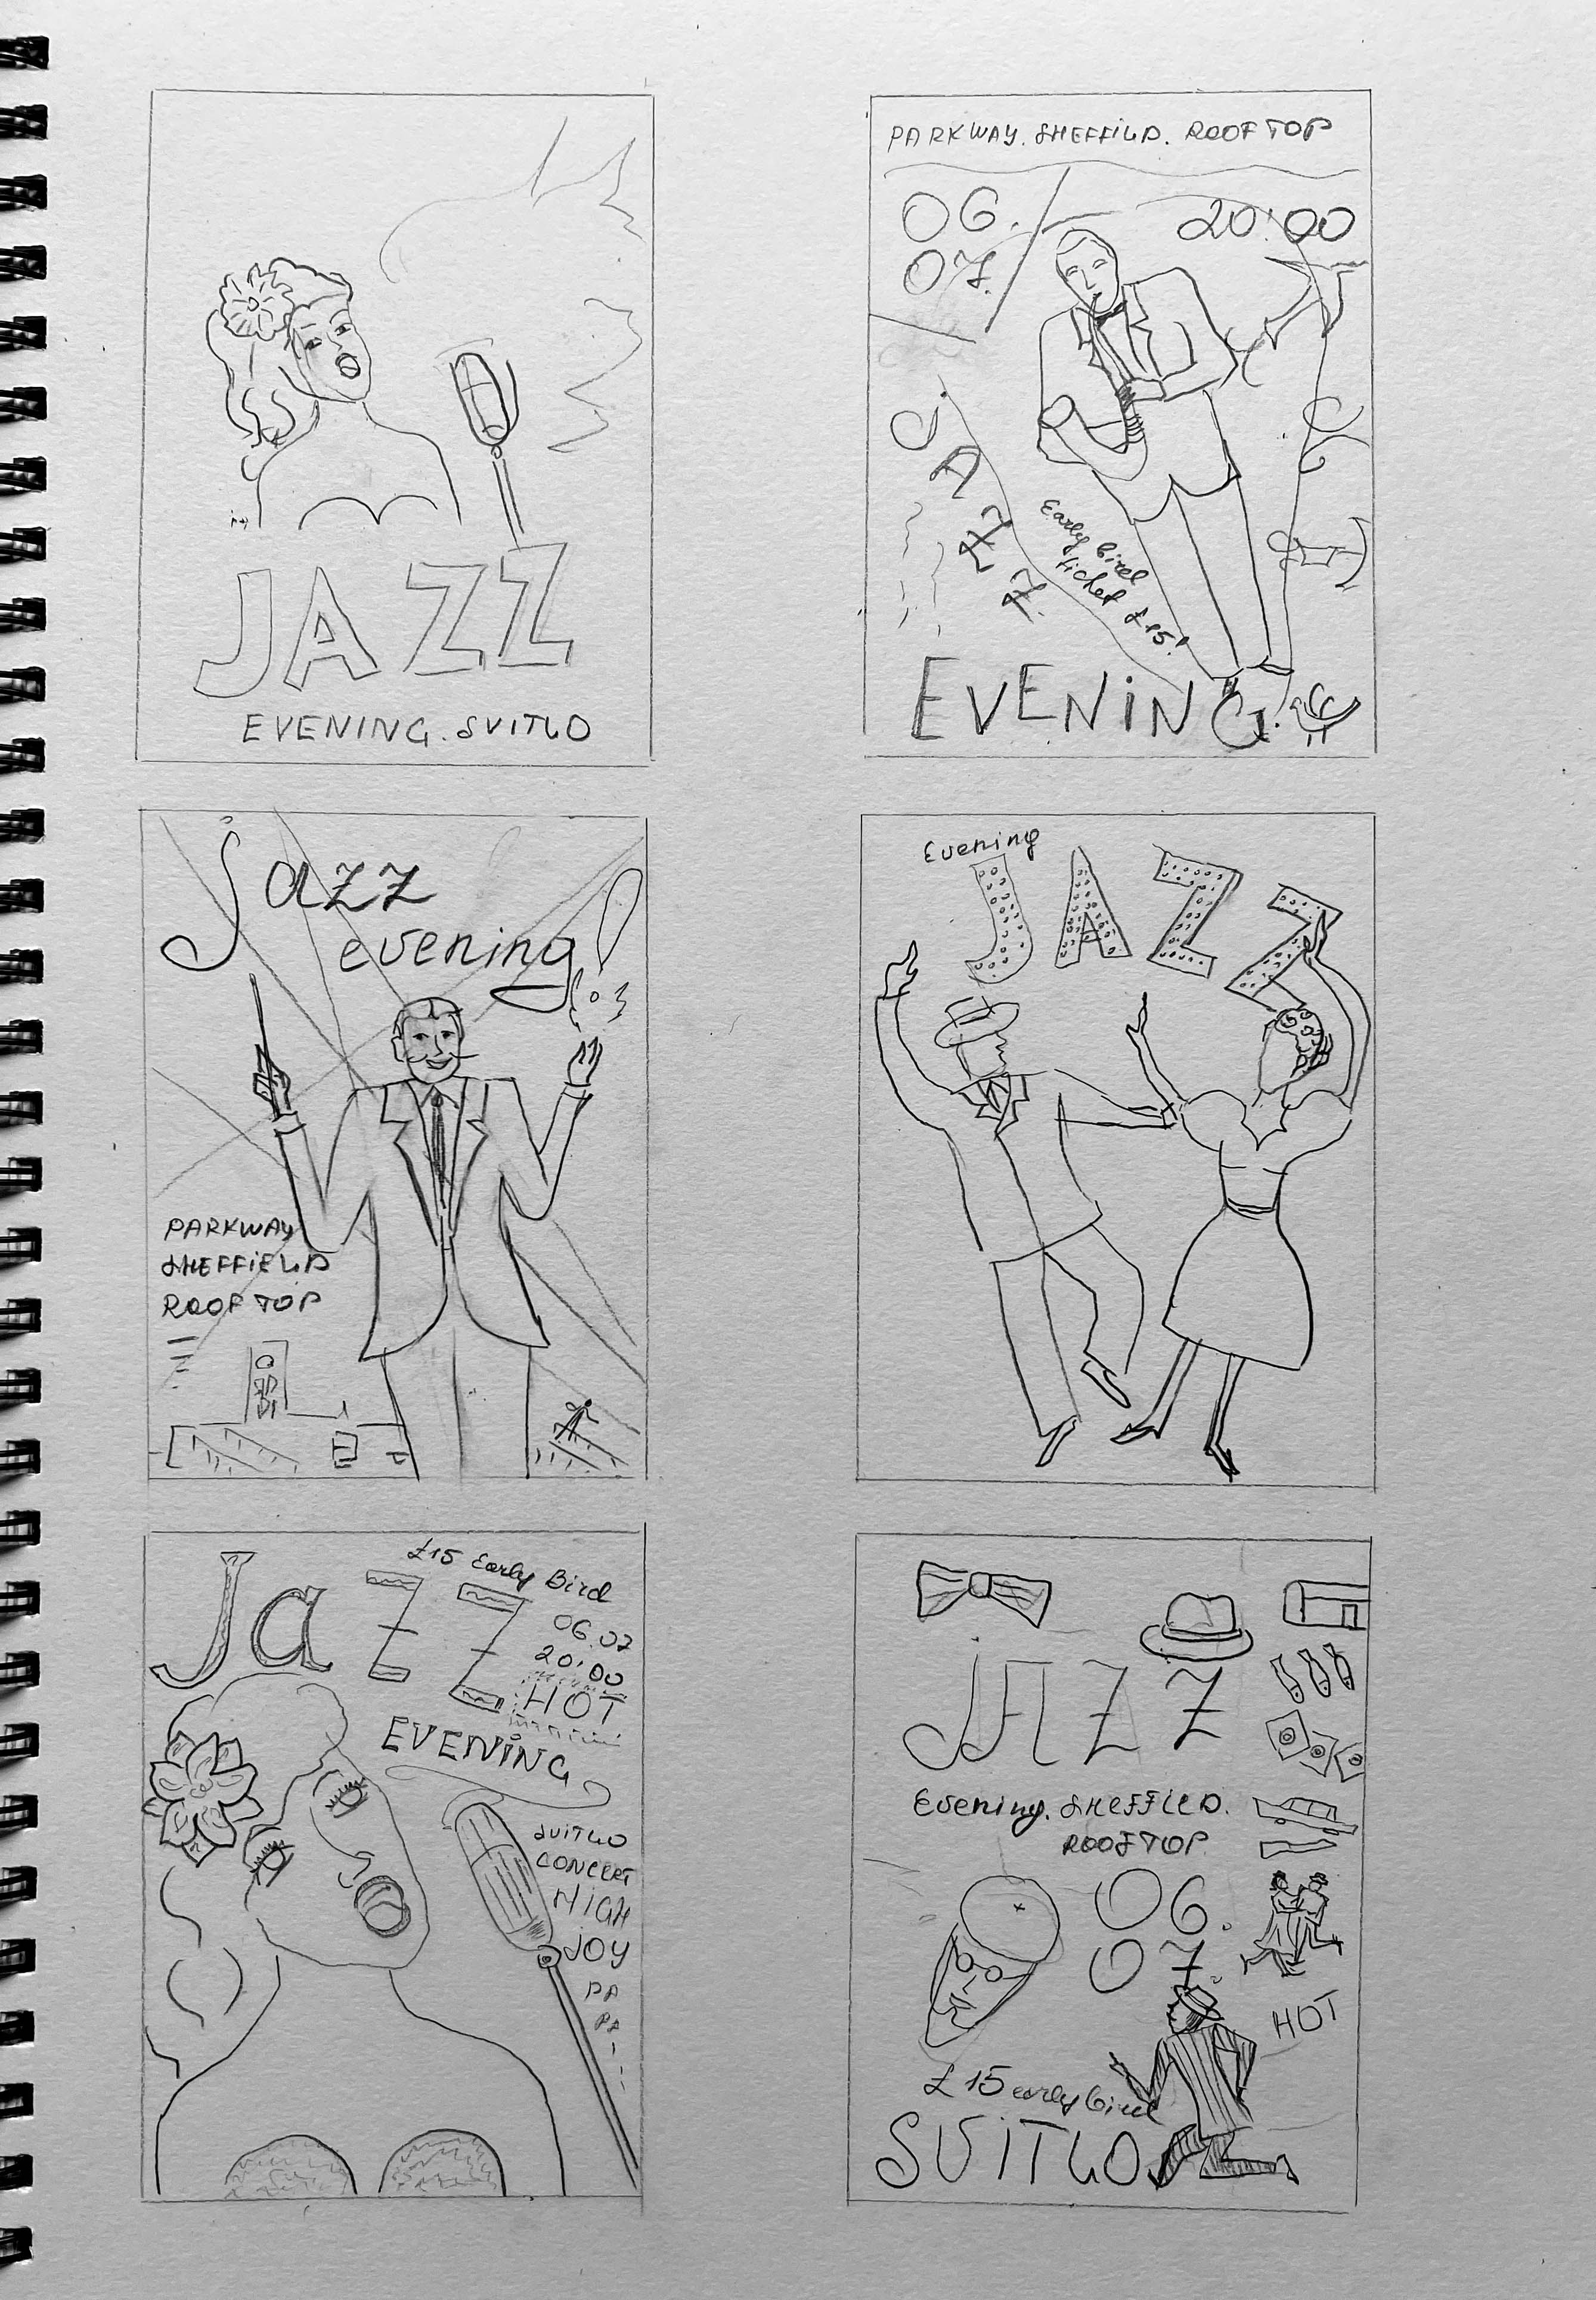
Thumbnails
Those sketches helped me to proceed to the thumbnails. I created little frames for future posters, so I played around with composition and some image variations for the poster. I tried on different arrangements of the text and figures, like the central location of the main character; the image coming from the corner, placed on the left or right, leaving another part for the text. Also, I was thinking of using dynamic composition, where elements evolve around the vocal point of the poster.
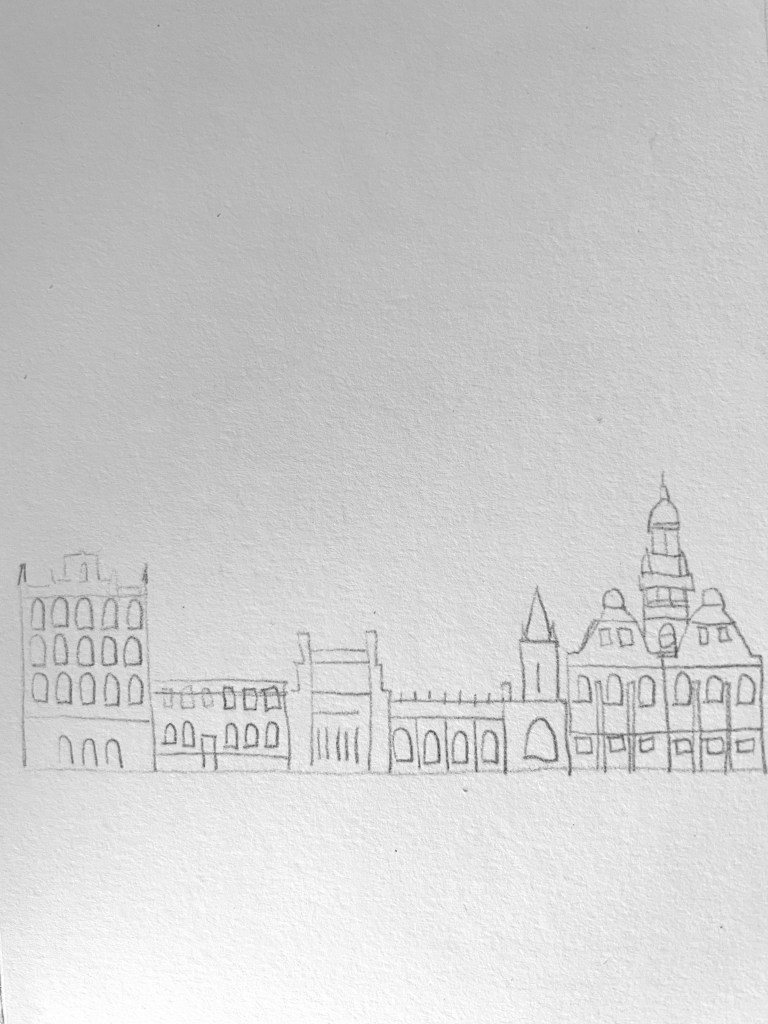
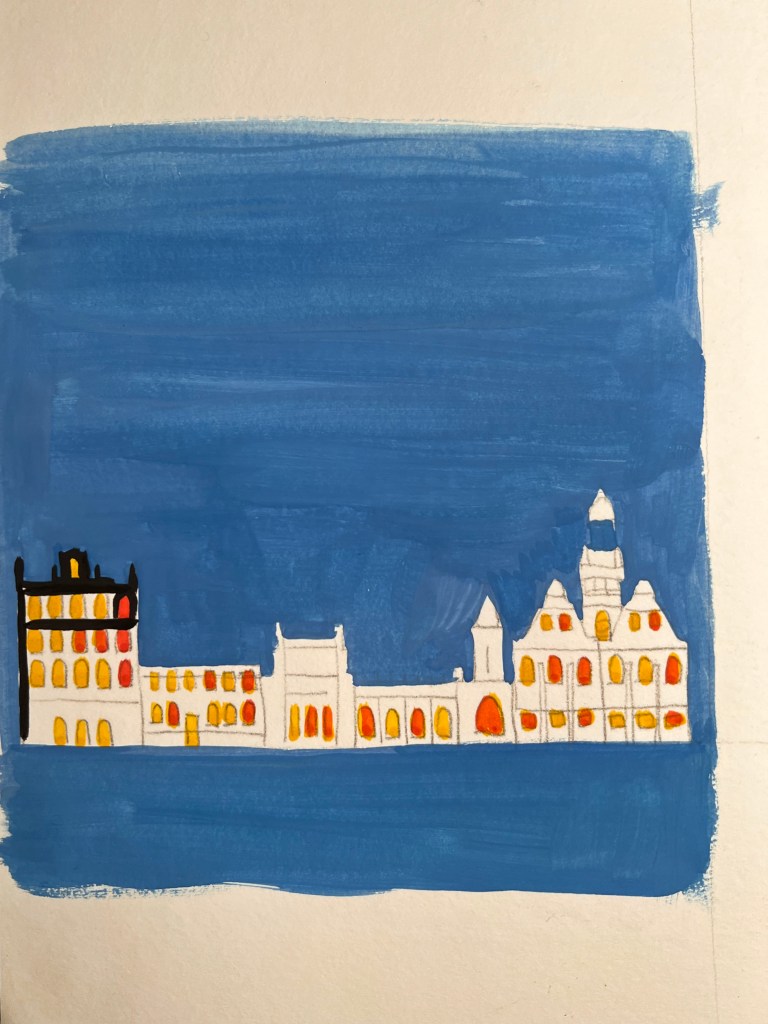
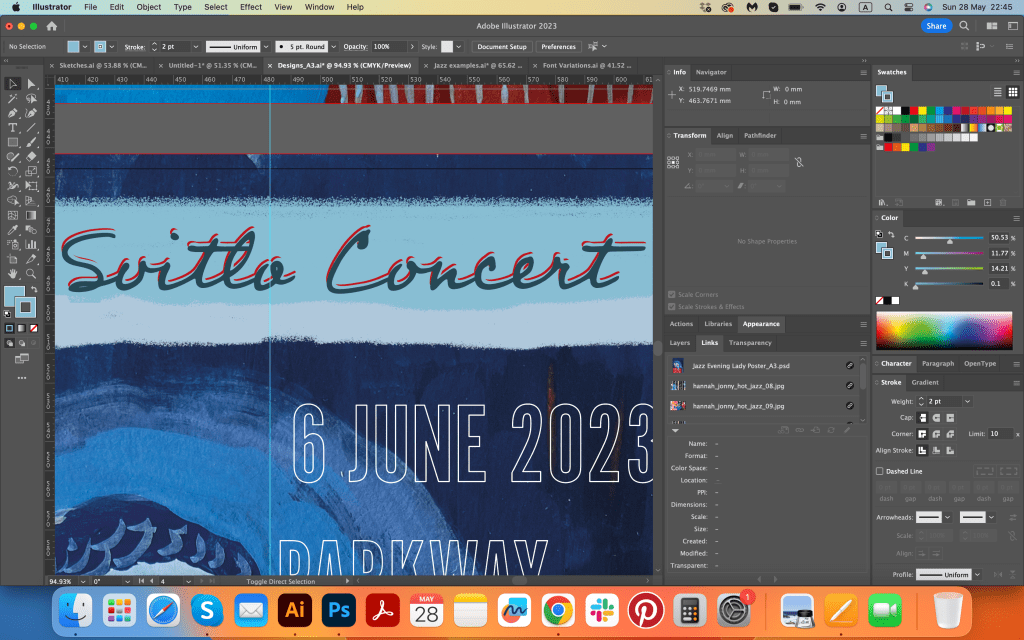
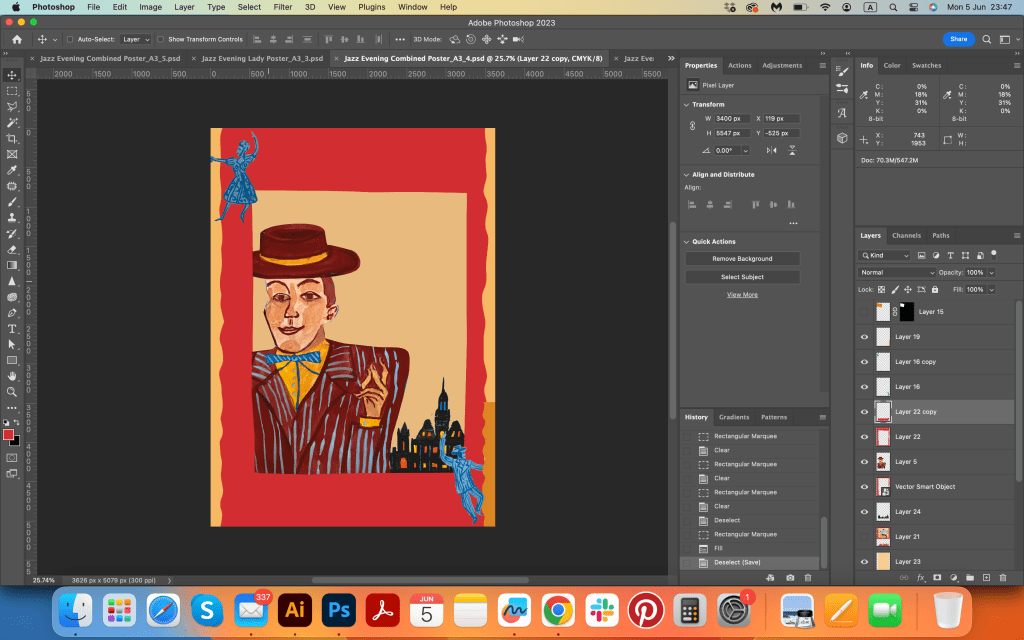
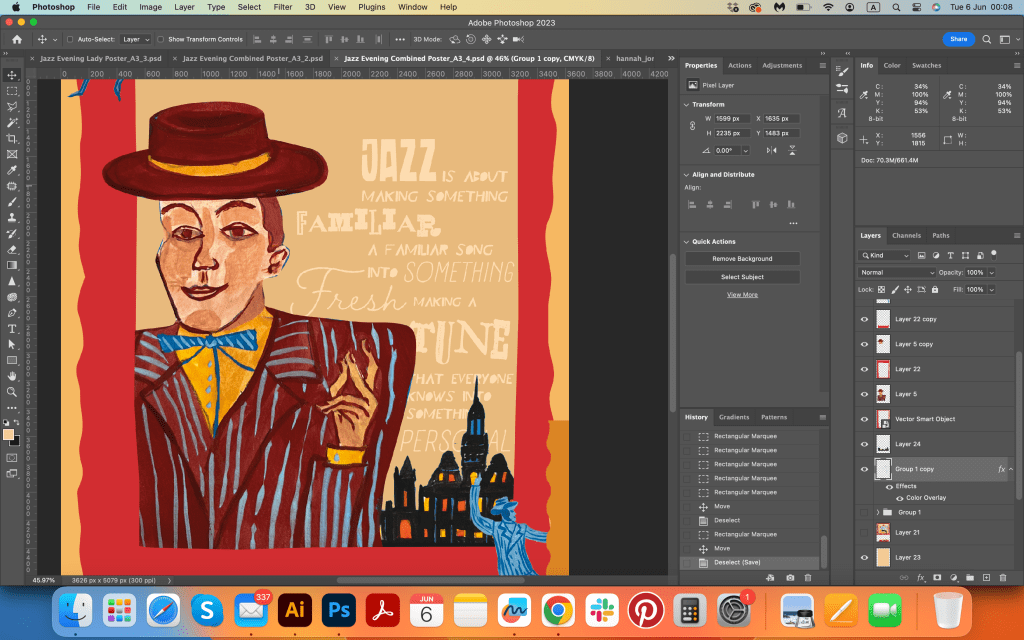
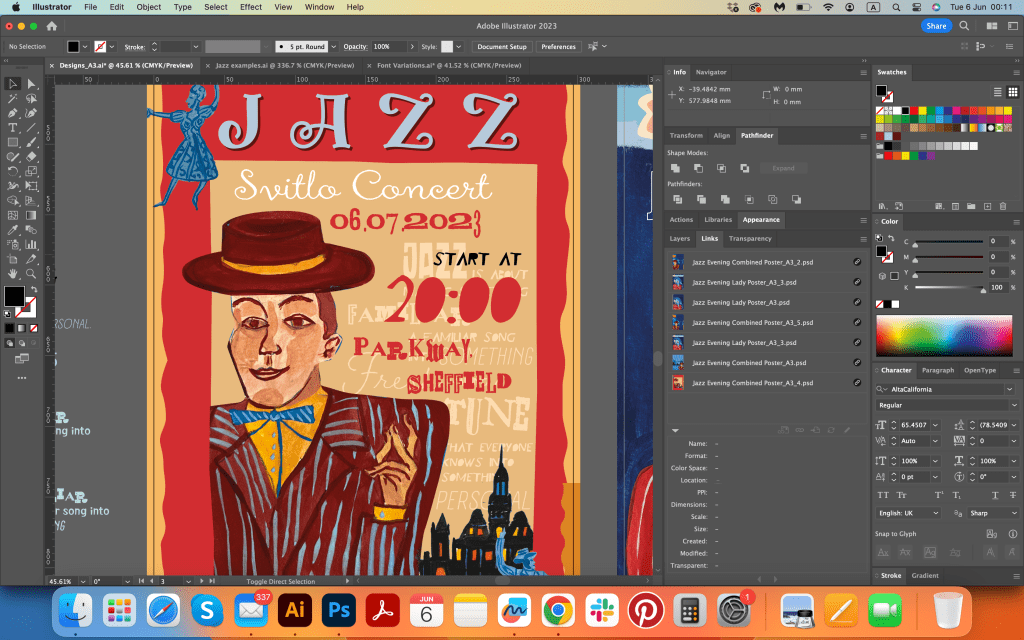
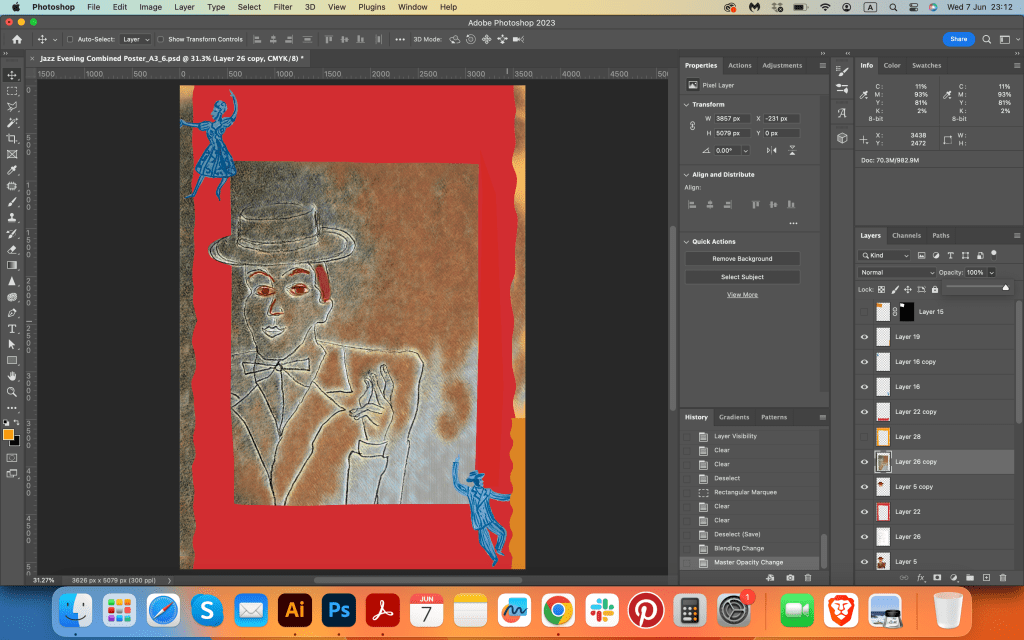
Illustrations
Those sketches helped me to determine the direction of the future poster. I knew I was going to use the midnight atmosphere, where the background is all dark, like the night sky, contrasting with the performer, lit by the projector lights. My main colours for the poster are going to be bright blue, dark blue, dark red, brown, yellow and orange, kind of warm, mature colours with distinctive depth in them.
I highlighted the main elements of the poster:
the singing lady, performer, artist;
musician, that found a rhythm;
dancing couple ;
Sheffield night city.
I wanted to experiment with my posters and try to combine different elements together and see what works in the most harmonious way in terms of visual art and proportion. At the same time, I would like to bring some kind of free hand-drawing style, missing the perfection, but highlighting the spirit of creativity and freedom.
The story of the poster is imaginative, but coming from my experience of visiting those jazz shows back in Ukraine. The performance organiser Svitlo Concert from Kyiv came to Sheffield with their Jazz Evening tour in the steel city. ‘Svitlo’ in translation from Ukrainian means light. The performance will be allocated somewhere in an open area, the perfect season for it is summer, with a warm breeze, night or evening time, and using such locations as roofs or botanical garden area. The details of the tour I highlighted in the poster.
I created the main parts for the poster, I was certain with a few compositions but also I wanted to experiment and mix them together as well. I created a singing lady, performer, dancing couple, and sketch of the Sheffield landmarks in black, with some bright windows inside.
In my previous exercises, I was using mainly watercolours, watercoloured pencils and crayons style for illustrations, but this time I was going to use gouache paints, as they are reacher and deeper in shades, more suitable for the vision I had. I painted two main characters wearing similar outfits, sort of warm red and brown blazers, with some stripy patterns in them. The man wearing a brown hat, and the woman, the singer has a white with a red design flower. Also, I made an illustration for the dancing couple, purposefully missing details in them, as I was going to use them for the background. I was going to create the type for the word Jazz, covered in different colour dots, that would associate with lights, but later I decided to create it in Adobe Illustrator, I thought that type need have more accurate details.
Typography
I selected a few font combinations, with chosen text I was going to place for the poster. I still was going to play around with typography, but that font selection helped me to imagine a couple of type variations for future designs. I wanted to bring into the poster not only a bright and eye-catching illustration of the performer but make the visual special by using unique typography. I planned to try to paint the font myself on the piece of paper but later decided to create one in the software. Also, I was going to use decorative elements in the font, like different coloured dots, and lines, or combine a few types of font in one word which all was a collective part of my future designs.
Design Process
Now I had on hand all the important parts for the poster, the next step would be to organise it into a musical visual. I had a long process ahead of me because you never know what designs can be successful. I could predict the effective outcome of some illustrations, but as usual, I had a couple of surprises when an idea wouldn’t work, and I had to put some effort into re-arranging and working on it. I sort of knew that the singing woman would be the best shot, and the reason for that is bold and clear design from the illustration and design point of view. The elements are quite eye-catchy, and the contrast of the colours was strong, that’s the way of creating a powerful message. As the visual of the singing woman was bright and dominant, I used simple bold and narrow font Alternate Gothic No1 D, instead of decorative and quirky typography. Later I added handwritten font on the top that to dilute the bold and narrow typography of the main text. I placed the name of the organiser Svitlo Concert, written in calligraphic Professor font. I changed the first letters SC into the decorative font, added a flowered logo, matching to the lady’s flower in her hair, and it helped to draw attention to the top part of the poster as well.
The poster with a musician and dancing couple had a few challenges, as I was not quite sure which direction to take composition-wise. In terms of presence, the illustration was not as strong as the singing woman, so mixing a few illustrations would be the best solution. I tried placing the dancing couple in the centre, arranged the city of Sheffield at the background, and the performer would have to go in the foreground corner. Colourwise, I still was going to use dark blue for the background, and red and brown colours as opposite colour palette to stand out. It worked, but I wanted to try an additional option, so I went for a completely new design, with a sort of creamy background and red border. For the details of the poster I used AltaCalifornia font, which is made from all different shapes of type for each letter, and for the main words Jazz Evening I used the decorative font Jamish Base.
I tried quite a few variations for the poster with the performer and a dancing couple. That’s positive side, keep on looking and experiment with the composition. I remembered some of the previous exercises from the Core Concepts, where we had to use only typography for the book cover, I thought I could use that approach here as well. I quite liked the idea of using different types in one poster, I think, that creates an distinguished layout, where the message communicates through striking visuals and unique typography.
Posters
Final posters
Here are my final designs for the Jazz Evening posters. I came up with two options, I thought they look complimentary to each other, and could be used as running theme in duo. Overall , I’m pretty satisfied with the final posters I came up with. I would still say that the visual with the singing jazz performer woman is my favourite, as it has a bold and clear-to-read illustration, a selection of contrasting colours, and easy-to-read typography. I like the detail on the top of the poster, where I added handwritten typography that consists of a few types in one letter, they are creating a nice tandem with the femininity of the singer, but the bold and clear font is straight to the point and speaks directly to the reader. I worked as a graphic designer for a techno events company, and that approach was always given as a favour when people are in a rush and have only a few seconds to pay attention to the poster. At the same time, the visual with a red border and performer is less likely to be as readable from a distance but could work well somewhere indoors, like a theatre poster behind the glass for a close read. The main focus in this part has been transforming my ideas into a form that best communicates them. I hope my research made sense and it was a success for the conclusion of part three.
A mock-up is a version of an artwork to show how it will function and what it will look like when finished. It often includes the type or indications of where the information will be placed. Also, mock-ups look like finished and complete products.
This exercise requires creating a mockup for the chosen book cover. I was thinking about which book shall I pick, I was considering to chose something I’ve read recently, like a book about Universe by Stephen Hawking, or a book about civilisation by Yuval Noah Harari. Then looked through some samples from my bookshelves, and I realise that the most obvious would be to choose a book related to pregnancy, as I had a few new books I enjoyed reading. Being 39 weeks pregnant and approaching my due date, I chose to re-design a book cover by Hollie de Cruz “Your baby Your Birth”. I bought this sample from WHSmith, as I liked the way the cover was designed, simple, bold colours in circles created the cover that stands out among the others. This book is all about positive thinking and believing in the nature of the body, which is very close to my way of living. I thought, it would be great to create my vision of this book cover, which could be something special from my own experience.
Chosen Book
Here is the book cover itself. I took photographs of it and examine it closely. I measured the proportions of it as well, so I could apply the printed version of the book cover I was going to design. That book cover had quite a modern feel, it has a minimalistic set of elements, but it does stand out because of its simplicity and bold colours, which are opposite on the spectrum, like a cold green cover and warm circles in the middle.
Mind map
I created a mind map, that helped me to gather my thoughts together. I wanted the design to be feminine and gentle, have a spirit of women’s nature, and physics and embrace the beauty of the pregnant body. When I went through the analysis of the book cover I was going to produce, I was led to such a concept to reflect the pregnancy through mother nature, the feeling of blossom, spring, self-love and not only psychological but subconscious understanding of the birth. Also, I wanted to portray a woman in connection with space and the cosmos, the continuity of life, and the spirit of surrounding that goes through woman into space.
There were a few sets of colours I was going to reflect in my design. My illustrations will be reflections of the Universe, with such colour combinations as blue sky, and yellow stars. Pink and warm colours for the natural colours of spring and blossom. And browny, cream colours to represent the Earth as a warm and comfortable space. These were my main ideas.
Ideas
For the book design, I went to get inspiration from Georgia O’Keeffe‘s artworks. I found her painting feminine and mysterious, with intricate details, and beautiful colour combinations. In her works, I love the connection between a women’s body and nature, her paintings communicate to the reader through tender details and smooth curves and shapes. I thought I can borrow that approach from the chosen theme of the book cover I’ve decided to design. So I started sketching a woman’s pregnant body in similar angles but slightly various shapes.
Sketches
I created those illustrations at the beginning of the process. My plan was to use the silhouette of the pregnant woman to be applied or implemented in the design. I wanted it to be a part of the composition, in some cases to dominate and stand out, and in some to be a complimentary part of the design.
Illustrations
The next step was to create colour sketches of illustrations with watercolour pencils. I created several concepts that were mentioned above. I started with a picture of a woman like mother nature, whose inner state was connected to the Universe. I wanted to create a woman against a backdrop of warm hues, oranges and browns like the colour of sand and gold on planet Earth, and the body’s connection to the cosmos and the stars. So far it was just a sketch that lacked hue and brightness. I planned to process the final design in Adobe Photoshop using brushes and colour tools.
My next concept was inspired by the work of Georgia O’Keeffe, with the image of a delicate and graceful Calla Lily flower. I marked the background for the cover in pink and fuchsia, and I planned to depict the flower itself in white. I also had to think about what colour and font to display the title of the book and the author so that the text was readable and combined with the concept of the cover.
I also created an illustration of the night sky and a fairy forest, I wanted to capture the atmosphere of magic and place this picture inside the silhouette of a female body. The rest illustrations were just sketches of landscape and flowery patterns, as alternative to use a background for the book cover, or implement them inside of the silhouette.
Designs
After drawing the illustrations with watercolour pencils, I proceeded to the next step, illustrating and colour correcting the drawings in Adobe Photoshop, and after that selecting fonts and designing the cover in Adobe Illustrator. When I was doing pencil sketches, and physical drawings, I didn’t know for sure what would work and what wouldn’t work for the final cover. When I placed illustrations in the book format, which was 162x196mm, plus 20mm spine, I could see the importance of the image placement and it proportion with the illustration. In the example with the first three sketches, it was clear that there was an imbalance in the connection between the silhouette of a woman and the title of the book, as I couldn’t figure out where the text should be. Also, due to the different colour transitions from white to bright orange, I could not choose the font colour for the bottom of the book cover.
On the next three covers, I corrected the mistakes and applied a more contrasting background for the cover, orange and bright pink, which allowed me to write the title of the book in white. Here I chose the handwritten font Homemade Apple Pro, that in my opinion looked harmonious with the overall design concept.
Another design was initiated around the fairytale inside of the woman’s body. It was a night forest with growing moon and stars. I liked the illustration, but the only way i could place it was to locate it on the left side, therefore the name of the book was placed on the right side, and looked like a stepladder, which is not ideal from the typography point of view.
The final book cover I illustrated was the dynamic illustration of the woman, whose hairs look in motion. I placed the night sky, stars and clouds inside of her body, and illustrated around the woman Earth with the warm orange and brow colours. I played around with the name of the book, placing it on a wave curve of the woman’s hair. Probably, if it was a gift car, it would look fine, but for the book cover, it was missing robust composition.
Book Cover Mockups
Those were the final designs I produced before arriving of my baby. They are quite symbolic for me, as I went to bed at 1 am, trying to finish designs before my due date, but a few hours after, at 3:30 am I woke up as my waters broke, so I had to rush into a Hospital. Almost 24 hours later a baby girl Felicity Anna Welch was born, and those designs could be a story for her to tell, how her mum was doing the coursework last minute, just before her birth.
I sent those designs to the student group, and most of the feedback was positive. I think everyone preferred the design with the Calla Lily flower in pink shades cover. As I made a course on Creative Book Design before this exercise, I could see advantages and some critical points to those covers. If I had more time, I would probably play more on the typography and font selection for those covers, as the name of the book and the author are quite valuable points in designing a book.
Printed Book Covers
As a final touch, I printed two chosen covers, matching the size of the actual book. I think I would still prefer orange pink cover with flowers on the background. The dark blue illustration looked great as well, the only concern was the placement of the name of the book, I thought it looked too squashed into the side for the important component of the book cover. I suppose that the exercise was examined detailed enough, so finally I’m ready to move into the next part of this section, the actual assignment.
Great Works of Japanese Graphic Art. The Stone Bridge at Edobashi Hiroshige III (1841-94) MockupSketch 287.5×428.7 mm
During the creative process, the illustrator will have to present images or ideas to the client at some point. It’s uncommon to produce a finished or complete illustration without prior clients’ approval. Illustrators can take on their responsibilities in the creative process, which includes research and generating ideas, leading to the production of thumbnails, sketches or client roughs. The visual should be straightforward and easy to read for the customer without additional explanations from the illustrator. Generally speaking, the graphic should communicate with a client independently. The wording that relates to the illustration can be added as well, which creates a key to successful communication as well.
In this part, I’m going to explore another important aspect of illustration – scaling, and its role in representing images. When illustrators work with images, the format of the illustrations can be different to the final artwork size, sketches can be smaller or bigger compared to the reproductional size. In this exercise, I need to examine two pieces of artwork from the collection of images I’ve gathered, and create a kind of reversed process of illustration creation. Images can be representational, diagrammatic or metaphorical. I need to measure their size and create a sketch which has to be at least two and a half times bigger than the original size.
I took some pictures of the range of illustrations I have been examining recently. I’ve noticed that I was drawn to Japanese graphic art, including paintings and ceramics, which are famous for their strength, elegance and colour. From those selected images I wanted to create my own version of illustrations, and how it would look in the first stages of designing. Also, I included works by British illustrator Edward Bawden, some of his works have notably sketched style with highlighted colour in it. That gave me the idea that some of his illustrations look like roughs or unfinished images, but that was one of the reasons why those illustrations look attractive, as they communicate not through precise elements, but through quick lines, emotions and contrasting colours.
In addition, I want to analyse illustrations by Kathleen Hale and her famous work of Orlando Marmelade Cat. I’m attracted to this traditional illustration, their warmth and respect for the history of art, and its communication that is mainly working with a younger audience, like kids and toddlers, but, at the same time there is so much that illustrators can learn from it. Her works offer a delightful slice of Edwardian imagination today, though most were published after the Second World War in the latter half of her life. At the time, stone lithographic plates were being replaced with zinc, which had to be submerged in acid with layers of vibrating marbles to roughen the surface to emulate the original chalk drawings.
I measured the size of the first illustration I picked The Stone Bridge at Edobashi Hiroshige III (1841-94) from the Japanese Graphic Art book, and it turned out as 115×175 mm, which is 28.75×42.87 cm, closer to the A3 format, similar to my sketchbook format, so I had to use the full page for the illustration in portrait format. The priority of this exercise was to keep the sketch in a minimalistic style, avoiding the details or precision, and highlighting the vocal point of the illustration.
Great Works of Japanese Graphic Art.The Stone Bridge at Edobashi Hiroshige III (1841-94) 115×175 mm
The first thing that I’ve noticed is that the image I used was quite busy with the details, such as bricks on the wall, wood texture on the buildings, and details of people’s clothes that walk by. Those were the aspects that I could definitely leave out. For the type of sketch I used similar techniques as Edward Bawden, I call it a rushed illustration, I thought that could be useful navigation for understanding the principle of the first sketch, or roughs provided by the illustrator to the customer. I think it was a good start to this task, I managed to show the East Asian vibe in it, such as umbrellas, rickshaws and architecture by the river, but at the same time, I could keep my identity in it, avoiding the pure replication of the original illustration. In terms of removing elements, I could probably delete some of the details, such as boats, located in the corner, and remove the complexity of the building and trees grown around, but I would probably keep the rest.
Sketch 287.5×428.7 mm
The next image I chose was from the same theme, Japanese Graphic Art, but with fewer details, compared to the previous art. The size of the illustration was identical to the previous one, 115×175 mm original, which is 2,5 times bigger and comes into an approximate A3 format. Here I wanted to highlight the main aspects of the composition, which are the cat, that starring into the massive window, the spacious landscape with the mountain in the distance, a couple of houses isolated from the rest of the village, and some interior details inside of the room. It took me much less time to sketch this illustration, as it had much fewer major points, and I could detect them straight away, completely avoiding the details. Later, I pushed stripping the details of the image even further by removing such elements, as the window, interior design elemnts and fabric with the cup. The content remained still the same, and that is the best result I could achieve so far. As that was the main idea of the brief – explore how many lines I need to use to describe the content. I could see in comparison how much content you can remove so that the image is distilled to an extremely edited form but still makes sense. However, the style of the illustration was similar to the previous design. So I decided to examine additional illustration, which is described below.
Great Works of Japanese Graphic Art.Asakusa Ricefields, Cock Festival 1857, Hiroshige (1797-1858) 115×175 mmSketch 287.5×428.7 mm
For the third image I chose design from the book Kathleen Hale, Orlando Marmelade Cat, from the series ofA Camping Holiday. The original size of the book was format A4, soft cover. So, for the illustration, it had to be quite a massive piece of paper 52.5×74.25 cm, which was quite difficult to find. Here I followed the same route of detailing the main points of the illustration, and gradually removing complementary elements. As this illustration contains five major characters, which brings the sense into the composition, it was quite difficult to consider what could be removed from here, apart from the tent, and some dishes and cutlery around. I found this particular illustration more challenging to play around with, as that is a part of the plot, and by losing some of the elements around it, I could miss the content that the author intended to bring to the reader. I still could strip back some of the little objects around, but, compared to the illustrations I analysed above, this Orlando Cat one looked overcomplicated.
Orland the Marmelade Cat. A Camping Holiday by Kathleen Hale 210×297 mmSketch 525×742.5 mm
In conclusion, I would like to say, that this exercise has shown me the way of highlighting the key elements of the illustration, and also learning the straightforward way of creating first sketches, that the final idea would be developed around later. That is one of the tasks I need to keep on working, as I tend to draw precise or completed sketches, but by doing that I’m potentially losing vital time that could be spent on generating ideas, which is one of the important parts of the illustration. That is a quite useful skill to be able to produce quick thumbnails and roughs before the designing final images.
A visual is the presentation of a design or solution for client approval before proceeding with the finished artwork.
Drawing is the fundamental part of illustration on which visual imagery is built. Drawing deals with composition, colour and texture, shape and forms, emotive and associative aspects of illustration, but also with visual language and research. The creative process of bringing ideas for observation is called visualisations. Drawings can also be called visuals, roughs or thumbnails.
Roughs: an illustrator will produce these to continue to help in the formulation and expansion of ideas and to explore other pictorial properties such as composition.
Thumbnails: are small-scale visuals where designers quickly document ideas, organising them in a range of images to compare and appraise.
In this exercise, I was asked to make a small collection of objects around a chosen theme. I went for the subject called workshop. The reason for that is that I felt I wanted to explore a new area, I’ve done some nice pretty pictures, here I wanted to examine closer some rough objects, that usually can be found at warehouses, garages, or workrooms, objects for the manual work, with grunge edges, dark, dusty colours and sharp angles. For inspiration, I went to my parent’s garage and garden shed. The garage is literally overloaded with different staff for house and manual work, paintings, different hovers and metal canisters, same as a garden shed was busy with different gardening tools, that my mum uses to look after her garden roses. I was quite curious to examine each object closely, looking for distinctive angles of objects, like from above and from underneath. Also, I was curious to experiment with the texture and imagine how that particular tool can look for illustration. I found some curious combinations like tangled wires, ropes, and smooth metal objects. It was sort of an experiment for me, as I’ve never seen that kind of theme will be my inspiration, as I mentioned before, it’s always useful to try something new and get familiar with a new area for exploration. I was attracted to the different shapes of the tools, their bends and forms, some of the objects were sharp and cold, some objects looked rough and barbed, and some smooth and slick.
Illustrations
In the next part of the exercise, I needed to explore those objects and experiment with their features in the illustration. I looked through pictures I’ve taken and analysed what was the most striking for the drawing. As with most of the tools I photographed individually, I was going to combine them later in illustration, by selecting the best combination. I wanted to try different frame shapes for the illustration, like round, and rectangular, or just follow the angle of the tool shapes, and see how they would communicate.
Here I placed each tool and composition individually, which helped me to examine them, see what extra I can join together, and what objects are more difficult to read, or don’t play as important roles compared to the rest.
Illustrations
That illustration is my favourite composition, as it has so many different shapes included in one, it has pipes, ribbons, hollows in plastic, round elements, and the bendy shape of a water gun.
I took two ‘L’ shaped frames to create different close-up compositions with three objects, that to learn what would be the vocal point here and which object emphasised the most depending on the frame shape. By looking at those illustrations I concluded that the water spray gun had the most impact on the majority of compositions. I think due to its position, shape, and smaller size it stands out when water butts are playing a role more like background.
The fact that I left the word ‘Sprayer’ on it played its role too, as our eyes are naturally attracted to the most recognisable part, which is this case the word itself, as it is clear to read, as it’s the easiest thing to catch the site, but apart from that, from the illustration point of view the object to look into first is the water gun still. Something to consider in the future is the role of the words in illustration, and plan what exactly I want to highlight in my composition, image or writing.
Which viewpoint best fitted the word your objects illustrated? Why was this?
In this exercise, I wanted to create an illusion like from the visitor’s point of view, introduce the observers to the world of manual work, let them enter some kind of shop and decide whether those objects can make a solid composition, or they look odd together. Most of the objects were photographed in angles, and from the dynamic angles, some of them called for action, like “Pick me up! I’m ready to do a job!”, instead of just lying flat, they looked like they were lifted from the surface. That was my intention, to make objects energetic and communicate. My final choice was a composition with three objects, that created a dynamic together.
Which format best illustrated your words?
I think analyses of composition with the ‘L’ shape played a role in figuring out the vocal points. I tried different shapes for the illustrations, such as round ones, arrows, and replication of the shape of the image, but still, the best one was for me not the odd shape of the frame but exploring close-up compositions by moving ‘L’ shapes around. Here I could see how the frame changes the mood and perspective. I liked the placement of objects from the left top corner to the bottom right, they looked like they are on the move, the tools have a direction, and it adds a special dynamic to the illustration.
Did changing viewpoints make you think differently about your choice of objects and arrangement of them?
Definitely yes, each frame and each viewpoint can play a role. When you look at the tool from the top, it feels like you are dominating the object and have control over it. But when you examine the object from the bottom, it seems to you that the composition rises and controls you. And when objects just lie down flat, they don’t have that call to action in them, you just stare at them, like at still life, therefore for the dynamic it’s vital to change the viewpoint and create a close-up vision.